Lab Equipment
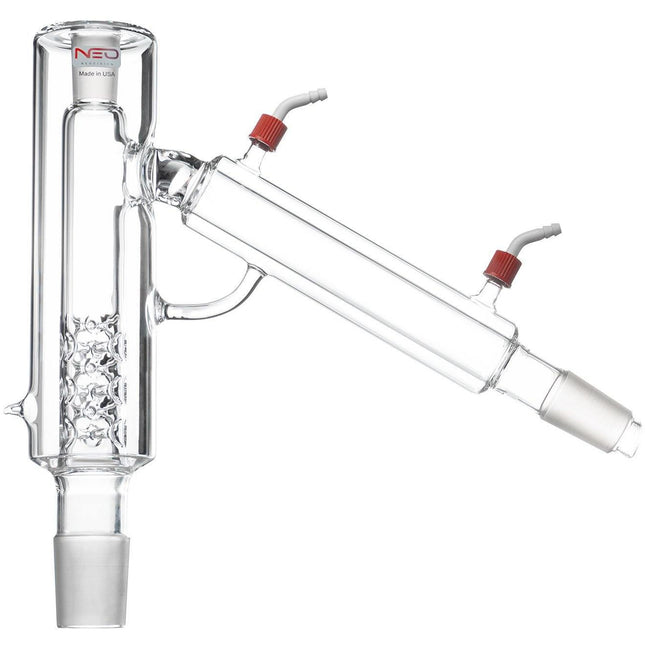
P10V6 Neocision Distillation Head - USA Made
P10V6 Distillation Head P10V6 Distillation Head has 6 sets of vigreux in the distillation column with 45/50 lower joint, 24/40 Thermometer Joint, and a 34/45 side joint and includes GL-14 barb connections. MADE IN THE USA Designed for 10 Liter Flasks Set of 6 vigreux to allow for packing media Larger vacuum jacket allows for less heat loss during distillations Larger vapor path to allow for gas/vapor phase flow Increased internal diameter for faster, more efficient fractioning as well as packing and unpacking of media Increased condenser length and diameter for more efficient condensation of vapor with zero clogging *Notice to customers: All units are inspected for broken glassware or parts before leaving BVV™. If the unit arrives damaged (this does not include minor imperfections or scuffs in glassware), the customer MUST contact BVV™ within 72 hours from carrier delivery to file a claim. If the customer DOES NOT contact BVV™ within 72 hours from carrier delivery, then BVV™ cannot issue any replacement(s) or compensation for the item; a new purchase will need to be made for a replacement. **Glassware Safety Disclaimer: BVV™ is not responsible for failure of glassware which must be inspected before and after every use because it may eventually develop imperfections or damage through normal usage, mishandling, and stress caused by temperature variations. If an imperfection or damage is noted while inspecting the glassware DO NOT use the glassware because it can fail causing bodily harm or damage to the surrounding area.**
$600.00
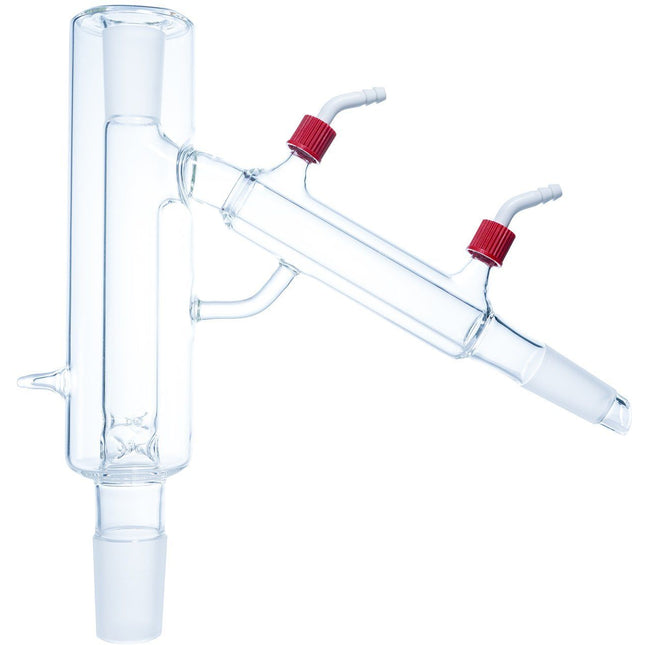
P5 Distillation Head - USA Made
P5 Distillation Head P5 Packable Distillation Head with 34/45 lower joint and 24/40 upper and side joints. Includes GL-14 Barb Connections. Recommended packing media: Raschig Rings, Porcelain Berl Saddles, Glass Beads, Pro-Pak, or Stainless Steel Wool. Key Features: MADE IN THE USA Designed for 5 Liter Flasks Single set of lowered vigreaux to allow for packing media Larger vacuum jacket allows for less heat loss during distillations Larger vapor path to allow for gas/vapor phase flow Increased internal diameter for faster, more efficient fractioning as well as packing and unpacking of media Increased condenser length and diameter for more efficient condensation of vapor with zero clogging *Notice to customers: All units are inspected for broken glassware or parts before leaving BVV™. If the unit arrives damaged (this does not include minor imperfections or scuffs in glassware), the customer MUST contact BVV™ within 72 hours from carrier delivery to file a claim. If the customer DOES NOT contact BVV™ within 72 hours from carrier delivery, then BVV™ cannot issue any replacement(s) or compensation for the item; a new purchase will need to be made for a replacement. **Glassware Safety Disclaimer: BVV™ is not responsible for failure of glassware which must be inspected before and after every use because it may eventually develop imperfections or damage through normal usage, mishandling, and stress caused by temperature variations. If an imperfection or damage is noted while inspecting the glassware DO NOT use the glassware because it can fail causing bodily harm or damage to the surrounding area.**
$550.00$400.00
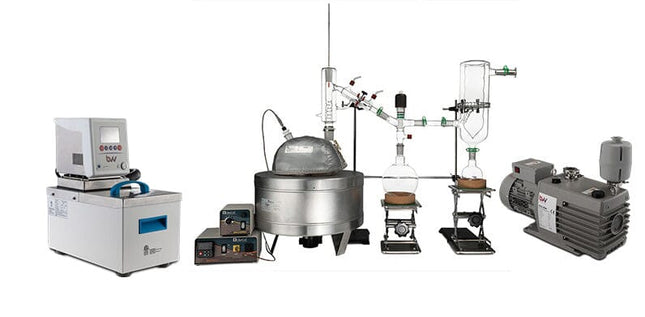
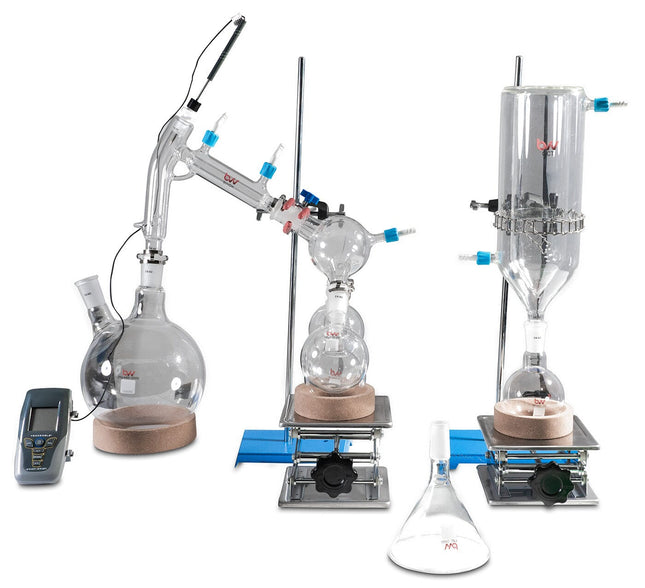
5L Neocision Short Path Distillation Turnkey Kit
5L Neocision Short Path Distillation Turnkey Kit This unit carries a 2 day lead time. The 5L Premium Distillation Turnkey Setup features our 5L Distillation Kit with P5 Distillation Head and USA made glass. Every component in this turnkey is made for precision, throughput, and repeatable results. Also included is our Pro Series Corrosion Resistant Two Stage Vacuum Pump giving you extreme power and depth with a long lifespan, the Bullseye Precision Vacuum Gauge from Digivac which is the most rugged and dependable vacuum gauge on the market, and a BVV 19L Heated Circulator for maximum condensation of vapors. You will also receive a Dewar Style Glass Cold Trap to keep all volatiles and solvents out of your vacuum system. This Turnkey Setup gives you everything needed to perform distillation at the highest level. The Premium Turnkey Kit Includes: 5L Neocision Kit with P5 Distillation Head KF-25 x 1/4" Barb Adapter Dewar Style Glass Cold Trap Bullseye Precision Vacuum Gauge BVV 19L MX Heated Circulator Pro Series 21.2CFM Corrosion Resistant Two Stage Vacuum Pump Distillation Quick Start Guide This guide gives basic quick start instructions for distillation systems. It is intended to provide a starting point for learning the process. Parameters should be adjusted to suit specific needs, Before beginning distillation, ensure the following steps have been taken: Vacuum Pump is in good working order. Pump should be run against dry load to allow internals to warm up. Oil should be clear. Cloudy or dark oil should be changed. All glass components are in good working order and ready to be assembled A winterization and degassing procedure has been done to prepare oil for distillation Once all three of these steps have been completed, you are ready to begin distilling. Begin by placing stir bar in boiling flask and then load your material. This should be done using a funnel. A small amount of alcohol in the oil will give it a thinner consistency making it easier to transfer. Assemble all glassware and ensure each joint is properly greased. Do not use too much, as the vacuum pressure might pull some grease into the system. To ensure a full seal, spread grease in a circular motion by rotating glassware Attach circulator to condenser and set temperature to 50C. Allow circulator to reach temperature before beginning distillation. Connect vacuum pump to manifold. The manifold will allow you to isolate each individual component as well as let atmosphere into and out of the system. Connect receiving cow to cold trap. Connect cold trap to manifold. Connect vacuum gauge to manifold. At this point, ensure all connections are correct. Also ensure receiving cow is positioned to collect the first fraction in the far-left receiving flask. Circulator should be at its set temperature. Turn on vacuum pump to begin process. Turn on heat and set to 60C. Vacuum pump will begin to pull down and temperature will begin to rise. Watch the gauge to monitor vacuum pressure and stability. Start stir slower and increase speed with temperature. Once you are close to 60C, increase the temperature 20 degrees. Continue to raise the heat incrementally in 20-degree steps, increasing the set temperature as you near your set point. Increase temperatures incrementally until you reach 220C. You will see your first fraction somewhere between 180C and 190C or slightly before. This is the “heads” fraction. You will move to your second fraction when you see an increased reaction in the head, a slight color change toward golden, as well as a thickening of distillate. When this fraction hits, allow the distillate to “self-clean” the head for a minute or two then, rotate the cow to the middle receiving flask. Collect your “main body” fraction. You will see temps between 190-220C during this fraction. Continue to increase stirring speed as necessary. Reaction in the head may vary but it should never stop. As fluid level in the boiling flask decreases, increase stir speed. The final “tails” fraction is a mixture of the first and second fractions and should be saved for re-distillation later. Ideally, you want to turn the cow to the final flask before the tails fraction hits. The “tails” fraction has an obvious color change and will be darker than the “main body” fraction. You will see temps between 200-250C during this fraction. As fluid level in the boiling flask decreases even more, set stirring RPM higher (1000+ RPM). You may need to compensate with a bit more heat to finish of the final fraction as well. Once process is complete, stop heat, stop stir, and stop vacuum. Let atmosphere into the system. Be sure to properly store your distillate as exposure to air and light can cause oxidation. ***Note: This entire setup will ship via motor freight.*** ***Note: All units are inspected for broken glass or parts before unit is shipped. If unit arrives damaged or glass is broken (this does not include minor imperfections or scuffs in glassware), Customer MUST contact BVV™ within 3 days of delivery to file a claim and receive a replacement part. If customer DOES NOT contact BVV™ within 3 days of delivery responsibility for replacement parts falls on the customer and they must pay for replacement pieces.*** ***Glassware Safety Disclaimer: BVV™ is not responsible for failure of glassware which must be inspected before and after every use because it may eventually develop imperfections or damage through normal usage, mishandling, and stress caused by temperature variations. If an imperfection or damage is noted while inspecting the glassware DO NOT use the glassware because it can fail causing bodily harm or damage to the surrounding area.***
$10,500.00 - $14,750.00
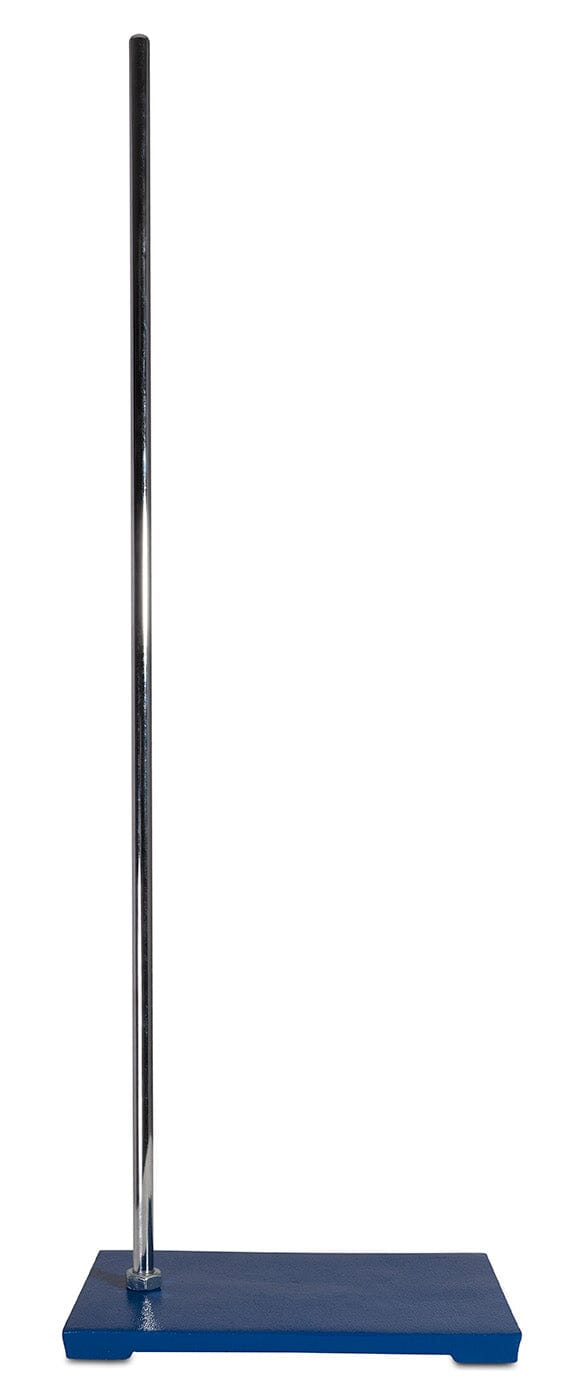
Eisco Labs Base Retort Stand Heavy Duty 8"x5"
Eisco Labs Base Retort Stand Heavy Duty 8"x5" HIGH QUALITY || Rectangular retort base made of chemical-resistant cast iron with a blue coating STABILITY || The 8" long by 5" wide base weighs 3lbs, providing superb stability for experiments & setups TAPPED HOLE FOR ROD || Base features a tapped hole for a 10mm x 1.5mm threaded rod (sold separately). Best used with Eisco Labs rod series: CH0657, CH0658, CH0659 GREAT FOR CLASSROOM &LABORATORIES || The durable and sturdy construction of this set...
$22.00 - $24.00
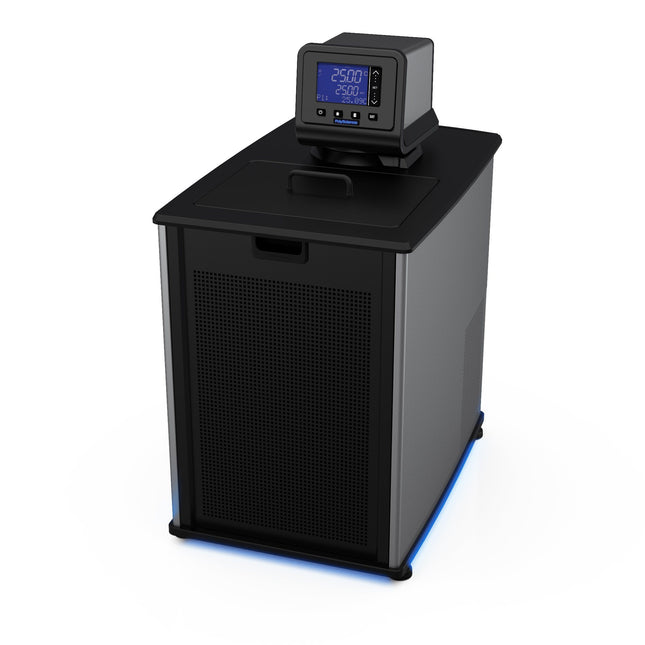
Polyscience 15 Liter Advanced Digital Refrigerated Circulator (-30°C/200°C)
Polyscience 15 Liter Advanced Digital Refrigerated Circulator (-30°C/200°C) ***Note: This item has a lead time of 2-3 weeks depending on stock availability.*** Description: -30, 15 L Ref. Circulator Controller Type: Advanced Digital Display: 3.75" Touch-Pad LCD Connectivity: Ethernet, USB A & B, RS232/addressable RS485, External Temperature Probe Languages Supported: 4: French, German, Spanish, English Swivel 180 Rotating Controller: Yes Working Temperature Range °C: -30° to 200° Temperature Stability °C: ±0.01° Fluid Optimization/Specific Heat Tuning: Automatic and/or user-adjustable Temperature Calibration Capability: 1-point Working Access (L x W x D) (cm): 21.2 x 27.6 x 14 cm Pump Type: Pressure/Suction External Temperature Control Capability: Yes Flammability Class (DIN 12876-1): III (FL) Specifications Working Temperature Range °F -22° to 392° Working Temperature Range °C -30° to 200° Nominal Cooling Capacity @ +20C (W) 915 Reservoir Capacity (gallons) 3.96 Reservoir Capacity (liters) 15 Reservoir/Tank Material Stainless Steel Reservoir Cover Included DuraTop Yes LidDock Yes Cleanable Air Filter Yes Working Access (L x W x D) (inches) 8.35 x 10.88 x 5.5 in Working Access (L x W x D) (cm) 21.2 x 27.6 x 14 cm Temperature Stability °F ±0.02° Temperature Stability °C ±0.01° Display 3.75" Touch-Pad LCD Display Resolution (Set) 0.01 Display Resolution (Read) 0.01 Pump Type Pressure/Suction Pump Speed Variable Process Connections 1/4" (F) NPT External Temperature Control Capability Yes Flammability Class (DIN 12876-1) III (FL) Over-Temperature Protection / Failsafe Heater Control Yes Low Liquid Level Protection Yes WhisperCool Environmental Control Technology Yes Cool Command Refrigeration Technology Yes Reservoir Drain Yes Included Software PolyTemp Viewer, USB driver Maximum Ambient Temperature °F 95° Maximum Ambient Temperature °C 35° Overall Dimensions (L x W x H) (inches) 22.4 x 14.5 x 26.9 in Overall Dimensions (L x W x H) (cm) 56.9 x 36.8 x 68.3 cm Refrigerant R404A Environmental Compliance RoHS, WEEE Shipping Weight (pounds) 118.0 Shipping Weight (kilograms) 53.5 60Hz Part Number AD15R-30-A11B Maximum Pressure (psi) 4.3 Maximum Pressure (bar) 0.30 Maximum Pressure Flow Rate (gpm) 5.30 Maximum Pressure Flow Rate (l/min) 20.1 Maximum Suction Flow Rate (gpm) 3.9 Maximum Suction Flow Rate (l/min) 14.7 Cooling Capacity @ -20°C (W) 165 Cooling Capacity @ 0°C (W) 505 Cooling Capacity @ +20°C (W) 915 Included Hardware Nylon hose adapters for 3/8", 1/4", and 3/16" Heater Wattage 1100 Electrical Requirements (VAC/Hz/Ph/A) 120/60/1/13 Regulatory Approvals ETL Certifications: Regulatory Approvals: ETL Circulating Bath Operator's Manual
$6,350.00
2L Short Path Parts Kit with Dry Ice Cold Trap
2L Short Path Parts Kit with Dry Ice Cold Trap This kit includes all the parts and fixturing to build a distillation setup with a 2L boiling flask. No heating or cooling equipment is included.
$750.00
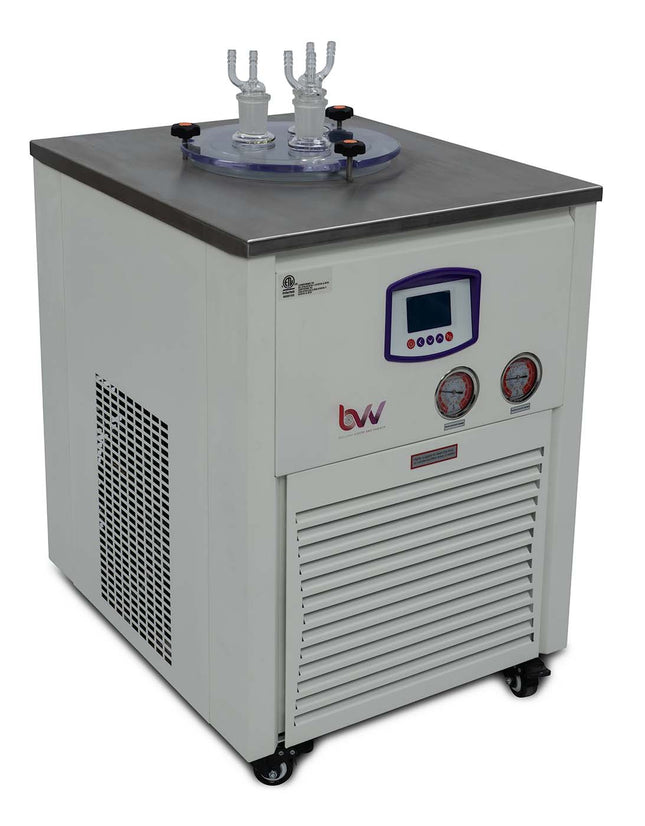
NEOCISION Cold Trap - ETL Rated - (-80c)
NEOCISION Cold Trap - ETL Rated - (-80c) The BVV™ CT80 Cold Trap is used to condense vapors lost in vacuum applications before they reach the vacuum system. This prolongs the life of the vacuum system, reduces the need to change oil frequently, and efficiently traps vapors otherwise lost to evaporation such as terpenes. The CT80 model reaches a maximum temp of -80°c or -112F under vacuum and contains three traps for maximum efficiency and condensation of vapors. Place in-line between application and your vacuum system. Specifications: Temp Range: -112F to Ambient Internal Dimensions: 180mm Internal Diameter x 210mm Depth (Holds about 1.4 gallons) External Dimensions: 505 x 620 x 750mm Weight: 149lbs Stainless Steel Interior 3x Pyrex Glass Traps 110V Power Please Note: This device is designed for operation on its own independent circuit breaker. For best results, do not use this device on a breaker shared with other equipment. ***Notice to Customers: All units are inspected for broken glass or parts before the unit is shipped. If unit arrives damaged or glass is broken (this does not include minor imperfections or scuffs in glassware), Customer MUST contact BVV™ within 3 days of delivery to file a claim and receive a replacement part. If customer DOES NOT contact BVV™ within 3 days of delivery responsibility for replacement parts falls on the customer and they must pay for replacement pieces.*** ***Glassware Safety Disclaimer: BVV™ is not responsible for failure of glassware which must be inspected before and after every use because it may eventually develop imperfections or damage through normal usage, mishandling, and stress caused by temperature variations. If an imperfection or damage is noted while inspecting the glassware DO NOT use the glassware because it can fail causing bodily harm or damage to the surrounding area.***
$5,800.00
10L Neocision Dual Head Short Path Distillation Turnkey System
10L Neocision Dual Head Short Path Distillation Turnkey System This unit carries a 2 day lead time. The 10L Neocision Distillation Turnkey Setup features our Dual 10L P5 Distillation Heads and USA made glass. Every component in this turnkey is made for precision, throughput, and repeatable results. Also included is a KF-25 Vacuum Pump giving you extreme power and depth with a long lifespan, the Bullseye Precision Vacuum Gauge from Digivac which is the most rugged and dependable vacuum gauge on the market, and a BVV 19L Heated Circulator for maximum condensation of vapors. You will also receive a Dual Dewar Style Glass Cold Trap to keep all volatiles and solvents out of your vacuum system. This Turnkey Setup gives you everything needed to perform distillation at the highest level. The Premium Turnkey Kit Includes: 10L Neocision Kit with Dual P5 Distillation Heads KF-25 2 Meter Bellows Dual Dewar Style Glass Cold Trap Bullseye Precision Vacuum Gauge BVV 19L Heated Circulator Your Choice Of KF-25 Vacuum Pump Distillation Quick Start Guide This guide gives basic quick start instructions for distillation systems. It is intended to provide a starting point for learning the process. Parameters should be adjusted to suit specific needs, Before beginning distillation, ensure the following steps have been taken: Vacuum Pump is in good working order. Pump should be run against dry load to allow internals to warm up. Oil should be clear. Cloudy or dark oil should be changed. All glass components are in good working order and ready to be assembled A winterization and degassing procedure has been done to prepare oil for distillation Once all three of these steps have been completed, you are ready to begin distilling. Begin by placing stir bar in boiling flask and then load your material. This should be done using a funnel. A small amount of alcohol in the oil will give it a thinner consistency making it easier to transfer. Assemble all glassware and ensure each joint is properly greased. Do not use too much, as the vacuum pressure might pull some grease into the system. To ensure a full seal, spread grease in a circular motion by rotating glassware Attach circulator to condenser and set temperature to 50C. Allow circulator to reach temperature before beginning distillation. Connect vacuum pump to manifold. The manifold will allow you to isolate each individual component as well as let atmosphere into and out of the system. Connect receiving cow to cold trap. Connect cold trap to manifold. Connect vacuum gauge to manifold. At this point, ensure all connections are correct. Also ensure receiving cow is positioned to collect the first fraction in the far-left receiving flask. Circulator should be at its set temperature. Turn on vacuum pump to begin process. Turn on heat and set to 60C. Vacuum pump will begin to pull down and temperature will begin to rise. Watch the gauge to monitor vacuum pressure and stability. Start stir slower and increase speed with temperature. Once you are close to 60C, increase the temperature 20 degrees. Continue to raise the heat incrementally in 20-degree steps, increasing the set temperature as you near your set point. Increase temperatures incrementally until you reach 220C. You will see your first fraction somewhere between 180C and 190C or slightly before. This is the “heads” fraction. You will move to your second fraction when you see an increased reaction in the head, a slight color change toward golden, as well as a thickening of distillate. When this fraction hits, allow the distillate to “self-clean” the head for a minute or two then, rotate the cow to the middle receiving flask. Collect your “main body” fraction. You will see temps between 190-220C during this fraction. Continue to increase stirring speed as necessary. Reaction in the head may vary but it should never stop. As fluid level in the boiling flask decreases, increase stir speed. The final “tails” fraction is a mixture of the first and second fractions and should be saved for re-distillation later. Ideally, you want to turn the cow to the final flask before the tails fraction hits. The “tails” fraction has an obvious color change and will be darker than the “main body” fraction. You will see temps between 200-250C during this fraction. As fluid level in the boiling flask decreases even more, set stirring RPM higher (1000+ RPM). You may need to compensate with a bit more heat to finish of the final fraction as well. Once process is complete, stop heat, stop stir, and stop vacuum. Let atmosphere into the system. Be sure to properly store your distillate as exposure to air and light can cause oxidation. ***Note: This entire setup will ship via motor freight.*** ***Note: All units are inspected for broken glass or parts before unit is shipped. If unit arrives damaged or glass is broken (this does not include minor imperfections or scuffs in glassware), Customer MUST contact BVV™ within 3 days of delivery to file a claim and receive a replacement part. If customer DOES NOT contact BVV™ within 3 days of delivery responsibility for replacement parts falls on the customer and they must pay for replacement pieces.*** ***Glassware Safety Disclaimer: BVV™ is not responsible for failure of glassware which must be inspected before and after every use because it may eventually develop imperfections or damage through normal usage, mishandling, and stress caused by temperature variations. If an imperfection or damage is noted while inspecting the glassware DO NOT use the glassware because it can fail causing bodily harm or damage to the surrounding area.***
$13,250.00 - $17,750.00
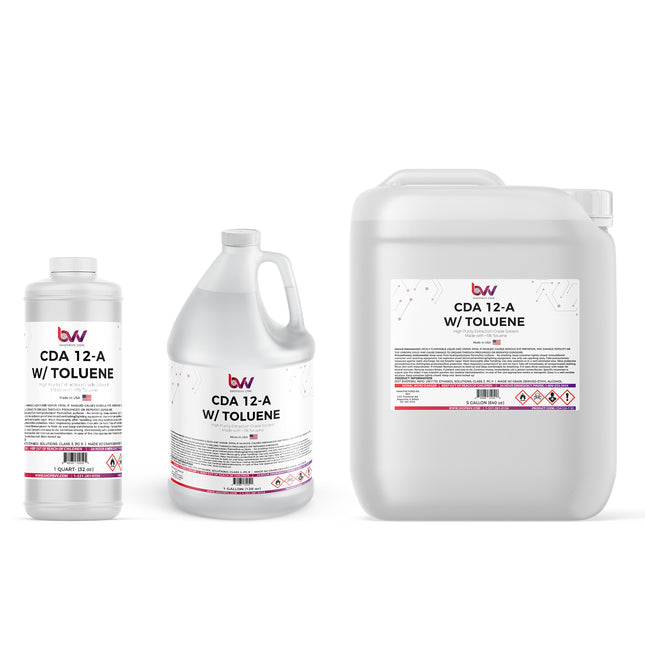
CDA 12A w/ Toluene High Purity Extraction Solvent
CDA 12A w/ Toluene HAZMAT ITEMS ARE NON-REFUNDABLE. ALL SALES ARE FINAL (Note: Container style and color may vary) BVV's Ultra High Purity Toluene Denatured Ethanol (CDA 12A) is distinguished by its exceptional purity, Our CDA 12A formulation combines 95% Food Grade/USP/ACS 200 Proof Ethanol, derived from corn, with ~5% high-purity Toluene. Adhering to stringent industry standards, ensuring it meets the precise requirements of our customers, our Ultra High Purity Toluene Denatured Ethanol excels across diverse applications widely adopted as an effective botanical extraction solvent. Being that our Ultra High Purity Denatured Ethanol is made unfit for consumption when denatured with Toluene it is not subject to the Federal Excise Tax on alcohol saving you a huge cost without compromising on it suitability for top-tier extractions. Primarily utilized as pure ethanol in extraction processes, this solvent is favored for its cost-effectiveness and extraction efficiency. Reduce manufacturing costs and increase extraction efficiency with BVV's Ultra High Purity Toluene Denatured Ethanol. Disclaimer: Prices may vary due to market value and for orders of 4 totes or more and a tanker there could be up to a 2 week lead time. Call in for more accurate lead times. Key Features: Significantly Reduced Cost due to the absence of Federal Tax Produces Exceptional Quality Extractions Leaves No Residuals or Tastes Evaporates Completely in a Rotary Evaporator Vapor Pressure: 40.9mmHg at 20°C UN Number 1170 Density: 0.7905g/cm³ Specific Gravity 0.7905 Flash Point: 13.9°C (57°F) Boiling Point: 78.5°C (173°F) Melting Point: -90.0°C (-130°F) Chemical Formula: Ethanol C2H6OToluene C7H8 CAS#(s) Ethanol 64-17-5Toluene 108-88-3 Molecular Weight: 72.1057 Appearance Colorless Liquid Odor: Mint or acetone-like Density 0.7905g/cm³ Boiling Point: 78.5c/173.3F Solubility in water: Miscible GHS Pictograms: GHS Signal Word: Danger GHS Hazard Statements: H225, H319 GHS Precautionary Statements P210, P233, P240, P241, P242, P243, P261, P264, P271, P280, P303+P361+P353, P304+P340, P305+P351+P338, P312, P337+P313, P370+P378, P403+P233, P403+P235, P405, P501 UN Identification Number: 1987 Proper Shipping Name: Alcohols Transport Hazard Class: 3 Packing Group: I DOT Placard: What is Denatured Ethanol? Denatured ethanol, also known as denatured alcohol, is ethanol (ethyl alcohol) that has been rendered unfit for human consumption by the addition of denaturants. Denaturants are typically chemicals that make the ethanol taste bad or have toxic effects, and they are added to discourage people from drinking the substance. The denaturation process is done to avoid the high taxes and regulations associated with beverage alcohol, as denatured ethanol is intended for industrial, pharmaceutical, or cosmetic uses rather than for consumption. Common denaturants include toluene, heptane, methanol, isopropyl alcohol, acetone, and other chemicals. Denatured ethanol is widely used in various industries, such as in the production of paints, solvents, cleaning products, and as a fuel for alcohol burners. Why is Ethanol Denatured? Ethanol is denatured, or rendered undrinkable, for several reasons: Tax Purposes: Denaturing ethanol allows for the imposition of lower taxes on industrial or non-beverage alcohol compared to potable alcohol. Governments often place higher excise taxes on alcohol intended for human consumption. Regulatory Compliance: Denaturing ethanol is a regulatory requirement to discourage the illegal diversion of tax-free industrial alcohol for beverage use. The addition of denaturants makes it unpalatable and unsafe for consumption. Public Safety: Making ethanol undrinkable helps prevent accidental or intentional ingestion of industrial alcohol, which can be toxic. Denaturing agents are chosen to deter people from attempting to use denatured alcohol as a substitute for beverage alcohol. Industrial Use: Denatured ethanol is widely used in various industries, including pharmaceuticals, cosmetics, and manufacturing. It serves as a solvent, fuel, or raw material in these applications. Common denaturants include substances like heptane, toluene, methanol, isopropanol, and various chemicals that make the alcohol unsuitable for human consumption while maintaining its usability in industrial processes. The specific denaturing formulations, such as CDA 12-A mentioned earlier, are defined by regulatory agencies to ensure compliance with safety and tax regulations. What is denatured ethanol used for? Denatured ethanol is used for various industrial and commercial purposes where the alcohol is needed for its properties but should not be consumed. Here are some common applications: Industrial Solvent: Denatured ethanol is widely used as a solvent in industries such as pharmaceuticals, cosmetics, and manufacturing. It is effective in dissolving a variety of substances. Cleaning Agent: Due to its solvent properties, denatured ethanol is used as a cleaning agent for surfaces, equipment, and machinery in industrial and commercial settings. Fuel Additive: Denatured ethanol is sometimes used as a fuel additive, especially in the blending of gasoline. It can improve combustion efficiency and reduce emissions. Paint and Coating Industry: It is used as a solvent in the formulation of paints, varnishes, and coatings. Pharmaceuticals: Denatured ethanol is used in the pharmaceutical industry for various purposes, including the extraction of medicinal compounds. Laboratory Use: In laboratories, denatured ethanol is often used for tasks like sterilization and as a solvent for experiments. Inks and Dyes: It is employed in the production of inks and dyes due to its ability to dissolve pigments. Adhesives and Sealants: Denatured ethanol is used in the formulation of adhesives and sealants. Window Cleaning: It is used in commercial window cleaning solutions. Automotive Industry: In the automotive industry, denatured ethanol is used for cleaning and degreasing. What can be used to denature ethanol? Here are examples of common Completely Denatured Alcohol (CDA) formulations used to denature ethanol: CDA 12-A To every 100 gallons of alcohol, add either: Five gallons of n-heptane or 5 gallons of toluene. CDA-19 To every 100 gallons of ethyl alcohol (not less than 160 proof), add: 4.0 gallons of either methyl isobutyl ketone, mixed isomers of nitro propane, or methyln-butyl ketone 1.0 gallon of either kerosene, deodorized kerosene, gasoline, unleaded gasoline, rubber hydrocarbon solvent, or heptane. CDA-20 To every 100 gallons of ethyl alcohol (not less than 195 proof), add a total of: 2.0 gallons of either unleaded gasoline, rubber hydrocarbon solvent, kerosene, or deodorized kerosene, or any combination of these. What does CDA mean? Completely Denatured Alcohol (CDA) is a type of denatured alcohol that has been rendered unfit for human consumption by the addition of denaturing agents. Denatured alcohol is ethanol (ethyl alcohol) that has been intentionally adulterated to make it toxic, foul-tasting, or otherwise undrinkable. This denaturing process is done to exempt the alcohol from excise duty and other taxes, as it's not intended for use in beverages. The denaturing agents used in CDA can vary, but they often include chemicals such as methanol, isopropanol, or other substances that make the alcohol unpalatable and potentially harmful if ingested. The specific formulation of denatured alcohol may be regulated by government authorities to ensure it meets safety standards and legal requirements. CDA is commonly used in industrial applications, as a solvent, fuel, or as a cleaning agent. It's important to note that due to the addition of denaturing agents, CDA should not be used for purposes that involve contact with the human body or ingestion. Safety precautions, including proper ventilation, should be followed when working with denatured alcohol. What is CDA 12A? CDA 12-A is a formulation specified by the Alcohol and Tobacco Tax and Trade Bureau (TTB) for Completely Denatured Alcohol (CDA). The formula is defined under §21.26 as Formula No. 12-A. The composition of CDA 12-A is as follows: For every 100 gallons of alcohol, add either: 5 gallons of n-heptane or 5 gallons of toluene. This denaturing process renders the ethanol unfit for consumption while meeting regulatory requirements for various industrial applications. CDA formulations, including CDA 12-A, are used to denature ethanol for purposes such as industrial solvents, cleaning agents, and manufacturing processes. Can you remove Toluene from CDA 12A? When toluene is added to ethanol it creates an azeotrope between the ethanol and n-heptane. An azeotrope is defined as a mixture of two liquids that have a constant boiling point and composition through distillation. This azeotrope results in the ethanol and n-heptane evaporating at the same temperature, making it extremely difficult to separate the two through distillation. While these azeotropic solvents are still easily recovered from a botanical extract at a relatively low boiling point around 78C/173F using a rotary evaporator or falling film evaporator, it is near impossible to separate the two via distillation. What is an Azeotrope? An azeotrope is a mixture characterized by having identical concentrations in both its vapor and liquid phases. This stands in contrast to ideal solutions, where one component is usually more volatile than the other, allowing for separation through distillation. When an azeotrope forms, the concentrations in both phases remain the same, hindering separation through traditional distillation methods. Azeotropes consist of a blend of at least two different liquids, and this mixture can exhibit either a higher or lower boiling point than either of its individual components. Azeotropes become relevant when certain liquid fractions resist alteration through distillation processes. In typical mixtures, components can be extracted using Fractional Distillation, a process involving repeated distillation stages. The more volatile component vaporizes and is collected separately, while the less volatile component remains in the distillation container, resulting in two distinct, pure solutions.
$10.00 - $200.00
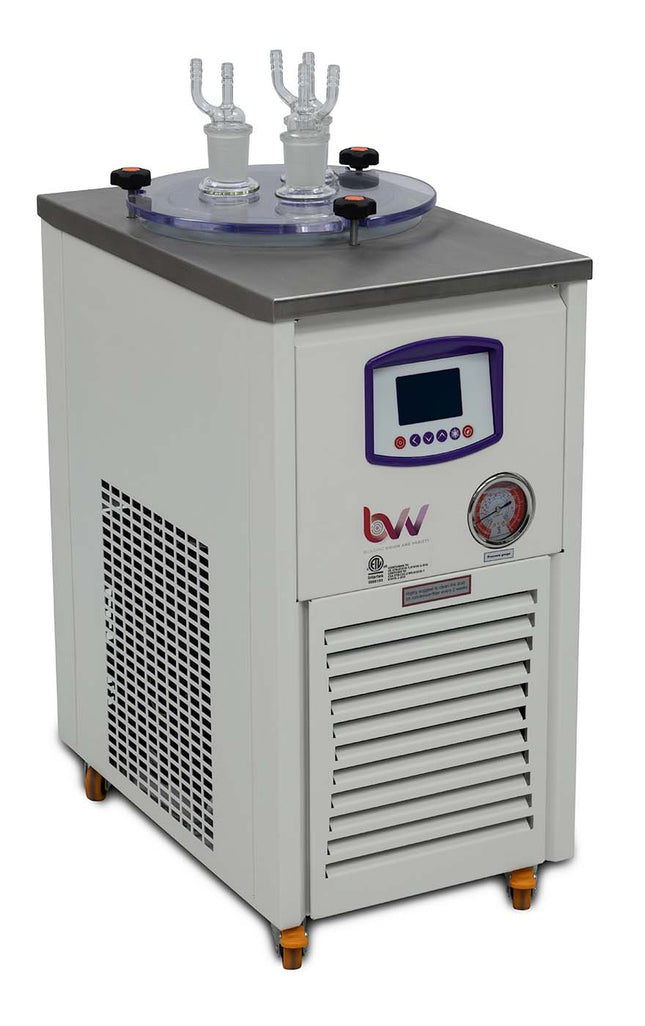
NEOCISION Cold Trap with Pump - ETL Rated - (-40c)
NEOCISION Cold Trap with Pump - ETL Rated - (-40c) Looking for a cold trap and small application chiller? The BVV™ CT40 features a 2-in-1 use with a cold trap function and built in circulating system for small batch temperature control. Cold Trap Function Use the BVV™ CT40 to condense vapors down to -40°C before they reach your vacuum pump. This prolongs the life of the vacuum system, reduces the need to change oil frequently, and efficiently traps vapors otherwise lost to evaporation such as terpenes. Common applications include short path distillation, rotary evaporation, reactor setups, or any other application where volatile vapors can damage your vacuum pump. Chiller Function Use the BVV™ CT40 for small batch temperature control down to -40°C. Switch out the cold trap configuration with solid lid to turn your cold trap into a chiller. Common applications include condensing coils, small vessel setups, heat exchangers. Operating 2-in-1 Simultaneously Use the BVV™ CT40 as a cold trap and chiller. The unit can be used with the cold trap configuration and circulating function simultaneously. Commonly used as for chilling applications with no additional heat load. BVV™-CTC40-WP Power Requirement AC 110V +/- 10% / 60Hz Relative Humidity < 85% Cooling Capacity 400W Refrigerant R404A Cold Trap Capacity 3 x 300ml Cold Trap Barb Dia. 10mm Reservoir Capacity 6.8L External Dimensions 305 x 485 x 635mm Weight 149 lbs Call in to see how we can pair this unit with your setup Please Note: This device is designed for operation on its own independent circuit breaker. For best results, do not use this device on a breaker shared with other equipment. ***Notice to Customers: All units are inspected for broken glass or parts before the unit is shipped. If unit arrives damaged or glass is broken (this does not include minor imperfections or scuffs in glassware), Customer MUST contact BVV™ within 3 days of delivery to file a claim and receive a replacement part. If customer DOES NOT contact BVV™ within 3 days of delivery responsibility for replacement parts falls on the customer and they must pay for replacement pieces.*** ***Glassware Safety Disclaimer: BVV™ is not responsible for failure of glassware which must be inspected before and after every use because it may eventually develop imperfections or damage through normal usage, mishandling, and stress caused by temperature variations. If an imperfection or damage is noted while inspecting the glassware DO NOT use the glassware because it can fail causing bodily harm or damage to the surrounding area.***
$3,100.00
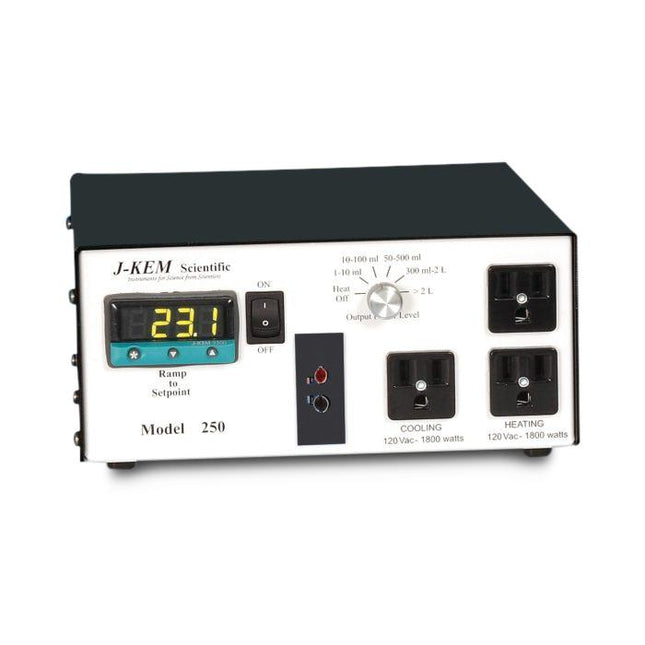
J-KEM Model 250
J-KEM Model 250 The Model 250 has both heating and cooling outlets for maximum versatility. Two heating outlets supply 1800 watts of power for large equipment and heating mantles up to 22L. The third outlet (1800 watts), normally used for cooling, is programmable to supply power below, above, or at the set point. Contains J-KEM’s patented power control computer which provides 0.1° regulation of anything. Specifications: 120vac, 15 amps, 1800 wattsWarranty: 2 Years The temperature range desired determines the probe/thermocouple type: J [black] (0 – 800° C)K [yellow] (-50 – 1200° C)T [blue] (-200 – 250° C)RTD: (-200 – 400° C)
$1,233.00 - $1,427.00
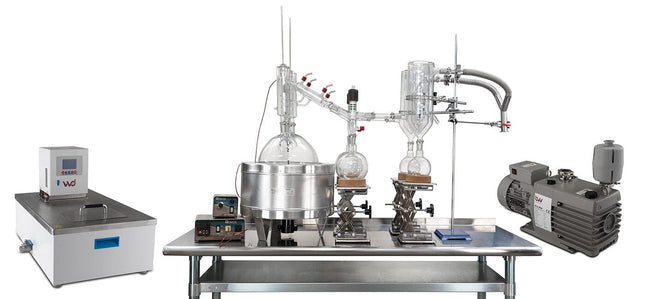
50L Neocision ETL Lab Certified Rotary Evaporator Turnkey System
50L Neocision ETL Lab Certified Rotary Evaporator Turnkey System 50L NEO Rotary Evaporator Turnkey System setup includes all the necessary components to successfully perform solvent recovery via rotary evaporation. A cold trap should always be used inline between your vacuum system and application to protect the pump from volatile vapors. 10-50L NEO and ECO Rotary Evaporator Diagram 50L NEO Rotary Evaporator Turnkey System setup includes: 50L Neocision ETL Lab Certified Rotary Evaporator Polyscience DuraChill 1.5HP Chiller w/ Turbine Pump 3/8" Gum Rubber - 100ft 3/8" Silicone Tubing - 25ft Welch BTpro100 Diaphragm Pump Adjustable Stainless Steel Hose Clamps This guide gives basic quick start instructions for rotovaps. It is intended to provide a starting point for learning the process. Parameters should be adjusted to suit specific needs. Clean and assemble unit. Make sure all pieces are cleaned and sterilized using an alcohol solution. Connect chiller to condenser and set to 0C (32F). Always fill a rotovap condenser from the top down (chiller output to top of condenser, chiller input to bottom of condenser). Connect vacuum pump to cold trap and connect cold trap to vacuum port on rotovap. Turn on heat bath and set to 40C (113F). Once heat bath, chiller and cold trap have reached desired temperatures, turn on rotovap motor and set speed to approximately 100 RPM (does not have to be precise). Keep in mind, higher RPM’s will increase evaporation power but also increase heat load. Start vacuum pump and allow vacuum to pull down for a few minutes before injection. Once vacuum has been pulled to a sufficient level (does not have to be precise but should be below 100 Torr), using the injection valve, very slowly inject approximately 500 mL of solution into evaporating flask and then close the valve. Allow this small amount to begin evaporating. You may see the chiller begin to rise in temperature, this is called “priming” the rotovap. Once the temperature stops rising or all liquid is almost completely evaporated, open the injection valve again very slowly so that a small amount of liquid begins to enter the evaporating flask. Do not close injection valve this time but continue to allow solution to enter the evaporating flask. At this point you must try to match the input speed to the output speed. What this means is that you should be injecting the same amount of liquid into the rotovap that is equal to the amount of liquid dripping from the condenser into the receiving flask. You will know that the input speed and output speed are matched because the chiller will remain at a stable temperature. If the chiller begins to rise, then you are injecting too much liquid. Dial back the valve until the chiller stabilizes. Once everything is stabilized, you may walk away from the rotovap if necessary. Check every so often to make sure temperatures remain stable and evaporation continues efficiently.
$21,200.00 - $24,250.00
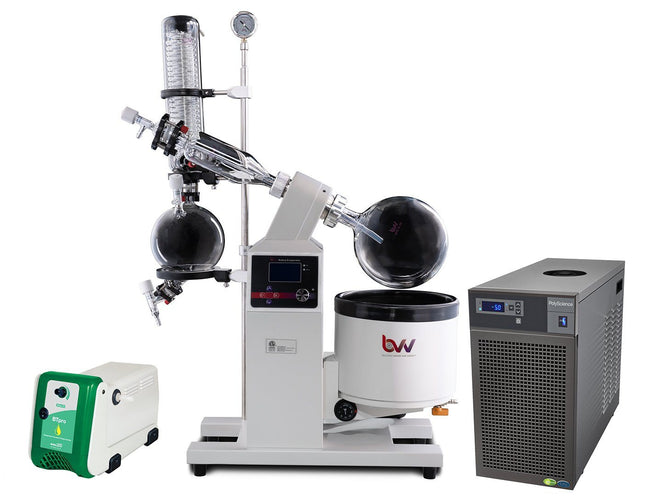
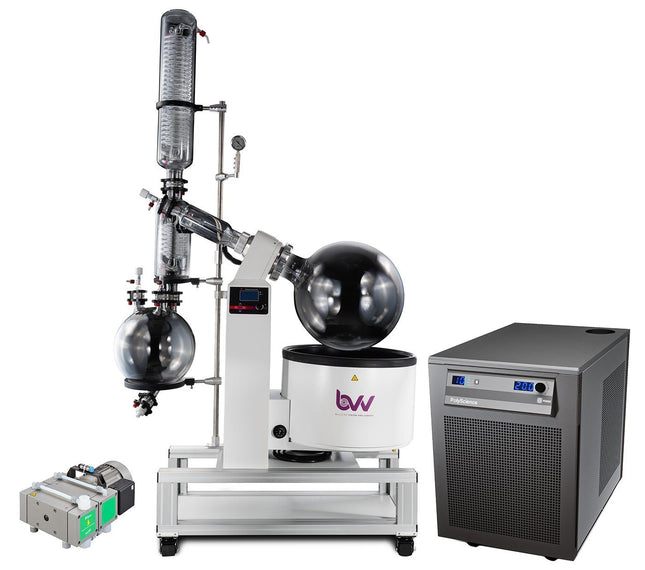
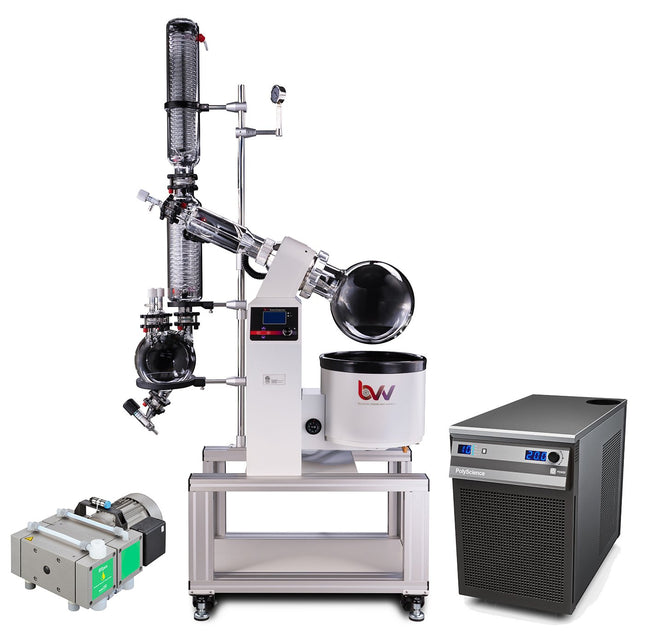
5L Neocision ETL Lab Certified Rotary Evaporator Turnkey System
5L Neocision ETL Lab Certified Rotary Evaporator Turnkey System The 5L Neocision ETL Lab Certified Rotary Evaporator is a full-scale system meant to fulfill the needs of large volume production and meet the requirements of a certified laboratory with its ETL certification standards. Featuring an electric lift bath and all PTFE valves for extreme chemical resistance, the 5L Neocision gives users the ability to recover large amounts of solvent in a smaller footprint with highly improved functionality. All Neocision rotovaps feature high-efficiency valves and drain ports making it easy to directly inject solution continuously without the need to stop the system or release vacuum to drain. The temperature and rotation speed are easily controlled from a single digital interface. Our rotovaps are a fraction of the price of more costly systems with the same functionality and evaporation efficiency. 5L NEO Rotary Evaporator Turnkey System setup includes: 5L Neocision ETL Lab Certified Rotary Evaporator Polyscience LS -20C to 40C 1/2HP Chiller w/ Turbine Pump 1/4" Gum Rubber - 100ft 1/4" Silicone Tubing - 25ft Welch BTpro70 Adjustable Stainless Steel Hose Clamps Features: ETL Certified for Lab use. Digital temperature and speed control with simple user interface Electric Bath Lift Teflon Coated Bath for corrosion resistance High-efficiency drain port and injection valves Smaller footprint for improved workspace allocation Mobility with locking casters Shorter vapor path for faster evaporation and condensation Direct injection capability for continuous feeding of solution Continuous draining capability without the need to release vacuum or stop the system 1-year warranty on all mechanical parts. Does not include glassware. Specifications: Model 5L Solvent Pro Series Rotary Evaporator Optimum Ambient Temperature 5~25C / 41~105.8F Glass Material GG-17 High Borosilicate Power (V/Hz) 110V 50/60Hz Single Phase Speed Regulation Digital Step-less Regulation Rotation Speed 20-130 RPM Set Temperature RT+5 - 99C Temperature Control Digital Temperature Control Maximum Vacuum Pressure -29.8 inHg Evaporating Flask Capacity 5L (5000ml) Receiving Flask Capacity 5L (5000ml) Condenser Style Main + Auxiliary Vertical Double Helix Heater Max Current Draw (Amps) 25 Water Bath Material 304 Stainless Steel Water Bath Size 17.7 x 9.8 in. Lifting Function Electric Lifting Stroke 190mm / 7.5 in. Total Power Consumption (kW) 1800w Dimensions 45 x 32 x 15in Weight 155 lbs Vacuum Connection 14mm / .55 in. Barb Condenser Connection 18mm / .70 in. Barb Warranty 1 Year excluding glass parts Certifications ETL Rotovap Quick Start Guide This guide gives basic quick start instructions for rotovaps. It is intended to provide a starting point for learning the process. Parameters should be adjusted to suit specific needs. Clean and assemble unit. Make sure all pieces are cleaned and sterilized using an alcohol solution. Connect chiller to condenser and set to 0C (32F). Always fill a rotovap condenser from the top down (chiller output to top of condenser, chiller input to bottom of condenser). Connect vacuum pump to cold trap and connect cold trap to vacuum port on rotovap. Turn on heat bath and set to 40C (113F). Once heat bath, chiller and cold trap have reached desired temperatures, turn on rotovap motor and set speed to approximately 100 RPM (does not have to be precise). Keep in mind, higher RPM’s will increase evaporation power but also increase heat load. Start vacuum pump and allow vacuum to pull down for a few minutes before injection. Once vacuum has been pulled to a sufficient level (does not have to be precise but should be below 100 Torr), using the injection valve, very slowly inject approximately 500 mL of solution into evaporating flask and then close the valve. Allow this small amount to begin evaporating. You may see the chiller begin to rise in temperature, this is called “priming” the rotovap. Once the temperature stops rising or all liquid is almost completely evaporated, open the injection valve again very slowly so that a small amount of liquid begins to enter the evaporating flask. Do not close injection valve this time but continue to allow solution to enter the evaporating flask. At this point you must try to match the input speed to the output speed. What this means is that you should be injecting the same amount of liquid into the rotovap that is equal to the amount of liquid dripping from the condenser into the receiving flask. You will know that the input speed and output speed are matched because the chiller will remain at a stable temperature. If the chiller begins to rise, then you are injecting too much liquid. Dial back the valve until the chiller stabilizes. Once everything is stabilized, you may walk away from the rotovap if necessary. Check every so often to make sure temperatures remain stable and evaporation continues efficiently. ***Note: All units are inspected for broken glass or parts before unit is shipped. If unit arrives damaged or glass is broken (this does not include minor imperfections or scuffs in glassware), Customer MUST contact BVV™ within 3 days of delivery to file a claim and receive a replacement part. If customer DOES NOT contact BVV™ within 3 days of delivery responsibility for replacement parts falls on the customer and they must pay for replacement pieces.*** ***Note: This item will ship by freight only.*** ***Glassware Safety Disclaimer: BVV™ is not responsible for failure of glassware which must be inspected before and after every use because it may eventually develop imperfections or damage through normal usage, mishandling, and stress caused by temperature variations. If an imperfection or damage is noted while inspecting the glassware DO NOT use the glassware because it can fail causing bodily harm or damage to the surrounding area.***
$10,250.00 - $12,250.00
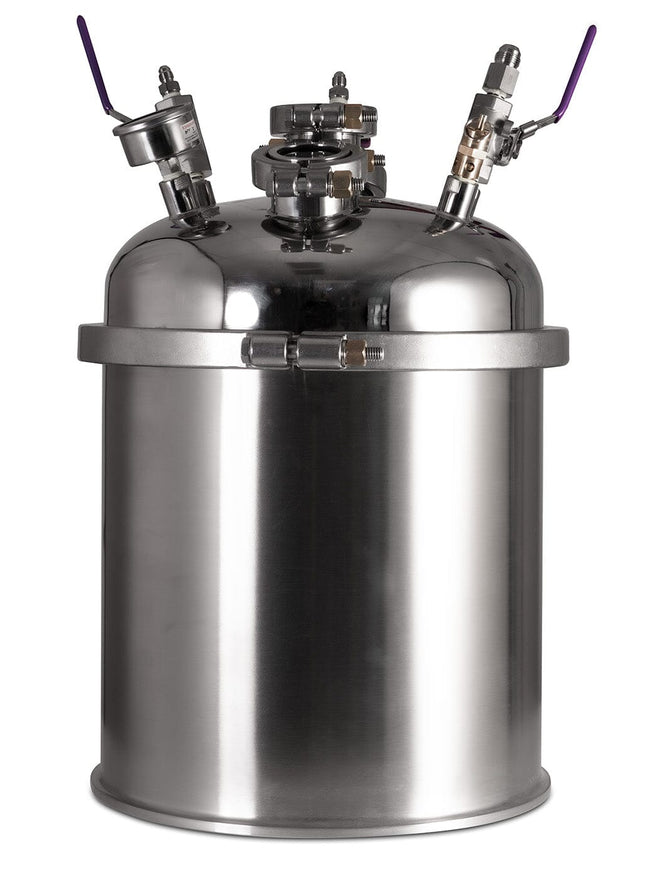
12" Collection Base
Pre-Built 12" Collection Base Double your capacity or configure your own custom system with BVV's Pre-Built 12" Collection base. Available in three different variations to suit your application all models of BVV's Pre-Built 12" Collections Base comes standard with high-pressure clamps, borosilicate sight glasses, and full-bore ball valves. Version 1 is the base model equipped with the standard 12" welded base perfect for cost-conscious applications. Version 2 is equipped with a 12"x12" spool & 12" splatter platter to make extract harvesting a breeze, and Version 3 is the top of the line 12" Colleciton base equipped with a 12" jacketed splatter platter for both optimized solvent recovery and ease of harvesting extract. Specifications High Pressure Clamps 2X 2" Borosilicate Sight Glasses 1X 125 PSI ASME Safety Valves 1X -30hg-250PSI Compound Pressure Gauge 1X 1/2" JIC Lid Valve 2X 1/4" JIC Lid Valves Maximum Pressure Rating: 125PSI Variations V1 : 12x12 Base (1200X12B) V2: 12" Splatter Platter base (1200X12S+1200SPL) V3: 12" Jacketed Splatter Platter Base (1200X12S+1200FJS)
$917.00 - $1,291.00
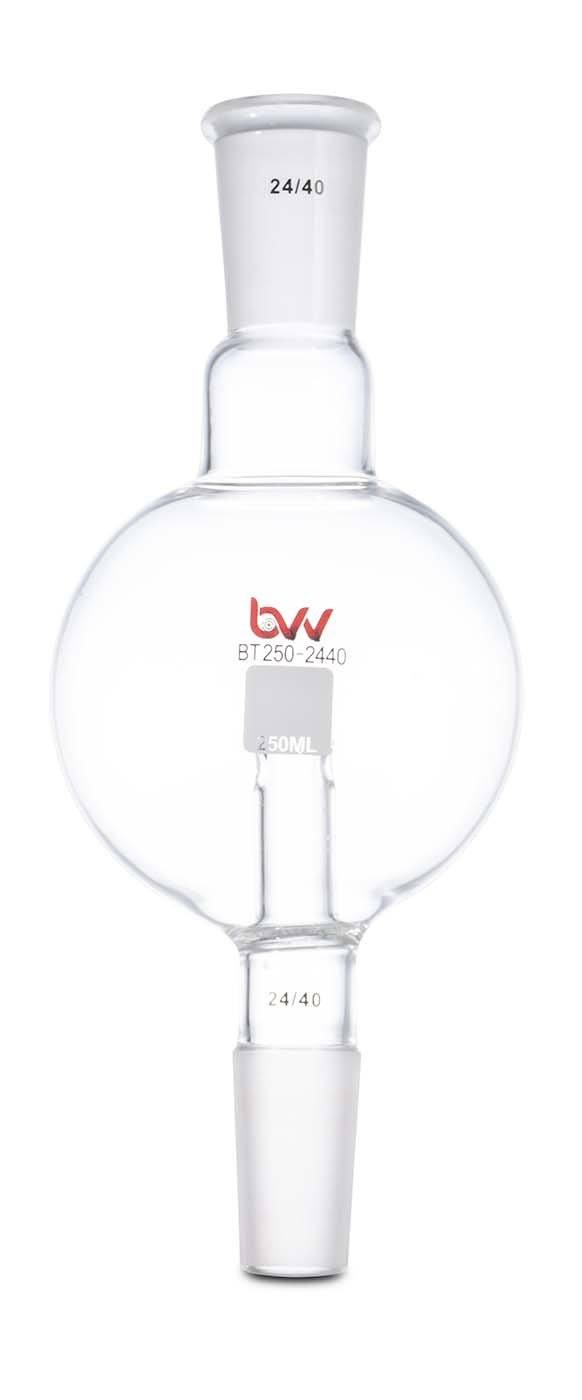
250ml Bump Trap 24/40 Male to 24/40 Female
Bump traps are used on rotary evaporators between the evaporating flask and condensing column. They help prevent contamination in the collection vessel when “bumping” occurs. When “bumping” occurs substance in the evaporating flask shoots up and ends up in the collection flask, which is unwanted when operating. This bump trap features a 250ML round flask with upper 24/40 female ground joint and bottom 24/40 male ground joint. With the use of ground joints vacuum grease must be applied to assure a tight seal. Internally, there is a tube that extends and two openings on the sides. This is what stops the bumping from occurring. If any substance makes its way through the openings, it will get trapped in the flask. Vapor is still allowed to flow freely through the openings. Recommend using this bump trap on 2L rotary evaporators and other distillation setups it has an overall length of 9". Specifications Material Borosilicate Flask Size 250ml Top Connection 24/40 Female Ground Joint Bottom Connection 24/40 Male Ground Joint *Notice to customers: All units are inspected for broken glassware or parts before leaving BVV™. If the unit arrives damaged (this does not include minor imperfections or scuffs in glassware), the customer MUST contact BVV™ within 72 hours from carrier delivery to file a claim. If the customer DOES NOT contact BVV™ within 72 hours from carrier delivery, then BVV™ cannot issue any replacement(s) or compensation for the item; a new purchase will need to be made for a replacement. **Glassware Safety Disclaimer: Best Value Vacs is not responsible for failure of glassware which must be inspected before and after every use because it may eventually develop imperfections or damage through normal usage, mishandling, and stress caused by temperature variations. If an imperfection or damage is noted while inspecting the glassware DO NOT use the glassware because it can fail causing bodily harm or damage to the surrounding area.**
$60.00
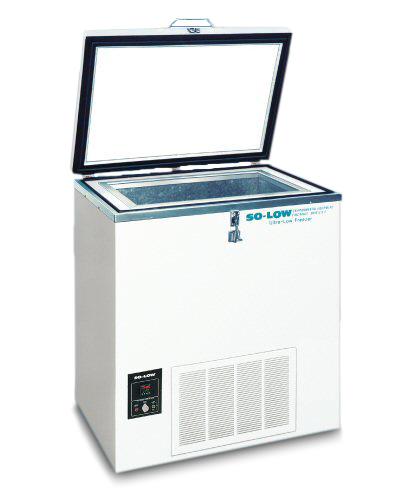
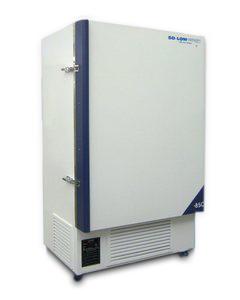
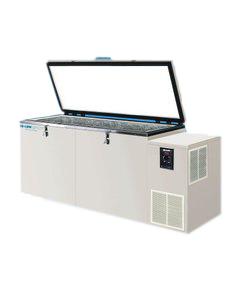
So-Low -85°C Ultra-Low Chest Freezer - 5 Cubic Ft.
So-Low -85°C Ultra-Low Chest Freezer - 5 Cubic Ft. Please note: This Product may carry up to an 8 week lead time! So-Low Ultra-Low Chest Freezers are second to none in low temp applications to suit any laboratory or application needs. These Ultra-Low Temp freezers feature digital temperature control with 2 temperature displays. One shows the set temperature and the other shows the actual temperature in the freezer. The So-Low C85-5 features a battery operated alarm system that will emit an audible and visual signal when there is a mechanical or electrical failure. The alarm has an over and under temperature setting, alarm silencing switch, and battery test switch. Product Specifications Temperature Control Digital Control with two temperature displays. One display shows the set temperature, the other shows the actual temperature in the freezer. Alarm System Battery operated alarm system will emit an audible and visual signal when there is a mechanical or electrical failure. The alarm has an over and under temperature setting, alarm silencing switch, and battery test switch. Remote Alarm Relay A relay for a remote alarm hook-up is also provided. Refrigeration System So-Low cascade type. Two hermetic compressors. CFC & HCFC free refrigerants. Construction Chamber is 14-ga. zinc coated galvanized steel. Exterior is 16-ga. steel. Powder coated cool gray finish. Voltages Available 115/60/1 - 208/60/1 - 230/60/1 - 220/50/1 Technical Support Supplied by Nation-Wide-Network of service companies. ETL Electrical Approval Specification Data Sheet Diagram Data Sheet Specification Manufacturer So-Low Temperature Range -40°C to -85°C / -40°F to -121°F Capacity 5 Cubic Ft. / 142 Liters Dimensions: Exterior: 40.5" x 31" x 47" Interior: 30" x 18" x 16" Refrigeration System So-Low cascade type. Two hermetic compressors. CFC & HCFC free refrigerants. Construction Chamber is 14-ga. zinc coated galvanized steel. Exterior is 16-ga. steel. Powder coated cool gray finish.
$6,800.00 - $7,300.00
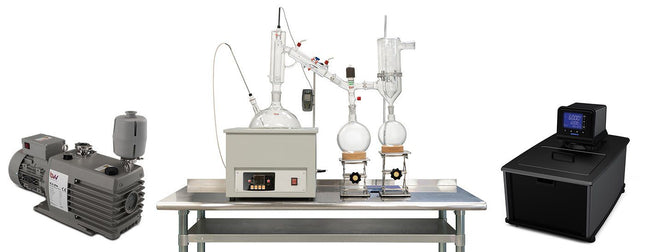
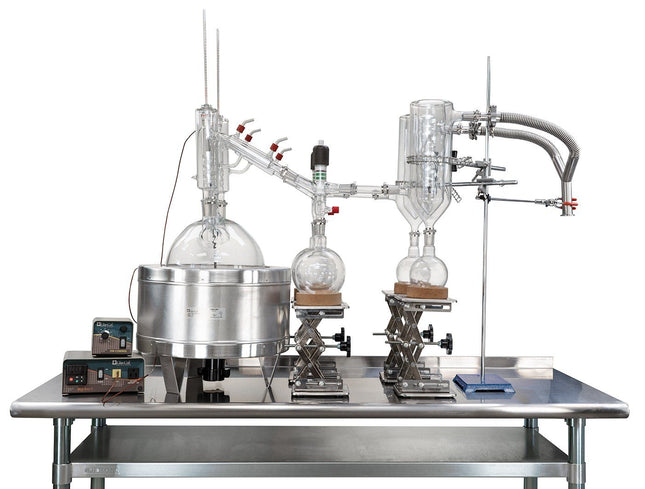
10L Premium Short Path Distillation Turnkey System
10L Premium Short Path Distillation Turnkey System This unit carries a 2 day lead time. (Note: Stainless Steel Table NOT Included.) The 10L Premium Short Path Distillation Turnkey System features our USA made P10 Distillation Head. Every component in this turnkey is made for precision, throughput, and repeatable results. Also included the Kangaroo digital thermometer which is very rugged and reliable. You will also receive a Ribbed Dewar Style Glass Cold Trap to keep all volatiles and solvents out of your vacuum system. This Turnkey Setup gives you everything needed to perform distillation at the highest level. The 10L Neo Kit Includes: 10L Short Path Distillation Kit including glassware, labware, and P10 Distillation Head. 10L Digital Heating and Stirring Mantle. Polyscience 15 Liter Advanced Digital Heated Circulator BVV™ 21.2CFM Pro Series Corrosion Resistant Vacuum Pump Valved Vacuum Adapter. Ribbed Dewar Style Glass Cold Trap. Kangaroo Digital Thermometer. Distillation Quick Start Guide This guide gives basic quick start instructions for distillation systems. It is intended to provide a starting point for learning the process. Parameters should be adjusted to suit specific needs, Before beginning distillation, ensure the following steps have been taken: Vacuum Pump is in good working order. Pump should be run against dry load to allow internals to warm up. Oil should be clear. Cloudy or dark oil should be changed. All glass components are in good working order and ready to be assembled A winterization and degassing procedure has been done to prepare oil for distillation The unit's max internal temperature cannot exceed 380C. The recommended max set temperature should not exceed 250C Once all three of these steps have been completed, you are ready to begin distilling. Begin by placing stir bar in boiling flask and then load your material. This should be done using a funnel. A small amount of alcohol in the oil will give it a thinner consistency making it easier to transfer. Assemble all glassware and ensure each joint is properly greased. Do not use too much, as the vacuum pressure might pull some grease into the system. To ensure a full seal, spread grease in a circular motion by rotating glassware Attach circulator to condenser and set temperature to 50C. Allow circulator to reach temperature before beginning distillation. Connect vacuum pump to manifold. The manifold will allow you to isolate each individual component as well as let atmosphere into and out of the system. Connect receiving cow to cold trap. Connect cold trap to manifold. Connect vacuum gauge to manifold. At this point, ensure all connections are correct. Also ensure receiving cow is positioned to collect the first fraction in the far-left receiving flask. Circulator should be at its set temperature. Turn on vacuum pump to begin process. Turn on heat and set to 60C. Vacuum pump will begin to pull down and temperature will begin to rise. Watch the gauge to monitor vacuum pressure and stability. Start stir slower and increase speed with temperature. Once you are close to 60C, increase the temperature 20 degrees. Continue to raise the heat incrementally in 20-degree steps, increasing the set temperature as you near your set point. Increase temperatures incrementally until you reach 220C. You will see your first fraction somewhere between 180C and 190C or slightly before. This is the “heads” fraction. You will move to your second fraction when you see an increased reaction in the head, a slight color change toward golden, as well as a thickening of distillate. When this fraction hits, allow the distillate to “self-clean” the head for a minute or two then, rotate the cow to the middle receiving flask. Collect your “main body” fraction. You will see temps between 190-220C during this fraction. Continue to increase stirring speed as necessary. Reaction in the head may vary but it should never stop. As fluid level in the boiling flask decreases, increase stir speed. The final “tails” fraction is a mixture of the first and second fractions and should be saved for re-distillation later. Ideally, you want to turn the cow to the final flask before the tails fraction hits. The “tails” fraction has an obvious color change and will be darker than the “main body” fraction. You will see temps between 200-250C during this fraction. As fluid level in the boiling flask decreases even more, set stirring RPM higher (1000+ RPM). You may need to compensate with a bit more heat to finish of the final fraction as well. Once process is complete, stop heat, stop stir, and stop vacuum. Let atmosphere into the system. Be sure to properly store your distillate as exposure to air and light can cause oxidation. ***Note: This entire setup will ship via motor freight.*** ***Note: All units are inspected for broken glass or parts before unit is shipped. If unit arrives damaged or glass is broken (this does not include minor imperfections or scuffs in glassware), Customer MUST contact BVV™ within 3 days of delivery to file a claim and receive a replacement part. If customer DOES NOT contact BVV™ within 3 days of delivery responsibility for replacement parts falls on the customer and they must pay for replacement pieces.*** ***Glassware Safety Disclaimer: BVV™ is not responsible for failure of glassware which must be inspected before and after every use because it may eventually develop imperfections or damage through normal usage, mishandling, and stress caused by temperature variations. If an imperfection or damage is noted while inspecting the glassware DO NOT use the glassware because it can fail causing bodily harm or damage to the surrounding area.***
$11,500.00
2L Electric Lift Glass Axis
Glass axis for 2L Best Value Electric Lift Rotary Evaporator. *Notice to customers: All units are inspected for broken glassware or parts before leaving BVV™. If the unit arrives damaged (this does not include minor imperfections or scuffs in glassware), the customer MUST contact BVV™ within 72 hours from carrier delivery to file a claim. If the customer DOES NOT contact BVV™ within 72 hours from carrier delivery, then BVV™ cannot issue any replacement(s) or compensation for the item; a new purchase will need to be made for a replacement. **Glassware Safety Disclaimer: BVV™ is not responsible for failure of glassware which must be inspected before and after every use because it may eventually develop imperfections or damage through normal usage, mishandling, and stress caused by temperature variations. If an imperfection or damage is noted while inspecting the glassware DO NOT use the glassware because it can fail causing bodily harm or damage to the surrounding area.**
$45.00
10L Neocision ETL Lab Certified Rotary Evaporator Turnkey System
10L NEO Rotary Evaporator Turnkey System 10L NEO Rotary Evaporator Turnkey System setup includes all the necessary components to successfully perform solvent recovery via rotary evaporation. A cold trap should always be used inline between your vacuum system and application to protect the pump from volatile vapors. To keep your bath heating properly, this unit should only be used with RO or DI water. 10-50L NEO and ECO Rotary Evaporator Diagram 10L NEO Rotary Evaporator Turnkey System setup includes: 10L Neocision ETL Lab Certified Rotary Evaporator Polyscience 6160T 1HP Chiller 3/8" Gum Rubber - 100ft 3/8" Silicone Tubing - 25ft Welch BTpro100 Diaphragm Pump Adjustable Stainless Steel Hose Clamps This guide gives basic quick start instructions for rotovaps. It is intended to provide a starting point for learning the process. Parameters should be adjusted to suit specific needs. Clean and assemble unit. Make sure all pieces are cleaned and sterilized using an alcohol solution. Connect chiller to condenser and set to 0C (32F). Always fill a rotovap condenser from the top down (chiller output to top of condenser, chiller input to bottom of condenser). Connect vacuum pump to cold trap and connect cold trap to vacuum port on rotovap. Turn on heat bath and set to 40C (113F). Once heat bath, chiller and cold trap have reached desired temperatures, turn on rotovap motor and set speed to approximately 100 RPM (does not have to be precise). Keep in mind, higher RPM’s will increase evaporation power but also increase heat load. Start vacuum pump and allow vacuum to pull down for a few minutes before injection. Once vacuum has been pulled to a sufficient level (does not have to be precise but should be below 100 Torr), using the injection valve, very slowly inject approximately 500 mL of solution into evaporating flask and then close the valve. Allow this small amount to begin evaporating. You may see the chiller begin to rise in temperature, this is called “priming” the rotovap. Once the temperature stops rising or all liquid is almost completely evaporated, open the injection valve again very slowly so that a small amount of liquid begins to enter the evaporating flask. Do not close injection valve this time but continue to allow solution to enter the evaporating flask. At this point you must try to match the input speed to the output speed. What this means is that you should be injecting the same amount of liquid into the rotovap that is equal to the amount of liquid dripping from the condenser into the receiving flask. You will know that the input speed and output speed are matched because the chiller will remain at a stable temperature. If the chiller begins to rise, then you are injecting too much liquid. Dial back the valve until the chiller stabilizes. Once everything is stabilized, you may walk away from the rotovap if necessary. Check every so often to make sure temperatures remain stable and evaporation continues efficiently. **Note: All units are inspected for broken glass or parts before unit is shipped. If unit arrives damaged or glass is broken (this does not include minor imperfections or scuffs in glassware), Customer MUST contact BVV™ within 3 days of delivery to file a claim and receive a replacement part. If customer DOES NOT contact BVV™ within 3 days of delivery responsibility for replacement parts falls on the customer and they must pay for replacement pieces.*** ***Note: This item will ship by freight only.*** ***Glassware Safety Disclaimer: BVV™ is not responsible for failure of glassware which must be inspected before and after every use because it may eventually develop imperfections or damage through normal usage, mishandling, and stress caused by temperature variations. If an imperfection or damage is noted while inspecting the glassware DO NOT use the glassware because it can fail causing bodily harm or damage to the surrounding area.***
$16,950.00 - $19,000.00
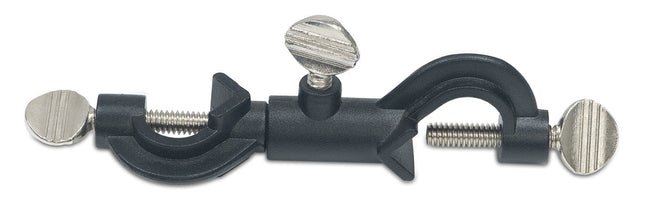
Boss Head - Double Swivel
Boss Head - Double Swivel Made of high strength powder coated alloy and can support up to 16mm rods. The boss head can be adjusted and locked to any angle (360°). It is also designed to carry heavy loads and prevent torque damage. Furthermore, it has three wide pad metal screws to easily secure itself to a clamp and support apparatus. Note:Clamps and rods are NOT included.
$10.00
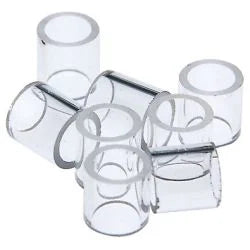
Raschig Ring 1LB
Raschig Ring 1LB Raschig rings are pieces of tube used in large numbers as a packed bed within columns for distillation. These glass rings provide a large surface area within the volume of the column for interaction between liquid and gas vapors. Our rings are made from borosilicate glass and are food grade quality. 8mm X 8mm *BVV recommends all users of any and all glassware to operate inside a ventilated fume hood with sufficient blast shields to prevent injury in case of fatigued glass failure. *BVV is not responsible or liable for the result of any failures from use, and/or loss of subsequent hardware contamination/failure with or without the result of material loss or damaged caused to surroundings. By purchasing our premiere lines of laboratory glassware the user is responsible to operate in the recommended environment safely. We recommend all users to operate in a legal and licensed facility where safety is the number 1 goal.
$60.00 - $110.00
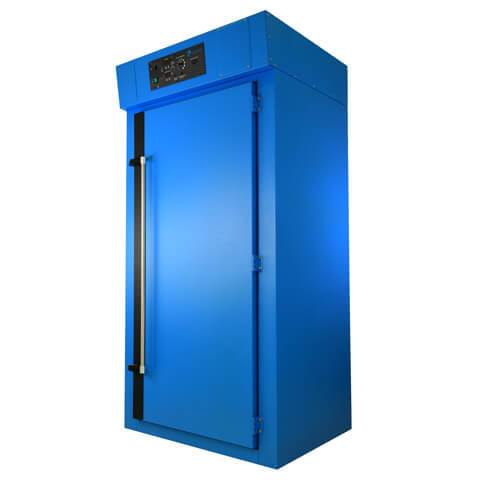
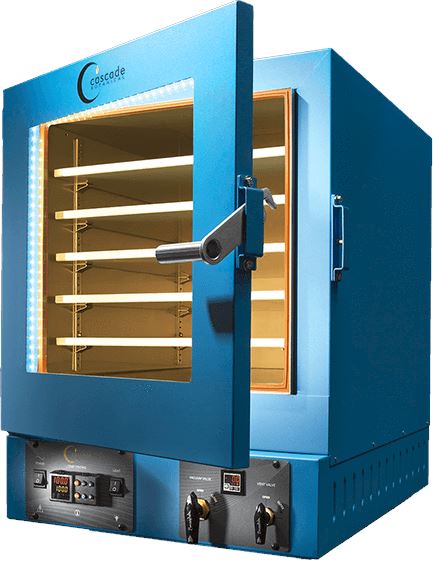
Cascade CDO-28 Dry & Decarb Oven
Cascade CDO-28 Dry & Decarb Oven This item carries up to a 2 week lead time. Cascade’s CDO-28 is purpose-built for large-scale, industrial decarboxylation of material with additional features: 28 Cu. Ft. Built-in Humidity Sensor assists in dryness targets Stay in place sliding extension shelves NRTL Certification 6 each FDA & temperature rated fine micron mesh bags for ground material – Mesh bags are required to prevent oven contamination and material loss. This powerful, large capacity forced air laboratory oven uses heated air to remove unwanted compounds from products that are not temperature sensitive. Our ovens feature horizontal airflow that enables more consistent distribution of air. They are designed to have uniform temperatures and airflow across the shelf space from right to left. The CDO-28 includes a built-in humidity sensor and fine micron mesh bags for drying or decarboxylating powders or ground material. Ideal Uses: Industrial scale forced-air convection drying below 149ºC / 300ºF Decarboxylation processes Drying organic material. Drier material will yield better results than processing wet material. Removing as much moisture as possible pre-processing will save time in the post process of vacuum purge and winterization. Lab glassware dryer Model CDO-28 Features Horizontal Airflow. The airflow moves uniformity across the shelf space from right to left Digital set-point control, timer and overtemp failsafe protection Humidity sensor displays relative humidity levels during process Includes 6 sliding, extend and stay in place shelves for ease of loading. Stainless Steel. Includes 6 temp-rated, fine micron mesh bags for easy loading & uniform drying of messy powders, ground up or turbulent materials Fast heat-up: 24 Minutes to 149ºC (300°F) / Uniformity: +/- 2ºC (3.5°F) Stainless steel interior / Food lab grade construction. 301 SST Shelves Triple wall construction meets CE, UL and TUV requirements to keep work-spaces cool. Quality Made in Oregon USA 1 Year Warranty The Cascade Difference Basic forced-air lab ovens are mass-produced and sold by many large scale laboratory equipment distributors. But there are key differences between Cascade and other less costly, often imported lab ovens: Independent Overtemp Failsafe Protection The Cascade Sciences CDO-28 is equipped with a heating cutoff system that will automatically stop power to the heaters when the overtemp setting is tripped. This protection system will provide peace of mind for overnight or unattended drying processing. NRTL Certification. No Extra cost. The CDO-28 Oven comes certified by the Nationally Recognized Test Lab, TUV. This certification is a requirement by many municipalities. CAN/CSA-C22.2 No. 61010-1:2012+UPD No. 1:2015-07 + UPD No. 2:2016-04CAN/CSA-C22.2 No. 61010-2-010:2015UL 61010-1:2012-05UL 61010-2-010:2015EN 61010-1:2010EN 61010-2-010:2014 Rigorous Quality Assurance in an ISO Certified, USA Manufacturing Facility Cascade Sciences manufactures our ovens in Oregon, USA. We are proud of our ISO 9001 Certification/Accreditation. Each oven completes a series of quality assurance procedures before shipment: Electrical & mechanical safety is thoroughly tested in compliance with TUV requirements Functional testing verifies user settable items consistent with most lab protocols/usage models Temperature verification includes calibration & temp chamber uniformity following ASTM standards Units are cleaned and packed in ISTA tested, certified packaging materials Specifications Capacity Volume 28 Cubic Ft. (793 Cubic Liters) Interior 31.5″W x 60.5″H x 26″D 800mm x 1,537mm x 661mm Exterior 43”W x 85.5”H x 34.3”D 1,092mm x 2,171mm x 871mm Temperature Temperature Range 2.2ºC (36°F) above room temp to 148ºC (300°F) Temperature Stability +/- 2ºC (+/-3.5°F) Temp Recovery @ 240°F *Load Dependent* Door Open 30 Seconds: 3 min to stabilize Door Open 60 Seconds: 5 min to stabilize Power 230V – 240V / 1ph / 26AMP Oven Must Be Hardwired By Electrician Oven will also run on 208V BTUs Per Hour at Max Power 18,425 BTUs Air Stats Air Intake Adjustable. Top 2.75” Diameter Air Exhaust Adjustable. Top 2.75” Diameter Linear Shelf Space Airflow 17.1 cubic ft per min Shelving Quantity Included 6 each. Height adjustable. Surface Area 31”W x 23”D (787mm x 584mm) Weight Capacity 75 lbs (34 kg) Mesh Bags Quantity Included Comes with 6 Temp Rated Mesh Bags Dimensions 27.5″W x 21.5″D (699mm x 546mm) Polypropylene (PP) Melt Temperature 161°C (363°F) Softening Point 152°C (305°F) Heat Deflection Temperature 90°C (194°F) Glass Transition Temperature 0°C (32°F) * Mesh bags are REQUIRED to prevent oven contamination and ground material loss. * Polypropylene products produced for some filtration applications are made from resin that complies with FDA regulations for food contact. The regulation compliance is product number dependent / specific. * Impact at cold temperatures is likely to cause strand cracking or breakage Weight Product Weight 565 lbs (256 kg) Shipping Weight 640 lbs (290 kg) Certifications ISO 9001NRTL TUV #U8 170464972 077CAN/CSA-C22.2 No. 61010-1:2012+ UPD No. 1:2015-07 + UPD No. 2:2016-04CAN/CSA-C22.2 No. 61010-2-010:2015UL 61010-1:2012/R:2016-04UL 61010-2-010:2015EN 61010-1:2010EN 61010-2-010:2014 Warranty 1 Year Additional Resources: Download P-Trap Exhaust Tutorial View NRTL Certification
$15,997.00
10L Neocision Dual Head Short Path Distillation Kit
10L Neocision Dual Head Short Path Distillation Kit This unit carries a 2 day lead time. The 10L Neocision Distillation Turnkey Setup features our Dual 10L P5 Distillation Heads and USA made glass. Every component in this turnkey is made for precision, throughput, and repeatable results. Also included the Bullseye Precision Vacuum Gauge from Digivac which is the most rugged and dependable vacuum gauge on the market. You will also receive a Dual Dewar Style Glass Cold Trap to keep all volatiles and solvents out of your vacuum system. This Turnkey Setup gives you everything needed to perform distillation at the highest level. The 10L Neo Kit Includes: 10L Neocision Kit with Dual P5 Distillation Heads KF-25 90 Degree Long Manifold and Metering Valve Dual Dewar Style Glass Cold Trap Bullseye Precision Vacuum Gauge Distillation Quick Start Guide This guide gives basic quick start instructions for distillation systems. It is intended to provide a starting point for learning the process. Parameters should be adjusted to suit specific needs, Before beginning distillation, ensure the following steps have been taken: Vacuum Pump is in good working order. Pump should be run against dry load to allow internals to warm up. Oil should be clear. Cloudy or dark oil should be changed. All glass components are in good working order and ready to be assembled A winterization and degassing procedure has been done to prepare oil for distillation Once all three of these steps have been completed, you are ready to begin distilling. Begin by placing stir bar in boiling flask and then load your material. This should be done using a funnel. A small amount of alcohol in the oil will give it a thinner consistency making it easier to transfer. Assemble all glassware and ensure each joint is properly greased. Do not use too much, as the vacuum pressure might pull some grease into the system. To ensure a full seal, spread grease in a circular motion by rotating glassware Attach circulator to condenser and set temperature to 50C. Allow circulator to reach temperature before beginning distillation. Connect vacuum pump to manifold. The manifold will allow you to isolate each individual component as well as let atmosphere into and out of the system. Connect receiving cow to cold trap. Connect cold trap to manifold. Connect vacuum gauge to manifold. At this point, ensure all connections are correct. Also ensure receiving cow is positioned to collect the first fraction in the far-left receiving flask. Circulator should be at its set temperature. Turn on vacuum pump to begin process. Turn on heat and set to 60C. Vacuum pump will begin to pull down and temperature will begin to rise. Watch the gauge to monitor vacuum pressure and stability. Start stir slower and increase speed with temperature. Once you are close to 60C, increase the temperature 20 degrees. Continue to raise the heat incrementally in 20-degree steps, increasing the set temperature as you near your set point. Increase temperatures incrementally until you reach 220C. You will see your first fraction somewhere between 180C and 190C or slightly before. This is the “heads” fraction. You will move to your second fraction when you see an increased reaction in the head, a slight color change toward golden, as well as a thickening of distillate. When this fraction hits, allow the distillate to “self-clean” the head for a minute or two then, rotate the cow to the middle receiving flask. Collect your “main body” fraction. You will see temps between 190-220C during this fraction. Continue to increase stirring speed as necessary. Reaction in the head may vary but it should never stop. As fluid level in the boiling flask decreases, increase stir speed. The final “tails” fraction is a mixture of the first and second fractions and should be saved for re-distillation later. Ideally, you want to turn the cow to the final flask before the tails fraction hits. The “tails” fraction has an obvious color change and will be darker than the “main body” fraction. You will see temps between 200-250C during this fraction. As fluid level in the boiling flask decreases even more, set stirring RPM higher (1000+ RPM). You may need to compensate with a bit more heat to finish of the final fraction as well. Once process is complete, stop heat, stop stir, and stop vacuum. Let atmosphere into the system. Be sure to properly store your distillate as exposure to air and light can cause oxidation. ***Note: This entire setup will ship via motor freight.*** *Notice to Customers: All units are inspected for broken glassware or parts before leaving BVV™. If the unit arrives damaged (this does not include minor imperfections or scuffs in glassware), the customer MUST contact BVV™ within 72 hours from carrier delivery to file a claim. If the customer DOES NOT contact BVV™ within 72 hours from carrier delivery, then BVV™ cannot issue any replacement(s) or compensation for the item; a new purchase will need to be made for a replacement. BVV™ is not responsible for the failure of glassware which must be inspected before and after every use because it may eventually develop imperfections or damage through normal usage, mishandling, and stress caused by temperature variations. If an imperfection or damage is noted while inspecting the glassware DO NOT use the glassware because it can fail, which can cause bodily harm or damage to the surrounding area.
$9,200.00
So-Low -85°C Ultra-Low Upright Freezer - 25 Cubic Ft.
So-Low -85°C Ultra-Low Upright Freezer - 25 Cubic Ft. Please note: This Product may carry up to an 8 week lead time! So-Low Ultra-Low Upright Freezers are second to none in low temp applications to suit any laboratory or application needs. These Ultra-Low Temp freezers feature digital temperature control with 2 temperature displays. One shows the set temperature and the other shows the actual temperature in the freezer. The So-Low U85-25 features a battery operated alarm system that will emit an audible and visual signal when there is a mechanical or electrical failure. The alarm has an over and under temperature setting, alarm silencing switch, and battery test switch. Product Specifications Temperature Control Touch Screen Control Displays set point and chamber temperature Hi/Low Alarm Relay Dry Contacts Power Failure Dry Contacts Battery Back-up Viewable Temperature graph Data logging downloadable via USB or FTP Multi-Level Security VNC Remote Access via PC / smart devices Alarm System Battery operated alarm system will emit an audible and visual signal when there is a mechanical or electrical failure. The alarm has an over and under temperature setting, alarm silencing feature. Dimensions: Exterior: 50" x 37" x 79.5" Interior: 34" x 25" x 51.25" Capacity 25 Cubic Ft. / 710 Liters Temperature Range -40°C to -85°C / -40°F to -121°F Shelving 4 Adjustable Shelves (5 Compartments) Inventory Rack Capacity 30 Remote Alarm Relay A relay for a remote alarm hook-up is also provided. Access Port Mounted in left hand side of the cabinet will be a 1/2" porthole leading into the chilling chamber, complete with plugs. Refrigeration System So-Low cascade type. Two hermetic motor compressors. These compressors are the heavy duty industrial type: air cooled. The motors are sealed in oil for life and have thermoguard overload protection. Compressors start in sequence to protect the unit from overloading. CFC & HCFC free refrigerants. Construction Chamber is 14-ga. zinc coated galvanized steel. Exterior is 16-ga. steel. Powder coated cool gray finish. Voltages Available 115/60/1 - 220/50/1 Technical Support Supplied by Nation-Wide-Network of service companies. ETL Electrical Approval Specification Data Sheet Diagram Data Sheet
$12,300.00
So-Low -80°C Ultra-Low Chest Freezer - 27 Cubic Ft.
So-Low -80°C Ultra-Low Chest Freezer - 27 Cubic Ft. Please note: This Product may carry up to an 8 week lead time! So-Low Ultra-Low Chest Freezers are second to none in low temp applications to suit any laboratory or application needs. These Ultra-Low Temp freezers feature digital temperature control with 2 temperature displays. One shows the set temperature and the other shows the actual temperature in the freezer. The So-Low C80-27 features a battery operated alarm system that will emit an audible and visual signal when there is a mechanical or electrical failure. The alarm has an over and under temperature setting, alarm silencing switch, and battery test switch. Product Specifications Temperature Control Digital Control with two temperature displays. One display shows the set temperature, the other shows the actual temperature in the freezer. Alarm System Battery operated alarm system will emit an audible and visual signal when there is a mechanical or electrical failure. The alarm has an over and under temperature setting, alarm silencing switch, and battery test switch. Dimensions: Exterior: 98" x 36" x 43.5" Interior: 67" x 23" x 31.25" Capacity 27 Cubic Ft. / 766 Liters Temperature Range -40°C to -80°C / -40°F to -112°F Shelving N/A Inventory Rack Capacity 48 Remote Alarm Relay A relay for a remote alarm hook-up is also provided. Refrigeration System So-Low cascade type. Two hermetic compressors. CFC & HCFC free refrigerants. Construction Chamber is 14-ga. zinc coated galvanized steel. Exterior is 16-ga. steel. Powder coated cool gray finish. Voltages Available 115/60/1 - 220/50/1 Technical Support Supplied by Nation-Wide-Network of service companies. ETL Electrical Approval Specification Data Sheet Diagram Data Sheet
$16,995.00
Cascade CVO-5 Vacuum Oven
Cascade CVO-5 Vacuum Oven (Oven Only) This item carries up to a 1-2 week lead time. Cascade’s Model CVO-5 offers incredible temperature stability for vacuum drying and purging of pharmaceuticals, botanicals, slurries, or any temperature sensitive material. This vacuum oven liberates solvents, water, and other unwanted compounds. It’s ideal for small batch, R&D and laboratory environments. Processing Temperature Sensitive Material? The CVO-5 comes in both low temp & high temp versions. Be sure to get the low temp CVO-5 version that has excellent temperature uniformity for products such as pharmaceuticals, slurries or any product that can be damaged or destroyed by temperature fluctuations. Low & High Temp Specifications Low Temp Specs Temperature Processing Range 26°F to 250°F (121°C) Temperature Uniformity +/- 1.5°F @ 105°F (40.5°C) Temperature Stability +/- 0.4°F @ 105°F(40.5°C) High Temp Specs Temperature Processing Range Up to 428°F / 220°C Temperature Uniformity +/- 6.5% of setpoint At time of order we will verify the high / low temp version best suited to your requirements. CVO-5 Vacuum Oven Features NRTL Certified by TUV 5 each adjustable shelves Stable temperature control. Digital temperature readout with temp sensor INSIDE the oven Solvent resistant BUNA door gasket Bright LED lights in window for visibility of sensitive material Touchscreen LED Control Panel with adjustable settings Smooth, quarter-turn vacuum and vent valves Energize vacuum pump from control panel Rear KF-25 port allows for rapid MAX EVAP purging or running feedthroughs inside oven for monitoring 120V or 220V power options are available Quality Tempered Rated Glass NGI-US to ANSI Z97.1.2007 156CFR/201 11 SGCC -2577 ½ UA Adjustable leveling feet insure your unit sits solid and level in the workspace The Cascade Difference Vacuum ovens have been around for decades. Basic vacuum ovens are mass-produced and sold by many large laboratory equipment distributors. But there are key differences between Cascade and other less costly, often imported vacuum ovens. Exceptional Temperature Control & Stability The Cascade CVO-5 uses a unique control logic not found in most lab grade vacuum ovens. The temperature probe is INSIDE the oven, which minimizes temperature overshoot and delivers best-in-class temperature stability and uniformity particularly in the low temperature ranges. Accurate, stable temps throughout the CVO-5 eliminate hot and cold spots, making accurate use of every inch of shelf space. Touchscreen LED Smart Controller The CVO-5 controller is a flat panel touch screen with built-in, controls that minimze temperature overshoot. When the oven door is open, the controller will wait and not agressively call for heat to attempt to keep the oven interior stable. When the oven is being vented, the controller will pause as to not over-react and overshoot temperature during this temporary event. Read Temperature in degrees Celcius or Fahrenheit Read Vacuum in Torr or Inches of Mercury Energize Vacuum Pump From Oven Control Panel Turn the vacuum pump off and on from the oven control panel. No more reaching around, behind, beside to turn the vacuum pump off an on. Vacuum pump plugs directly into the back of the oven’s auxillary outlet. Independent Overtemp Failsafe Protection The Cascade Sciences TVO-5 is equipped with a heating cutoff system that will automatically stop power to the heaters when the oven shelf temps exceed 392°F or 200°C. This protection system will provide peace of mind for overnight processing or unattended vacuum bake outs. Log Temperature & Vacuum With Data Port The TVO-5 features a rear mounted data port which outputs a digital log line once per minute. Viewing/logging this data requires terminal emulator software such as the open source (BSD License) emulator Tera Term. NRTL Certification #U8 170464972 077. No Extra cost. The TVO-5 Vacuum Oven comes certified by the Nationally Recognized Test Lab, TUV. This certification is a requirement by many municipalities and is often an extra charge on low cost ovens. CAN/CSA-C22.2 No. 61010-1:2012 +UPD No. 1:2015-07 + UPD No. 2:2016-04 CAN/CSA-C22.2 No. 61010-2-010:2015 UL 61010-1:2012/R:2016-04 UL 61010-2-010:2015 EN 61010-1:2010 EN 61010-2-010:2014 Rigorous Quality Assurance in an ISO Certified, USA Manufacturing Facility Cascade Sciences manufactures our ovens in Oregon, USA. We are proud of our ISO 9001 Certification/Accreditation. Each oven completes a series of quality assurance procedures before shipment. Chambers are vacuum tested after welding for vacuum integrity Electrical & mechanical safety is thoroughly tested in compliance with TUV requirements Functional testing verifies user settable items consistent with most lab protocols/usage models Temperature verification includes calibration & temp chamber uniformity following ASTM standards Units are cleaned and packed in ISTA tested, certified packaging materials Equipped for Inert Gas Backfill. Built-In Safety Relief Introduce inert gasses such as nitrogen, argon, helium, etc. as part of your process via the ¼” rear vent barb. The maximum backfill pressure is 15PSI. In an overpressure situation, a simple, built-in safety relief allows gasses to escape via a spring loaded tempered window. Flexible Pumping / Feedthru Connection Ports The TVO-5 ovens offer two different vacuum oven connection points. The standard connection is a 3/8th dia barb located at the rear of the oven. It is connected to the vacuum valve level on the front control panel. For even faster evaporation, purging or drying consider upgrading to the MAX EVAP connection kit. The MAX EVAP connection kit secures to the oven’s rear 1” dia KF-25 port located on the back center of the chamber. The MAX EVAP connection never reduces flow by continuing with 1” diameter vacuum rated clear lines, a 1” dia KF-25 side mounted vacuum valve and KF-25 fittings and hardware. This KF-25 port can also be used to run temperature feedthrus, or monitoring sensors inside the vacuum chamber during processing. Ergonomically Designed, Easy Quarter-Turn Valves For anyone that has struggled with consistently turning the small, round, low-quality vacuum/vent valves, relief is in sight. You will love our large, quarter-turn vacuum/vent valves. Your wrists will thank you! ANSI Rated Tempered Glass + USA Made Steel Cascade ovens are made in Oregon, USA with high quality materials. Our glass is NGI-USA Tempered and certified to ANSI Z97.1.2007 16CFR / 201 11. Our door handles are rugged brushed steel, not plastic. Our vacuum vessels are constructed with American made steel. We’ve tried lower cost, imported steel. But over time, vacuum chambers made of lesser quality/lower tolerance material cannot withstand the flex and pressure changes of vacuum pumping/venting/purging. This can deteriorate vacuum integrity and the oven will lose its ability to hold vacuum. Model CVO-5 Vacuum Oven Specifications: Capacity Volume 4.5 Cubic Ft. Interior 18”W x 24”D x 18”H 457mm x 609mm x 457mm Exterior 26.5” W x 34.5” D x 32.3”H 673mm x 876mm x 819mm Temperature Range Low-Temp Processing Range 26°F to 250°F (121°C) Temperature Uniformity +/- 1.5°F @ 105°F (40.5°C) Temperature Stability +/- 0.4°F @ 105°F(40.5°C) Heat Up / Stabilization Time to 250°F: 120 minutes (to minimize overshoot) High-Temp Processing Range 428°F / 220°C available Temperature Uniformity +/- 6.5% of setpoint *Note that ambient laboratory conditions can affect temp performance. The TVO-5 (CVO-5) comes in both low temp and high temp versions. The low temp version has excellent temperature uniformity for temperature sensitive material. The higher temp version, 220°C has a uniformity about 6.5% of setpoint. At time of order we will verify the high / low temp version you require. INTERIOR LIGHTING - LED Strips (Rated to 150C) GLASS WINDOW - Tempered NGI-US to ANSI Z97.1.2007 Temperature Controller Touch Screen Accurate Within 1°F Independent Overtemp Failsafe Rear Ports Vacuum 3/8th Barb Vent ¼” Barb Auxiliary KF-25 Port Data: Log temp & vacuum levels INERT GAS INTRODUCTION - Yes. Via ¼” Vent Barb. 15 psi max inlet pressure Power Options 110V – 120V / 1ph / 14A 50/60HzCord IncludedNEMA 5-15 Power Outlet 1105 BTU/hrRating at max power 220V – 240V / 1ph / 7A 50/60HzCord IncludedNEMA 6-15R Power Outlet 1228 BTU/hrRating at max power Included Accessories 5 Shelves 20 Clips 4 Leveling Feet Power Cord Door Gasket 18” x 18” Comes with Solvent Resistant BUNA Standard rated to221°F to 105°C Compatible With:High Temp Silicone rated to 446°F to 230°C Viton rated to 401°F to 205°C Weights & Shipping Weight 360 lbs / 163.3 Kg Shipping Weight: 449 lbs / 207.3 Kg 41”L x 41”W x 45”H Class 85 Certifications ISO 9001 NRTL TUV #U8 170464972 077 CAN/CSA-C22.2 No. 61010-1:2012 + UPD No. 1:2015-07 + UPD No. 2:2016-04 CAN/CSA-C22.2 No. 61010-2-010:2015 UL 61010-1:2012/R:2016-04 UL 61010-2-010:2015 EN 61010-1:2010 EN 61010-2-010:2014 Warrenty 1 Year (gaskets not included) Package Specs CVO-5 Manual CVO-Dimentions CVO-5 Calibration Procedure NRTL Certification Vacuum Pressure Chart
$11,398.00

J-KEM Digital Temperature Monitor
J-KEM Digital Temperature Monitor Monitors and displays the temperature of an attached piece of equipment on a bright LED display. Built-in USB and free KEM-Net software provide remote temperature monitoring and data logging to a GLP/GMP compliant file. Audible alarm. Specifications: 120 or 230Vac, 50 watts.Warranty: 2 Years The temperature range desired determines the probe/thermocouple type: J [black] (0 – 800° C) K [yellow] (-50 – 1200° C) T [blue] (-200 – 250° C)
$600.00
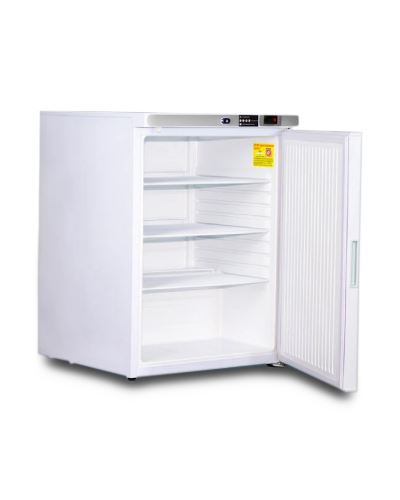
So-Low Flammable Material Storage Refrigerators 1°C to 10°C, 14 Cu.Ft, MV4-6UCFMSR
So-Low Flammable Material Storage Refrigerators 1°C to 10°C, 14 Cu.Ft, MV4-6UCFMSR Please note: This Product may carry up to an 11 week lead time! Our Flammable Refrigerators and Freezers are designed to meet National Fire Protection Agency NFPA and OSHA guidelines for the refrigerated storage of flammable (volatile) material storage in general laboratory work areas. Designed exclusively to control flammable material, The So-Low Flammable Material Storage Freezers and Refrigerators are ideal for storage of any flammable material products. There are no electrical components located in the interior of the unit and the compressor's electrical components have been sealed in a vapor-proof enclosure for additional safety. Units are supplied with a power cord to ease installation. Temperature control and temperature recorder options allow for an individualized intensity of temperature control and monitoring. Adjustable legs and shelves add more availability and storage options to fit your laboratories needs. Features Solid Polyurethane Foam Insulated Doors Epoxy Coated Shelves Adjustable Shelves Adjustable Legs CFC-Free Refrigerant and Insulation Adjustable Thermostat Manual Defrost UL Listed Product Specification Manufacturer So-Low Temperature Range 1°C to 7°C Capacity 6.1 Cufic Feet Exterior w x d x h (inches) 23.625" x 24.25" x 32.187" Exterior w x d x h (cm) 68 x 62 x 82 Door Single Solid, locking Interior Finish Anodized aluminum Leg Four Leveling Legs Insulation Polyurethane foam Refrigerant R134A CFC free Compressor 1/5 hp Condenser Static Defrost Manual Voltage:Domestic 115/60/1 Running Amps/Breaker 2.5/15 Supply Plug 5-15P NEMA UL listed Shipping weight 150lbs Warranty -(Domestic) 12 months parts and labor Compressors additional 4 years, no labor. Specification Data Sheet
$2,390.00
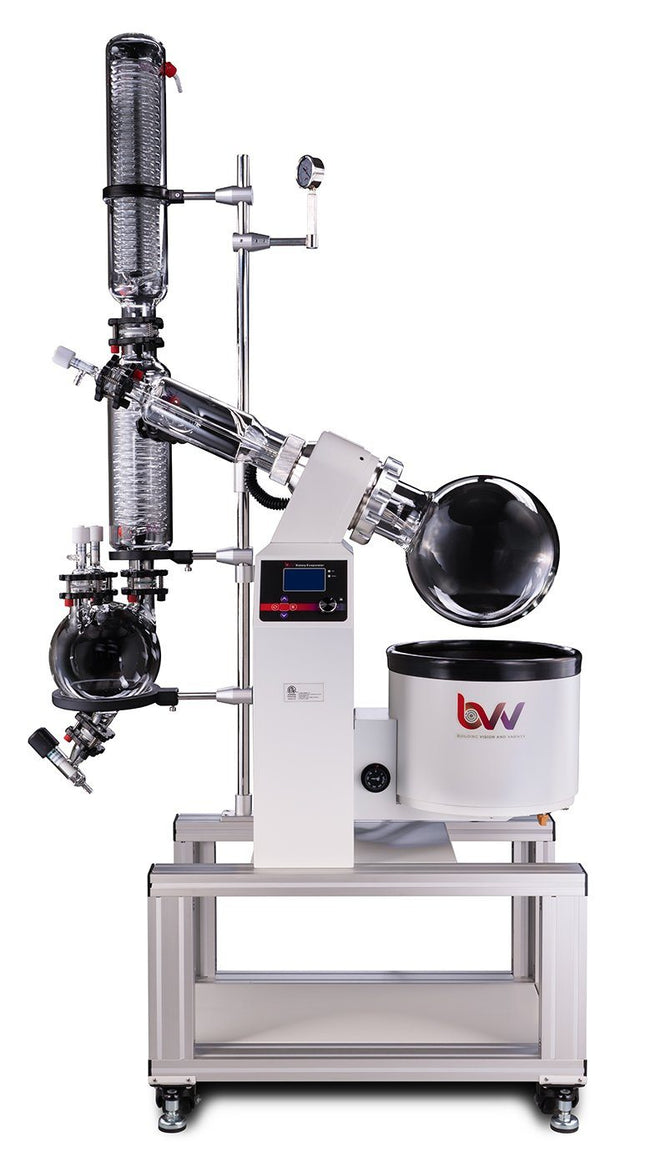
10L Neocision ETL Lab Certified Rotary Evaporator
10L Neocision ETL Lab Certified Rotary Evaporator The 10L Neocision ETL Lab Certified Rotary Evaporator is a full-scale system meant to fulfill the needs of large volume production and meet the requirements of a certified laboratory with its ETL certification standards. Featuring an electric lift bath and all PTFE valves for extreme chemical resistance, the 10L Neocision gives users the ability to recover large amounts of solvent in a smaller footprint with highly improved functionality. All Neocision rotovaps feature high-efficiency valves and drain ports making it easy to directly inject solution continuously without the need to stop the system or release vacuum to drain. The temperature and rotation speed are easily controlled from a single digital interface. Our rotovaps are a fraction of the price of more costly systems with the same functionality and evaporation efficiency. To keep your bath heating properly, this unit should only be used with RO or DI water. 10-50L NEO and ECO Rotary Evaporator Diagram Features: ETL Certified for Lab use. Digital temperature and speed control with simple user interface Electric Bath Lift Teflon Coated Bath for corrosion resistance High-efficiency drain port and injection valves Smaller footprint for improved workspace allocation Mobility with locking casters Shorter vapor path for faster evaporation and condensation Direct injection capability for continuous feeding of solution Continuous draining capability without the need to release vacuum or stop the system 1-year warranty on all mechanical parts. Does not include glassware. Specifications: Model 10L Solvent Pro Series Rotary Evaporator Optimum Ambient Temperature 5~25C / 41~105.8F Glass Material GG-17 High Borosilicate Power (V/Hz) 220-240V 60Hz Single Phase Speed Regulation Digital Step-less Regulation Rotation Speed 20-130 RPM Set Temperature RT+5-99C Temperature Control Digital Temperature Control Maximum Vacuum Pressure -29.8 inHg Evaporating Flask Capacity 10L (10000ml) Receiving Flask Capacity 10L (10000ml) Condenser Style Main + Auxiliary Vertical Double Helix Heater Max Current Draw (Amps) 25 Water Bath Material 304 Stainless Steel Water Bath Size 17.7 x 9.8 in. Lifting Function Electric Lifting Stroke 190mm / 7.5 in. Total Power Consumption (kW) 3300w Dimensions 81 x 44 x 20 in. Weight 155 lbs Vacuum Connection 14mm / .55 in. Barb Condenser Connection 18mm / .70 in. Barb Warranty 90 days excluding glass parts Certifications ETL Rotovap Quick Start Guide This guide gives basic quick start instructions for rotovaps. It is intended to provide a starting point for learning the process. Parameters should be adjusted to suit specific needs. Clean and assemble unit. Make sure all pieces are cleaned and sterilized using an alcohol solution. Connect chiller to condenser and set to 0C (32F). Always fill a rotovap condenser from the top down (chiller output to top of condenser, chiller input to bottom of condenser). Connect vacuum pump to cold trap and connect cold trap to vacuum port on rotovap. Turn on heat bath and set to 40C (113F). Once heat bath, chiller and cold trap have reached desired temperatures, turn on rotovap motor and set speed to approximately 100 RPM (does not have to be precise). Keep in mind, higher RPM’s will increase evaporation power but also increase heat load. Start vacuum pump and allow vacuum to pull down for a few minutes before injection. Once vacuum has been pulled to a sufficient level (does not have to be precise but should be below 100 Torr), using the injection valve, very slowly inject approximately 500 mL of solution into evaporating flask and then close the valve. Allow this small amount to begin evaporating. You may see the chiller begin to rise in temperature, this is called “priming” the rotovap. Once the temperature stops rising or all liquid is almost completely evaporated, open the injection valve again very slowly so that a small amount of liquid begins to enter the evaporating flask. Do not close injection valve this time but continue to allow solution to enter the evaporating flask. At this point you must try to match the input speed to the output speed. What this means is that you should be injecting the same amount of liquid into the rotovap that is equal to the amount of liquid dripping from the condenser into the receiving flask. You will know that the input speed and output speed are matched because the chiller will remain at a stable temperature. If the chiller begins to rise, then you are injecting too much liquid. Dial back the valve until the chiller stabilizes. Once everything is stabilized, you may walk away from the rotovap if necessary. Check every so often to make sure temperatures remain stable and evaporation continues efficiently. ***Note: All units are inspected for broken glass or parts before unit is shipped. If unit arrives damaged or glass is broken (this does not include minor imperfections or scuffs in glassware), Customer MUST contact BVV™ within 3 days of delivery to file a claim and receive a replacement part. If customer DOES NOT contact BVV™ within 3 days of delivery responsibility for replacement parts falls on the customer and they must pay for replacement pieces.*** ***Note: This item will ship by freight only.*** ***Glassware Safety Disclaimer: BVV™ is not responsible for failure of glassware which must be inspected before and after every use because it may eventually develop imperfections or damage through normal usage, mishandling, and stress caused by temperature variations. If an imperfection or damage is noted while inspecting the glassware DO NOT use the glassware because it can fail causing bodily harm or damage to the surrounding area.***
$5,250.00$3,500.00
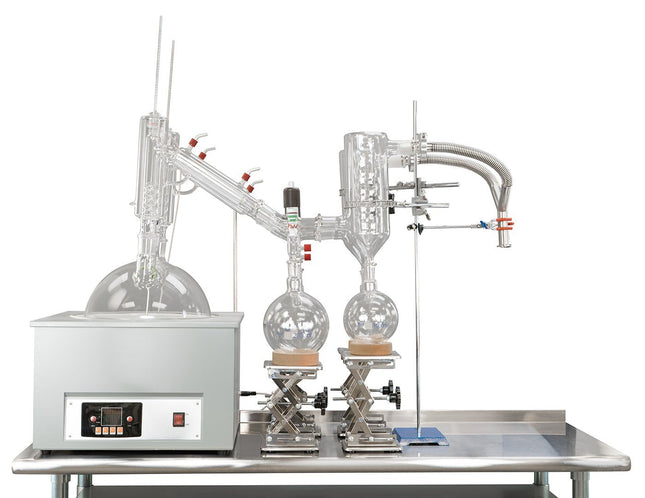
20L Neocision Dual Head Short Path Distillation Kit
20L Neocision Dual Head Short Path Distillation Kit This unit carries a 2 day lead time. (Note: This kit does NOT include the stainless steel table.) The 20L Neocision Distillation Kit Setup features our Dual P10V6 Distillation Heads and USA made glass. Every component in this distillation kit is made for precision, throughput, and repeatable results. You will also receive Dual Dewar Style Ribbed Glass Cold Traps to keep all volatiles and solvents out of your vacuum system. This kit gives you the essentials of a short path distillation system and allows you to add a pump and temperature control system of your choosing. The 20L Neo Kit Includes: 20L Neocision Kit with glassware, labware, and Dual P10V6 Distillation Heads. KF-25 Bellow Y Manifold Dual Ribbed Dewar Style Glass Cold Trap Non-Mercury Glass Thermometers 20L Digital Heating and Stirring Mantle Distillation Quick Start Guide This guide gives basic quick start instructions for distillation systems. It is intended to provide a starting point for learning the process. Parameters should be adjusted to suit specific needs, Before beginning distillation, ensure the following steps have been taken: Vacuum Pump is in good working order. Pump should be run against dry load to allow internals to warm up. Oil should be clear. Cloudy or dark oil should be changed. All glass components are in good working order and ready to be assembled A winterization and degassing procedure has been done to prepare oil for distillation The unit's max internal temperature cannot exceed 380C. The recommended max set temperature should not exceed 250C Once all three of these steps have been completed, you are ready to begin distilling. Begin by placing stir bar in the boiling flask and then load your material. This should be done using a funnel. A small amount of alcohol in the oil will give it a thinner consistency making it easier to transfer. Assemble all glassware and ensure each joint is properly greased. Do not use too much, as the vacuum pressure might pull some grease into the system. To ensure a full seal, spread grease in a circular motion by rotating glassware Attach circulator to condenser and set temperature to 50C. Allow circulator to reach temperature before beginning distillation. Connect vacuum pump to manifold. The manifold will allow you to isolate each individual component as well as let atmosphere into and out of the system. Connect receiving cow to cold trap. Connect cold trap to manifold. Connect vacuum gauge to manifold. At this point, ensure all connections are correct. Also ensure receiving cow is positioned to collect the first fraction in the far-left receiving flask. Circulator should be at its set temperature. Turn on vacuum pump to begin process. Turn on heat and set to 60C. Vacuum pump will begin to pull down and temperature will begin to rise. Watch the gauge to monitor vacuum pressure and stability. Start stir slower and increase speed with temperature. Once you are close to 60C, increase the temperature 20 degrees. Continue to raise the heat incrementally in 20-degree steps, increasing the set temperature as you near your set point. Increase temperatures incrementally until you reach 220C. You will see your first fraction somewhere between 180C and 190C or slightly before. This is the “heads” fraction. You will move to your second fraction when you see an increased reaction in the head, a slight color change toward golden, as well as a thickening of distillate. When this fraction hits, allow the distillate to “self-clean” the head for a minute or two then, rotate the cow to the middle receiving flask. Collect your “main body” fraction. You will see temps between 190-220C during this fraction. Continue to increase stirring speed as necessary. Reaction in the head may vary but it should never stop. As fluid level in the boiling flask decreases, increase stir speed. The final “tails” fraction is a mixture of the first and second fractions and should be saved for re-distillation later. Ideally, you want to turn the cow to the final flask before the tails fraction hits. The “tails” fraction has an obvious color change and will be darker than the “main body” fraction. You will see temps between 200-250C during this fraction. As fluid level in the boiling flask decreases even more, set stirring RPM higher (1000+ RPM). You may need to compensate with a bit more heat to finish of the final fraction as well. Once process is complete, stop heat, stop stir, and stop vacuum. Let atmosphere into the system. Be sure to properly store your distillate as exposure to air and light can cause oxidation. *Note: This entire setup will ship via motor freight.*** *Notice to Customers: All units are inspected for broken glassware or parts before leaving BVV™. If the unit arrives damaged (this does not include minor imperfections or scuffs in glassware), the customer MUST contact BVV™ within 72 hours from carrier delivery to file a claim. If the customer DOES NOT contact BVV™ within 72 hours from carrier delivery, then BVV™ cannot issue any replacement(s) or compensation for the item; a new purchase will need to be made for a replacement. BVV™ is not responsible for the failure of glassware which must be inspected before and after every use because it may eventually develop imperfections or damage through normal usage, mishandling, and stress caused by temperature variations. If an imperfection or damage is noted while inspecting the glassware DO NOT use the glassware because it can fail, which can cause bodily harm or damage to the surrounding area.
$6,800.00 - $7,000.00
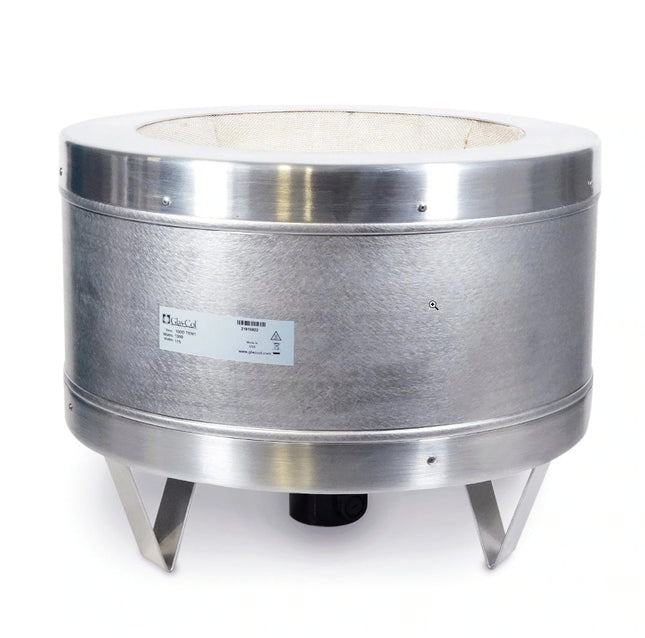
Glas-Col 22L Stir Mantle
Glas-Col 22L Stir Mantle Safely and accurately heat solutions used in various distillations in laboratory and scientific applications Apply heat directly and uniformly to containers, such as round bottom flasks More accurate than hot plates and safer than Bunsen burners Controllers can be purchased individually Accommodates 22L spherical flasks Specifications & Description Max Flask Size (mL) 22000 Min Stirrer Speed (rpm) 100 Max Stirrer Speed (rpm) 1850 Max temperature (° F) 752 Max temperature (° C) 400 Power (VAC) 115 Power (watts) 1540 Height (in) 14 Diameter (in) 6.875 Outside Diameter (OD) (in) 19 Description Stirring/Heating Mantle, 22L Spherical Flask; 115V
$1,600.00$900.00
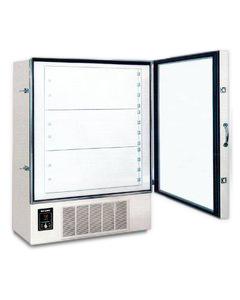
So-Low -80°C Ultra-Low Upright Freezer - 30 Cubic Ft.
So-Low -80°C Ultra-Low Upright Freezer - 30 Cubic Ft. Please note: This Product may carry up to an 8 week lead time! So-Low Ultra-Low Upright Freezers are second to none in low temp applications to suit any laboratory or application needs. These Ultra-Low Temp freezers feature digital temperature control with 2 temperature displays. One shows the set temperature and the other shows the actual temperature in the freezer. The So-Low U80-30 features a battery operated alarm system that will emit an audible and visual signal when there is a mechanical or electrical failure. The alarm has an over and under temperature setting, alarm silencing switch, and battery test switch. Product Specifications Temperature Control Digital Control with two temperature displays. One display shows the set temperature, the other shows the actual temperature in the freezer. Alarm System Battery operated alarm system will emit an audible and visual signal when there is a mechanical or electrical failure. The alarm has an over and under temperature setting, alarm silencing switch, and battery test switch. Dimensions: Exterior: 60.5" x 37" x 79.5" Interior: 42" x 25" x 51.25" Capacity 30 Cubic Ft. / 877 Liters Temperature Range -40°C to -80°C / -40°F to -112°F Shelving 4 Fixed Shelves (5 Compartments) Inventory Rack Capacity 35 Remote Alarm Relay A relay for a remote alarm hook-up is also provided. Refrigeration System So-Low cascade type. Two hermetic compressors. CFC & HCFC free refrigerants. Construction Chamber is 14-ga. zinc coated galvanized steel. Exterior is 16-ga. steel. Powder coated cool gray finish. Voltages Available 115/60/1 - 220/50/1 Technical Support Supplied by Nation-Wide-Network of service companies. ETL Electrical Approval Specification Data Sheet Diagram Data Sheet
$15,600.00

So-Low -80°C Ultra-Low Upright Freezer - 28 Cubic Ft.
So-Low -80°C Ultra-Low Upright Freezer - 28 Cubic Ft. Please note: This product may carry up to an 8 week lead time So-Low Ultra-Low Upright Freezers are second to none in low temp applications to suit any laboratory or application needs. These Ultra-Low Temp freezers feature digital temperature control with 2 temperature displays. One shows the set temperature and the other shows the actual temperature in the freezer. The So-Low U80-28 features a battery operated alarm system that will emit an audible and visual signal when there is a mechanical or electrical failure. The alarm has an over and under temperature setting, alarm silencing switch, and battery test switch. Product Specifications Temperature Control Digital Control with two temperature displays. One display shows the set temperature, the other shows the actual temperature in the freezer. Alarm System Battery operated alarm system will emit an audible and visual signal when there is a mechanical or electrical failure. The alarm has an over and under temperature setting, alarm silencing switch, and batter test switch. Dimensions: Exterior: 54" x 37" x 79.5" Interior: 38" x 25" x 51.25" Capacity 28 Cubic Ft. / 792 Liters Temperature Range -40°C to -80°C / -40°F to -112°F Shelving 4 Adjustable Shelves (5 Compartments) Inventory Rack Capacity 30 Remote Alarm Relay A relay for a remote alarm hook-up is also provided. Refrigeration System So-Low cascade type. Two hermetic compressors. CFC & HCFC free refrigerants. Construction Chamber is 14-ga. zinc coated galvanized steel. Exterior is 16-ga. steel. Powder coated cool gray finish. Voltages Available 115/60/1 - 220/50/1 Technical Support Supplied by Nation-Wide-Network of service companies. ETL Electrical Approval Specification Data Sheet Diagram Data Sheet
$15,100.00
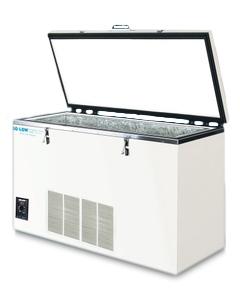
So-Low -85°C Ultra-Low Chest Freezer - 17 Cubic Ft.
So-Low -85°C Ultra-Low Chest Freezer - 17 Cubic Ft. Please note: This Product may carry up to an 8 week lead time! So-Low Ultra-Low Chest Freezers are second to none in low temp applications to suit any laboratory or application needs. These Ultra-Low Temp freezers feature digital temperature control with 2 temperature displays. One shows the set temperature and the other shows the actual temperature in the freezer. The So-Low C85-17 features a battery operated alarm system that will emit an audible and visual signal when there is a mechanical or electrical failure. The alarm has an over and under temperature setting, alarm silencing switch, and battery test switch. Product Specifications Temperature Control Digital Control with two temperatures display. One Display shows the set temperature, the other shows the actual temperature Alarm System Battery operated alarm system will emit an audible and visual signal when there is a mechanical or electrical failure. The alarm has an over and under temperature setting, alarm silencing switch, and battery test switch. Dimensions: Exterior: 81.25" x 33.5" x 48.5" Interior: 69" x 20" x 21" Capacity 17 Cubic Ft. / 480 Liters Temperature Range -40°C to -85°C / -40°F to -121°F Shelving N/A Inventory Rack Capacity 36 Remote Alarm Relay A relay for a remote alarm hook-up is also provided. Refrigeration System So-Low cascade type. Two hermetic compressors. CFC & HCFC free refrigerants. Construction Chamber is 14-ga. zinc coated galvanized steel. Exterior is 16-ga. steel. Powder coated cool gray finish. Voltages Available 115/60/1 - 220/50/1 Technical Support Supplied by Nation-Wide-Network of service companies. ETL Electrical Approval Specification Data Sheet Diagram Data Sheet
$11,400.00

So-Low -85°C Ultra-Low Chest Freezer - 3 Cubic Ft.
So-Low -85°C Ultra-Low Chest Freezer - 3 Cubic Ft. Please note: This Product may carry up to an 8 week lead time! So-Low Ultra-Low Chest Freezers are second to none in low temp applications to suit any laboratory or application needs. These Ultra-Low Temp freezers feature digital temperature control with 2 temperature displays. One shows the set temperature and the other shows the actual temperature in the freezer. The So-Low C85-3 features a battery operated alarm system that will emit an audible and visual signal when there is a mechanical or electrical failure. The alarm has an over and under temperature setting, alarm silencing switch, and battery test switch. Specification Data Sheet Diagram Data Sheet Specification Manufacturer So-Low Temperature Range -40°C to -85°C / -40°F to -121°F Capacity 3 Cubic Ft. / 83 Liters Dimensions: Exterior: 34.5" x 25.25" x 48" Interior: 24" x 12" x 18" Refrigeration System So-Low cascade type. Two hermetic compressors. CFC & HCFC free refrigerants. Construction Chamber is 14-ga. zinc coated galvanized steel. Exterior is 16-ga. steel. Powder coated cool gray finish.
$6,600.00 - $7,100.00
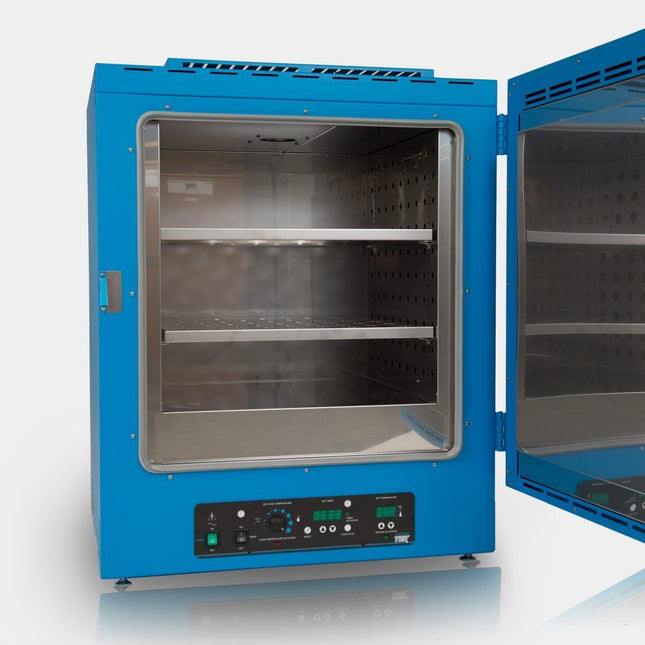
Cascade CDO-5 Dry & Decarb Oven, 5 cu ft, 2 Mesh Bags
Cascade CDO-5 Dry & Decarb Oven, 5 cu ft, 2 Mesh Bags This item carries up to a 2 week lead time. Cascade’s CDO-5 is purpose-built for bench-top, R&D drying and decarboxylation of material with additional features: Built-in Humidity Sensor assists in monitoring dryness Adjustable stainless steel shelves – 2 each NRTL Certification 2 each FDA temp rated fine micron mesh bags for ground material – Mesh bags are required to prevent oven contamination and ground material loss. This powerful benchtop forced air laboratory oven uses heated air to remove unwanted compounds from products that are not temperature sensitive. Our ovens feature horizontal airflow that enables more consistent distribution of air. They are designed to have uniform temperatures and airflow across the shelf space from right to left. The CDO-5 includes a built-in humidity sensor and fine micron mesh bags for drying or decarboxylating powders or ground material. Ideal Uses: R&D, laboratory scale forced-air convection drying Decarboxylation processes Drying organic material. Drier material will yield better results than processing wet material. Removing as much moisture as possible pre-processing will save time in in the post process of vacuum purge and winterization. Lab glassware dryer Model CDO-5 Features Horizontal Airflow. The airflow moves uniformity across the shelf space from right to left Digital set-point control, timer and overtemp failsafe protection Humidity sensor displays relative humidity levels during process Stainless steel interior / Food lab-grade construction 1 Year Warranty Includes 2 stainless steel shelves, height adjustable with mounting clips Includes 2 temp rated mesh bags for easy loading & uniform drying of messy powders, ground up or turbulent materials Triple wall construction the CDO-5 meets CE, UL and TUV requirements to keep work-spaces cool Quality made in Oregon USA 120V / 1ph / 14FLA NEMA 5-15P Plug Supplied (220V 1 PH Version available) The Cascade Difference Basic forced-air lab ovens are mass-produced and sold by many large scale laboratory equipment distributors. But there are key differences between Cascade and other less costly, often imported lab ovens: Independent Overtemp Failsafe Protection The Cascade Sciences CDO-5 is equipped with a heating cutoff system that will automatically stop power to the heaters when the overtemp setting is tripped. This protection system will provide peace of mind for overnight or unattended drying processing. NRTL Certification No Extra cost. The CDO-5 Oven comes certified by the Nationally Recognized Test Lab, TUV. This certification is a requirement by many municipalities. CAN/CSA-C22.2 No. 61010-1:2012 +UPD No. 1:2015-07 + UPD No. 2:2016-04 CAN/CSA-C22.2 No. 61010-2-010:2015 UL 61010-1:2012-05 UL 61010-2-010:2015 EN 61010-1:2010 EN 61010-2-010:2014 Rigorous Quality Assurance in an ISO Certified, USA Manufacturing Facility Cascade Sciences manufactures our ovens in Oregon, USA. We are proud of our ISO 9001 Certification/Accreditation. Each oven completes a series of quality assurance procedures before shipment: Electrical & mechanical safety is thoroughly tested in compliance with TUV requirements Functional testing verifies user settable items consistent with most lab protocols/usage models Temperature verification includes calibration & temp chamber uniformity following ASTM standards Units are cleaned and packed in ISTA tested, certified packaging materials Specifications Capacity Volume 4.9 Cubic Ft. / 138 Cubic Liters Interior Dimensions 21” x 19.44” x 20.75”534mm x 494mm x 527mm Exterior Dimensions 34.1” x 28.1” x 38.75”866mm x 711mm x 984mm Temperature Temperature Range +2°C (36°F) above room temp to 180°C (350°F) Temp Stability +/-0.4 °F Temp Uniformity @ 40°C (100°F): +/- .5°C (1°F)@ 115°C (240°F): +/- 1°C (1.5°F)@ 150°C (305°F): +/- 2°C (3°F) Heat up / Stabilization Time from 25°C (77°F) to 115°C (240°F) 40 minutes Air Statistics Airflow Exchanges 220 per hour @ 80°C (176°F) Linear Shelf Space Airflow 145 Feet Per Min (44 Liters Per Min) Air Intake Adjustable side vents. Air Exhaust Adjustable. Top 2.75: Dia Exhaust Airflow @ 80°C (176°F) 18.5 Feet Per Min (523.9 Liters Per Min) Shelving 18.5 Feet Per Min (523.9 Liters Per Min) Fits 5 maximum Surface Area (W x D): 20.75″ x 19″ Weight Capacity: 50lbs Bags Comes with 2 Temp Rated Mesh Bags, fits four max Material Polypropylene (PP) Melt Temperature 161°C (363°F) Softening Point 152°C (305°F) Heat Deflection Temperature 90°C (194°F) Glass Transition Temperature 0°C (32°F) * Mesh bags are REQUIRED to prevent oven contamination and ground material loss. * Polypropylene products produced for some filtration applications are made from resin that complies with FDA regulations for food contact. The regulation compliance is product number dependent / specific. * Impact at cold temperatures is likely to cause strand cracking or breakage Certifications ISO 9001NRTL TUV #U8 170464972 077CAN/CSA-C22.2 No. 61010-1:2012+ UPD No. 1:2015-07 + UPD No. 2:2016-04CAN/CSA-C22.2 No. 61010-2-010:2015UL 61010-1:2012/R:2016-04UL 61010-2-010:2015EN 61010-1:2010EN 61010-2-010:2014 Warranty 1 Year
$8,897.00
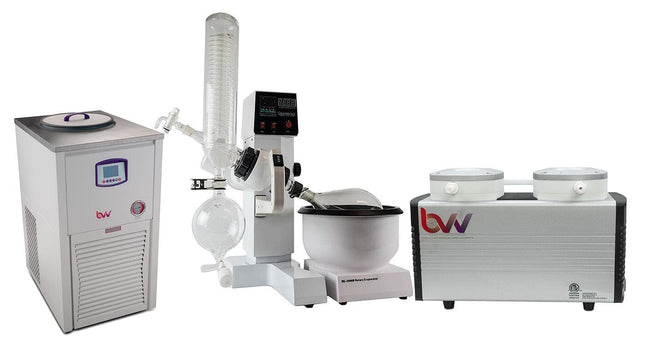
2L BVV™ Rotary Evaporator Turnkey Setup
2L BVV™ Rotary Evaporator Turnkey Setup 2L Electric Lift Rotary Evaporator turnkey setup includes all the necessary components to successfully perform solvent recovery via rotary evaporation. A cold trap should always be used inline between your vacuum system and application to protect the pump from volatile vapors. 2L Rotary Evaporator Turnkey Setup includes: 2L Electric Lift Rotary Evaporator 90-day limited warranty (excludes glassware, consumables & moving parts) BVV NEO 1.4 CFM Diaphragm Pump ETL Rated OR. 3.5CFM Dry Floating Scroll Vacuum Pump Polyscience LS -20C to 40C 1/2HP Chiller w/ Turbine Pump OR BVV NEOCISION 20L Chiller (-40C) - ETL Rated 10ft of Vacuum Tubing 20ft of Chiller Tubing 10 Pack of Adjustable stainless steel hose clamps 3/8" Vacuum Manifold Optional add-on : BVV™ CT40 -40°F 300ml x 3 Cold Trap, BVV™ CT80 -112°F 300ml x 3 Cold Trap Optional add-on: J-KEM DVR-200 Digital Vacuum Regulator Optional add-on: Heat Transfer Fluid -- NuTherm PF-50 or Dynalene HC-50 Rotovap Quick Start Guide This guide gives basic quick start instructions for rotovaps. It is intended to provide a starting point for learning the process. Parameters should be adjusted to suit specific needs. Clean and assemble unit. Make sure all pieces are cleaned and sterilized using an alcohol solution. Connect chiller to the condenser and set to 0C (32F). Always fill a rotovap condenser from the top down (chiller output to top of the condenser, chiller input to bottom of the condenser). Connect vacuum pump to cold trap and connect cold trap to the vacuum port on rotovap. Turn on heat bath and set to 40C (113F). Once heat bath, chiller, and cold trap have reached desired temperatures, turn on the rotovap motor and set the speed to approximately 100 RPM (does not have to be precise). Keep in mind, higher RPM’s will increase evaporation power but also increase heat load. Start vacuum pump and allow vacuum to pull down for a few minutes before injection. Once the vacuum has been pulled to a sufficient level (does not have to be precise but should be below 100 Torr), using the injection valve, very slowly inject approximately 500 mL of solution into evaporating flask and then close the valve. Allow this small amount to begin evaporating. You may see the chiller begin to rise in temperature, this is called “priming” the rotovap. Once the temperature stops rising or all liquid is almost completely evaporated, open the injection valve again very slowly so that a small amount of liquid begins to enter the evaporating flask. Do not close injection valve this time but continue to allow the solution to enter the evaporating flask. At this point, you must try to match the input speed to the output speed. What this means is that you should be injecting the same amount of liquid into the rotovap that is equal to the amount of liquid dripping from the condenser into the receiving flask. You will know that the input speed and output speed are matched because the chiller will remain at a stable temperature. If the chiller begins to rise, then you are injecting too much liquid. Dial back the valve until the chiller stabilizes. Once everything is stabilized, you may walk away from the rotovap if necessary. Check every so often to make sure temperatures remain stable and evaporation continues efficiently. ***Glassware Safety Disclaimer: BVV™ is not responsible for failure of glassware which must be inspected before and after every use because it may eventually develop imperfections or damage through normal usage, mishandling, and stress caused by temperature variations. If an imperfection or damage is noted while inspecting the glassware DO NOT use the glassware because it can fail causing bodily harm or damage to the surrounding area.***
$7,000.00 - $13,500.00
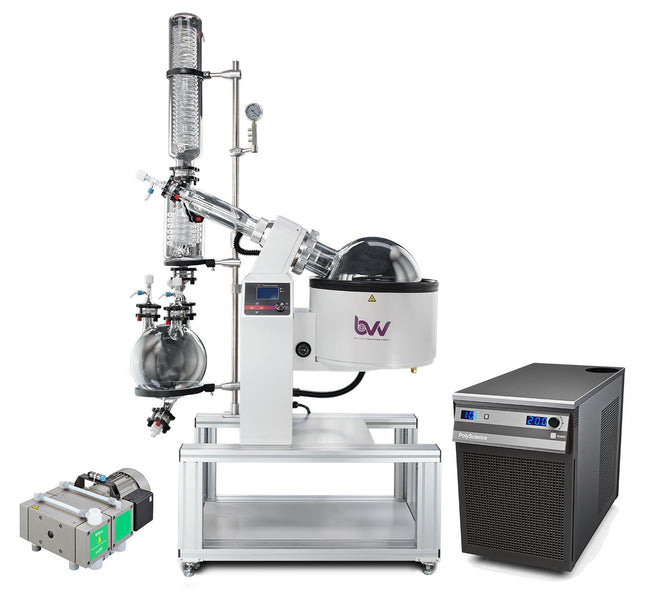
20L Neocision ETL Lab Certified Rotary Evaporator Turnkey System
20L Neocision ETL Lab Certified Rotary Evaporator Turnkey System 20L NEO Rotary Evaporator Turnkey System setup includes all the necessary components to successfully perform solvent recovery via rotary evaporation. A cold trap should always be used inline between your vacuum system and application to protect the pump from volatile vapors. To keep your bath heating properly, this unit should only be used with RO or DI water. 10-50L NEO and ECO Rotary Evaporator Diagram 20L NEO Rotary Evaporator Turnkey System setup includes: 20L Neocision ETL Lab Certified Rotary Evaporator Polyscience 6160T 1HP Chiller 3/8" Gum Rubber - 25ft 3/8" Tubing - 25ft Welch BTpro100 Diaphragm Pump Adjustable Stainless Steel Hose Clamps Rotovap Quick Start Guide This guide gives basic quick start instructions for rotovaps. It is intended to provide a starting point for learning the process. Parameters should be adjusted to suit specific needs. Clean and assemble unit. Make sure all pieces are cleaned and sterilized using an alcohol solution. Connect chiller to condenser and set to 0C (32F). Always fill a rotovap condenser from the top down (chiller output to top of condenser, chiller input to bottom of condenser). Connect vacuum pump to cold trap and connect cold trap to vacuum port on rotovap. Turn on heat bath and set to 40C (113F). Once heat bath, chiller and cold trap have reached desired temperatures, turn on rotovap motor and set speed to approximately 100 RPM (does not have to be precise). Keep in mind, higher RPM’s will increase evaporation power but also increase heat load. Start vacuum pump and allow vacuum to pull down for a few minutes before injection. Once vacuum has been pulled to a sufficient level (does not have to be precise but should be below 100 Torr), using the injection valve, very slowly inject approximately 500 mL of solution into evaporating flask and then close the valve. Allow this small amount to begin evaporating. You may see the chiller begin to rise in temperature, this is called “priming” the rotovap. Once the temperature stops rising or all liquid is almost completely evaporated, open the injection valve again very slowly so that a small amount of liquid begins to enter the evaporating flask. Do not close injection valve this time but continue to allow solution to enter the evaporating flask. At this point you must try to match the input speed to the output speed. What this means is that you should be injecting the same amount of liquid into the rotovap that is equal to the amount of liquid dripping from the condenser into the receiving flask. You will know that the input speed and output speed are matched because the chiller will remain at a stable temperature. If the chiller begins to rise, then you are injecting too much liquid. Dial back the valve until the chiller stabilizes. Once everything is stabilized, you may walk away from the rotovap if necessary. Check every so often to make sure temperatures remain stable and evaporation continues efficiently. ***Note: All units are inspected for broken glass or parts before unit is shipped. If unit arrives damaged or glass is broken (this does not include minor imperfections or scuffs in glassware), Customer MUST contact BVV™ within 3 days of delivery to file a claim and receive a replacement part. If customer DOES NOT contact BVV™ within 3 days of delivery responsibility for replacement parts falls on the customer and they must pay for replacement pieces.*** ***Note: This item will ship by freight only.*** ***Glassware Safety Disclaimer: BVV™ is not responsible for failure of glassware which must be inspected before and after every use because it may eventually develop imperfections or damage through normal usage, mishandling, and stress caused by temperature variations. If an imperfection or damage is noted while inspecting the glassware DO NOT use the glassware because it can fail causing bodily harm or damage to the surrounding area.***
$19,450.00 - $22,500.00
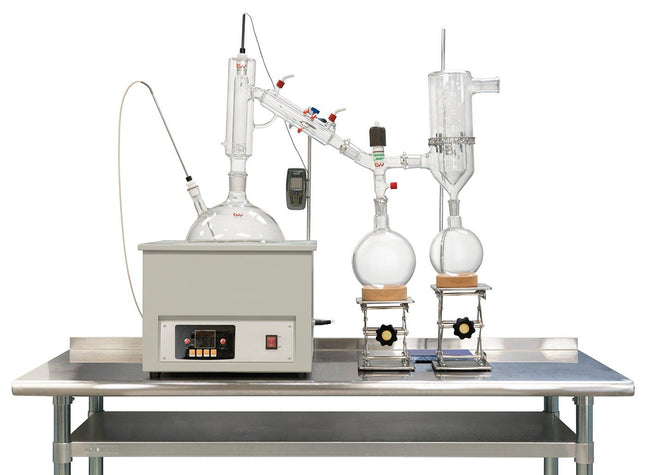
10L Premium Short Path Distillation Kit with P10 Distillation Head
10L Short Path Distillation Kit with P10 Distillation Head This unit carries a 2 day lead time. (Note: Stainless Steel Table NOT Included.) The 10L Short Path Distillation Kit features our USA made P10 Distillation Head. Every component in this turnkey is made for precision, throughput, and repeatable results. Also included the Kangaroo digital thermometer which is very rugged and reliable. You will also receive a Ribbed Dewar Style Glass Cold Trap to keep all volatiles and solvents out of your vacuum system. This Kit gives you the basic necessities of a short path distillation system and allows you to add on a temperature control system and vacuum pump to fit your needs. The 10L Neo Kit Includes: 10L Short Path Distillation Kit including glassware, labware, and P10 Distillation Head. 10L Digital Heating and Stirring Mantle. Valved Vacuum Adapter. Ribbed Dewar Style Glass Cold Trap. Kangaroo Digital Thermometer. Distillation Quick Start Guide This guide gives basic quick start instructions for distillation systems. It is intended to provide a starting point for learning the process. Parameters should be adjusted to suit specific needs, Before beginning distillation, ensure the following steps have been taken: Vacuum Pump is in good working order. Pump should be run against dry load to allow internals to warm up. Oil should be clear. Cloudy or dark oil should be changed. All glass components are in good working order and ready to be assembled A winterization and degassing procedure has been done to prepare oil for distillation The unit's max internal temperature cannot exceed 380C. The recommended max set temperature should not exceed 250C Once all three of these steps have been completed, you are ready to begin distilling. Begin by placing stir bar in boiling flask and then load your material. This should be done using a funnel. A small amount of alcohol in the oil will give it a thinner consistency making it easier to transfer. Assemble all glassware and ensure each joint is properly greased. Do not use too much, as the vacuum pressure might pull some grease into the system. To ensure a full seal, spread grease in a circular motion by rotating glassware Attach circulator to condenser and set temperature to 50C. Allow circulator to reach temperature before beginning distillation. Connect vacuum pump to manifold. The manifold will allow you to isolate each individual component as well as let atmosphere into and out of the system. Connect receiving cow to cold trap. Connect cold trap to manifold. Connect vacuum gauge to manifold. At this point, ensure all connections are correct. Also ensure receiving cow is positioned to collect the first fraction in the far-left receiving flask. Circulator should be at its set temperature. Turn on vacuum pump to begin process. Turn on heat and set to 60C. Vacuum pump will begin to pull down and temperature will begin to rise. Watch the gauge to monitor vacuum pressure and stability. Start stir slower and increase speed with temperature. Once you are close to 60C, increase the temperature 20 degrees. Continue to raise the heat incrementally in 20-degree steps, increasing the set temperature as you near your set point. Increase temperatures incrementally until you reach 220C. You will see your first fraction somewhere between 180C and 190C or slightly before. This is the “heads” fraction. You will move to your second fraction when you see an increased reaction in the head, a slight color change toward golden, as well as a thickening of distillate. When this fraction hits, allow the distillate to “self-clean” the head for a minute or two then, rotate the cow to the middle receiving flask. Collect your “main body” fraction. You will see temps between 190-220C during this fraction. Continue to increase stirring speed as necessary. Reaction in the head may vary but it should never stop. As fluid level in the boiling flask decreases, increase stir speed. The final “tails” fraction is a mixture of the first and second fractions and should be saved for re-distillation later. Ideally, you want to turn the cow to the final flask before the tails fraction hits. The “tails” fraction has an obvious color change and will be darker than the “main body” fraction. You will see temps between 200-250C during this fraction. As fluid level in the boiling flask decreases even more, set stirring RPM higher (1000+ RPM). You may need to compensate with a bit more heat to finish of the final fraction as well. Once process is complete, stop heat, stop stir, and stop vacuum. Let atmosphere into the system. Be sure to properly store your distillate as exposure to air and light can cause oxidation. ***Note: This entire setup will ship via motor freight.*** *Notice to Customers: All units are inspected for broken glassware or parts before leaving BVV™. If the unit arrives damaged (this does not include minor imperfections or scuffs in glassware), the customer MUST contact BVV™ within 72 hours from carrier delivery to file a claim. If the customer DOES NOT contact BVV™ within 72 hours from carrier delivery, then BVV™ cannot issue any replacement(s) or compensation for the item; a new purchase will need to be made for a replacement. BVV™ is not responsible for the failure of glassware which must be inspected before and after every use because it may eventually develop imperfections or damage through normal usage, mishandling, and stress caused by temperature variations. If an imperfection or damage is noted while inspecting the glassware DO NOT use the glassware because it can fail, which can cause bodily harm or damage to the surrounding area.
$4,100.00
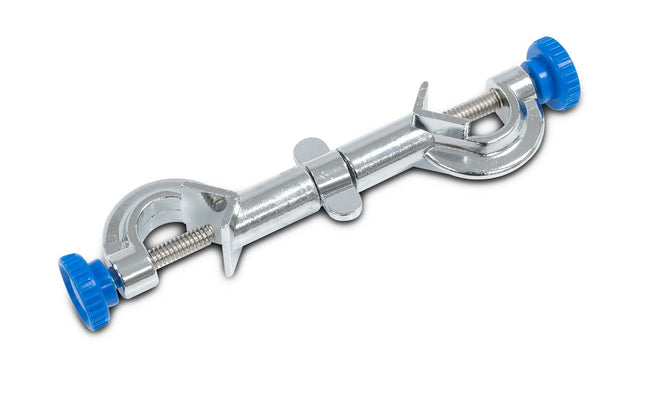
Swivel Bosshead
This swivel boss head is made out of die-cast alloy is nickel plated and will fit rod diameters up to 16mm. The boss head can be adjusted and locked to any angle (360°). It is also designed to carry heavy loads and prevent torque damage. Note:Clamps and rods are NOT included.
$10.00
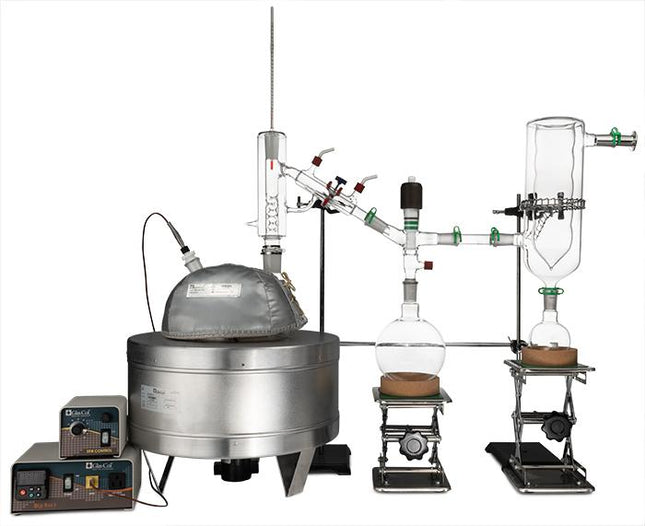
5L Neocision Short Path Distillation Kit
5L Neocision Short Path Distillation Kit This unit carries a 2 day lead time. The 5L Neocision Short Path Distillation Kit features our 5L Distillation Kit with P5 Distillation Head and USA made glass. Every component in this turnkey is made for precision, throughput, and repeatable results. You will also receive a Dewar Style Glass Cold Trap to keep all volatiles and solvents out of your vacuum system. The Premium Turnkey Kit Includes: 5L Neocision Kit with P5 Distillation Head KF-25 x 1/4" Barb Adapter Dewar Style Glass Cold Trap Distillation Quick Start Guide This guide gives basic quick start instructions for distillation systems. It is intended to provide a starting point for learning the process. Parameters should be adjusted to suit specific needs, Before beginning distillation, ensure the following steps have been taken: Vacuum Pump is in good working order. Pump should be run against dry load to allow internals to warm up. Oil should be clear. Cloudy or dark oil should be changed. All glass components are in good working order and ready to be assembled A winterization and degassing procedure has been done to prepare oil for distillation Once all three of these steps have been completed, you are ready to begin distilling. Begin by placing stir bar in boiling flask and then load your material. This should be done using a funnel. A small amount of alcohol in the oil will give it a thinner consistency making it easier to transfer. Assemble all glassware and ensure each joint is properly greased. Do not use too much, as the vacuum pressure might pull some grease into the system. To ensure a full seal, spread grease in a circular motion by rotating glassware Attach circulator to condenser and set temperature to 50C. Allow circulator to reach temperature before beginning distillation. Connect vacuum pump to manifold. The manifold will allow you to isolate each individual component as well as let atmosphere into and out of the system. Connect receiving cow to cold trap. Connect cold trap to manifold. Connect vacuum gauge to manifold. At this point, ensure all connections are correct. Also ensure receiving cow is positioned to collect the first fraction in the far-left receiving flask. Circulator should be at its set temperature. Turn on vacuum pump to begin process. Turn on heat and set to 60C. Vacuum pump will begin to pull down and temperature will begin to rise. Watch the gauge to monitor vacuum pressure and stability. Start stir slower and increase speed with temperature. Once you are close to 60C, increase the temperature 20 degrees. Continue to raise the heat incrementally in 20-degree steps, increasing the set temperature as you near your set point. Increase temperatures incrementally until you reach 220C. You will see your first fraction somewhere between 180C and 190C or slightly before. This is the “heads” fraction. You will move to your second fraction when you see an increased reaction in the head, a slight color change toward golden, as well as a thickening of distillate. When this fraction hits, allow the distillate to “self-clean” the head for a minute or two then, rotate the cow to the middle receiving flask. Collect your “main body” fraction. You will see temps between 190-220C during this fraction. Continue to increase stirring speed as necessary. Reaction in the head may vary but it should never stop. As fluid level in the boiling flask decreases, increase stir speed. The final “tails” fraction is a mixture of the first and second fractions and should be saved for re-distillation later. Ideally, you want to turn the cow to the final flask before the tails fraction hits. The “tails” fraction has an obvious color change and will be darker than the “main body” fraction. You will see temps between 200-250C during this fraction. As fluid level in the boiling flask decreases even more, set stirring RPM higher (1000+ RPM). You may need to compensate with a bit more heat to finish of the final fraction as well. Once process is complete, stop heat, stop stir, and stop vacuum. Let atmosphere into the system. Be sure to properly store your distillate as exposure to air and light can cause oxidation. ***Note: This entire setup will ship via motor freight.*** *Notice to Customers: All units are inspected for broken glassware or parts before leaving BVV™. If the unit arrives damaged (this does not include minor imperfections or scuffs in glassware), the customer MUST contact BVV™ within 72 hours from carrier delivery to file a claim. If the customer DOES NOT contact BVV™ within 72 hours from carrier delivery, then BVV™ cannot issue any replacement(s) or compensation for the item; a new purchase will need to be made for a replacement. BVV™ is not responsible for the failure of glassware which must be inspected before and after every use because it may eventually develop imperfections or damage through normal usage, mishandling, and stress caused by temperature variations. If an imperfection or damage is noted while inspecting the glassware DO NOT use the glassware because it can fail, which can cause bodily harm or damage to the surrounding area.
$6,950.00
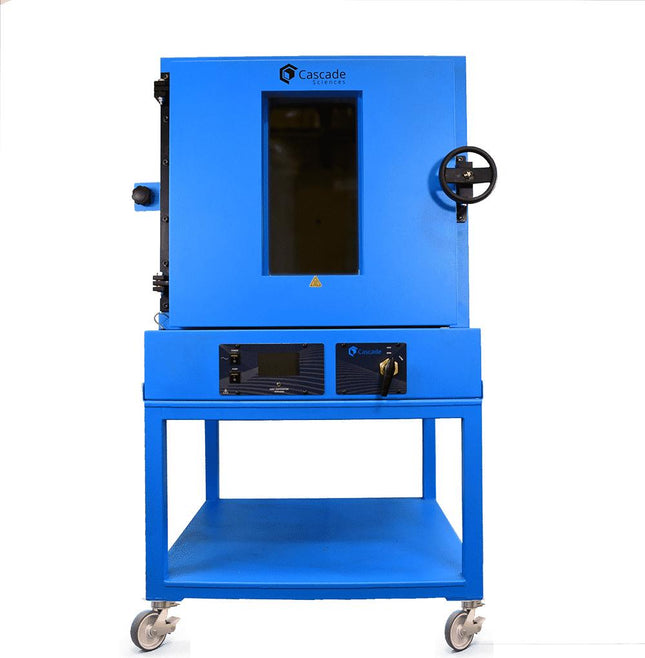
Cascade CVO-10 Vacuum Oven
Cascade CVO-10 Vacuum Purge Oven (On Stand) This item carries up to a 1-2 week lead time. Cascade’s Model CVO-10 offers incredible temperature stability for vacuum drying and purging of pharmaceuticals, botanicals, and slurries – especially temperature sensitive material. This vacuum oven liberates solvents, water, and other unwanted compounds. It’s ideal for large batch production environments. Processing Temperature Sensitive Material? The CVO-10 comes in both low temp & high temp versions. Be sure to get the low temp CVO-10 version that has excellent temperature uniformity for products such as pharmaceuticals, slurries or any product that can be damaged or destroyed by temperature fluctuations. CVO-10 Vacuum Oven Features NRTL Certified by TUV 9 sliding, removable shelves that pull out and stay in place for easy load/unload Stable temperature control. Digital temperature readout with temp sensor INSIDE the oven Easy mobility as oven sits on heavy duty industrial cart. Pump sits underneath at base of cart. VITON door gasket Bright LED lights in window for visibility of sensitive material Digital vacuum gauge reads in inches of mercury or torr Smooth, quarter-turn vent valve Rear KF-25 port includes MAX EVAP Connection Kit for rapid vacuum drying or running feedthroughs inside oven for monitoring 220V / 1ph / 10AMPS Quality Tempered Rated Glass NGI-US to ANSI Z97.1.2007 156CFR/201 11 SGCC -2577 ½ UA Ergonomic. Turn vacuum pump on/off from oven control panel Fast Venting with larger ½” diameter vent line Rear vent barb allows for nitrogen or other inert gas connection Touch Panel LED control screen with user settable features The Cascade Difference Vacuum ovens have been around for decades. Basic vacuum ovens are mass-produced and sold by many large laboratory equipment distributors. But there are key differences between Cascade and other less costly, often imported vacuum ovens. Exceptional Temperature Control & Stability The Cascade CVO-10 uses a unique control logic not found in most lab grade vacuum ovens. The temperature probe is INSIDE the oven, which minimizes temperature overshoot and delivers best-in-class temperature stability and uniformity particularly in the low temperature ranges. Accurate, stable temps throughout the CVO-10 eliminate hot and cold spots, making accurate use of every inch of shelf space. Independent Overtemp Failsafe Protection The Cascade Sciences CVO-10 is equipped with a heating cutoff system that will automatically stop power to the heaters when the oven shelf temps exceed 392°F or 200°C. This protection system will provide peace of mind for overnight processing or unattended vacuum bake outs. NRTL Certification #U8 170464972 077. No Extra cost. The CVO-10 Vacuum Oven comes certified by the Nationally Recognized Test Lab, TUV. This certification is a requirement by many municipalities. CAN/CSA-C22.2 No. 61010-1:2012 +UPD No. 1:2015-07 + UPD No. 2:2016-04 CAN/CSA-C22.2 No. 61010-2-010:2015 UL 61010-1:2012/R:2016-04 UL 61010-2-010:2015 EN 61010-1:2010 EN 61010-2-010:2014 Rigorous Quality Assurance in an ISO Certified, USA Manufacturing Facility Cascade Sciences manufactures our ovens in Oregon, USA. We are proud of our ISO 9001 Certification/Accreditation. Each oven completes a series of quality assurance procedures before shipment. Chambers are vacuum tested after welding for vacuum integrity Electrical & mechanical safety is thoroughly tested in compliance with TUV requirements Functional testing verifies user settable items consistent with most lab protocols/usage models Temperature verification includes calibration & temp chamber uniformity following ASTM standards Units are cleaned and packed in ISTA tested, certified packaging materials Digital Vacuum Gauge The digital vacuum gauge installed on the CVO-10 displays in is factory default set to read in inches of mercury (“Hg) or torr. Log Temperature & Vacuum With Data Port The CVO-10 features a rear mounted data port which outputs a digital log line once per minute. Viewing/logging this data requires terminal emulator software such as the open source (BSD License) emulator Tera Term. Equipped for Inert Gas Backfill. Built-In Safety Relief Introduce inert gasses such as nitrogen, argon, helium, etc. as part of your process via the ¼” rear vent barb. The maximum backfill pressure is 15PSI. In an overpressure situation, a simple, built-in safety relief allows gasses to escape via a spring loaded tempered window. Flexible Pumping / Feedthru Connection Ports For faster evaporation, purging or drying the CVO-10 includes Cascade’s MAX EVAP connection kit. The MAX EVAP connection kit secures to the oven’s rear 1” dia KF-25 port located on the back center of the chamber. The MAX EVAP connection never reduces flow by continuing with 1” diameter vacuum rated clear lines, a 1” dia KF-25 side mounted vacuum valve and KF-25 fittings and hardware. This KF-25 port can also be used to run temperature feedthrus, or monitoring sensors inside the vacuum chamber during processing. Ergonomically Designed, Easy Quarter-Turn Valves For anyone that has struggled with consistently turning the small, round, low-quality vacuum/vent valves, relief is in sight. You will love our large, quarter-turn vent valve. Your wrists will thank you! Faster Venting With Large ½” Diameter Vent Lines For large capacity production environments, time is money. The CVO-10 vacuum oven has larger than industry standard vent lines. ½” diameter vent lines means operators spend less time venting the oven. ANSI Rated Tempered Glass + USA Made Steel Cascade ovens are made in Oregon, USA with high quality materials. Our glass is NGI-USA Tempered and certified to ANSI Z97.1.2007 16CFR / 201 11. Our door handles are rugged brushed steel, not plastic. Our vacuum vessels are constructed with American made steel. We’ve tried lower cost, imported steel. But over time, vacuum chambers made of lesser quality/lower tolerance material cannot withstand the flex and pressure changes of vacuum pumping/venting/purging. This can deteriorate vacuum integrity and the oven will lost its ability to hold vacuum. Need A Complete CVO-10 Vacuum Drying or Purge System? Cascade has taken the guesswork out of pairing the right vacuum oven with the proper pump. We offer two complete 10 cubic foot vacuum oven packages that have everything you need to begin vacuum drying on a large scale. The CVO-10 PRO Package pairs the CVO-10 with the clean, quiet, powerful Agilent IDP15 vacuum pump. Purchase the CVO-10 PRO Package and save $1642.86 over retail. The CVO-5 DOUBLE UP Package offers the same 10 cubic foot processing capacity, but in two ovens for smaller, multiple batch management. The TVO-5 DOUBLE UP Package is also self-contained on its own mobile, industrial cart. The TVO-5 DOUBLE UP Package saves $1642.86 over retail. A Vacuum Cold Trap for High Production Environments For high production environments, adding a vacuum cold trap keeps the vacuum pump running optimally, extends time between maintenance and allows reclamation of outgassed materials. Cascade’s MAXTRAP50 is ideally suited for trapping in these high production environments where typical lab grade traps, with small inlets and outlets can slow things down. Specifications Capacity Volume 9.3 Cubic Ft. / 264 Liters Interior 28”W x 24”D x 24”H 711mm x 609mm x 609mm Exterior (Not Including Rack) 44”W x 42”D x 40”H 1118mm x 1067mm x 1016mm 67.6”H with stand Temperature Ranges Low-Temp Processing Range 26°F to 250°F (121°C) Temperature Uniformity +/- 1.5°F @ 105°F (40.5°C) Temperature Stability +/- 0.4°F @ 105°F(40.5°C) Heat Up / Stabilization Time to 250°F 120 minutes (to minimize overshoot) High-Temp CVO-10 (SVAC 9.3) to 428°F / 220°C Available Temperature Uniformity +/- 6.5% of setpoint *Note that ambient laboratory conditions can affect temp performance. Vacuum Valve Type Side Mounted Round Vent Valve Sizes ¼ Turn Lever ½” diameter line Lighting Interior LED Strips (Rated to 150C) On low temp CVO-10 only Window Type Glass Tempered NGI-US to ANSI Z97.1.2007 Vacuum Gauge Indication Reads in inches mercury or torr(Selectable) Temperature Controller Screen Type Touch Screen Accuracy Accurate Within 1°F Failsafe Independent Overtemp Failsafe Ports-Rear Vacuum KF-25 Port Vent 1/2” Barb Data Log temp & vacuum levels Inert Gas Introduction Yes. Via 3/8” Vent Barb 15 psi max inlet pressure Power Options Power 220V – 240V / 1ph / 10A 50/60Hz Cord? Cord Included Outlet Type NEMA 6-15R Power Outlet Shelving Removable? Removable Quantity Included Comes with 9 Each. Fixed. Detail Slide on rails, extend, stay in place. Surface Area 28″W x 24″D Weight Capacity 50 lbs Weight Net Weight 663 lbs / 300.1 Kg Shipping Weight 995 lbs / 351.5 Kg Shipping Details Dimensions 63″L x 60″W x 88″H Class Class 110 Certifications - ISO 9001 - NRTL TUV #U8 170464972 077 - CAN/CSA-C22.2 No. 61010-1:2012 - + UPD No. 1:2015-07 + UPD No. 2:2016-04 - CAN/CSA-C22.2 No. 61010-2-010:2015 - UL 61010-1:2012/R:2016-04 - UL 61010-2-010:2015 - EN 61010-1:2010 - EN 61010-2-010:2014 Warranty Length 1 Year Exclusions Gaskets Not Incuded Dimensional Drawing Download Oven Manual Download DCS Controller Manual View NRTL Certification Contoller Software
$24,997.00
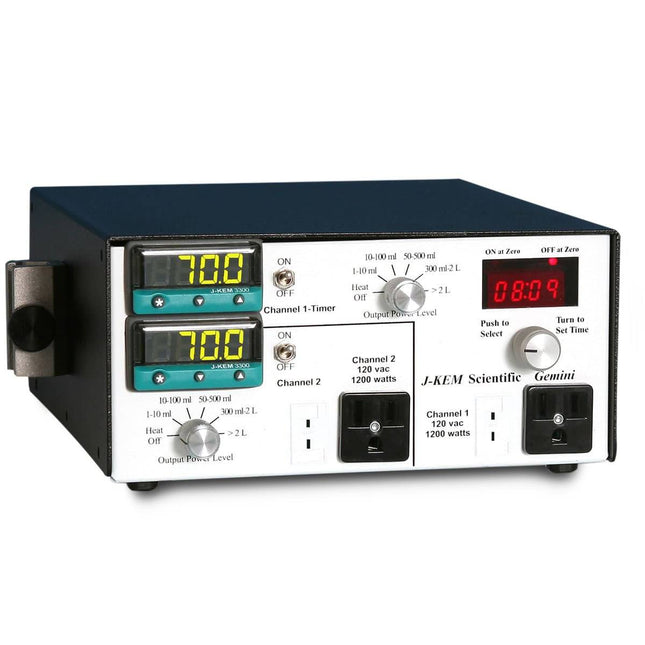
J-Kem Gemini-2 Dual Temperature Controller
J-Kem Gemini-2 Dual Temperature Controller Gemini-2 Dual Temperature Controller displays two temperature controllers in a single cabinet to regulate two independent reactions. Each channel is 1200 Watts MAX (1800 Watts total), 15 Amps @ 120VAC, The Gemini is one of J-KEM’s most versatile controllers featuring high power outlets and a 100 hour digital timer (on channel 1) to turn heating OFF (or ON) at a user entered time. Features Included: Over-temperature protection circuits with audible alarms, dual temperature displays, selectable operating modes, double fused, and 100% solid state design. The USB port on the back panel of the controller is an interface to J-KEM’s KEM-Net software. Safety features include: 100% solid state, double fused, audible error alarm, and over temperature circuitry that disconnects power if an over temperature condition occurs. Specifications: Dimensions: 3.5" H x 7.75" W x 8.75" D Power: 15 Amps @ 120VAC, 1200 Watts MAX/Channel, 1800 Watts (Total) Weight: 7 lbs Complete System Includes: One controller Two Teflon thermocouples (12″ long, 1/8″ diameter) Two connecting cords Two 14/20 joint adapters
$1,569.00 - $1,921.00
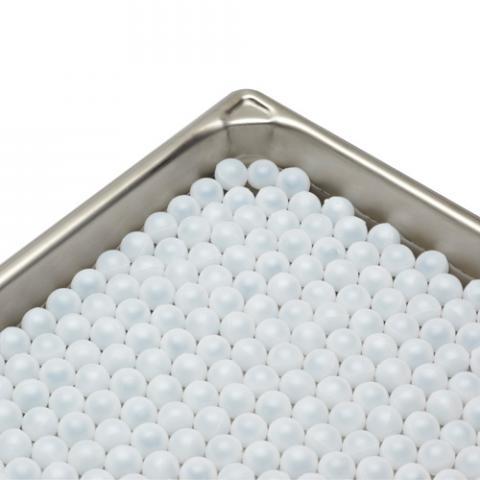
PolyScience Floating Ball Cover; 3/4" (19 mm) diameter
PolyScience Floating Ball Cover; 3/4" (19 mm) diameter Description Covers top of any open tank. Reduces fumes, splashing hazard and heat loss by 75% and evaporation by 87%. Usable to 95°C. Package of 400 Quantity: 1 pkg Part Number: 060301 For use with: Circulating Baths Stainless Steel Open Bath Systems Polycarbonate Open Bath Systems General Purpose Water Baths
$133.00

So-Low -85°C Ultra-Low Upright Freezer - 18 Cubic Ft.
So-Low -85°C Ultra-Low Upright Freezer - 18 Cubic Ft. Please note: This Product may carry up to an 8 week lead time! So-Low Ultra-Low Upright Freezers are second to none in low temp applications to suit any laboratory or application needs. These Ultra-Low Temp freezers feature digital temperature control with 2 temperature displays. One shows the set temperature and the other shows the actual temperature in the freezer. The So-Low U85-18 features a battery operated alarm system that will emit an audible and visual signal when there is a mechanical or electrical failure. The alarm has an over and under temperature setting, alarm silencing switch, and battery test switch. Product Specifications Temperature Control Digital control with two temperatures displays. one display shows the set temperature, the other shows the actual temperature in the freezer. Alarm System Battery operated alarm system will emit an audible and visual signal when there is a mechanical or electrical failure. The alarm has an over and under temperature setting, alarm silencing switch, and battery test switch. Dimensions: Exterior: 40"" x 36" x 79.5" Interior: 23" x 26" x 51.25" Capacity 18 Cubic Ft. / 505 Liters Temperature Range -40°C to -85°C / -40°F to -121°F Shelving 4 Adjustable Shelves (5 Compartments) Inventory Rack Capacity 20 Remote Alarm Relay A relay for a remote alarm hook-up is also provided. Refrigeration System So-Low cascade type. Two hermetic compressors. CFC & HCFC free refrigerants. Construction Chamber is 14-ga. zinc coated galvanized steel. Exterior is 16-ga. steel. Powder coated cool gray finish. Voltages Available 115/60/1 - 220/50/1 Technical Support Supplied by Nation-Wide-Network of service companies. ETL Electrical Approval Specification Data Sheet Diagram Data Sheet
$10,200.00
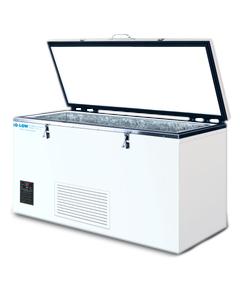
So-Low -80°C Ultra-Low Chest Freezer - 21 Cubic Ft.
So-Low -80°C Ultra-Low Chest Freezer - 21 Cubic Ft. Please note: This Product may carry up to an 8 week lead time! So-Low Ultra-Low Chest Freezers are second to none in low temp applications to suit any laboratory or application needs. These Ultra-Low Temp freezers feature digital temperature control with 2 temperature displays. One shows the set temperature and the other shows the actual temperature in the freezer. The So-Low C80-21 features a battery operated alarm system that will emit an audible and visual signal when there is a mechanical or electrical failure. The alarm has an over and under temperature setting, alarm silencing switch, and battery test switch Product Specifications Temperature Control Digital Control with two temperature displays. One display shows the set temperature, the other shows the actual temperature in the freezer. Alarm System Battery operated alarm system will emit an audible and visual signal when there is a mechanical or electrical failure. The alarm has an over and under temperature setting, alarm silencing switch, and battery test switch. Dimensions: Exterior: 91" x 36" x 49" Interior: 81" x 21.5" x 21" Capacity 21 Cubic ft. / 594 Liters Temperature Range -40°C to -80°C / -40°F to -112°F Shelving N/A Inventory Rack Capacity 36 Remote Alarm Relay A relay for a remote alarm hook-up is also provided. Refrigeration System So-Low cascade type. Two hermetic compressors. CFC & HCFC free refrigerants. Construction Chamber is 14-ga. zinc coated galvanized steel. Exterior is 16-ga. steel. Powder coated cool gray finish. Voltages Available 115/60/1 - 220/50/1 Technical Support Supplied by Nation-Wide-Network of service companies. ETL Electrical Approval Specification Data Sheet Diagram Data Sheet
$13,750.00
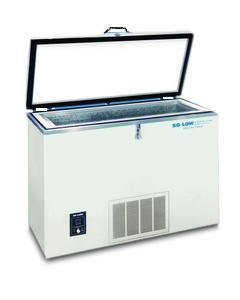
So-Low -85°C Ultra-Low Chest Freezer - 9 Cubic Ft.
So-Low -85°C Ultra-Low Chest Freezer - 9 Cubic Ft. Please note: This Product may carry up to an 8 week lead time! So-Low Ultra-Low Chest Freezers are second to none in low temp applications to suit any laboratory or application needs. These Ultra-Low Temp freezers feature digital temperature control with 2 temperature displays. One shows the set temperature and the other shows the actual temperature in the freezer. The So-Low C85-9 features a battery operated alarm system that will emit an audible and visual signal when there is a mechanical or electrical failure. The alarm has an over and under temperature setting, alarm silencing switch, and battery test switch. Product Specifications Temperature Control Digital Control with two temperature displays. One display shows the set temperature, the other shows the actual temperature in the freezer. Alarm System Battery operated alarm system will emit an audible and visual signal when there is a mechanical or electrical failure. The alarm has an over and under temperature setting, alarm silencing switch, and battery test switch. Dimensions: Exterior: 57.5" x 29" x 46.5" Interior: 46" x 16" x 20" Capacity 9 Cubic Ft. / 255 Liters Temperature Range -40°C to -85°C / -40°F to -121°F Remote Alarm Relay A relay for a remote alarm hook-up is also provided. Refrigeration System So-Low cascade type. Two hermetic compressors. CFC & HCFC free refrigerants. Construction Chamber is 14-ga. zinc coated galvanized steel. Exterior is 16-ga. steel. Powder coated cool gray finish. Voltages Available 115/60/1 - 220/50/1 Technical Support Supplied by Nation-Wide-Network of service companies. ETL Electrical Approval Specification Data Sheet Diagram Data Sheet
$8,300.00 - $8,800.00
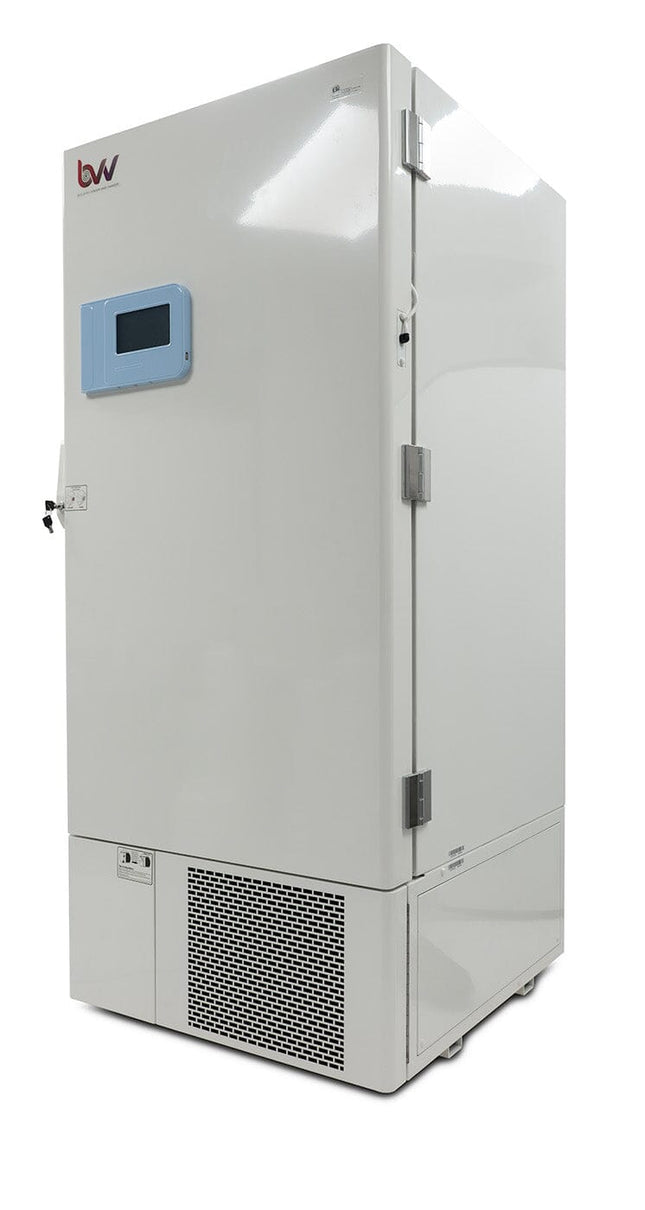
Neocision ULTRA-Low Upright Style Freezer with Touch Screen LCD (-86°C) 17.3 Cubic Feet - ETL Rated
Neocision ULTRA-Low Upright Style Freezer with Touch Screen LCD (-86°C) 17.3 Cubic Feet - ETL Rated The BVV™ Neocision Freezers offer optimal temperature control conditions to use in laboratories and medical facilities. The freezers have a quiet operating noise of less than 53 decibels. This freezer has a user friendly touch screen that can be used to monitor many different aspects of the internal systems. The screen will display any errors such as temperature faults or power faults. There is a backup battery that will keep the screen operational though a facility power outage, and it will display the internal temperatures. This information can help the user input dry ice or liquid nitrogen to assist in cooling sensitive materials through a prolonged power outage. The internal chamber has 4 sections that can be used individually or the shelves can be removed or adjusted to fit larger items. Features: Backup Battery Data Logging Gasket Heating Locking Handle Vent Port Interior Chamber Probe High Condenser Temperature Alarm Power Failure Alarm Temperature Sensor Failure Alarm Low Battery Alarm High/Low Temperature Alarm Door Alarm Specifications: Model NEO-86L490 Temperature Range (°C) -50 ~ -86 Temperature Uniformity (°C) ≤6 Cooldown time (hours) ≤6 Capacity (ft^3) 17.3 Exterior Dimensions (LxWxH) (in) 35.8 x 36.5 x 78.3 Interior Dimensions (LxWxH) (in) 23.1 x 25 x 51.5 Door Opening (LxH) (in) 23.1 x 51.5 Insulation thickness (in) 5 Interior Material Stainless Steel Door Sections 4 Shelves 3 Levels 4 Refrigerant Type Non HCFC Voltage 110V AC Power 1500 W Weight (lbs) 732
$7,000.00$6,250.00


You have seen 192 out of 206 products