Solvent Recovery
-
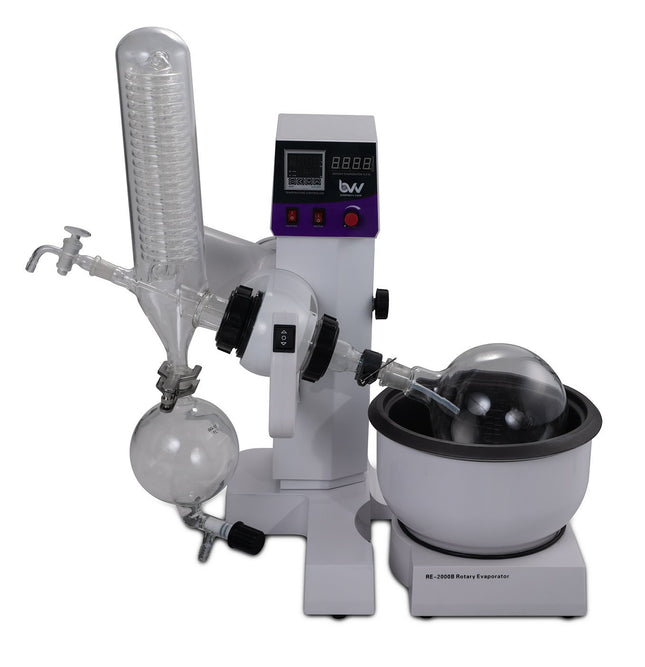
2L Electric Lift Rotary Evaporator
2L Electric Lift Rotary Evaporator The 2L BVV™ Electric Lift Rotary Evaporator is the ideal tabletop rotovap for small scale evaporation and recovery of solvents. Designed with ease of use in mind, the 2L allows users to separate solvents from a given mixture with minimal user input. The heating bath and temperature controls allow for precise, repeatable results. The double helix vertical condenser gives maximum surface area for condensation of vapors. PTFE seals on the entire system are made for maximum chemical resistance to ensure vacuum depth and lifespan of the system. Our rotovaps are a fraction of the price of more costly systems with the same functionaility and evaporation efficiency. 2L Best Value Electric Lift Rotovap Parts Diagram Features: Digital PID temperature and rotation speed control All PTFE valves for improved lifespan and chemical resistance Direct injection capability for continuous feeding of solution Small tabletop footprint Electric multi-level lifting mechanism for ease of use CE Listed 90-day limited warranty (excludes glassware, consumables & moving parts) Specifications: Model 2L Best Value Electric Lift Rotary Evaporator Optimum Ambient Temperature 5~25C / 41~105.8F Glass Material GG-17 High Borosilicate Power (V/Hz) 110V 60Hz Speed Regulation Digital Step-less Regulation Rotation Speed 20-198 RPM Set Temperature 0-99C / 0-210F Temperature Control Digital Temperature Control Maximum Vacuum Pressure -29.8 inHg Evaporating Flask Capacity 2L (2000mL) Receiving Flask Capacity 1L (1000mL) Condenser Style Vertical Double Helix Evaporation Capacity Alcohol >/= 1 L/H Heater Max Current Draw (Amps) 13.6 Water Bath Material Teflon Composite Water Bath Size 10 x 5 in. Lifting Function Electric Lifting Stroke 14cm / 5.5 in. Total Power Consumption (kW) 1.8 kW Dimensions 28 x 18 x 27 in. Weight 37.2 kg / 82 lbs Vacuum Connection 3/8” Barb Condenser Connection 3/8” Barb Warranty 90 days excluding glass parts Certifications CE Rotovap Quick Start Guide This guide gives basic quick start instructions for rotovaps. It is intended to provide a starting point for learning the process. Parameters should be adjusted to suit specific needs. Clean and assemble unit. Make sure all pieces are cleaned and sterilized using an alcohol solution. Connect chiller to condenser and set to 0C (32F). Always fill a rotovap condenser from the top down (chiller output to top of condenser, chiller input to bottom of condenser). Connect vacuum pump to cold trap and connect cold trap to vacuum port on rotovap. Turn on heat bath and set to 40C (113F). Once heat bath, chiller and cold trap have reached desired temperatures, turn on rotovap motor and set speed to approximately 100 RPM (does not have to be precise). Keep in mind, higher RPM’s will increase evaporation power but also increase heat load. Start vacuum pump and allow vacuum to pull down for a few minutes before injection. Once vacuum has been pulled to a sufficient level (does not have to be precise but should be below 100 Torr), using the injection valve, very slowly inject approximately 500 mL of solution into evaporating flask and then close the valve. Allow this small amount to begin evaporating. You may see the chiller begin to rise in temperature, this is called “priming” the rotovap. Once the temperature stops rising or all liquid is almost completely evaporated, open the injection valve again very slowly so that a small amount of liquid begins to enter the evaporating flask. Do not close injection valve this time but continue to allow solution to enter the evaporating flask. At this point you must try to match the input speed to the output speed. What this means is that you should be injecting the same amount of liquid into the rotovap that is equal to the amount of liquid dripping from the condenser into the receiving flask. You will know that the input speed and output speed are matched because the chiller will remain at a stable temperature. If the chiller begins to rise, then you are injecting too much liquid. Dial back the valve until the chiller stabilizes. Once everything is stabilized, you may walk away from the rotovap if necessary. Check every so often to make sure temperatures remain stable and evaporation continues efficiently. ***Note: All units are inspected for broken glass or parts before unit is shipped. If unit arrives damaged or glass is broken (this does not include minor imperfections or scuffs in glassware), Customer MUST contact BVV™ within 3 days of delivery to file a claim and receive a replacement part. If customer DOES NOT contact BVV™ within 3 days of delivery responsibility for replacement parts falls on the customer and they must pay for replacement pieces.*** ***Glassware Safety Disclaimer: BVV™ is not responsible for failure of glassware which must be inspected before and after every use because it may eventually develop imperfections or damage through normal usage, mishandling, and stress caused by temperature variations. If an imperfection or damage is noted while inspecting the glassware DO NOT use the glassware because it can fail causing bodily harm or damage to the surrounding area.***
$1,595.00 - $1,750.00
-
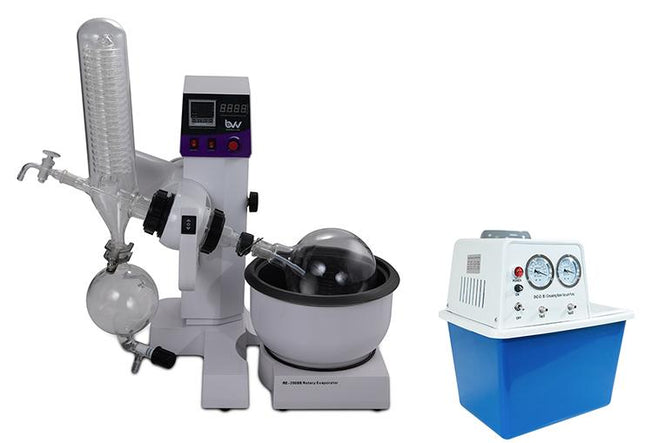
2L Electric Rotary Evaporator Kit with BVV Water Circulation Vacuum Pump
2L Electric Rotary Evaporator Kit with BVV™ Water Circulation Vacuum Pump 2L Electric Rotary Evaporator Kit with BVV™ Water Circulation Vacuum Pump setup includes all the neccessary components to successfully perform solvent recovery via rotary evaporation. A cold trap should always be used inline between your vacuum system and application to protect the pump from volatile vapors. 2L Rotary Evaporator Turnkey Setup includes: 2L Electric Lift Rotary Evaporator 90-day limited warranty (excludes glassware, consumables & moving parts) BVV™ Water Circulation Vacuum Pump Rotovap Quick Start Guide This guide gives basic quick start instructions for rotovaps. It is intended to provide a starting point for learning the process. Parameters should be adjusted to suit specific needs. Clean and assemble unit. Make sure all pieces are cleaned and sterilized using an alcohol solution. Connect chiller to the condenser and set to 0C (32F). Always fill a rotovap condenser from the top down (chiller output to top of the condenser, chiller input to bottom of the condenser). Connect vacuum pump to cold trap and connect cold trap to the vacuum port on rotovap. Turn on heat bath and set to 40C (113F). Once heat bath, chiller, and cold trap have reached desired temperatures, turn on the rotovap motor and set the speed to approximately 100 RPM (does not have to be precise). Keep in mind, higher RPM’s will increase evaporation power but also increase heat load. Start vacuum pump and allow vacuum to pull down for a few minutes before injection. Once the vacuum has been pulled to a sufficient level (does not have to be precise but should be below 100 Torr), using the injection valve, very slowly inject approximately 500 mL of solution into evaporating flask and then close the valve. Allow this small amount to begin evaporating. You may see the chiller begin to rise in temperature, this is called “priming” the rotovap. Once the temperature stops rising or all liquid is almost completely evaporated, open the injection valve again very slowly so that a small amount of liquid begins to enter the evaporating flask. Do not close injection valve this time but continue to allow the solution to enter the evaporating flask. At this point, you must try to match the input speed to the output speed. What this means is that you should be injecting the same amount of liquid into the rotovap that is equal to the amount of liquid dripping from the condenser into the receiving flask. You will know that the input speed and output speed are matched because the chiller will remain at a stable temperature. If the chiller begins to rise, then you are injecting too much liquid. Dial back the valve until the chiller stabilizes. Once everything is stabilized, you may walk away from the rotovap if necessary. Check every so often to make sure temperatures remain stable and evaporation continues efficiently. ***Glassware Safety Disclaimer: BVV™ is not responsible for failure of glassware which must be inspected before and after every use because it may eventually develop imperfections or damage through normal usage, mishandling, and stress caused by temperature variations. If an imperfection or damage is noted while inspecting the glassware DO NOT use the glassware because it can fail causing bodily harm or damage to the surrounding area.***
$1,850.00
-
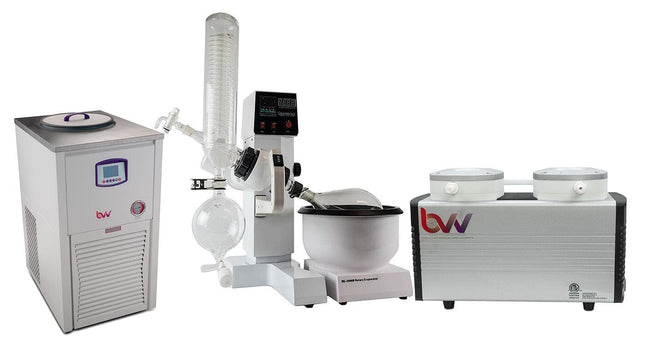
2L Rotary Evaporator Turnkey Setup
2L Rotary Evaporator Turnkey Setup 2L Electric Lift Rotary Evaporator turnkey setup includes all the necessary components to successfully perform solvent recovery via rotary evaporation. A cold trap should always be used inline between your vacuum system and application to protect the pump from volatile vapors. 2L Rotary Evaporator Turnkey Setup includes: 2L Electric Lift Rotary Evaporator 90-day limited warranty (excludes glassware, consumables & moving parts) BVV NEO 1.4 CFM Diaphragm Pump ETL Rated OR. 3.5CFM Dry Floating Scroll Vacuum Pump Polyscience LS -20C to 40C 1/2HP Chiller w/ Turbine Pump OR BVV NEOCISION 20L Chiller (-40C) - ETL Rated 10ft of Vacuum Tubing 20ft of Chiller Tubing 10 Pack of Adjustable stainless steel hose clamps 3/8" Vacuum Manifold Optional add-on : BVV™ CT40 -40°F 300ml x 3 Cold Trap, BVV™ CT80 -112°F 300ml x 3 Cold Trap Optional add-on: J-KEM DVR-200 Digital Vacuum Regulator Optional add-on: Heat Transfer Fluid -- NuTherm PF-50 or Dynalene HC-50 Rotovap Quick Start Guide This guide gives basic quick start instructions for rotovaps. It is intended to provide a starting point for learning the process. Parameters should be adjusted to suit specific needs. Clean and assemble unit. Make sure all pieces are cleaned and sterilized using an alcohol solution. Connect chiller to the condenser and set to 0C (32F). Always fill a rotovap condenser from the top down (chiller output to top of the condenser, chiller input to bottom of the condenser). Connect vacuum pump to cold trap and connect cold trap to the vacuum port on rotovap. Turn on heat bath and set to 40C (113F). Once heat bath, chiller, and cold trap have reached desired temperatures, turn on the rotovap motor and set the speed to approximately 100 RPM (does not have to be precise). Keep in mind, higher RPM’s will increase evaporation power but also increase heat load. Start vacuum pump and allow vacuum to pull down for a few minutes before injection. Once the vacuum has been pulled to a sufficient level (does not have to be precise but should be below 100 Torr), using the injection valve, very slowly inject approximately 500 mL of solution into evaporating flask and then close the valve. Allow this small amount to begin evaporating. You may see the chiller begin to rise in temperature, this is called “priming” the rotovap. Once the temperature stops rising or all liquid is almost completely evaporated, open the injection valve again very slowly so that a small amount of liquid begins to enter the evaporating flask. Do not close injection valve this time but continue to allow the solution to enter the evaporating flask. At this point, you must try to match the input speed to the output speed. What this means is that you should be injecting the same amount of liquid into the rotovap that is equal to the amount of liquid dripping from the condenser into the receiving flask. You will know that the input speed and output speed are matched because the chiller will remain at a stable temperature. If the chiller begins to rise, then you are injecting too much liquid. Dial back the valve until the chiller stabilizes. Once everything is stabilized, you may walk away from the rotovap if necessary. Check every so often to make sure temperatures remain stable and evaporation continues efficiently. ***Glassware Safety Disclaimer: BVV™ is not responsible for failure of glassware which must be inspected before and after every use because it may eventually develop imperfections or damage through normal usage, mishandling, and stress caused by temperature variations. If an imperfection or damage is noted while inspecting the glassware DO NOT use the glassware because it can fail causing bodily harm or damage to the surrounding area.***
$13,500.00
-
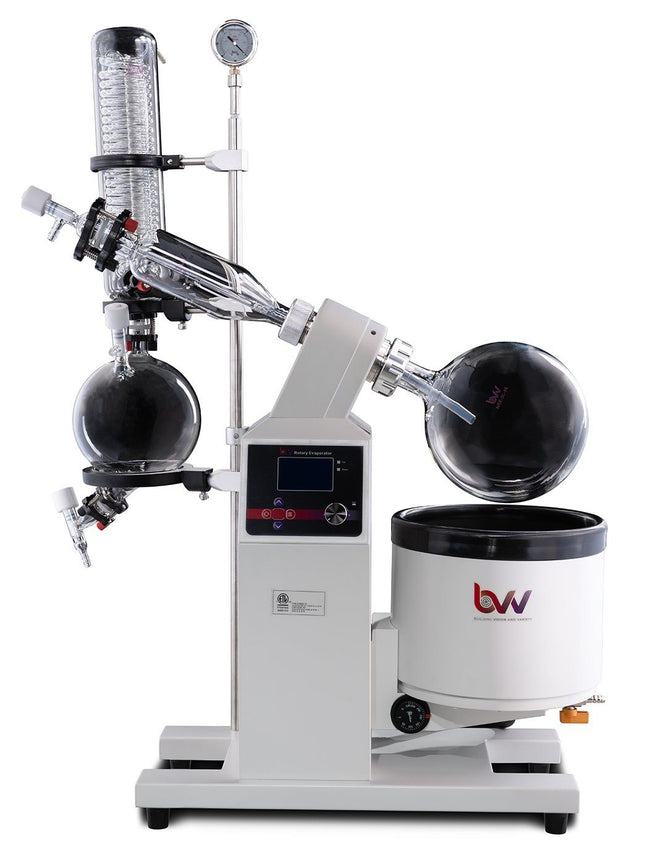
5L Neocision ETL Lab Certified Rotary Evaporator
5L Neocision ETL Lab Certified Rotary Evaporator The 5L Neocision ETL Lab Certified Rotary Evaporator is a full-scale system meant to fulfill the needs of large volume production and meet the requirements of a certified laboratory with its ETL certification standards. Featuring an electric lift bath and all PTFE valves for extreme chemical resistance, the 5L Neocision gives users the ability to recover large amounts of solvent in a smaller footprint with highly improved functionality. All Neocision rotovaps feature high-efficiency valves and drain ports making it easy to directly inject solution continuously without the need to stop the system or release vacuum to drain. The temperature and rotation speed are easily controlled from a single digital interface. Our rotovaps are a fraction of the price of more costly systems with the same functionality and evaporation efficiency. Features: ETL Certified for Lab use. Digital temperature and speed control with simple user interface Electric Bath Lift Teflon Coated Bath for corrosion resistance High-efficiency drain port and injection valves Smaller footprint for improved workspace allocation Mobility with locking casters Shorter vapor path for faster evaporation and condensation Direct injection capability for continuous feeding of solution Continuous draining capability without the need to release vacuum or stop the system 1-year warranty on all mechanical parts. Does not include glassware. Specifications: Model 5L Solvent Pro Series Rotary Evaporator Optimum Ambient Temperature 5~25C / 41~105.8F Glass Material GG-17 High Borosilicate Power (V/Hz) 110V 50/60Hz Single Phase Speed Regulation Digital Step-less Regulation Rotation Speed 20-130 RPM Set Temperature RT+5 - 99C Temperature Control Digital Temperature Control Maximum Vacuum Pressure -29.8 inHg Evaporating Flask Capacity 5L (5000ml) Receiving Flask Capacity 5L (5000ml) Condenser Style Main + Auxiliary Vertical Double Helix Heater Max Current Draw (Amps) 25 Water Bath Material 304 Stainless Steel Water Bath Size 17.7 x 9.8 in. Lifting Function Electric Lifting Stroke 190mm / 7.5 in. Total Power Consumption (kW) 1800w Dimensions 45 x 32 x 15in Weight 155 lbs Vacuum Connection 14mm / .55 in. Barb Condenser Connection 18mm / .70 in. Barb Warranty 1 Year Excluding: Moving Parts Glassware Certifications ETL Rotovap Quick Start Guide This guide gives basic quick start instructions for rotovaps. It is intended to provide a starting point for learning the process. Parameters should be adjusted to suit specific needs. Clean and assemble unit. Make sure all pieces are cleaned and sterilized using an alcohol solution. Connect chiller to condenser and set to 0C (32F). Always fill a rotovap condenser from the top down (chiller output to top of condenser, chiller input to bottom of condenser). Connect vacuum pump to cold trap and connect cold trap to vacuum port on rotovap. Turn on heat bath and set to 40C (113F). Once heat bath, chiller and cold trap have reached desired temperatures, turn on rotovap motor and set speed to approximately 100 RPM (does not have to be precise). Keep in mind, higher RPM’s will increase evaporation power but also increase heat load. Start vacuum pump and allow vacuum to pull down for a few minutes before injection. Once vacuum has been pulled to a sufficient level (does not have to be precise but should be below 100 Torr), using the injection valve, very slowly inject approximately 500 mL of solution into evaporating flask and then close the valve. Allow this small amount to begin evaporating. You may see the chiller begin to rise in temperature, this is called “priming” the rotovap. Once the temperature stops rising or all liquid is almost completely evaporated, open the injection valve again very slowly so that a small amount of liquid begins to enter the evaporating flask. Do not close injection valve this time but continue to allow solution to enter the evaporating flask. At this point you must try to match the input speed to the output speed. What this means is that you should be injecting the same amount of liquid into the rotovap that is equal to the amount of liquid dripping from the condenser into the receiving flask. You will know that the input speed and output speed are matched because the chiller will remain at a stable temperature. If the chiller begins to rise, then you are injecting too much liquid. Dial back the valve until the chiller stabilizes. Once everything is stabilized, you may walk away from the rotovap if necessary. Check every so often to make sure temperatures remain stable and evaporation continues efficiently. ***Note: All units are inspected for broken glass or parts before unit is shipped. If unit arrives damaged or glass is broken (this does not include minor imperfections or scuffs in glassware), Customer MUST contact BVV™ within 3 days of delivery to file a claim and receive a replacement part. If customer DOES NOT contact BVV™ within 3 days of delivery responsibility for replacement parts falls on the customer and they must pay for replacement pieces.*** ***Note: This item will ship by freight only.*** ***Glassware Safety Disclaimer: BVV™ is not responsible for failure of glassware which must be inspected before and after every use because it may eventually develop imperfections or damage through normal usage, mishandling, and stress caused by temperature variations. If an imperfection or damage is noted while inspecting the glassware DO NOT use the glassware because it can fail causing bodily harm or damage to the surrounding area.***
$4,000.00
-
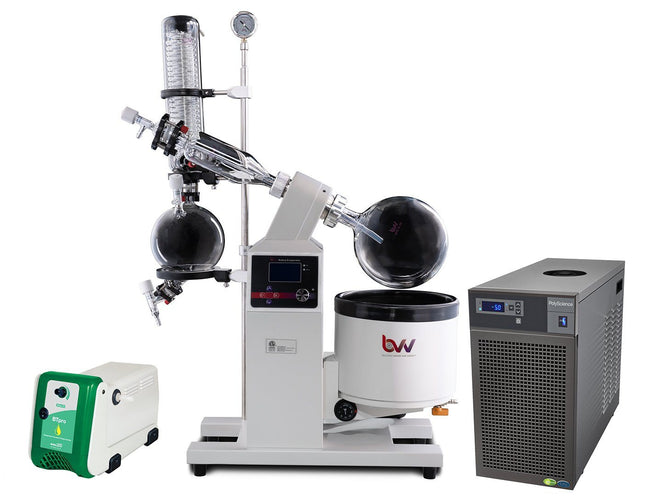

5L Neocision ETL Lab Certified Rotary Evaporator Turnkey System
5L Neocision ETL Lab Certified Rotary Evaporator Turnkey System The 5L Neocision ETL Lab Certified Rotary Evaporator is a full-scale system meant to fulfill the needs of large volume production and meet the requirements of a certified laboratory with its ETL certification standards. Featuring an electric lift bath and all PTFE valves for extreme chemical resistance, the 5L Neocision gives users the ability to recover large amounts of solvent in a smaller footprint with highly improved functionality. All Neocision rotovaps feature high-efficiency valves and drain ports making it easy to directly inject solution continuously without the need to stop the system or release vacuum to drain. The temperature and rotation speed are easily controlled from a single digital interface. Our rotovaps are a fraction of the price of more costly systems with the same functionality and evaporation efficiency. 5L NEO Rotary Evaporator Turnkey System setup includes: 5L Neocision ETL Lab Certified Rotary Evaporator Polyscience LS -20C to 40C 1/2HP Chiller w/ Turbine Pump 1/4" Gum Rubber - 100ft 1/4" Silicone Tubing - 25ft Welch BTpro70 Adjustable Stainless Steel Hose Clamps Features: ETL Certified for Lab use. Digital temperature and speed control with simple user interface Electric Bath Lift Teflon Coated Bath for corrosion resistance High-efficiency drain port and injection valves Smaller footprint for improved workspace allocation Mobility with locking casters Shorter vapor path for faster evaporation and condensation Direct injection capability for continuous feeding of solution Continuous draining capability without the need to release vacuum or stop the system 1-year warranty on all mechanical parts. Does not include glassware. Specifications: Model 5L Solvent Pro Series Rotary Evaporator Optimum Ambient Temperature 5~25C / 41~105.8F Glass Material GG-17 High Borosilicate Power (V/Hz) 110V 50/60Hz Single Phase Speed Regulation Digital Step-less Regulation Rotation Speed 20-130 RPM Set Temperature RT+5 - 99C Temperature Control Digital Temperature Control Maximum Vacuum Pressure -29.8 inHg Evaporating Flask Capacity 5L (5000ml) Receiving Flask Capacity 5L (5000ml) Condenser Style Main + Auxiliary Vertical Double Helix Heater Max Current Draw (Amps) 25 Water Bath Material 304 Stainless Steel Water Bath Size 17.7 x 9.8 in. Lifting Function Electric Lifting Stroke 190mm / 7.5 in. Total Power Consumption (kW) 1800w Dimensions 45 x 32 x 15in Weight 155 lbs Vacuum Connection 14mm / .55 in. Barb Condenser Connection 18mm / .70 in. Barb Warranty 1 Year excluding glass parts Certifications ETL Rotovap Quick Start Guide This guide gives basic quick start instructions for rotovaps. It is intended to provide a starting point for learning the process. Parameters should be adjusted to suit specific needs. Clean and assemble unit. Make sure all pieces are cleaned and sterilized using an alcohol solution. Connect chiller to condenser and set to 0C (32F). Always fill a rotovap condenser from the top down (chiller output to top of condenser, chiller input to bottom of condenser). Connect vacuum pump to cold trap and connect cold trap to vacuum port on rotovap. Turn on heat bath and set to 40C (113F). Once heat bath, chiller and cold trap have reached desired temperatures, turn on rotovap motor and set speed to approximately 100 RPM (does not have to be precise). Keep in mind, higher RPM’s will increase evaporation power but also increase heat load. Start vacuum pump and allow vacuum to pull down for a few minutes before injection. Once vacuum has been pulled to a sufficient level (does not have to be precise but should be below 100 Torr), using the injection valve, very slowly inject approximately 500 mL of solution into evaporating flask and then close the valve. Allow this small amount to begin evaporating. You may see the chiller begin to rise in temperature, this is called “priming” the rotovap. Once the temperature stops rising or all liquid is almost completely evaporated, open the injection valve again very slowly so that a small amount of liquid begins to enter the evaporating flask. Do not close injection valve this time but continue to allow solution to enter the evaporating flask. At this point you must try to match the input speed to the output speed. What this means is that you should be injecting the same amount of liquid into the rotovap that is equal to the amount of liquid dripping from the condenser into the receiving flask. You will know that the input speed and output speed are matched because the chiller will remain at a stable temperature. If the chiller begins to rise, then you are injecting too much liquid. Dial back the valve until the chiller stabilizes. Once everything is stabilized, you may walk away from the rotovap if necessary. Check every so often to make sure temperatures remain stable and evaporation continues efficiently. ***Note: All units are inspected for broken glass or parts before unit is shipped. If unit arrives damaged or glass is broken (this does not include minor imperfections or scuffs in glassware), Customer MUST contact BVV™ within 3 days of delivery to file a claim and receive a replacement part. If customer DOES NOT contact BVV™ within 3 days of delivery responsibility for replacement parts falls on the customer and they must pay for replacement pieces.*** ***Note: This item will ship by freight only.*** ***Glassware Safety Disclaimer: BVV™ is not responsible for failure of glassware which must be inspected before and after every use because it may eventually develop imperfections or damage through normal usage, mishandling, and stress caused by temperature variations. If an imperfection or damage is noted while inspecting the glassware DO NOT use the glassware because it can fail causing bodily harm or damage to the surrounding area.***
$10,950.00 - $12,250.00
-
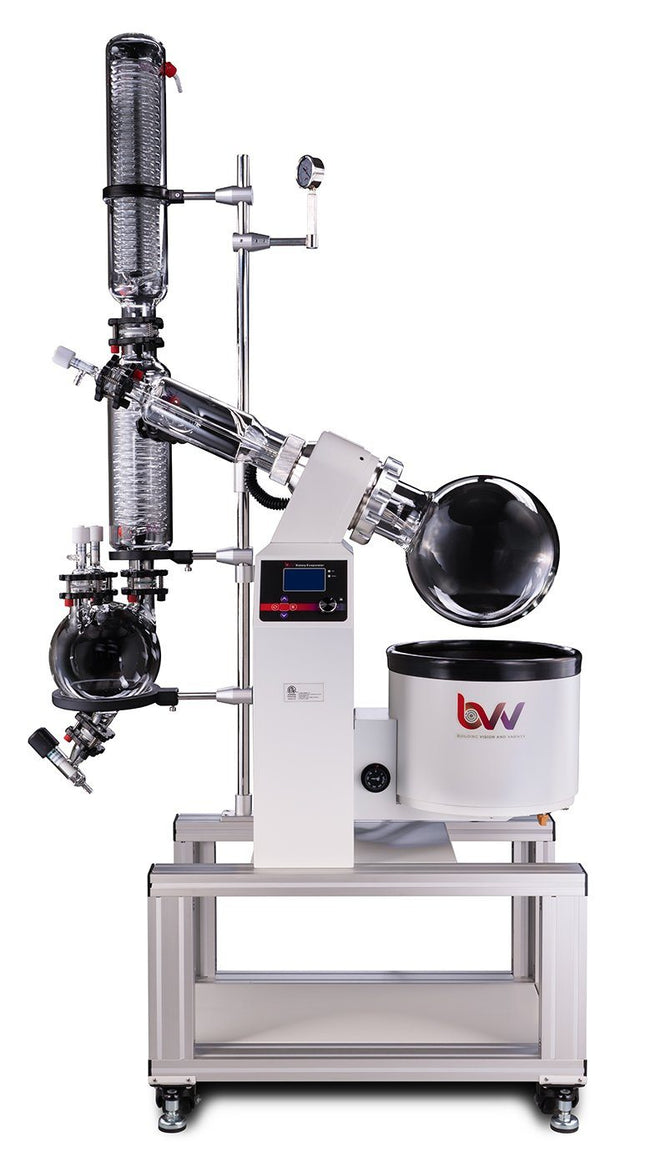
10L Neocision ETL Lab Certified Rotary Evaporator
10L Neocision ETL Lab Certified Rotary Evaporator The 10L Neocision ETL Lab Certified Rotary Evaporator is a full-scale system meant to fulfill the needs of large volume production and meet the requirements of a certified laboratory with its ETL certification standards. Featuring an electric lift bath and all PTFE valves for extreme chemical resistance, the 10L Neocision gives users the ability to recover large amounts of solvent in a smaller footprint with highly improved functionality. All Neocision rotovaps feature high-efficiency valves and drain ports making it easy to directly inject solution continuously without the need to stop the system or release vacuum to drain. The temperature and rotation speed are easily controlled from a single digital interface. Our rotovaps are a fraction of the price of more costly systems with the same functionality and evaporation efficiency. To keep your bath heating properly, this unit should only be used with RO or DI water. 10-50L NEO and ECO Rotary Evaporator Diagram Features: ETL Certified for Lab use. Digital temperature and speed control with simple user interface Electric Bath Lift Teflon Coated Bath for corrosion resistance High-efficiency drain port and injection valves Smaller footprint for improved workspace allocation Mobility with locking casters Shorter vapor path for faster evaporation and condensation Direct injection capability for continuous feeding of solution Continuous draining capability without the need to release vacuum or stop the system 1-year warranty on all mechanical parts. Does not include glassware. Specifications: Model 10L Solvent Pro Series Rotary Evaporator Optimum Ambient Temperature 5~25C / 41~105.8F Glass Material GG-17 High Borosilicate Power (V/Hz) 220-240V 60Hz Single Phase Speed Regulation Digital Step-less Regulation Rotation Speed 20-130 RPM Set Temperature RT+5-99C Temperature Control Digital Temperature Control Maximum Vacuum Pressure -29.8 inHg Evaporating Flask Capacity 10L (10000ml) Receiving Flask Capacity 10L (10000ml) Condenser Style Main + Auxiliary Vertical Double Helix Heater Max Current Draw (Amps) 25 Water Bath Material 304 Stainless Steel Water Bath Size 17.7 x 9.8 in. Lifting Function Electric Lifting Stroke 190mm / 7.5 in. Total Power Consumption (kW) 3300w Dimensions 81 x 44 x 20 in. Weight 155 lbs Vacuum Connection 14mm / .55 in. Barb Condenser Connection 18mm / .70 in. Barb Warranty 90 days excluding glass parts Certifications ETL Rotovap Quick Start Guide This guide gives basic quick start instructions for rotovaps. It is intended to provide a starting point for learning the process. Parameters should be adjusted to suit specific needs. Clean and assemble unit. Make sure all pieces are cleaned and sterilized using an alcohol solution. Connect chiller to condenser and set to 0C (32F). Always fill a rotovap condenser from the top down (chiller output to top of condenser, chiller input to bottom of condenser). Connect vacuum pump to cold trap and connect cold trap to vacuum port on rotovap. Turn on heat bath and set to 40C (113F). Once heat bath, chiller and cold trap have reached desired temperatures, turn on rotovap motor and set speed to approximately 100 RPM (does not have to be precise). Keep in mind, higher RPM’s will increase evaporation power but also increase heat load. Start vacuum pump and allow vacuum to pull down for a few minutes before injection. Once vacuum has been pulled to a sufficient level (does not have to be precise but should be below 100 Torr), using the injection valve, very slowly inject approximately 500 mL of solution into evaporating flask and then close the valve. Allow this small amount to begin evaporating. You may see the chiller begin to rise in temperature, this is called “priming” the rotovap. Once the temperature stops rising or all liquid is almost completely evaporated, open the injection valve again very slowly so that a small amount of liquid begins to enter the evaporating flask. Do not close injection valve this time but continue to allow solution to enter the evaporating flask. At this point you must try to match the input speed to the output speed. What this means is that you should be injecting the same amount of liquid into the rotovap that is equal to the amount of liquid dripping from the condenser into the receiving flask. You will know that the input speed and output speed are matched because the chiller will remain at a stable temperature. If the chiller begins to rise, then you are injecting too much liquid. Dial back the valve until the chiller stabilizes. Once everything is stabilized, you may walk away from the rotovap if necessary. Check every so often to make sure temperatures remain stable and evaporation continues efficiently. ***Note: All units are inspected for broken glass or parts before unit is shipped. If unit arrives damaged or glass is broken (this does not include minor imperfections or scuffs in glassware), Customer MUST contact BVV™ within 3 days of delivery to file a claim and receive a replacement part. If customer DOES NOT contact BVV™ within 3 days of delivery responsibility for replacement parts falls on the customer and they must pay for replacement pieces.*** ***Note: This item will ship by freight only.*** ***Glassware Safety Disclaimer: BVV™ is not responsible for failure of glassware which must be inspected before and after every use because it may eventually develop imperfections or damage through normal usage, mishandling, and stress caused by temperature variations. If an imperfection or damage is noted while inspecting the glassware DO NOT use the glassware because it can fail causing bodily harm or damage to the surrounding area.***
$4,500.00 $2,000.00
-
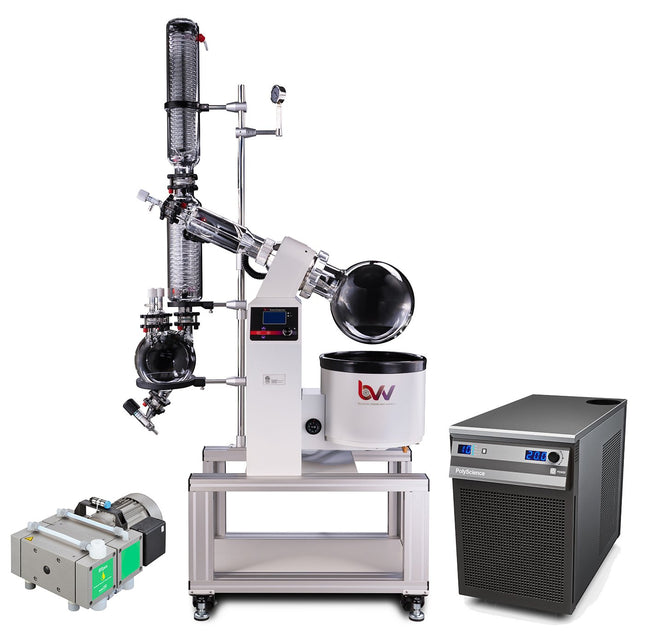

10L Neocision ETL Lab Certified Rotary Evaporator Turnkey System
10L NEO Rotary Evaporator Turnkey System 10L NEO Rotary Evaporator Turnkey System setup includes all the necessary components to successfully perform solvent recovery via rotary evaporation. A cold trap should always be used inline between your vacuum system and application to protect the pump from volatile vapors. To keep your bath heating properly, this unit should only be used with RO or DI water. 10-50L NEO and ECO Rotary Evaporator Diagram 10L NEO Rotary Evaporator Turnkey System setup includes: 10L Neocision ETL Lab Certified Rotary Evaporator Polyscience 6160T 1HP Chiller 3/8" Gum Rubber - 100ft 3/8" Silicone Tubing - 25ft Welch BTpro100 Diaphragm Pump Adjustable Stainless Steel Hose Clamps This guide gives basic quick start instructions for rotovaps. It is intended to provide a starting point for learning the process. Parameters should be adjusted to suit specific needs. Clean and assemble unit. Make sure all pieces are cleaned and sterilized using an alcohol solution. Connect chiller to condenser and set to 0C (32F). Always fill a rotovap condenser from the top down (chiller output to top of condenser, chiller input to bottom of condenser). Connect vacuum pump to cold trap and connect cold trap to vacuum port on rotovap. Turn on heat bath and set to 40C (113F). Once heat bath, chiller and cold trap have reached desired temperatures, turn on rotovap motor and set speed to approximately 100 RPM (does not have to be precise). Keep in mind, higher RPM’s will increase evaporation power but also increase heat load. Start vacuum pump and allow vacuum to pull down for a few minutes before injection. Once vacuum has been pulled to a sufficient level (does not have to be precise but should be below 100 Torr), using the injection valve, very slowly inject approximately 500 mL of solution into evaporating flask and then close the valve. Allow this small amount to begin evaporating. You may see the chiller begin to rise in temperature, this is called “priming” the rotovap. Once the temperature stops rising or all liquid is almost completely evaporated, open the injection valve again very slowly so that a small amount of liquid begins to enter the evaporating flask. Do not close injection valve this time but continue to allow solution to enter the evaporating flask. At this point you must try to match the input speed to the output speed. What this means is that you should be injecting the same amount of liquid into the rotovap that is equal to the amount of liquid dripping from the condenser into the receiving flask. You will know that the input speed and output speed are matched because the chiller will remain at a stable temperature. If the chiller begins to rise, then you are injecting too much liquid. Dial back the valve until the chiller stabilizes. Once everything is stabilized, you may walk away from the rotovap if necessary. Check every so often to make sure temperatures remain stable and evaporation continues efficiently. **Note: All units are inspected for broken glass or parts before unit is shipped. If unit arrives damaged or glass is broken (this does not include minor imperfections or scuffs in glassware), Customer MUST contact BVV™ within 3 days of delivery to file a claim and receive a replacement part. If customer DOES NOT contact BVV™ within 3 days of delivery responsibility for replacement parts falls on the customer and they must pay for replacement pieces.*** ***Note: This item will ship by freight only.*** ***Glassware Safety Disclaimer: BVV™ is not responsible for failure of glassware which must be inspected before and after every use because it may eventually develop imperfections or damage through normal usage, mishandling, and stress caused by temperature variations. If an imperfection or damage is noted while inspecting the glassware DO NOT use the glassware because it can fail causing bodily harm or damage to the surrounding area.***
$11,200.00 - $14,090.00
-
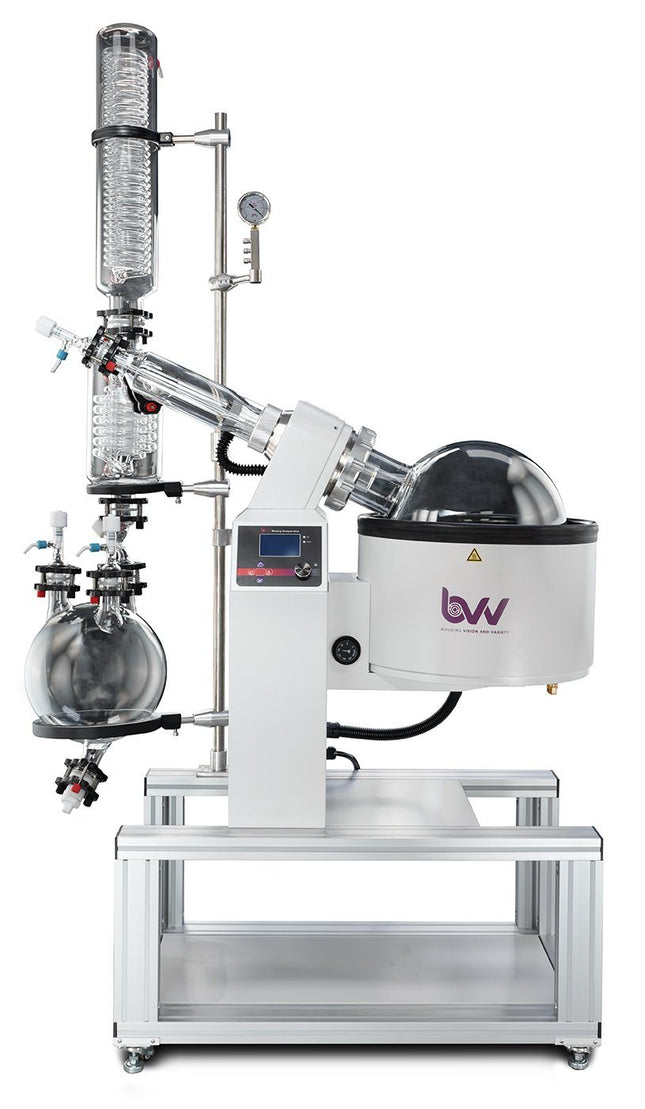
20L Neocision ETL Lab Certified Rotary Evaporator
20L Neocision ETL Lab Certified Rotary Evaporator The 20L Neocision ETL Lab Certified Rotary Evaporator is a full-scale system meant to fulfill the needs of large volume production and meet the requirements of a certified laboratory with its ETL certification standards. Featuring an electric lift bath and all PTFE valves for extreme chemical resistance, the 20L Neocision gives users the ability to recover large amounts of solvent in a smaller footprint with highly improved functionality. All Neocision rotovaps feature high-efficiency valves and drain ports making it easy to directly inject solution continuously without the need to stop the system or release vacuum to drain. The temperature and rotation speed are easily controlled from a single digital interface. Our rotovaps are a fraction of the price of more costly systems with the same functionality and evaporation efficiency. To keep your bath heating properly, this unit should only be used with RO or DI water. 10-50L NEO and ECO Rotary Evaporator Diagram Features: ETL Certified for Lab use. Digital temperature and speed control with simple user interface Electric Bath Lift Teflon Coated Bath for corrosion resistance High-efficiency drain port and injection valves Smaller footprint for improved workspace allocation Mobility with locking casters Shorter vapor path for faster evaporation and condensation Direct injection capability for continuous feeding of solution Continuous draining capability without the need to release vacuum or stop the system 1-year warranty on all mechanical parts. Does not include glassware. Model 20L NEOCISION Rotary Evaporator Optimum Ambient Temperature 5~25C / 41~105.8F Glass Material GG-17 High Borosilicate Power (V/Hz) 220-240V 60Hz Single Phase Speed Regulation Digital Step-less Regulation Rotation Speed 0-120 RPM Set Temperature 0-99C / 0-210F Temperature Control Digital Temperature Control Maximum Vacuum Pressure -29.8 inHg Evaporating Flask Capacity 20L (20000ml) Receiving Flask Capacity 10L (10000ml) Condenser Style Main + Auxiliary Vertical Double Helix Evaporation Capacity Alcohol >/= 12 L/H Heater Max Current Draw (Amps) 25 Water Bath Material 304 Stainless Steel Water Bath Size 17.7 x 9.8 in. Lifting Function Electric Lifting Stroke 190mm / 7.5 in. Total Power Consumption (kW) 4.1 Dimensions 49 x 24 x 83 in. Weight 155 lbs Vacuum Connection 10mm / 3/8 in. Barb Condenser Connection 10mm / 3/8 in. Barb Warranty 1 Year excluding glass parts Certifications ETL Rotovap Quick Start Guide This guide gives basic quick start instructions for rotovaps. It is intended to provide a starting point for learning the process. Parameters should be adjusted to suit specific needs. Clean and assemble unit. Make sure all pieces are cleaned and sterilized using an alcohol solution. Connect chiller to condenser and set to 0C (32F). Always fill a rotovap condenser from the top down (chiller output to top of condenser, chiller input to bottom of condenser). Connect vacuum pump to cold trap and connect cold trap to vacuum port on rotovap. Turn on heat bath and set to 40C (113F). Once heat bath, chiller and cold trap have reached desired temperatures, turn on rotovap motor and set speed to approximately 100 RPM (does not have to be precise). Keep in mind, higher RPM’s will increase evaporation power but also increase heat load. Start vacuum pump and allow vacuum to pull down for a few minutes before injection. Once vacuum has been pulled to a sufficient level (does not have to be precise but should be below 100 Torr), using the injection valve, very slowly inject approximately 500 mL of solution into evaporating flask and then close the valve. Allow this small amount to begin evaporating. You may see the chiller begin to rise in temperature, this is called “priming” the rotovap. Once the temperature stops rising or all liquid is almost completely evaporated, open the injection valve again very slowly so that a small amount of liquid begins to enter the evaporating flask. Do not close injection valve this time but continue to allow solution to enter the evaporating flask. At this point you must try to match the input speed to the output speed. What this means is that you should be injecting the same amount of liquid into the rotovap that is equal to the amount of liquid dripping from the condenser into the receiving flask. You will know that the input speed and output speed are matched because the chiller will remain at a stable temperature. If the chiller begins to rise, then you are injecting too much liquid. Dial back the valve until the chiller stabilizes. Once everything is stabilized, you may walk away from the rotovap if necessary. Check every so often to make sure temperatures remain stable and evaporation continues efficiently. ***Note: All units are inspected for broken glass or parts before unit is shipped. If unit arrives damaged or glass is broken (this does not include minor imperfections or scuffs in glassware), Customer MUST contact BVV™ within 3 days of delivery to file a claim and receive a replacement part. If customer DOES NOT contact BVV™ within 3 days of delivery responsibility for replacement parts falls on the customer and they must pay for replacement pieces.*** ***Note: This item will ship by freight only.*** ***Glassware Safety Disclaimer: BVV™ is not responsible for failure of glassware which must be inspected before and after every use because it may eventually develop imperfections or damage through normal usage, mishandling, and stress caused by temperature variations. If an imperfection or damage is noted while inspecting the glassware DO NOT use the glassware because it can fail causing bodily harm or damage to the surrounding area.***
$7,200.00
-
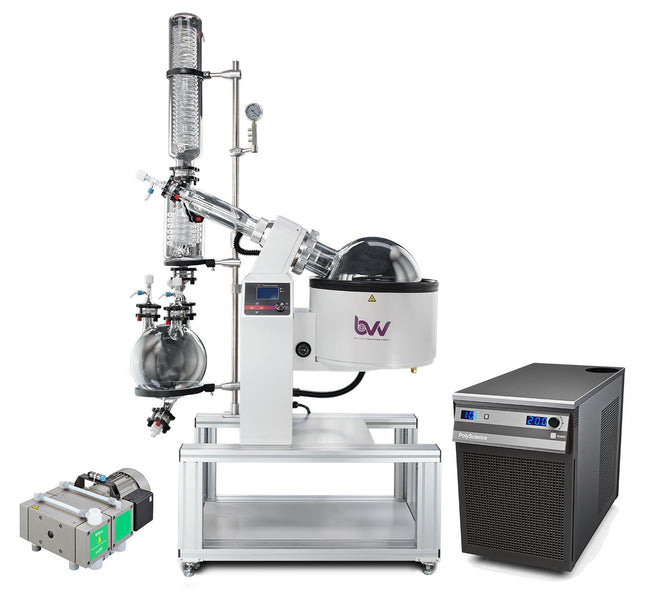

20L Neocision ETL Lab Certified Rotary Evaporator Turnkey System
20L Neocision ETL Lab Certified Rotary Evaporator Turnkey System 20L NEO Rotary Evaporator Turnkey System setup includes all the necessary components to successfully perform solvent recovery via rotary evaporation. A cold trap should always be used inline between your vacuum system and application to protect the pump from volatile vapors. To keep your bath heating properly, this unit should only be used with RO or DI water. 10-50L NEO and ECO Rotary Evaporator Diagram 20L NEO Rotary Evaporator Turnkey System setup includes: 20L Neocision ETL Lab Certified Rotary Evaporator Polyscience 6160T 1HP Chiller 3/8" Gum Rubber - 25ft 3/8" Tubing - 25ft Welch BTpro100 Diaphragm Pump Adjustable Stainless Steel Hose Clamps Rotovap Quick Start Guide This guide gives basic quick start instructions for rotovaps. It is intended to provide a starting point for learning the process. Parameters should be adjusted to suit specific needs. Clean and assemble unit. Make sure all pieces are cleaned and sterilized using an alcohol solution. Connect chiller to condenser and set to 0C (32F). Always fill a rotovap condenser from the top down (chiller output to top of condenser, chiller input to bottom of condenser). Connect vacuum pump to cold trap and connect cold trap to vacuum port on rotovap. Turn on heat bath and set to 40C (113F). Once heat bath, chiller and cold trap have reached desired temperatures, turn on rotovap motor and set speed to approximately 100 RPM (does not have to be precise). Keep in mind, higher RPM’s will increase evaporation power but also increase heat load. Start vacuum pump and allow vacuum to pull down for a few minutes before injection. Once vacuum has been pulled to a sufficient level (does not have to be precise but should be below 100 Torr), using the injection valve, very slowly inject approximately 500 mL of solution into evaporating flask and then close the valve. Allow this small amount to begin evaporating. You may see the chiller begin to rise in temperature, this is called “priming” the rotovap. Once the temperature stops rising or all liquid is almost completely evaporated, open the injection valve again very slowly so that a small amount of liquid begins to enter the evaporating flask. Do not close injection valve this time but continue to allow solution to enter the evaporating flask. At this point you must try to match the input speed to the output speed. What this means is that you should be injecting the same amount of liquid into the rotovap that is equal to the amount of liquid dripping from the condenser into the receiving flask. You will know that the input speed and output speed are matched because the chiller will remain at a stable temperature. If the chiller begins to rise, then you are injecting too much liquid. Dial back the valve until the chiller stabilizes. Once everything is stabilized, you may walk away from the rotovap if necessary. Check every so often to make sure temperatures remain stable and evaporation continues efficiently. ***Note: All units are inspected for broken glass or parts before unit is shipped. If unit arrives damaged or glass is broken (this does not include minor imperfections or scuffs in glassware), Customer MUST contact BVV™ within 3 days of delivery to file a claim and receive a replacement part. If customer DOES NOT contact BVV™ within 3 days of delivery responsibility for replacement parts falls on the customer and they must pay for replacement pieces.*** ***Note: This item will ship by freight only.*** ***Glassware Safety Disclaimer: BVV™ is not responsible for failure of glassware which must be inspected before and after every use because it may eventually develop imperfections or damage through normal usage, mishandling, and stress caused by temperature variations. If an imperfection or damage is noted while inspecting the glassware DO NOT use the glassware because it can fail causing bodily harm or damage to the surrounding area.***
$15,600.00 - $19,400.00
-
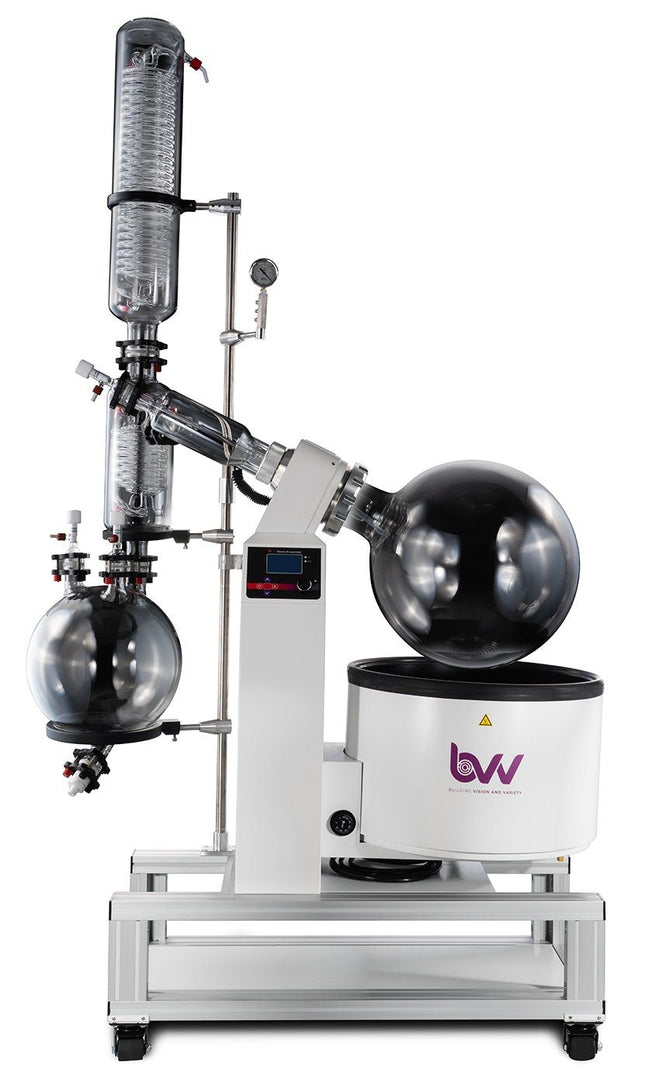
50L Neocision ETL Lab Certified Rotary Evaporator
50L Neocision ETL Lab Certified Rotary Evaporator The 50L Neocision ETL Lab Certified Rotary Evaporator is a full-scale system meant to fulfill the needs of large volume production and meet the requirements of a certified laboratory with its ETL certification standards. Featuring an electric lift bath and all PTFE valves for extreme chemical resistance, the 50L Neocision gives users the ability to recover large amounts of solvent in a smaller footprint with highly improved functionality. All Neocision rotovaps feature high-efficiency valves and drain ports making it easy to directly inject solution continuously without the need to stop the system or release vacuum to drain. The temperature and rotation speed are easily controlled from a single digital interface. Our rotovaps are a fraction of the price of more costly systems with the same functionality and evaporation efficiency. To keep your bath heating properly, this unit should only be used with RO or DI water. 10-50L NEO and ECO Rotary Evaporator Diagram Features: ETL Certified for Lab use. Digital temperature and speed control with simple user interface Electric Bath Lift Teflon Coated Bath for corrosion resistance High-efficiency drain port and injection valves Smaller footprint for improved workspace allocation Mobility with locking casters Shorter vapor path for faster evaporation and condensation Direct injection capability for continuous feeding of solution Continuous draining capability without the need to release vacuum or stop the system 1-year warranty on all mechanical parts. Does not include glassware/moving parts Specifications: Model 50L NEOCISION Rotary Evaporator Optimum Ambient Temperature 5~25C / 41~105.8F Glass Material GG-17 High Borosilicate Power (V/Hz) 220-240V 60Hz Single Phase Speed Regulation Digital Step-less Regulation Rotation Speed 0-120 RPM Set Temperature 0-99C / 0-210F Temperature Control Digital Temperature Control Maximum Vacuum Pressure -29.8 inHg Evaporating Flask Capacity 50L (20000ml) Receiving Flask Capacity 20L (10000ml) Condenser Style Main + Auxiliary Vertical Double Helix Evaporation Capacity Alcohol >/= 12 L/H Heater Max Current Draw (Amps) 25 Water Bath Material 304 Stainless Steel Water Bath Size 17.7 x 9.8 in. Lifting Function Electric Lifting Stroke 190mm / 7.5 in. Total Power Consumption (kW) 4.1 kW Dimensions 49 x 24 x 83 in. Weight 155 lbs Vacuum Connection 10mm / 3/8 in. Barb Condenser Connection 10mm / 3/8 in. Barb Warranty 1 Year Excluding: Moving Parts Glassware Certifications ETL Rotovap Quick Start Guide This guide gives basic quick start instructions for rotovaps. It is intended to provide a starting point for learning the process. Parameters should be adjusted to suit specific needs. Clean and assemble unit. Make sure all pieces are cleaned and sterilized using an alcohol solution. Connect chiller to condenser and set to 0C (32F). Always fill a rotovap condenser from the top down (chiller output to top of condenser, chiller input to bottom of condenser). Connect vacuum pump to cold trap and connect cold trap to vacuum port on rotovap. Turn on heat bath and set to 40C (113F). Once heat bath, chiller and cold trap have reached desired temperatures, turn on rotovap motor and set speed to approximately 100 RPM (does not have to be precise). Keep in mind, higher RPM’s will increase evaporation power but also increase heat load. Start vacuum pump and allow vacuum to pull down for a few minutes before injection. Once vacuum has been pulled to a sufficient level (does not have to be precise but should be below 100 Torr), using the injection valve, very slowly inject approximately 500 mL of solution into evaporating flask and then close the valve. Allow this small amount to begin evaporating. You may see the chiller begin to rise in temperature, this is called “priming” the rotovap. Once the temperature stops rising or all liquid is almost completely evaporated, open the injection valve again very slowly so that a small amount of liquid begins to enter the evaporating flask. Do not close injection valve this time but continue to allow solution to enter the evaporating flask. At this point you must try to match the input speed to the output speed. What this means is that you should be injecting the same amount of liquid into the rotovap that is equal to the amount of liquid dripping from the condenser into the receiving flask. You will know that the input speed and output speed are matched because the chiller will remain at a stable temperature. If the chiller begins to rise, then you are injecting too much liquid. Dial back the valve until the chiller stabilizes. Once everything is stabilized, you may walk away from the rotovap if necessary. Check every so often to make sure temperatures remain stable and evaporation continues efficiently. ***Note: All units are inspected for broken glass or parts before unit is shipped. If unit arrives damaged or glass is broken (this does not include minor imperfections or scuffs in glassware), Customer MUST contact BVV™ within 3 days of delivery to file a claim and receive a replacement part. If customer DOES NOT contact BVV™ within 3 days of delivery responsibility for replacement parts falls on the customer and they must pay for replacement pieces.*** ***Note: This item will ship by freight only.*** ***Glassware Safety Disclaimer: BVV™ is not responsible for failure of glassware which must be inspected before and after every use because it may eventually develop imperfections or damage through normal usage, mishandling, and stress caused by temperature variations. If an imperfection or damage is noted while inspecting the glassware DO NOT use the glassware because it can fail causing bodily harm or damage to the surrounding area.***.
$9,300.00
-
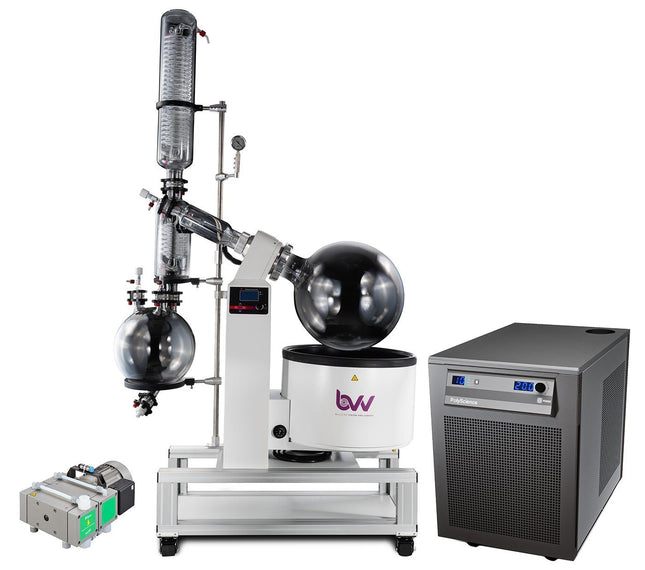

50L Neocision ETL Lab Certified Rotary Evaporator Turnkey System
50L Neocision ETL Lab Certified Rotary Evaporator Turnkey System 50L NEO Rotary Evaporator Turnkey System setup includes all the necessary components to successfully perform solvent recovery via rotary evaporation. A cold trap should always be used inline between your vacuum system and application to protect the pump from volatile vapors. 10-50L NEO and ECO Rotary Evaporator Diagram 50L NEO Rotary Evaporator Turnkey System setup includes: 50L Neocision ETL Lab Certified Rotary Evaporator Polyscience DuraChill 1.5HP Chiller w/ Turbine Pump 3/8" Gum Rubber - 100ft 3/8" Silicone Tubing - 25ft Welch BTpro100 Diaphragm Pump Adjustable Stainless Steel Hose Clamps This guide gives basic quick start instructions for rotovaps. It is intended to provide a starting point for learning the process. Parameters should be adjusted to suit specific needs. Clean and assemble unit. Make sure all pieces are cleaned and sterilized using an alcohol solution. Connect chiller to condenser and set to 0C (32F). Always fill a rotovap condenser from the top down (chiller output to top of condenser, chiller input to bottom of condenser). Connect vacuum pump to cold trap and connect cold trap to vacuum port on rotovap. Turn on heat bath and set to 40C (113F). Once heat bath, chiller and cold trap have reached desired temperatures, turn on rotovap motor and set speed to approximately 100 RPM (does not have to be precise). Keep in mind, higher RPM’s will increase evaporation power but also increase heat load. Start vacuum pump and allow vacuum to pull down for a few minutes before injection. Once vacuum has been pulled to a sufficient level (does not have to be precise but should be below 100 Torr), using the injection valve, very slowly inject approximately 500 mL of solution into evaporating flask and then close the valve. Allow this small amount to begin evaporating. You may see the chiller begin to rise in temperature, this is called “priming” the rotovap. Once the temperature stops rising or all liquid is almost completely evaporated, open the injection valve again very slowly so that a small amount of liquid begins to enter the evaporating flask. Do not close injection valve this time but continue to allow solution to enter the evaporating flask. At this point you must try to match the input speed to the output speed. What this means is that you should be injecting the same amount of liquid into the rotovap that is equal to the amount of liquid dripping from the condenser into the receiving flask. You will know that the input speed and output speed are matched because the chiller will remain at a stable temperature. If the chiller begins to rise, then you are injecting too much liquid. Dial back the valve until the chiller stabilizes. Once everything is stabilized, you may walk away from the rotovap if necessary. Check every so often to make sure temperatures remain stable and evaporation continues efficiently.
$22,850.00 - $25,700.00
-
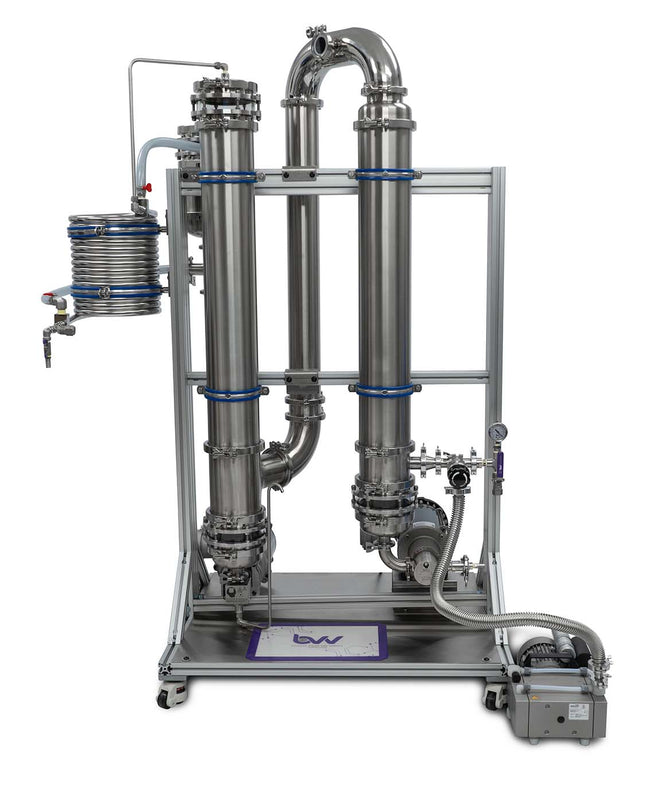

BVV 6" Falling Film Evaporator
BVV 6" Falling Film Evaporator Cutsheet Is your lab floor filled with a fleet of rotary evaporators? Looking to increase solvent recovery throughput? Our new and compact 20GPH Falling Film Evaporator (FFE) has the capability to maximize throughput and replace up to five 50L Rotary Evaporators. The BVV™ 20GPH Falling Film Evaporator is designed to evaporate ethanol that has been diluted in crude oil during a filtration or extraction process. By reducing the vapor pressure inside the system and metering the injection valve, the user can set the heat exchangers to the appropriate temperatures to efficiently evaporate solvent from their crude oil. We paired our FFE with reliable equipment that will keep operations running. End users are required to plumb the process inlet and outlet connections for both heat exchangers. They are supplied with 1.5” sanitary tri-clamp connections. BVV™ can assist with necessary parts needed for a permanent or temporary installation. Temporary installations may be necessary if your lab has limited fume hoods or space which is shared with other processing equipment. Below you will find key features, additional equipment included with the system and the power requirements for each, and real-life efficiencies that were tested. Key Features: · Compact rack design for use in fume hoods (39”x30”x75.5”) · Vernier scale metering valve for controlled injection · Accurate heater and chiller temperature control · Deep vacuum for effective solvent removal · Discharge pumps to eliminate constant reservoir draining and down time · Chemical resistant vacuum pump · Adaptable discharge outlets to customer preference · Insulation to limit thermal loses and reduce condensation (Not Pictured) · Sanitary tri-clamp and compression fittings · Pre-heat injection coil · Injection distribution plate · Tube in shell heat exchanger for efficient evaporation and condensation · Packable vapor path for reduction of contaminants and cleaner separation · Water reservoir for priming the heating system and expansion during operation Crude Discharge Pump Easily control discharge speed and collect your extract directly from the 3/8" tube via a collection vessel or swage on a fitting of your preference to pump collected extract to a secondary location. Eliminate constant reservoir draining and operate continuously. Metered Solvent Injection Effectively repeat efficiency and throughput with our vernier scale metering valve. Easy to dial in the desired efficiency and throughput desired by the user. Distribution Plate Directs the injected solvent to be evenly distributed across all tubes in the heat exchanger which maximizes the effective heating surface area. Solvent Discharge and Vacuum Pump The solvent discharge pump eliminates the need for a reservoir and allows you to pump recovered solvent to any desired secondary location. The vacuum pump manifold gives you easy vacuum control during the complete operation. POWER REQUIREMENTS The equipment listed below is included with the system. Check power requirements and amp draw prior to purchasing. Equipment Purpose Power Requirement Amp Draw Notes 2GPM Ethanol Recovery Pump for Vacuum Pump for Ethanol Recovery Discharge 230V 1-Phase 2.4 2GPM Max Flow Rate, Vacuum Check Valve Beaker and Wrench Explosion Proof Oil Pump Pump for Oil Recovery Discharge 230V 1-Phase 1.1 90L/hr. Max Flow Rate, Vacuum Check Valve Welch BTpro100 Diaphragm Pump Vacuum Pump for System 115 1-Phase 3.4 3.5 CFM, 6 Torr Ultimate Vacuum Total Amp Draw 6.9 EFFICIENCY We are proud to present real data with running parameters and efficiencies that reflect the actual operation of our system. Below you will find the tested throughputs and efficiencies that our FFE is capable of handling. Throughput 11 GPH 18 GPH 20 GPH 22 GPH 24 GPH Efficiency 98% 97% 94% 90% 85% ** Efficiency calculated at 10:1 ratio (Ethanol : Crude Oil) with heater temperature of 160°F. Crude is fully dewaxed when going into the falling film evaporator. Solution starts at room temperature. Speeds may differ based on dilution ratio, crude quality, and running parameters. **
$35,000.00
-
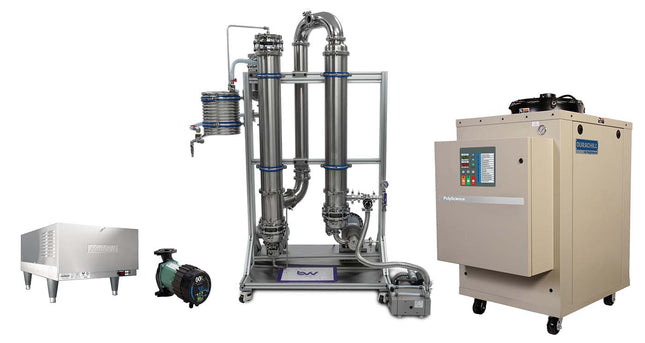

6" Turnkey Falling Film Evaporator
BVV 6" Turnkey Falling Film Evaporator Cutsheet Is your lab floor filled with a fleet of rotary evaporators? Looking to increase solvent recovery throughput? Our new and compact 20GPH Falling Film Evaporator (FFE) has the capability to maximize throughput and replace up to five 50L Rotary Evaporators. The BVV™ 20GPH Falling Film Evaporator is designed to evaporate ethanol that has been diluted in crude oil during a filtration or extraction process. By reducing the vapor pressure inside the system and metering the injection valve, the user can set the heat exchangers to the appropriate temperatures to efficiently evaporate solvent from their crude oil. We paired our FFE with reliable equipment that will keep operations running. End users are required to plumb the process inlet and outlet connections for both heat exchangers. They are supplied with 1.5” sanitary tri-clamp connections. BVV™ can assist with necessary parts needed for a permanent or temporary installation. Temporary installations may be necessary if your lab has limited fume hoods or space which is shared with other processing equipment. Below you will find key features, additional equipment included with the system and the power requirements for each, and real-life efficiencies that were tested. Key Features: · Compact rack design for use in fume hoods (39”x30”x75.5”) · Vernier scale metering valve for controlled injection · Accurate heater and chiller temperature control · Deep vacuum for effective solvent removal · Discharge pumps to eliminate constant reservoir draining and down time · Chemical resistant vacuum pump · Adaptable discharge outlets to customer preference · Insulation to limit thermal loses and reduce condensation (Not Pictured) · Sanitary tri-clamp and compression fittings · Pre-heat injection coil · Injection distribution plate · Tube in shell heat exchanger for efficient evaporation and condensation · Packable vapor path for reduction of contaminants and cleaner separation · Water reservoir for priming the heating system and expansion during operation · The certified model is 22 State certified by PRV Engineers and includes an Infield Verification by PRV Engineers within the purchase price. States include but are not limited to: Alabama, Arizona, Arkansas, California, Colorado, Connecticut, Florida, Illinois, Kansas, Louisiana, Maine, Massachusetts, Missouri, Nevada, North Carolina, Oklahoma, Oregon, Texas, Vermont, Washington, West Virginia, and Wyoming Crude Discharge Pump Easily control discharge speed and collect your extract directly from the 3/8" tube via a collection vessel or swage on a fitting of your preference to pump collected extract to a secondary location. Eliminate constant reservoir draining and operate continuously. Metered Solvent Injection Effectively repeat efficiency and throughput with our vernier scale metering valve. Easy to dial in the desired efficiency and throughput desired by the user. Distribution Plate Directs the injected solvent to be evenly distributed across all tubes in the heat exchanger which maximizes the effective heating surface area. Solvent Discharge and Vacuum Pump The solvent discharge pump eliminates the need for a reservoir and allows you to pump recovered solvent to any desired secondary location. The vacuum pump manifold gives you easy vacuum control during the complete operation. POWER REQUIREMENTS The equipment listed below is included with the system. Check power requirements and amp draw prior to purchasing. Equipment Purpose Power Requirement Amp Draw Notes Hubbell Process Water Heater Heater for Heat Exchanger Column (Evaporation) 240V 3-Phase 87 36kW Heating Capacity Taco ECM High-Efficiency Circulator Water Circulator for Heater 115V 1-Phase 2.5 Max flow rate 52GPM 10 Ton Low Temp Glycol Chiller Chiller for Heat Exchanger Column (Condensation) 230V 3-Phase 64 10 ton Cooling Capacity 2GPM Ethanol Recovery Pump for Vacuum Pump for Ethanol Recovery Discharge 230V 1-Phase 2.4 2GPM Max Flow Rate, Vacuum Check Valve Beaker and Wrench Explosion Proof Oil Pump Pump for Oil Recovery Discharge 230V 1-Phase 1.1 90L/hr. Max Flow Rate, Vacuum Check Valve Welch BTpro100 Diaphragm Pump Vacuum Pump for System 115 1-Phase 3.4 3.5 CFM, 6 Torr Ultimate Vacuum Total Amp Draw 174.4 EFFICIENCY We are proud to present real data with running parameters and efficiencies that reflect the actual operation of our system. Below you will find the tested throughputs and efficiencies that our FFE is capable of handling. Throughput 11 GPH 18 GPH 20 GPH 22 GPH 24 GPH Efficiency 98% 97% 94% 90% 85% ** Efficiency calculated at 10:1 ratio (Ethanol : Crude Oil) with heater temperature of 160°F. Crude is fully dewaxed when going into the falling film evaporator. Solution starts at room temperature. Speeds may differ based on dilution ratio, crude quality, and running parameters. **
$69,000.00 - $74,000.00
-
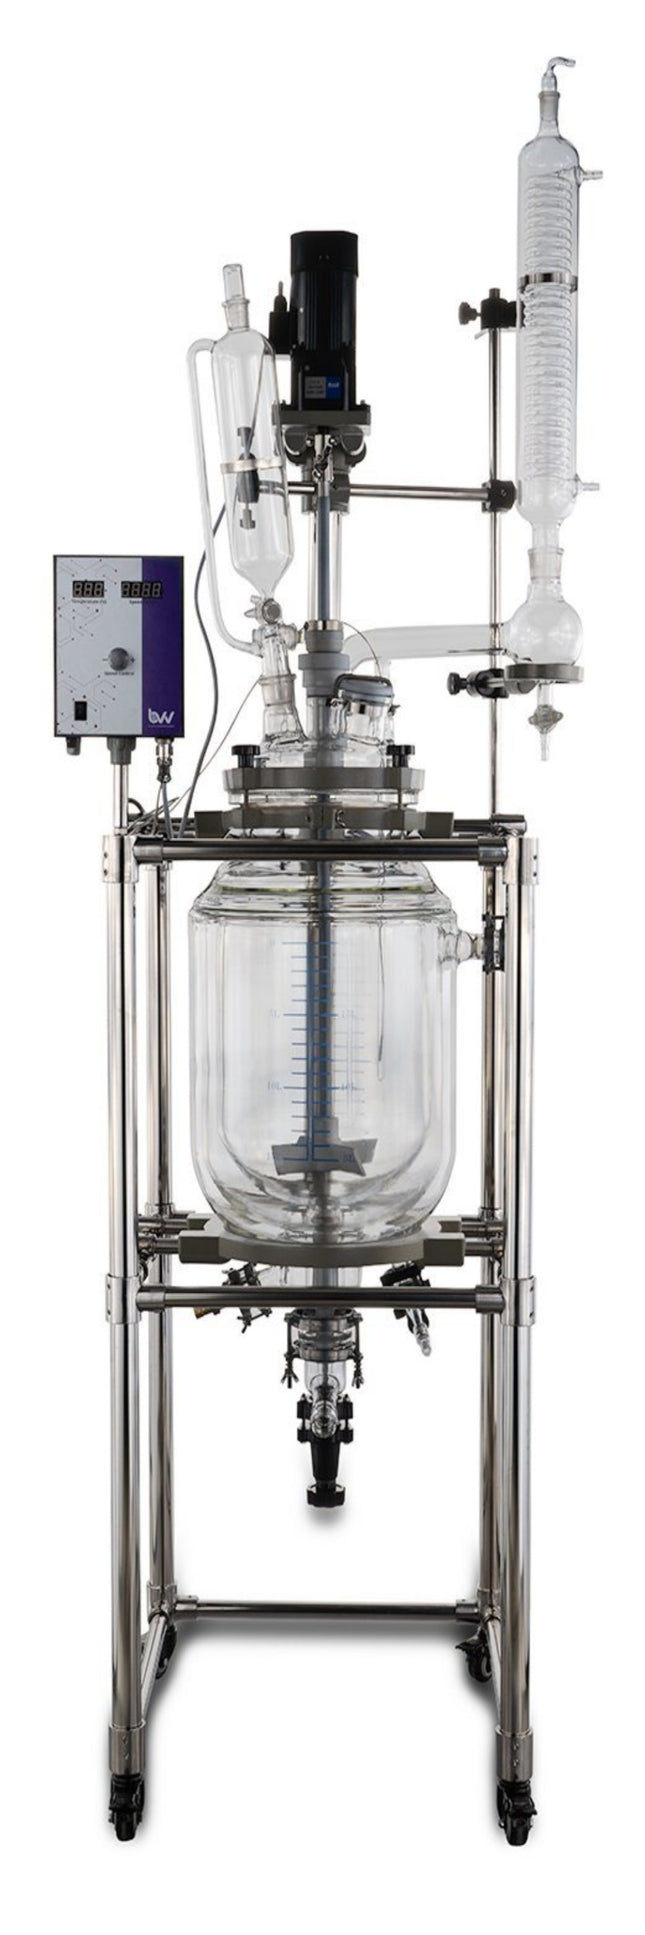

20L Double Jacketed Glass Reactor
The Double Jacketed Glass Reactors are ideal for reaction applications involving extreme temperatures. They include an inner jacket for cooling or heating and an outer jacket for vacuum insulation. The outer jacket also alleviates moisture buildup so you can always see exactly what's happening inside the system. Jacketed Reaction vessels are used for synthetic reaction of different types of materials in a controlled temperature and vacuum environment. Reaction Vessels can be used as an all in one tool for extraction, refinement, distillation, and homogenization. Consisting of an inner vessel with either one or two jackets, a reactor uses temperature differentials created by a chiller to change it's internal environment. Reaction vessels also operate under vacuum making them ideal for any atmospheric sensitive applications. They can be made out of glass or stainless steel and range in volume from 1L to 100L+. To run a reaction vessel most efficiently, you will need a chiller capable of bringing the internal temperature of the vessel to an extreme low, a chemical resistant vacuum pump, and a cold trap to catch any vapors that might pass through the condenser during operation. BVV™ Jacketed Reaction vessels are simple, cost-effective, and durable machines that allow you to process material quickly and efficiently. BVV 20L and 50L Glass Reactor Diagram Specifications: Glass Material: GG-17 High Borosilicate Glass Internal Volume: 20L 6.75L Jacket Capacity Shelf Material: Aluminum Alloy Homogenizer Power: 110V/60Hz Homogenizer Speed: 0-400 RPM Digital Homogenizer Control Digital temperature probe readout included Double Jacket 3/4" Jacket Connections 1/4" and 3/8" Vacuum Connections Length: 20 in. Width: 30 in. Height: 76 in. Does not include: Chiller, Vacuum System, Cold Trap Requires Assembly *Notice to customers: All units are inspected for broken glassware or parts before leaving BVV™. If the unit arrives damaged (this does not include minor imperfections or scuffs in glassware), the customer MUST contact BVV™ within 72 hours from carrier delivery to file a claim. If the customer DOES NOT contact BVV™ within 72 hours from carrier delivery, then BVV™ cannot issue any replacement(s) or compensation for the item; a new purchase will need to be made for a replacement. ***Disclaimer: This unit is intended for LEGAL purposes only, to be used in accordance with local laws and ordinances. Use only in WELL VENTILATED AREAS!*** ***Glassware Safety Disclaimer: BVV™ is not responsible for failure of glassware which must be inspected before and after every use because it may eventually develop imperfections or damage through normal usage, mishandling, and stress caused by temperature variations. If an imperfection or damage is noted while inspecting the glassware DO NOT use the glassware because it can fail causing bodily harm or damage to the surrounding area.***
$4,500.00 - $4,900.00
-
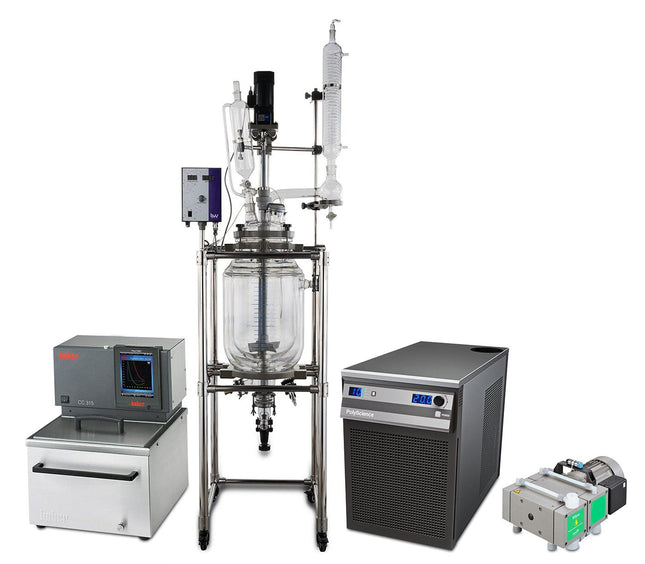
20L Turnkey Reactor Kit
20L Turnkey Reactor Kit The BVV 20L Double Jacketed Glass Reactor Kit is the ideal solution for small to medium-sized solvent recovery and decarboxylation applications. This kit includes everything to get you up and running including a Single 20L triple-layer Glass Reactor with Condenser, either a BVV 19L Heated circulator capable of heating to 220C or a UL-listed Huber CC-315B capable of heating up to 300C, a 1HP Polyscience 6160T for chilling the condenser, a Welch BTpro100 for vacuum, 25ft of 3/8" Gum rubber tubing for vacuum connections, 20ft of reinforced PVC hose for the chiller, 1/2" Stainless Steel JIC Hoses for the heater, 5 Gallons of Therminol Heat transfer fluid and 5 Gallons of Propylene glycol. 20L Double Jacketed Glass Reactor Specifications Glass Material: GG-17 High Borosilicate Glass Internal Volume: 20L 6.75L Jacket Capacity Shelf Material: Aluminum Alloy Homogenizer Power: 110V/60Hz Homogenizer Speed: 0-400 RPM Digital Homogenizer Control Digital temperature probe readout included Double Jacket 3/4" Jacket Connections 1/4" and 3/8" Vacuum Connections Length: 20 in. Width: 30 in. Height: 76 in. Polyscience 6100 1 HP Chiller Specifications 6100 Series 1 HP Chiller with Turbine Pump, 100psi; 13.2l/min Display: LED Working Temperature Range C: -10 to 40 Temperature Stability: +/-0.1 Temperature Calibration Capability: 1-point Pump Type: Turbine Working Temperature Range F: 14 to 104 Working Temperature Range C: -10 to 40 Reservoir Capacity (gallons): 1.11 Reservoir Capacity (liters): 4.2 Reservoir Cover: Screw-on cap Cleanable Air Filter: Yes Cleanable Fluid Filter: Yes Temperature Stability F: +/-0.2 Temperature Stability C: +/-0.1 Display: LED Display Resolution (Read): 0.1 Pump Type: Turbine Process Connections: 1/2" FNPT Over-Temperature Protection / Failsafe Heater Control: Yes Reservoir Liquid Level Indicator: Yes Reservoir Drain: Yes Cool Command Refrigeration Technology: Yes WhisperCool Environmental Control Technology: Yes Maximum Ambient Temperature F: 95 Maximum Ambient Temperature C: 35 Overall Dimensions (LxWxH inches): 27.6 x 14.5 x 22.6 Overall Dimensions (LxWxH cm): 70 x 36.8 x 57.5 Compressor Size (HP): 1 Refrigerant: R134a Shipping Weight (pounds): 199 Shipping Weight (kilograms): 90 Welch BTpro100 Specifications Model BTpro100 Free Air Displacement@60Hz,lpm(CFM) 100(3.5) Ultimate Vacuum Pressure, Torr 6 Maximum Vacuum, in. Hg 29.7 Horsepower, HP (watts) 0.5(390) Built-in adjustable vacuum - Gas Ballast Yes Head Material PTFE Diaphragm PTFE Inlet/outlet Connection NW16 flange1 Agency (National Recognized Lab) cUL Weight, lbs (kg) 40.3(18.3) Overall DimensionsLxWxH in.(cm) 9x15x7(23x38x18) Shipping Weight, lbs(kg) 48.5 (22) Shipping Carton DimensionsLxWxH in.(cm) 18.9x12.6x11.8(48x32x30) HUBER CC-315B Specifications Common Specifications Temperature range (-20) 28...300 °C Temperature stability ±0.02 °C Temperature control TAC, self-optimizing (True Adaptive Control) Controller Pilot ONE (E-grade "basic") Safety class III / FL Protection class IP20 Dimensions (W x D x H) 13.19 x 15.04 x 17.05 inches Weight 48.51 pounds Heating / cooling capacity Heating capacity 3 - 3,5 kW Circulation pump Pressure pump max. 25 lpm : 0,7 bar | 6.6 gpm ; 10.15 psi Suction pump max. 18.5 lpm : 0,4 bar | bar 4.89 gpm ; 5.8 psi Pump connection M16x1 AG male Permissible viscosity 50 mm²/s Connections Pt100 connection Pt100 Digital interface RS232, Ethernet, USB Device, USB Host Operating data Old sku 2007.0003.01 Permissible ambient temp. 5...40 °C Bath opening W x D / BD 10.63 x 5.71 / 7.87 inches Bath volume 15 Liters | 3.96 gal Filling volume min. 11.5 Liters | 3.04 gal Power supply 208V 2~ 60Hz Current max. 16 A Fusing 20 A
$22,830.00 - $29,700.00
-
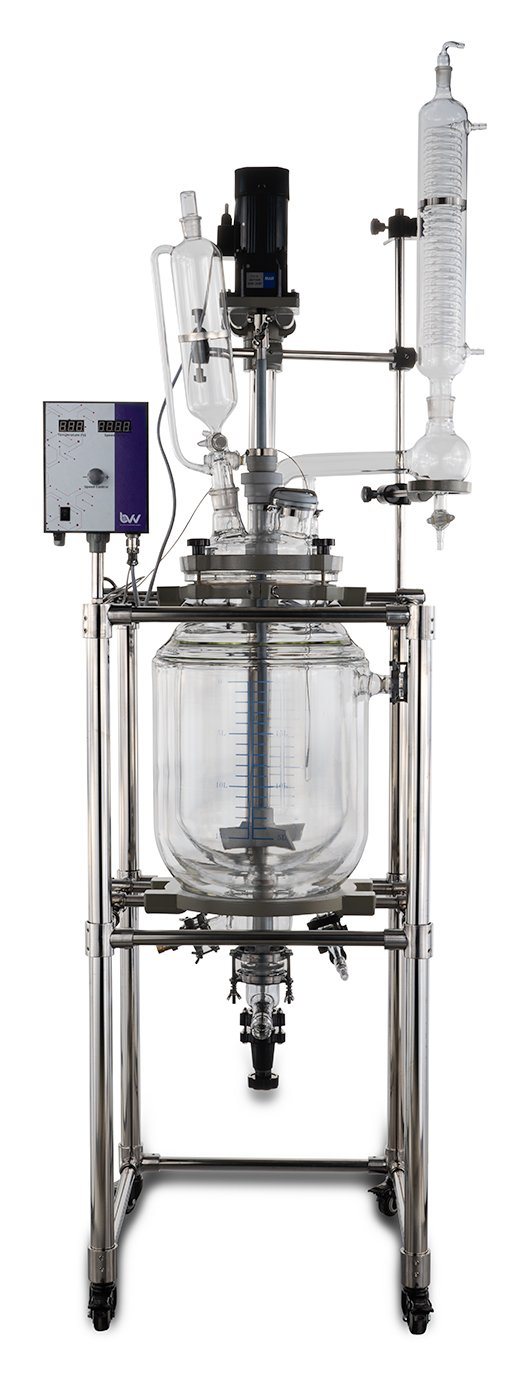

50L Double Jacketed Glass Reactor
The Double Jacketed Glass Reactors are ideal for reaction applications involving extreme temperatures. They include an inner jacket for cooling or heating and an outer jacket for vacuum insulation. The outer jacket also alleviates moisture buildup so you can always see exactly what's happening inside the system. Jacketed Reaction vessels are used for synthetic reaction of different types of materials in a controlled temperature and vacuum environment. Reaction Vessels can be used as an all in one tool for extraction, refinement, distillation, and homogenization. Consisting of an inner vessel with either one or two jackets, a reactor uses temperature differentials created by a chiller to change it's internal environment. Reaction vessels also operate under vacuum making them ideal for any atmospheric sensitive applications. They can be made out of glass or stainless steel and range in volume from 1L to 100L+. To run a reaction vessel most efficiently, you will need a chiller capable of bringing the internal temperature of the vessel to an extreme low, a chemical resistant vacuum pump, and a cold trap to catch any vapors that might pass through the condenser during operation. BVV™ Jacketed Reaction vessels are simple, cost-effective, and durable machines that allow you to process material quickly and efficiently. BVV 20L and 50L Glass Reactor Diagram Specifications: Glass Material: GG-17 High Borosilicate Glass Internal Volume: 50L 10.5L Jacket Capacity Shelf Material: Aluminum Alloy Homogenizer Power: 110V/60Hz Homogenizer Speed: 0-400 RPM Digital Homogenizer Control Digital temperature probe readout included Double Jacket 3/4" Jacket Connections 1/4" and 3/8" Vacuum Connections Length: 24 in. Width: 30 in. Height: 90 in. Does not include: Chiller, Vacuum System, Cold Trap Requires Assembly ***Note: All units are inspected for broken glass or parts before unit is shipped. If unit arrives damaged or glass is broken (this does not include minor imperfections or scuffs in glassware), Customer MUST contact BVV™ within 3 days of delivery to file a claim and receive a replacement part. If customer DOES NOT contact BVV™ within 3 days of delivery responsibility for replacement parts falls on the customer and they must pay for replacement pieces.*** ***Disclaimer: This unit is intended for LEGAL purposes only, to be used in accordance with local laws and ordinances. Use only in WELL VENTILATED AREAS!*** ***Glassware Safety Disclaimer: BVV™ is not responsible for failure of glassware which must be inspected before and after every use because it may eventually develop imperfections or damage through normal usage, mishandling, and stress caused by temperature variations. If an imperfection or damage is noted while inspecting the glassware DO NOT use the glassware because it can fail causing bodily harm or damage to the surrounding area.***
$5,000.00 - $5,400.00
-
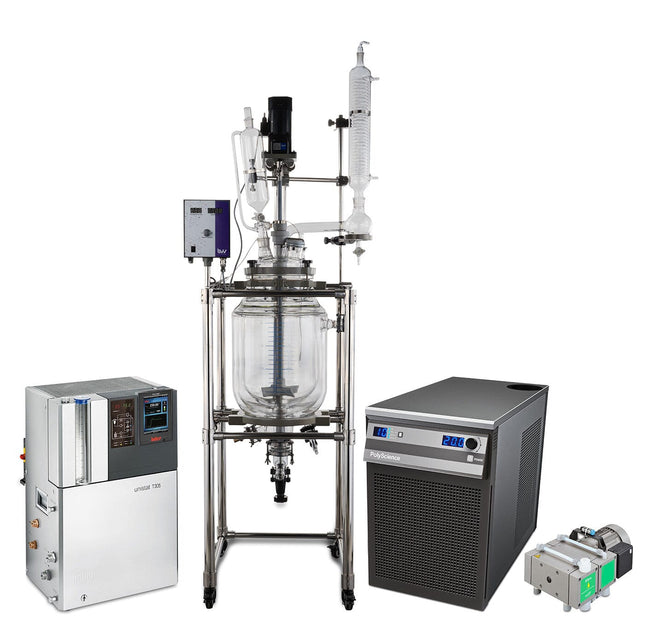
50L Turnkey Reactor Kit
50L Turnkey Reactor Kit The BVV 50L Double Jacketed Glass Reactor Kit is the ideal solution for small to medium-sized solvent recovery and decarboxylation applications. This kit includes everything to get you up and running including a Single 50L triple-layer Glass Reactor with Condenser, either a BVV 19L Heated circulator capable of heating to 220C or a UL-listed Huber T305 Capable of heating up to 300C, a 1HP Polyscience 6160T for chilling the condenser, a Welch BTpro100 for vacuum, 25ft of 3/8" Gum rubber tubing for vacuum connections, 20ft of reinforced PVC hose for the chiller, 1/2" Stainless Steel JIC Hoses for the heater, 5 Gallons of Therminol Heat transfer fluid and 5 Gallons of Propylene glycol. 50L Double Jacketed Glass Reactor Specifications Glass Material: GG-17 High Borosilicate Glass Internal Volume: 50L 10.5L Jacket Capacity Shelf Material: Aluminum Alloy Homogenizer Power: 110V/60Hz Homogenizer Speed: 0-400 RPM Digital Homogenizer Control Digital temperature probe readout included Double Jacket 3/4" Jacket Connections 1/4" and 3/8" Vacuum Connections Length: 24 in. Width: 30 in. Height: 90 in. Polyscience 6100 1 HP Chiller Specifications 6100 Series 1 HP Chiller with Turbine Pump, 100psi; 13.2l/min Display: LED Working Temperature Range C: -10 to 40 Temperature Stability: +/-0.1 Temperature Calibration Capability: 1-point Pump Type: Turbine Working Temperature Range F: 14 to 104 Working Temperature Range C: -10 to 40 Reservoir Capacity (gallons): 1.11 Reservoir Capacity (liters): 4.2 Reservoir Cover: Screw-on cap Cleanable Air Filter: Yes Cleanable Fluid Filter: Yes Temperature Stability F: +/-0.2 Temperature Stability C: +/-0.1 Display: LED Display Resolution (Read): 0.1 Pump Type: Turbine Process Connections: 1/2" FNPT Over-Temperature Protection / Failsafe Heater Control: Yes Reservoir Liquid Level Indicator: Yes Reservoir Drain: Yes Cool Command Refrigeration Technology: Yes WhisperCool Environmental Control Technology: Yes Maximum Ambient Temperature F: 95 Maximum Ambient Temperature C: 35 Overall Dimensions (LxWxH inches): 27.6 x 14.5 x 22.6 Overall Dimensions (LxWxH cm): 70 x 36.8 x 57.5 Compressor Size (HP): 1 Refrigerant: R134a Shipping Weight (pounds): 199 Shipping Weight (kilograms): 90 Welch BTpro100 Specifications Model BTpro100 Free Air Displacement@60Hz,lpm(CFM) 100(3.5) Ultimate Vacuum Pressure, Torr 6 Maximum Vacuum, in. Hg 29.7 Horsepower, HP (watts) 0.5(390) Built-in adjustable vacuum - Gas Ballast Yes Head Material PTFE Diaphragm PTFE Inlet/outlet Connection NW16 flange1 Agency (National Recognized Lab) cUL Weight, lbs (kg) 40.3(18.3) Overall DimensionsLxWxH in.(cm) 9x15x7(23x38x18) Shipping Weight, lbs(kg) 48.5 (22) Shipping Carton DimensionsLxWxH in.(cm) 18.9x12.6x11.8(48x32x30) HUBER T305 Specifications General Information & Temperature Controller Temperature range 65...300 °C Temperature stability ±0,02 °C Temperature control TAC, self-optimizing (True Adaptive Control) Controller Pilot ONE (E-grade "Basic") Safety class III / FL Protection class IP20 Dimensions (W x D x H) 425 x 250 x 631 mm | 16.73 x 9.84 x 24.84 inches Weight 37 kg | 81.59 pounds Heating / Cooling Capacity Heating capacity 4,8 kW Circulation Pump Pressure pump max. 45 lpm ; 0.9 bar | 11.89 gpm ; 13.05 psi Pump connection M24x1,5 AG male Permissible viscosity 50 mm²/s Connections Pt100 connection Pt100 Analogue input via optional Com.G@te Analogue output via optional Com.G@te Digital interface RS232, Ethernet, USB Device, USB Host Operating Data Old sku 1003.0022.01 Permissible ambient temp. 5 to 40 °C Filling volume min. 1.45 Liters | 0.38 gal Volume of expansion 2.8 Liters | 0.74 gal Power supply 208V 3~ 60Hz Current max. 15 A Fusing 15,5 A
$24,250.00 - $45,000.00
-
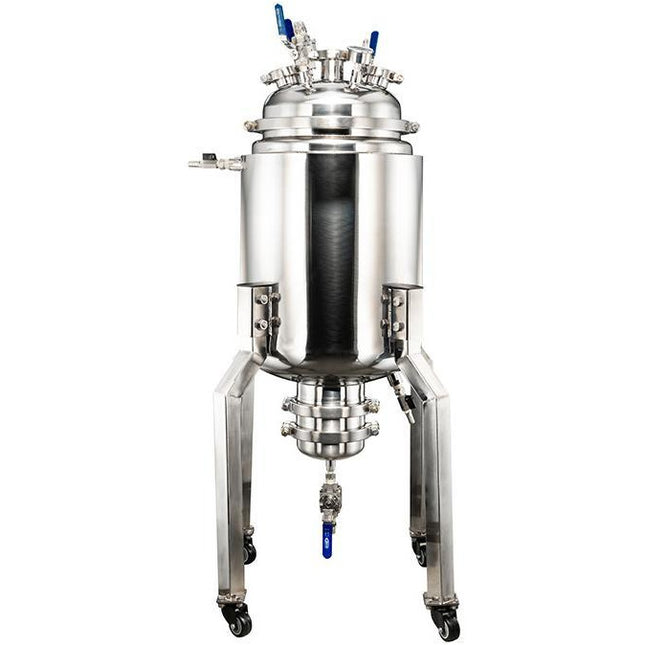

Pre-Built 50L Stainless Steel Jacketed Reactor
The 50L Stainless Steel Jacketed Reactor is designed for use with positive pressure. Glass reactors are only able to handle negative pressures which limits their usability. The vessel jacket can be used to circulate chilling fluid or as vacuum insulation. The vessel wild hold 50L (13 gallons) of liquid or 10 lbs of botanical material and the outer jacket capacity is 14.22L or 3.76 gallons of fluid. Reaction Vessel Applications: Ethanol Extraction Winterization Filtration Pre-Chilling Solvent Mixing & Homogenizing Key Features: Vessel Rated to 100 PSI MAX 1/2" MJIC Connection 1/4" MJIC Connection High-Pressure Clamps Minimal footprint 12" Tri-Clamp top ferrule for easy loading and unloading Lockable casters for mobility 6" Tri-Clamp bottom ferrule for easy loading and unloading Modular Tri-Clamp design Polycarbonate sight glasses for easy viewing 1/2" barb connection on the jacket Alcohol resistant silicone gaskets. Low temperature model comes with PTFE gaskets and Borosilicate sight glasses.
$2,075.00
-
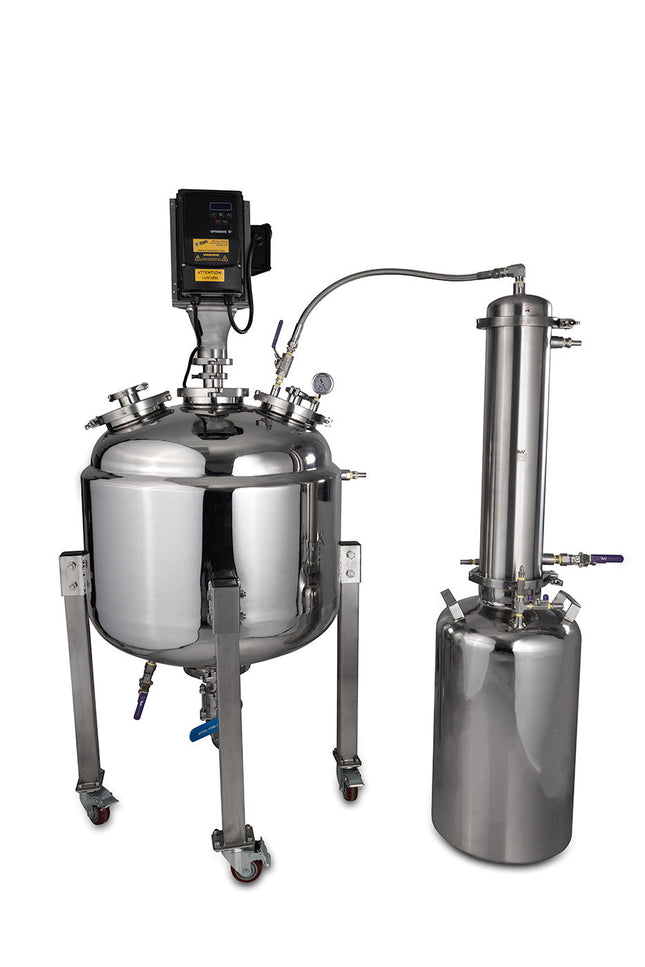

Jacketed Reactor with Motor and Collection Vessel
Jacketed Reactor with Motor and Collection Vessel This jacketed reactor kit includes your choice of a C1D1 motor, standard motor, or non-electric air powered motor (air compressor required). If using an electric motor it will require wiring to the included speed controller. Using the jacketed reactor to heat your solution, use your reactor to mix your solution during the heating process. The condenser and collection vessel allow you to recover residual solvents up to 100L. The collection vessel includes a dip tube to empty the vessel and a 1/4" JIC flare to input pressure into the base to assist in emptying the tank through the dip tube. This system does NOT include a heater or chiller, please inquire with your account representative for recommendations based on your application! Jacket connections are 1/2" hose barbs. Mixer Type Pneumatic Electric C1D1 Electric Horsepower 3/4 HP 3/4 HP 1 HP Power Air Compressor 120V 220V 1ph Reactor Size 150L Collection Size 50L / 100L Jacket Connections 1/2" Hose Barb
$6,760.00 - $14,200.00
-
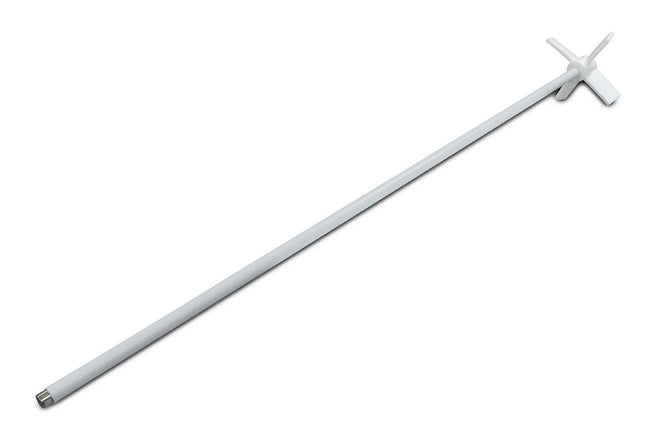

50LTGR-V3 Replacement Parts
50LTGR-V3 Replacement Parts BVV Replacement parts for 20L and 50L glass reactors. They are compatible with SKU: 20LTGR-V3 and SKU: 50LTGR-V3
$40.00 - $710.00
-
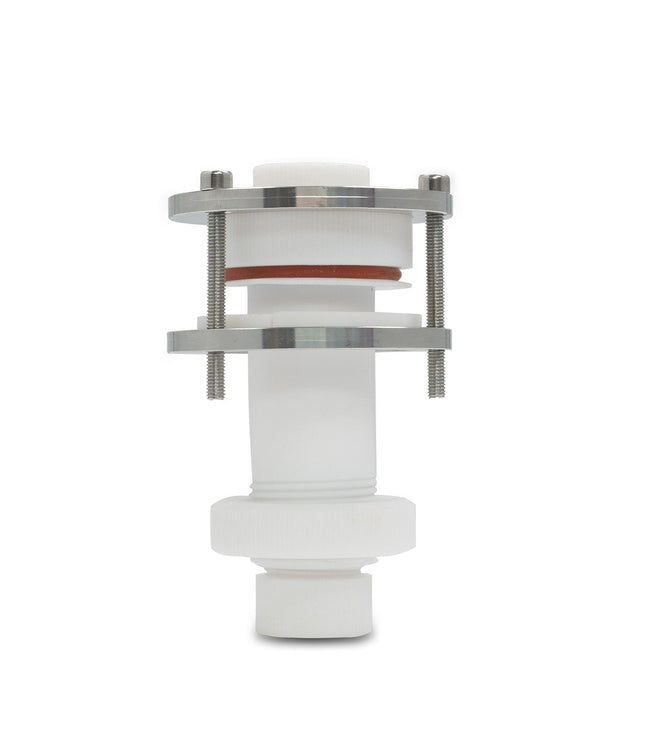

50L Glass Reactor Shaft Seal Kit 13MM Replacement
50L Glass Reactor Shaft Seal Kit 13MM Replacement This part is made for 50LTGR-V3 reactors. The body is PTFE and has viton shaft seals that are made for mixing shafts with 13mm diameters. It includes a clamp and retaining ring to attach to our glass reactor lids.
$500.00 $400.00
-
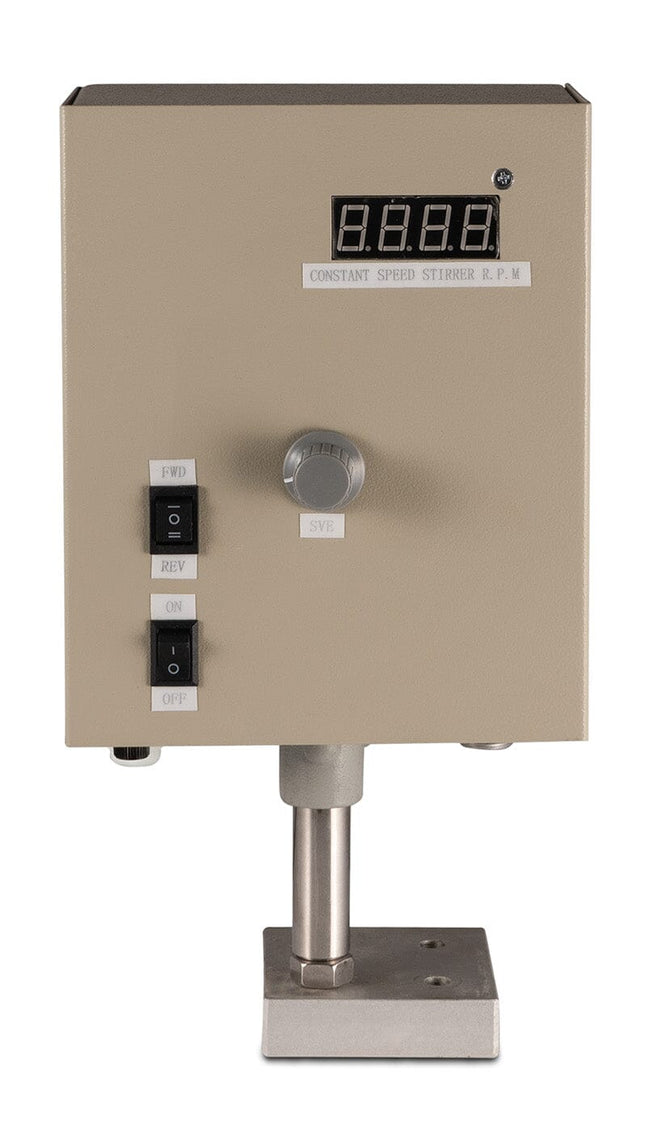

120W Motor/gearbox with FWD/REV controller
This controller/ motor can be retrofitted to fit a 20 or 50 liter glass reactor to have additional control to your process.
$850.00
-
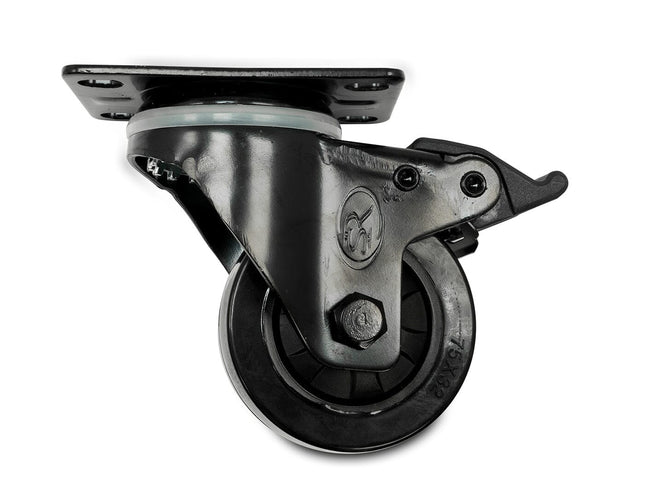

Caster Wheels for Reactors
Heavy duty replacement wheels to be used on 50L, 150L, and 300L BVV Stainless Steel Reactors.
$30.00
-
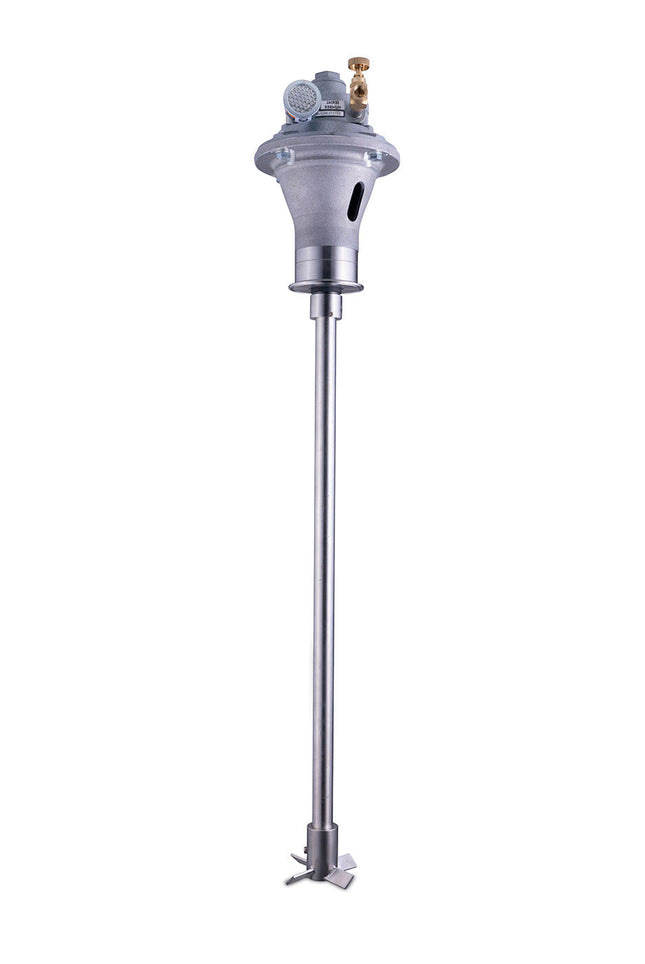

Tri-Clamp Direct Drive Mixers
Tri-Clamp Direct Drive Mixers 3/4 HP Air Direct Drive Tri-Clamp Mixer, (1) 4" PRL, 1" x 28" Exposed, Comp Mech Seal 3/4HP Shaft Length: 28" (From bottom of Tri-clamp) Air inlet port: 1/4" NPT Air adjustment valve to control speed Requires 30CFM @ 100 PSI air supply 3/4 HP Variable Speed Electric Direct Drive Tri-Clamp Mount Mixer 3/4 HP 115V Power supply Shaft Length: 28" (From bottom of Tri-clamp) 1 HP XP Direct Drive Tri-Clamp Mixer, Mech. Seal, (1) 5.5" HEI, 0.625" x 28" Exposed Shaft, VFD Motor: 1 HP, XPFC Inverter Duty, Class 1, Div 1, Group C&D; Class 2,Div 1, Group F&G, Temp Code T4, 10:1 Turndown, 208-230/460V,3Ph, 1760 RPM VFD Controler: 1HP Speed Controller with Digital RPM Readout in Outdoor Rated NEMA 4X Enclosure, 240V/1Ph (Mounted Outside of XP Area)w/ Local XP Control Package, 352 to 1760 RPM, Mounted to Motor ,Bare Wire Leads Mount: 3'' Sanitary Mount, 316SS Wetted faces Seal: 316 SS 60 Series 2-Piece Mechanical Inside Seal w/Viton ORings; Carbon-Graphite Rotary, Sintered Silicon Carbide Stationary, Hastelloy C-276 Springs, Dry Running, Sealed for Pressure/Vacuum Wetted Surface Finish: Mill Shaft: 0.625'' x 28'' Exposed Length, 316SS Bottom Impeller: 5.5'' High Efficiency Impeller, 3 Blades, Low Shear,316SS **On Site Wiring Required**
$4,620.00 - $7,900.00


