Distillation

436 products


  • Steam Distillation Kit Shop All Categories BVV

    Steam Distillation Kit

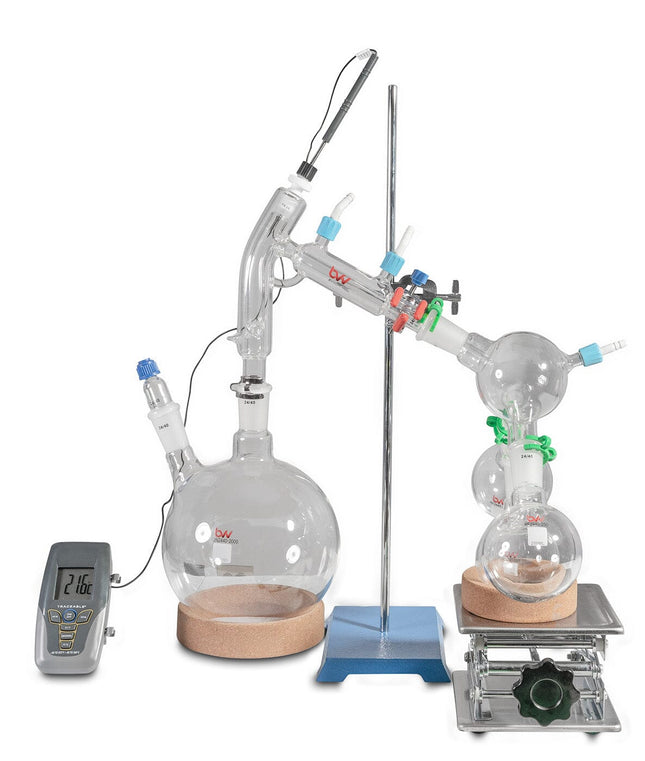
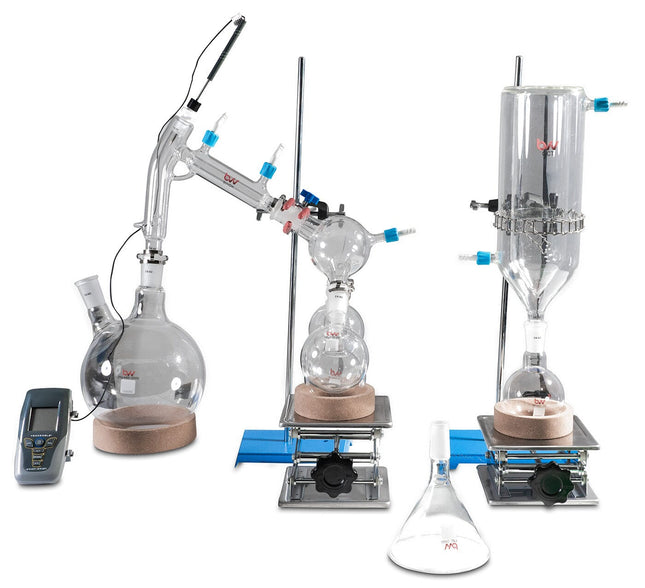
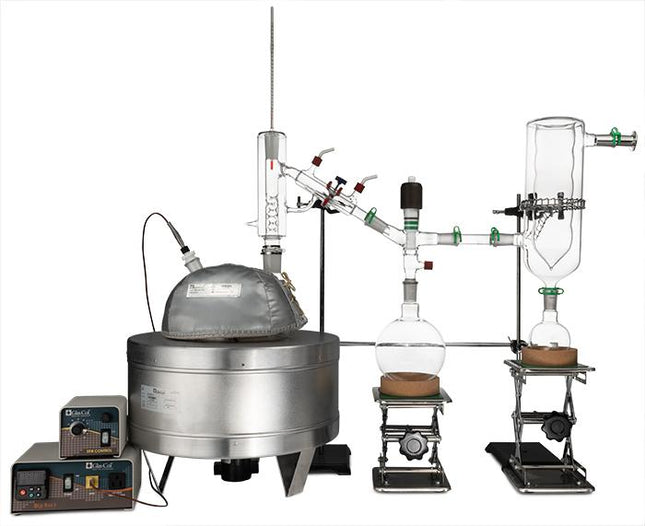
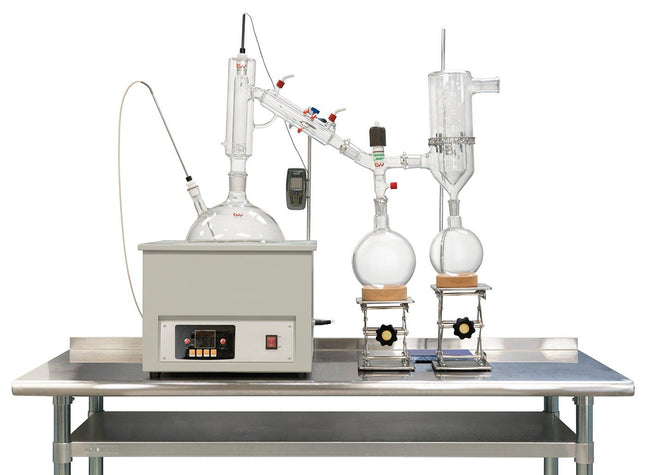
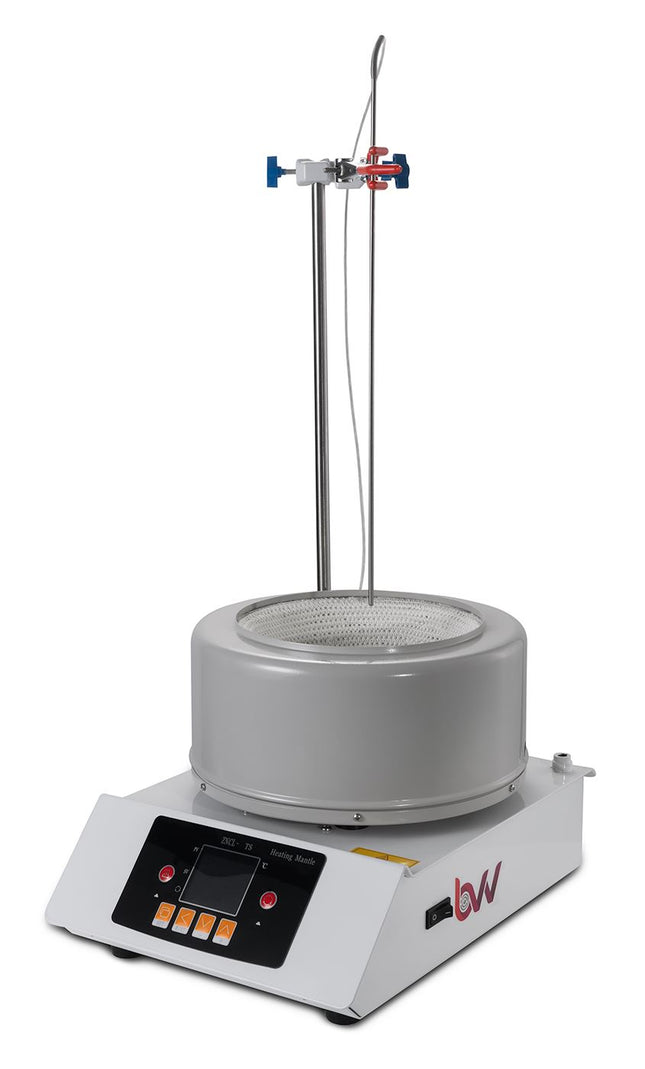
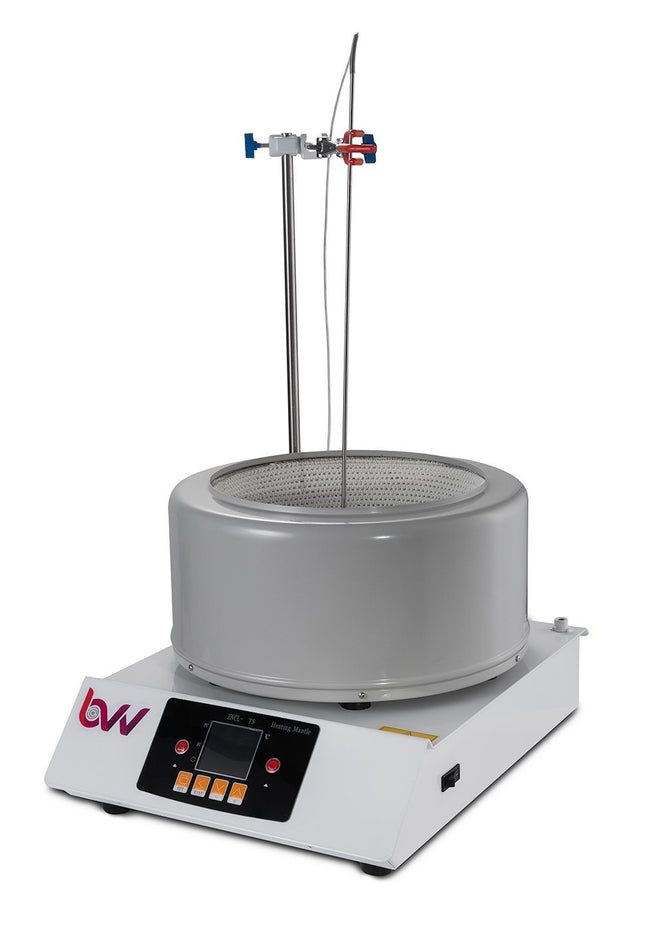
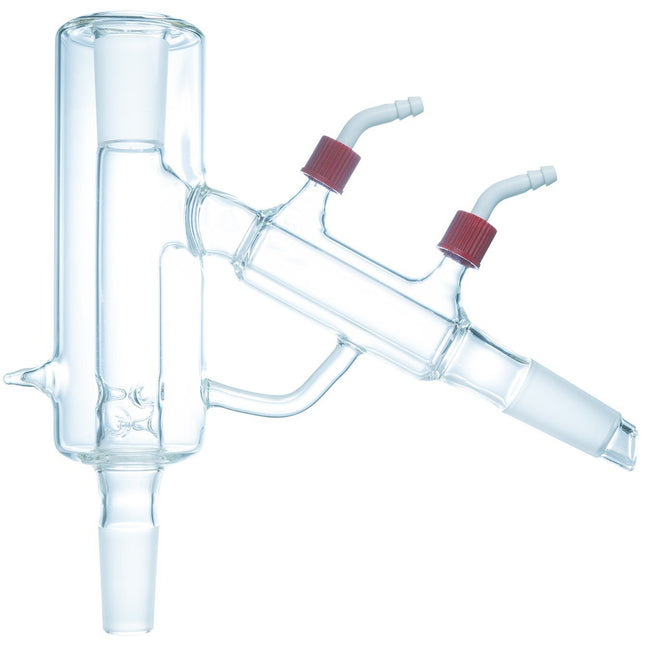
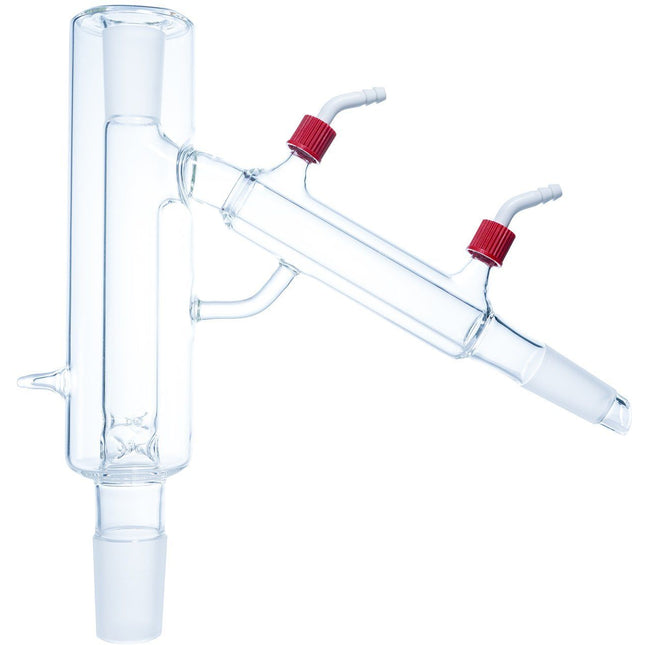
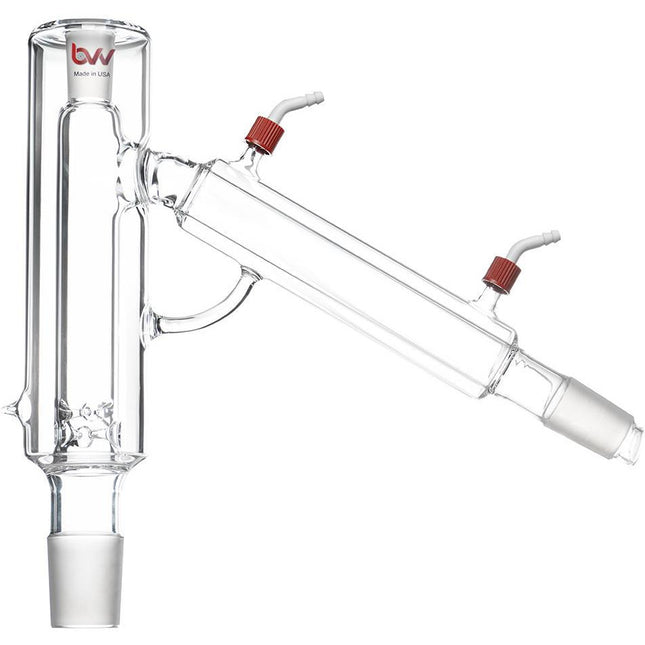
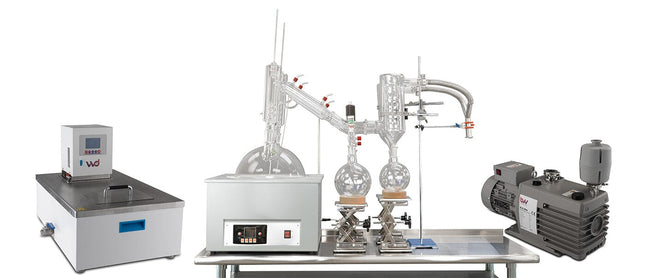
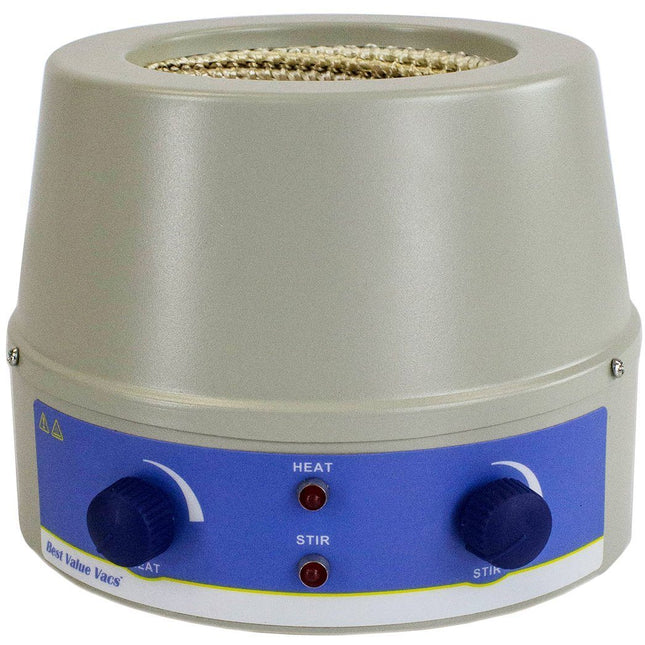
    Steam Distillation Steam distillation is the separation of organic compounds at low temperatures by boiling water. It is widely used for essential oils and terpenes because it does not degrade the organic material as a traditional fractional distillation does. Alternatively, steam distillation can extract a diverse array of immiscible substances. You can use steam distillation for “steam stripping” in petroleum refineries and separate commercially important organic compounds, including fatty acids. Our system is composed of a 6-piece glass distillation set up paired with a separatory funnel. Simply fill the boiling flask with water and the material flask with your organic material, then use the heating mantle to boil the water and pass the steam through the material flask. There is a port above the material flask on the U-Tube to insert a thermometer to more closely monitor the process. The steam passing around the material will lower the boiling point on the surface of the plant material and cause the terpenes to boil off at low temperatures. After moving through the U-Tube the steam and terpenes will condense in the graham condenser and drain into the flask below. After filling the flask, simply swap it and drain the contents into the separatory funnel to remove all water. Steam Distillation is beneficial due to the lower boiling point being able to reduce the decomposition of temperature-sensitive compounds. Here’s a look at the key benefits of steam distillation. Key Benefits of Steam Distillation: Streamlined method produces organic solvent-free products Possesses large capacity for processing at the industrial scale Requires no subsequent separation steps Requires less fuel for the steam boiler for extraction of oils Due to its wide application and inexpensive equipment, steam distillation can be a cost-effective investment Kit Includes: 2L Analog Mantle 2L Boiling Flask 2L Material Flask U-Tube 24/40 Thermometer Adapter 24/40 Male Stopper Graham Condenser 500ml Flask 500ml Separatory Funnel BVV™ Lab Stand Three Finger Clamp Boss Head Please Note: for any replacement parts, please contact us. 2L Dual Neck Flask (SKU: STEAM-01-2000ml) 2L Material Flask (SKU: STEAM-02) U-Tube (SKU: STEAM-03) Graham Condenser (SKU: STEAM-04)
    $495.00

  • 1L Distillation Kit Shop All Categories BVV

    1L Distillation Kit

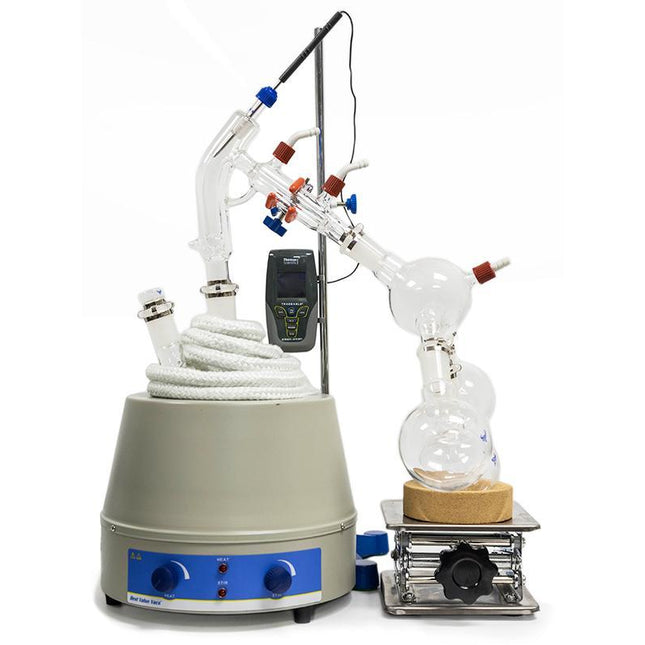
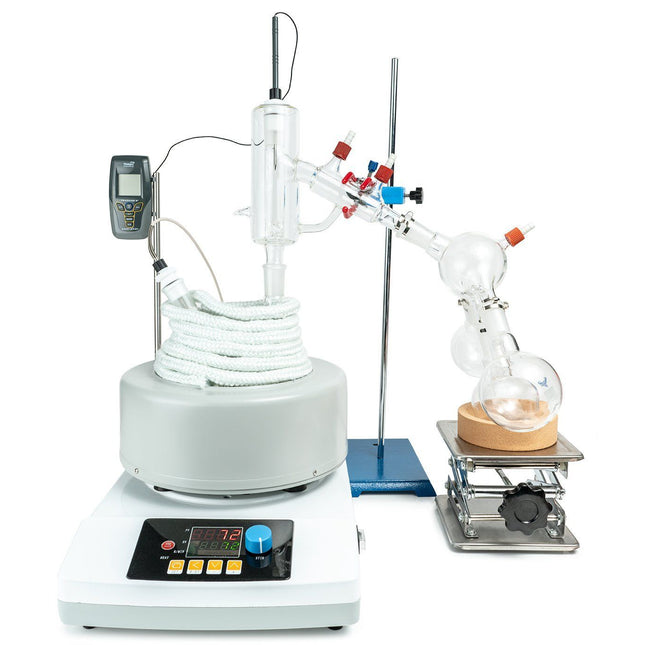
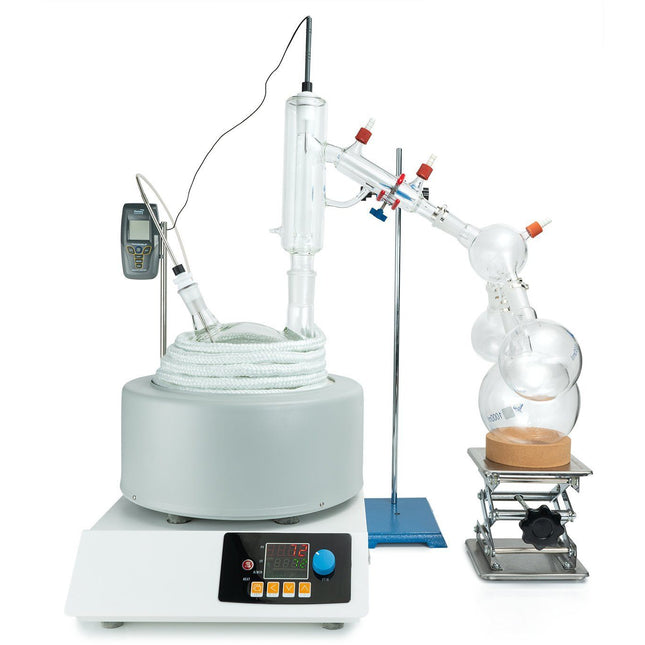
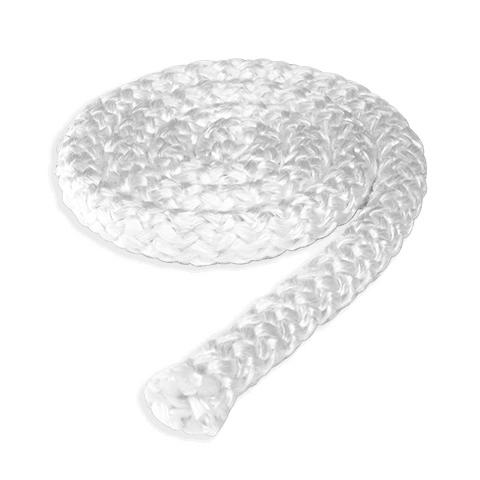
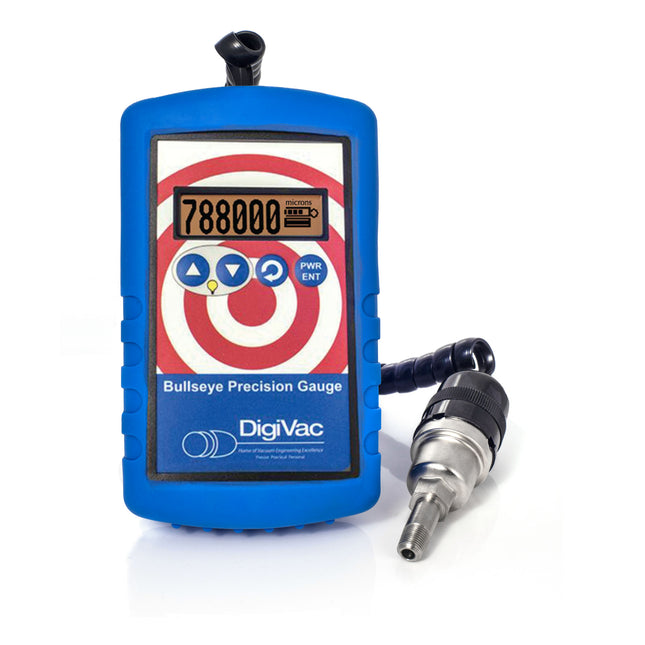
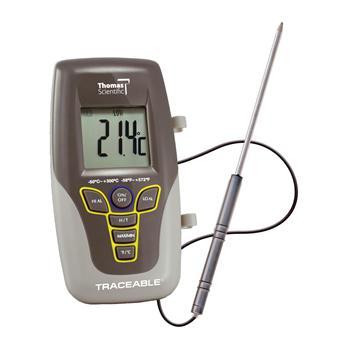
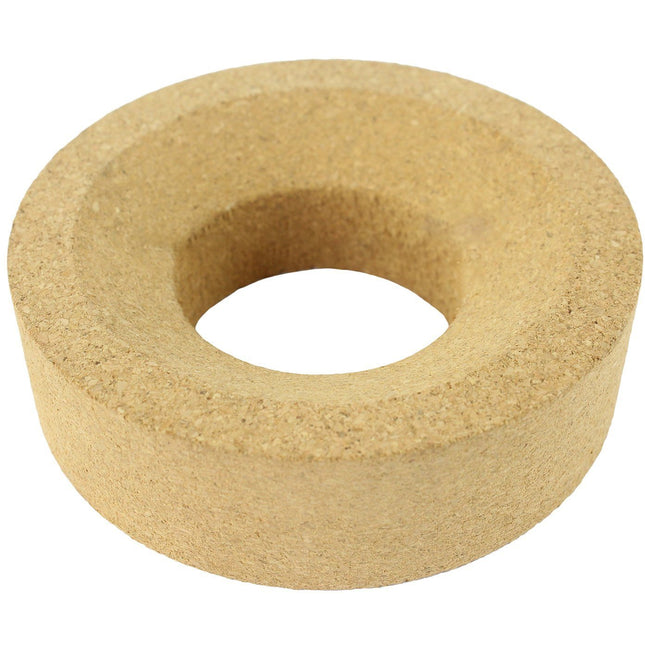
    1L Distillation Kit The 1L Distillation Kit is a simple, easy to use system designed for small personal use. It includes all stands, clamps, clips, and tubing needed to begin distilling immediately. This Kit Does NOT include a vacuum pump or circulator. Please see the below recommendations for both as well as recommended add-ons. Or check out our 1L Standard Distillation Turnkey Setup which includes vacuum pump and circulator. Recommended Vacuum Pumps: Pro Series 5.6CFM Corrosion Resistant Two Stage Vacuum Pump (premium option) Just Better 6 CFM 2 Stage Deep Vacuum Pump (USA made economy option) Best Value Vacs VE280 9CFM Two Stage Vacuum Pump (economy option) Recommended Circulator: Polyscience 7 Liter MX Heated Circulator (economy option) Polyscience 7 Liter MX Refrigerated Circulator (premium option with chilling capability) Recommended Add-Ons: Glass Dewar Style Cold Trap (recommended cold trap) Bullseye Precison Vacuum Gauge (premium vacuum gauge for measuring depth) CT40 or CT80 Electronic Cold Trap (electronic cold trap, dry ice replacement) Specifications: Boiling Flask Size: 1L Receveiving Flask Size: 250ml Batch Capacity approximate: 200-400 grams Run time: 4 to 8 hours dependent upon material composition and throughput Distillation Temperature Range: 140-250C (Do not exceed 250C) Recommended Condenser Temperature: 40-50C This Kit Includes: Glass Components: 1L 2-Neck Boiling Flask Short Path Head Triple Neck Cow Receiving Flask 3x 250ml Single Neck Round Bottom Flask 14/20 Thermometer Adapter 24/40 Thermometer Adapter 120mm Glass Funnel 14/20 Stopper 24/40 Stopper Accessories: Magnetic PTFE Stirring Bar Retriever 5 Pack of Metal Keck Clips Dow Corning High Vacuum Silicone Grease Tripod Stand 1L Analog Heating and Stirring Mantle 3 Finger Clamp Adjustable 0-70mm Boss Head -13mm 6" x 6" Scissor Jack 250-500ml Cork Stand 10ft of Vacuum Hose 10ft of Chiller Hose 1/4" Vacuum Manifold Traceable Kangaroo Thermometer - Digital 10 Pack of Adjustable Stainless Steel Tubing Clamps Fiberglass Insulation Rope 10 Feet 1.5 Gallon Cold Trap (2QT Tank) Dry Ice, Liquid Nitrogen w/ 2x 1/4" Barb Adapters Distillation Quick Start Guide This guide gives basic quick start instructions for distillation systems. It is intended to provide a starting point for learning the process. Parameters should be adjusted to suit specific needs, Before beginning distillation, ensure the following steps have been taken: Vacuum Pump is in good working order. Pump should be run against dry load to allow internals to warm up. Oil should be clear. Cloudy or dark oil should be changed. All glass components are in good working order and ready to be assembled A winterization and degassing procedure has been done to prepare oil for distillation Once all three of these steps have been completed, you are ready to begin distilling. Begin by placing stir bar in boiling flask and then load your material. This should be done using a funnel. A small amount of alcohol in the oil will give it a thinner consistency making it easier to transfer. Assemble all glassware and ensure each joint is properly greased. Do not use too much, as the vacuum pressure might pull some grease into the system. To ensure a full seal, spread grease in a circular motion by rotating glassware Attach circulator to condenser and set temperature to 50C. Allow circulator to reach temperature before beginning distillation. Connect vacuum pump to manifold. The manifold will allow you to isolate each individual component as well as let atmosphere into and out of the system. Connect receiving cow to cold trap. Connect cold trap to manifold. Connect vacuum gauge to manifold. At this point, ensure all connections are correct. Also ensure receiving cow is positioned to collect the first fraction in the far-left receiving flask. Circulator should be at its set temperature. Turn on vacuum pump to begin process. Turn on heat and set to 60C. Vacuum pump will begin to pull down and temperature will begin to rise. Watch the gauge to monitor vacuum pressure and stability. Start stir slower and increase speed with temperature. Once you are close to 60C, increase the temperature 20 degrees. Continue to raise the heat incrementally in 20-degree steps, increasing the set temperature as you near your set point. Increase temperatures incrementally until you reach 220C. You will see your first fraction somewhere between 180C and 190C or slightly before. This is the “heads” fraction. You will move to your second fraction when you see an increased reaction in the head, a slight color change toward golden, as well as a thickening of distillate. When this fraction hits, allow the distillate to “self-clean” the head for a minute or two then, rotate the cow to the middle receiving flask. Collect your “main body” fraction. You will see temps between 190-220C during this fraction. Continue to increase stirring speed as necessary. Reaction in the head may vary but it should never stop. As fluid level in the boiling flask decreases, increase stir speed. The final “tails” fraction is a mixture of the first and second fractions and should be saved for re-distillation later. Ideally, you want to turn the cow to the final flask before the tails fraction hits. The “tails” fraction has an obvious color change and will be darker than the “main body” fraction. You will see temps between 200-250C during this fraction. As fluid level in the boiling flask decreases even more, set stirring RPM higher (1000+ RPM). You may need to compensate with a bit more heat to finish of the final fraction as well. Once process is complete, stop heat, stop stir, and stop vacuum. Let atmosphere into the system. Be sure to properly store your distillate as exposure to air and light can cause oxidation. *Notice to Customers: All units are inspected for broken glassware or parts before leaving BVV™. If the unit arrives damaged (this does not include minor imperfections or scuffs in glassware), the customer MUST contact BVV™ within 72 hours from carrier delivery to file a claim. If the customer DOES NOT contact BVV™ within 72 hours from carrier delivery, then BVV™ cannot issue any replacement(s) or compensation for the item; a new purchase will need to be made for a replacement.  BVV™ is not responsible for the failure of glassware which must be inspected before and after every use because it may eventually develop imperfections or damage through normal usage, mishandling, and stress caused by temperature variations. If an imperfection or damage is noted while inspecting the glassware DO NOT use the glassware because it can fail, which can cause bodily harm or damage to the surrounding area.
    $900.00

  • 1L Standard Distillation Turnkey Setup Shop All Categories BVV

    1L Standard Distillation Turnkey Setup

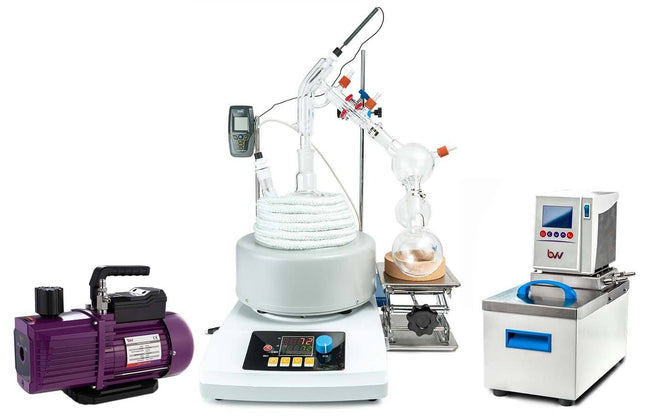
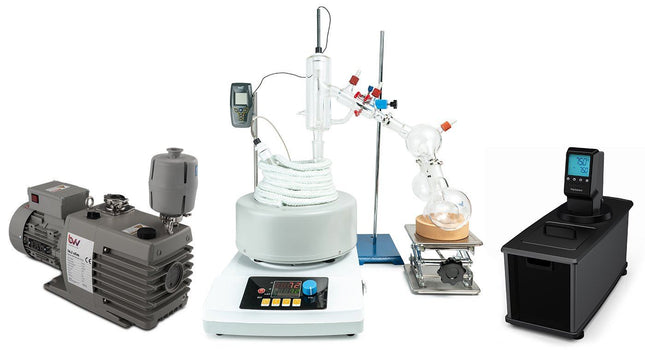
    1L Standard Distillation Turnkey Setup  The Standard Distillation Turnkey Setup includes all the components necessary to successfully perform distillation at an entry level price point. The Standard Turnkey Setup Includes: 1L Distillation Kit 1/4" Flare x 1/4" Barb Adapter BVV™ 5L Heated Circulator BVV™ V9D 9CFM Two Stage Vacuum Pump Distillation Quick Start Guide This guide gives basic quick start instructions for distillation systems. It is intended to provide a starting point for learning the process. Parameters should be adjusted to suit specific needs, Before beginning distillation, ensure the following steps have been taken: Vacuum Pump is in good working order. Pump should be run against dry load to allow internals to warm up. Oil should be clear. Cloudy or dark oil should be changed. All glass components are in good working order and ready to be assembled A winterization and degassing procedure has been done to prepare oil for distillation Once all three of these steps have been completed, you are ready to begin distilling. Begin by placing stir bar in boiling flask and then load your material. This should be done using a funnel. A small amount of alcohol in the oil will give it a thinner consistency making it easier to transfer. Assemble all glassware and ensure each joint is properly greased. Do not use too much, as the vacuum pressure might pull some grease into the system. To ensure a full seal, spread grease in a circular motion by rotating glassware Attach circulator to condenser and set temperature to 50C. Allow circulator to reach temperature before beginning distillation. Connect vacuum pump to manifold. The manifold will allow you to isolate each individual component as well as let atmosphere into and out of the system. Connect receiving cow to cold trap. Connect cold trap to manifold. Connect vacuum gauge to manifold. At this point, ensure all connections are correct. Also ensure receiving cow is positioned to collect the first fraction in the far-left receiving flask. Circulator should be at its set temperature. Turn on vacuum pump to begin process. Turn on heat and set to 60C. Vacuum pump will begin to pull down and temperature will begin to rise. Watch the gauge to monitor vacuum pressure and stability. Start stir slower and increase speed with temperature. Once you are close to 60C, increase the temperature 20 degrees. Continue to raise the heat incrementally in 20-degree steps, increasing the set temperature as you near your set point. Increase temperatures incrementally until you reach 220C. You will see your first fraction somewhere between 180C and 190C or slightly before. This is the “heads” fraction. You will move to your second fraction when you see an increased reaction in the head, a slight color change toward golden, as well as a thickening of distillate. When this fraction hits, allow the distillate to “self-clean” the head for a minute or two then, rotate the cow to the middle receiving flask. Collect your “main body” fraction. You will see temps between 190-220C during this fraction. Continue to increase stirring speed as necessary. Reaction in the head may vary but it should never stop. As fluid level in the boiling flask decreases, increase stir speed. The final “tails” fraction is a mixture of the first and second fractions and should be saved for re-distillation later. Ideally, you want to turn the cow to the final flask before the tails fraction hits. The “tails” fraction has an obvious color change and will be darker than the “main body” fraction. You will see temps between 200-250C during this fraction. As fluid level in the boiling flask decreases even more, set stirring RPM higher (1000+ RPM). You may need to compensate with a bit more heat to finish of the final fraction as well. Once process is complete, stop heat, stop stir, and stop vacuum. Let atmosphere into the system. Be sure to properly store your distillate as exposure to air and light can cause oxidation. ***Note: This entire setup will ship via motor freight.*** *Notice to Customers: All units are inspected for broken glassware or parts before leaving BVV™. If the unit arrives damaged (this does not include minor imperfections or scuffs in glassware), the customer MUST contact BVV™ within 72 hours from carrier delivery to file a claim. If the customer DOES NOT contact BVV™ within 72 hours from carrier delivery, then BVV™ cannot issue any replacement(s) or compensation for the item; a new purchase will need to be made for a replacement.  BVV™ is not responsible for the failure of glassware which must be inspected before and after every use because it may eventually develop imperfections or damage through normal usage, mishandling, and stress caused by temperature variations. If an imperfection or damage is noted while inspecting the glassware DO NOT use the glassware because it can fail, which can cause bodily harm or damage to the surrounding area.

    $2,100.00 - $2,350.00

  • 2L Short Path Distillation Kit set up

    2L Short Path Distillation Kit

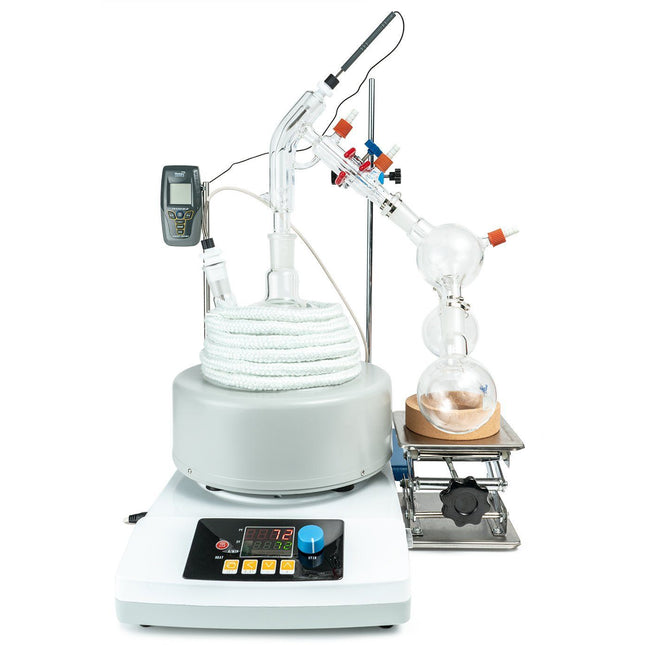
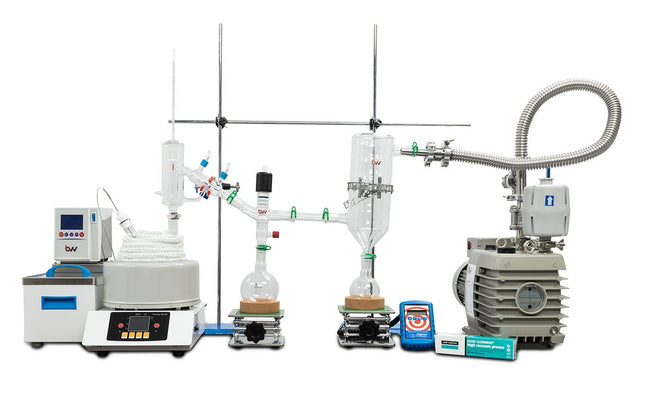
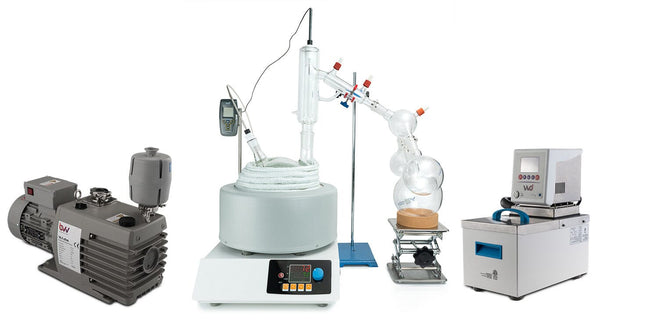
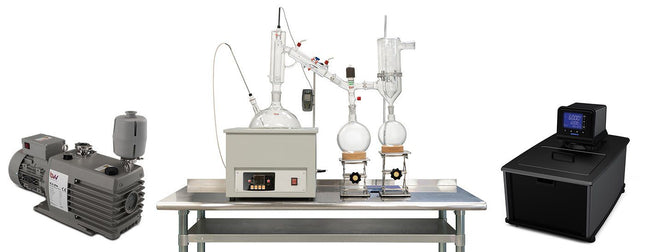
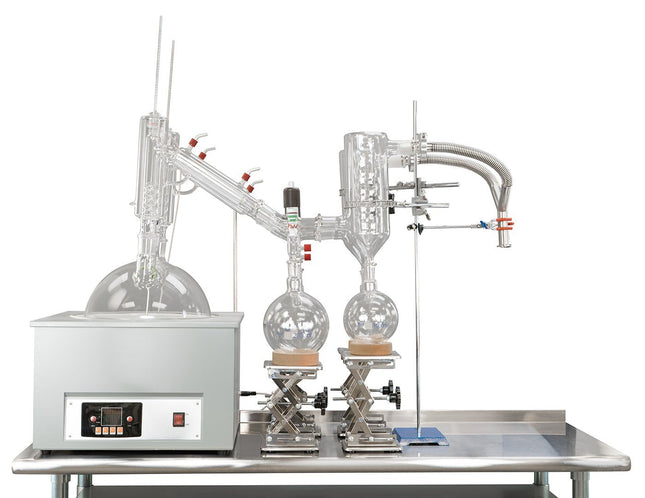
    Short Path Distillation Setup Short path distillation is used for compounds that are not stable at high temperatures. It can also be used to purify small amounts of a compound. For those new to this type of distillation, our Short Path Kit includes everything you will need as you get started. All stands, clamps, clips, and tubing are included, which means it’s ready to start working straight out of the box. The cold trap, cow and vacuum grease can all be customized to meet your needs. The 2L Distillation Kit builds upon the same principal as the 1L Distillation Kit, giving users an easy to use system that will get them up and running at an affordable price. It includes all stands, clamps, clips, and tubing needed to begin distilling immediately. This Kit Does NOT include a vacuum pump or circulator. Please see the below recommendations for both as well as recommended add-ons. Or check out our 2L Standard Distillation Turnkey Setup which includes vacuum pump and circulator. Crossbar pictured is not included. We recommend purchasing multiple lab stands to accommodate your specific needs. Recommended Vacuum Pumps: Pro Series 5.6CFM Corrosion Resistant Two Stage Vacuum Pump (recommended option) Just Better 6 CFM 2 Stage Deep Vacuum Pump (economy option) Best Value Vacs VE280 9CFM Two Stage Vacuum Pump (economy option) Recommended Circulators: Polyscience 7 Liter MX Heated Circulator (economy option) Polyscience 7 Liter MX Refrigerated Circulator (premium option with chilling capability) Recommended Add-Ons: Glass Dewar Style Cold Trap (recommended cold trap) Bullseye Precison Vacuum Gauge (premium vacuum gauge for measuring depth) CT40 or CT80 Electronic Cold Trap (electronic cold trap, dry ice replacement)   Short Path Distillation Kit Specifications: Boiling Flask Size: 2L Recieving Flask Size: 250ml Batch Capacity approximate: 2L = 400-1000 grams Run time: 4 to 8 hours dependent upon material composition and throughput Distillation Temperature Range: 140-250C (Do not exceed 250C) Recommended Condenser Temperature: 40-50C   This Kit Comes Standard With The Following: Glass Components: 2L 2-Neck Boiling Flask Short Path Head Triple Neck Cow 3x 250mL Single Neck Receiving Flask 1/8" 14/20 PTFE Thermometer Adapter 1/4" 24/40 PTFE Thermometer Adapter 120mm Glass Funnel Accessories: Magnetic PTFE Stirring Bar Retriever 5 Pack of Metal Keck Clips Dow Corning High Vacuum Silicone Grease Tripod Stand 2L Digital Heating and Stirring Mantle 3 Finger Clamp Adjustable 0-70mm 6" x 6" Scissor Jack 250-500ml Cork Stand 10ft of Vacuum Hose 10ft of Chiller Hose 1/4" Vacuum Manifold Traceable Kangaroo Thermometer - Digital 10 Pack of Adjustable Stainless Steel Tubing Clamps Fiberglass Insulation Rope 10 Feet 1.5 Gallon Cold Trap (2QT Tank) Dry Ice, Liquid Nitrogen w/ 2x 1/4" Barb Adapters Distillation Quick Start Guide This guide gives basic quick start instructions for distillation systems. It is intended to provide a starting point for learning the process. Parameters should be adjusted to suit specific needs. Before beginning distillation, ensure the following steps have been taken: Vacuum Pump is in good working order. Pump should be run against dry load to allow internals to warm up. Oil should be clear. Cloudy or dark oil should be changed. All glass components are in good working order and ready to be assembled A winterization and degassing procedure has been done to prepare oil for distillation Once all three of these steps have been completed, you are ready to begin distilling. Begin by placing stir bar in boiling flask and then load your material. This should be done using a funnel. A small amount of alcohol in the oil will give it a thinner consistency making it easier to transfer. Assemble all glassware and ensure each joint is properly greased. Do not use too much, as the vacuum pressure might pull some grease into the system. To ensure a full seal, spread grease in a circular motion by rotating glassware Attach circulator to condenser and set temperature to 50C. Allow circulator to reach temperature before beginning distillation. Connect vacuum pump to manifold. The manifold will allow you to isolate each individual component as well as let atmosphere into and out of the system. Connect receiving cow to cold trap. Connect cold trap to manifold. Connect vacuum gauge to manifold. At this point, ensure all connections are correct. Also ensure receiving cow is positioned to collect the first fraction in the far-left receiving flask. Circulator should be at its set temperature. Turn on vacuum pump to begin process. Turn on heat and set to 60C. Vacuum pump will begin to pull down and temperature will begin to rise. Watch the gauge to monitor vacuum pressure and stability. Start stir slower and increase speed with temperature. Once you are close to 60C, increase the temperature 20 degrees. Continue to raise the heat incrementally in 20-degree steps, increasing the set temperature as you near your set point. Increase temperatures incrementally until you reach 220C. You will see your first fraction somewhere between 180C and 190C or slightly before. This is the “heads” fraction. You will move to your second fraction when you see an increased reaction in the head, a slight color change toward golden, as well as a thickening of distillate. When this fraction hits, allow the distillate to “self-clean” the head for a minute or two then, rotate the cow to the middle receiving flask. Collect your “main body” fraction. You will see temps between 190-220C during this fraction. Continue to increase stirring speed as necessary. Reaction in the head may vary but it should never stop. As fluid level in the boiling flask decreases, increase stir speed. The final “tails” fraction is a mixture of the first and second fractions and should be saved for re-distillation later. Ideally, you want to turn the cow to the final flask before the tails fraction hits. The “tails” fraction has an obvious color change and will be darker than the “main body” fraction. You will see temps between 200-250C during this fraction. As fluid level in the boiling flask decreases even more, set stirring RPM higher (1000+ RPM). You may need to compensate with a bit more heat to finish of the final fraction as well. Once process is complete, stop heat, stop stir, and stop vacuum. Let atmosphere into the system. Be sure to properly store your distillate as exposure to air and light can cause oxidation.   Learn more about short path distillation components and FAQs with this distillation guide. *Notice to Customers: All units are inspected for broken glassware or parts before leaving BVV™. If the unit arrives damaged (this does not include minor imperfections or scuffs in glassware), the customer MUST contact BVV™ within 72 hours from carrier delivery to file a claim. If the customer DOES NOT contact BVV™ within 72 hours from carrier delivery, then BVV™ cannot issue any replacement(s) or compensation for the item; a new purchase will need to be made for a replacement.  BVV™ is not responsible for the failure of glassware which must be inspected before and after every use because it may eventually develop imperfections or damage through normal usage, mishandling, and stress caused by temperature variations. If an imperfection or damage is noted while inspecting the glassware DO NOT use the glassware because it can fail, which can cause bodily harm or damage to the surrounding area.

    $1,275.00

  • 2L Short Path Distillation Kit with P2 Distillation Head Shop All Categories BVV

    2L Short Path Distillation Kit with P2 Distillation Head

    2L Short Path Distillation Kit with P2 Distillation Head   The 2L Distillation Kit w/ P2 Distillation Head includes everything needed to perform distillation excluding the vacuum pump and chiller. This kit features our USA made P2 Distillation Head as well as USA made glass. It is designed with ease of use in mind and includes the highest quality components to ensure results are repeatable time and again. **This Kit Does NOT include a vacuum pump or circulator. Please see the below recommendations for both as well as recommended add-ons. Or check out our 2L Premium Turnkey Setup which includes vacuum pump and circulator.** Crossbar pictured is not included. We recommend purchasing multiple lab stands to accomodate your specific needs. Recommended Vacuum Pumps: Pro Series 5.6CFM Corrosion Resistant Two Stage Vacuum Pump (recommended option) Just Better 6 CFM 2 Stage Deep Vacuum Pump (USA made economy option) Welch 1400 DuoSeal 0.9 cfm 0.1 Micron Belt Drive Dual-Stage Pump Recommended Circulators: Polyscience 7 Liter MX Heated Circulator (economy option) Polyscience 7 Liter MX Refrigerated Circulator (premium option with chilling capability) Recommended Add-Ons: Glass Dewar Style Cold Trap (recommended cold trap) Bullseye Precison Vacuum Gauge (premium vacuum gauge for measuring depth) CT40 or CT80 Electronic Cold Trap (electronic cold trap, dry ice replacement) J-KEM Digital Vapor Temp Monitor (digital vapor temp monitor with data-logging capabilities) Specifications: Boiling Flask Size: 2L Receveiving Flask Size: 250mL Batch Capacity approximate: 2L = 400-1000 grams Run time: 4 to 8 hours dependent upon material composition and throughput Distillation Temperature Range: 140-250C (Do not exceed 250C) Recommended Condenser Temperature: 40-50C This Kit Includes: Glass components: 2L USA Made 2-Neck Boiling Flask P2 USA Made Distillation Head Triple Neck Cow 3x 250mL Receiving Flask 2x 24/40 Chemglass Thermometer Inlet Adapter 120mm Glass Funnel Accessories: Magnetic PTFE Stirring Bar Retriever 5 Pack of Metal Keck Clips Dow Corning High Vacuum Silicone Grease Tripod Stand 2L Digital Heating and Stirring Mantle 3 Finger Clamp Adjustable 0-70mm 6" x 6" Scissor Jack 250-500ml Cork Stand 10ft of Vacuum Hose 10ft of Chiller Hose 1/4" Vacuum Manifold Traceable Kangaroo Thermometer - Digital 10 Pack of Adjustable Stainless Steel Tubing Clamps Fiberglass Insulation Rope 10 Feet 1.5 Gallon Cold Trap (2QT Tank) Dry Ice, Liquid Nitrogen w/ 2x 1/4" Barb Adapters Distillation Quick Start Guide This guide gives basic quick start instructions for distillation systems. It is intended to provide a starting point for learning the process. Parameters should be adjusted to suit specific needs, Before beginning distillation, ensure the following steps have been taken: Vacuum Pump is in good working order. Pump should be run against dry load to allow internals to warm up. Oil should be clear. Cloudy or dark oil should be changed. All glass components are in good working order and ready to be assembled A winterization and degassing procedure has been done to prepare oil for distillation Once all three of these steps have been completed, you are ready to begin distilling. Begin by placing stir bar in boiling flask and then load your material. This should be done using a funnel. A small amount of alcohol in the oil will give it a thinner consistency making it easier to transfer. Assemble all glassware and ensure each joint is properly greased. Do not use too much, as the vacuum pressure might pull some grease into the system. To ensure a full seal, spread grease in a circular motion by rotating glassware Attach circulator to condenser and set temperature to 50C. Allow circulator to reach temperature before beginning distillation. Connect vacuum pump to manifold. The manifold will allow you to isolate each individual component as well as let atmosphere into and out of the system. Connect receiving cow to cold trap. Connect cold trap to manifold. Connect vacuum gauge to manifold. At this point, ensure all connections are correct. Also ensure receiving cow is positioned to collect the first fraction in the far-left receiving flask. Circulator should be at its set temperature. Turn on vacuum pump to begin process. Turn on heat and set to 60C. Vacuum pump will begin to pull down and temperature will begin to rise. Watch the gauge to monitor vacuum pressure and stability. Start stir slower and increase speed with temperature. Once you are close to 60C, increase the temperature 20 degrees. Continue to raise the heat incrementally in 20-degree steps, increasing the set temperature as you near your set point. Increase temperatures incrementally until you reach 220C. You will see your first fraction somewhere between 180C and 190C or slightly before. This is the “heads” fraction. You will move to your second fraction when you see an increased reaction in the head, a slight color change toward golden, as well as a thickening of distillate. When this fraction hits, allow the distillate to “self-clean” the head for a minute or two then, rotate the cow to the middle receiving flask. Collect your “main body” fraction. You will see temps between 190-220C during this fraction. Continue to increase stirring speed as necessary. Reaction in the head may vary but it should never stop. As fluid level in the boiling flask decreases, increase stir speed. The final “tails” fraction is a mixture of the first and second fractions and should be saved for re-distillation later. Ideally, you want to turn the cow to the final flask before the tails fraction hits. The “tails” fraction has an obvious color change and will be darker than the “main body” fraction. You will see temps between 200-250C during this fraction. As fluid level in the boiling flask decreases even more, set stirring RPM higher (1000+ RPM). You may need to compensate with a bit more heat to finish of the final fraction as well. Once process is complete, stop heat, stop stir, and stop vacuum. Let atmosphere into the system. Be sure to properly store your distillate as exposure to air and light can cause oxidation. *Notice to Customers: All units are inspected for broken glassware or parts before leaving BVV™. If the unit arrives damaged (this does not include minor imperfections or scuffs in glassware), the customer MUST contact BVV™ within 72 hours from carrier delivery to file a claim. If the customer DOES NOT contact BVV™ within 72 hours from carrier delivery, then BVV™ cannot issue any replacement(s) or compensation for the item; a new purchase will need to be made for a replacement.  BVV™ is not responsible for the failure of glassware which must be inspected before and after every use because it may eventually develop imperfections or damage through normal usage, mishandling, and stress caused by temperature variations. If an imperfection or damage is noted while inspecting the glassware DO NOT use the glassware because it can fail, which can cause bodily harm or damage to the surrounding area.

    $2,200.00

  • 2L Standard Short Path Distillation Turnkey Setup Shop All Categories BVV

    2L Standard Short Path Distillation Turnkey Setup

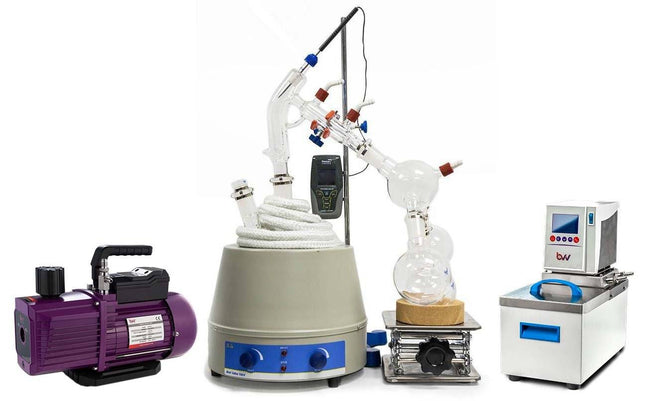
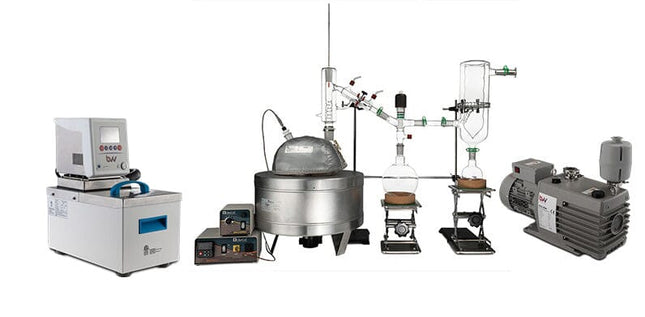
    2L Standard Short Path Distillation Turnkey Setup   The Standard Distillation Turnkey Setup includes all the components necessary to successfully perform distillation at an entry-level price point. Crossbar pictured is not included. We recommend purchasing multiple lab stands to accommodate your specific needs. The Standard Turnkey Setup Includes: 2L Distillation Kit 1/4" Flare x 1/4" Barb Adapter BVV™ 5L Heated Circulator BVV™ V9D 9CFM Two Stage Vacuum Pump   High quality and durable Borosilicate 3.3 glass   Vacuum-jacketed distillation adapter   3-way cow adapter, accommodating up to 3 pcs of 500mL flasks   GCT-01 cold trap guarding from damage of vapors Kangaroo Traceable Digital Thermometer   Flexible Gum Rubber Vacuum Tubing  and Silicone Tubing for Flow Distillation Quick Start Guide This guide gives basic quick start instructions for distillation systems. It is intended to provide a starting point for learning the process. Parameters should be adjusted to suit specific needs, Before beginning distillation, ensure the following steps have been taken: Vacuum Pump is in good working order. The pump should be run against the dry load to allow internals to warm up. Oil should be clear. Cloudy or dark oil should be changed. All glass components are in good working order and ready to be assembled A winterization and degassing procedure has been done to prepare oil for distillation Once all three of these steps have been completed, you are ready to begin distilling. Begin by placing stir bar in boiling flask and then load your material. This should be done using a funnel. A small amount of alcohol in the oil will give it a thinner consistency making it easier to transfer. Assemble all glassware and ensure each joint is properly greased. Do not use too much, as the vacuum pressure might pull some grease into the system. To ensure a full seal, spread grease in a circular motion by rotating glassware Attach circulator to condenser and set temperature to 50C. Allow circulator to reach temperature before beginning distillation. Connect vacuum pump to manifold. The manifold will allow you to isolate each individual component as well as let atmosphere into and out of the system. Connect receiving cow to cold trap. Connect cold trap to manifold. Connect vacuum gauge to manifold. At this point, ensure all connections are correct. Also ensure receiving cow is positioned to collect the first fraction in the far-left receiving flask. Circulator should be at its set temperature. Turn on vacuum pump to begin process. Turn on heat and set to 60C. Vacuum pump will begin to pull down and temperature will begin to rise. Watch the gauge to monitor vacuum pressure and stability. Start stir slower and increase speed with temperature. Once you are close to 60C, increase the temperature 20 degrees. Continue to raise the heat incrementally in 20-degree steps, increasing the set temperature as you near your set point. Increase temperatures incrementally until you reach 220C. You will see your first fraction somewhere between 180C and 190C or slightly before. This is the “heads” fraction. You will move to your second fraction when you see an increased reaction in the head, a slight color change toward golden, as well as a thickening of distillate. When this fraction hits, allow the distillate to “self-clean” the head for a minute or two then, rotate the cow to the middle receiving flask. Collect your “main body” fraction. You will see temps between 190-220C during this fraction. Continue to increase stirring speed as necessary. Reaction in the head may vary but it should never stop. As fluid level in the boiling flask decreases, increase stir speed. The final “tails” fraction is a mixture of the first and second fractions and should be saved for re-distillation later. Ideally, you want to turn the cow to the final flask before the tails fraction hits. The “tails” fraction has an obvious color change and will be darker than the “main body” fraction. You will see temps between 200-250C during this fraction. As fluid level in the boiling flask decreases even more, set stirring RPM higher (1000+ RPM). You may need to compensate with a bit more heat to finish of the final fraction as well. Once the process is complete, stop heat, stop stir, and stop vacuum. Let the atmosphere into the system. Be sure to properly store your distillate as exposure to air and light can cause oxidation. ***Note: This entire setup will ship via motor freight.*** *Notice to Customers: All units are inspected for broken glassware or parts before leaving BVV™. If the unit arrives damaged (this does not include minor imperfections or scuffs in glassware), the customer MUST contact BVV™ within 72 hours from carrier delivery to file a claim. If the customer DOES NOT contact BVV™ within 72 hours from carrier delivery, then BVV™ cannot issue any replacement(s) or compensation for the item; a new purchase will need to be made for a replacement.  BVV™ is not responsible for the failure of glassware which must be inspected before and after every use because it may eventually develop imperfections or damage through normal usage, mishandling, and stress caused by temperature variations. If an imperfection or damage is noted while inspecting the glassware DO NOT use the glassware because it can fail, which can cause bodily harm or damage to the surrounding area.

    $2,600.00

  • 2L Premium Short Path Distillation Turnkey Setup with P2 Distillation Head Shop All Categories BVV

    2L Premium Short Path Distillation Turnkey Setup with P2 Distillation Head

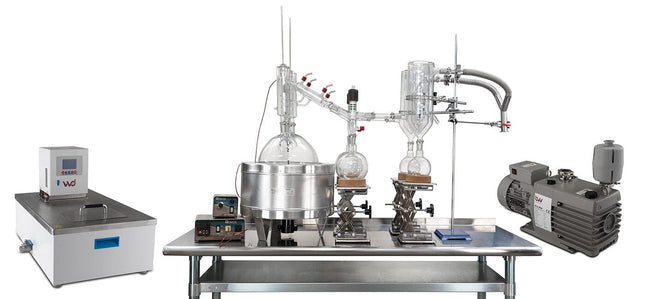
    2L Premium Short Path Distillation Turnkey Setup with P2 Distillation Head The 2L Premium Distillation Turnkey Setup features our 2L Distillation Kit with P2 Distillation Head and USA made glass. Every component in this turnkey is made for precision, throughput, and repeatable results. Also included is our Pro Series 11.3CFM Corrosion Resistant Two Stage Vacuum Pump giving you extreme power and depth with long lifespan, the Bullseye Precision Vacuum Gauge from Digivac which is the most rugged and dependable vacuum gauge on the market, and a Polyscience 7L MX Heated Circulator for maximum condensation of vapors. You will also receive a Dewar Style Glass Cold Trap to keep all volatiles and solvents out of your vacuum system. This Turnkey Setup gives you everything needed to perform distillation at the highest level. The Premium Turnkey Kit Includes: 2L Distillation Kit w/ P2 Distillation Head KF-25 x 1/4" Barb Adapter Dewar Style Glass Cold Trap Bullseye precision Vacuum Gauge Polyscience 7L MX Heated Circulator Pro Series 14.1CFM Corrosion Resistant Two Stage Vacuum Pump Distillation Quick Start Guide This guide gives basic quick start instructions for distillation systems. It is intended to provide a starting point for learning the process. Parameters should be adjusted to suit specific needs, Before beginning distillation, ensure the following steps have been taken: Vacuum Pump is in good working order. Pump should be run against dry load to allow internals to warm up. Oil should be clear. Cloudy or dark oil should be changed. All glass components are in good working order and ready to be assembled A winterization and degassing procedure has been done to prepare oil for distillation Once all three of these steps have been completed, you are ready to begin distilling. Begin by placing stir bar in boiling flask and then load your material. This should be done using a funnel. A small amount of alcohol in the oil will give it a thinner consistency making it easier to transfer. Assemble all glassware and ensure each joint is properly greased. Do not use too much, as the vacuum pressure might pull some grease into the system. To ensure a full seal, spread grease in a circular motion by rotating glassware Attach circulator to condenser and set temperature to 50C. Allow circulator to reach temperature before beginning distillation. Connect vacuum pump to manifold. The manifold will allow you to isolate each individual component as well as let atmosphere into and out of the system. Connect receiving cow to cold trap. Connect cold trap to manifold. Connect vacuum gauge to manifold. At this point, ensure all connections are correct. Also ensure receiving cow is positioned to collect the first fraction in the far-left receiving flask. Circulator should be at its set temperature. Turn on vacuum pump to begin process. Turn on heat and set to 60C. Vacuum pump will begin to pull down and temperature will begin to rise. Watch the gauge to monitor vacuum pressure and stability. Start stir slower and increase speed with temperature. Once you are close to 60C, increase the temperature 20 degrees. Continue to raise the heat incrementally in 20-degree steps, increasing the set temperature as you near your set point. Increase temperatures incrementally until you reach 220C. You will see your first fraction somewhere between 180C and 190C or slightly before. This is the “heads” fraction. You will move to your second fraction when you see an increased reaction in the head, a slight color change toward golden, as well as a thickening of distillate. When this fraction hits, allow the distillate to “self-clean” the head for a minute or two then, rotate the cow to the middle receiving flask. Collect your “main body” fraction. You will see temps between 190-220C during this fraction. Continue to increase stirring speed as necessary. Reaction in the head may vary but it should never stop. As fluid level in the boiling flask decreases, increase stir speed. The final “tails” fraction is a mixture of the first and second fractions and should be saved for re-distillation later. Ideally, you want to turn the cow to the final flask before the tails fraction hits. The “tails” fraction has an obvious color change and will be darker than the “main body” fraction. You will see temps between 200-250C during this fraction. As fluid level in the boiling flask decreases even more, set stirring RPM higher (1000+ RPM). You may need to compensate with a bit more heat to finish of the final fraction as well. Once the process is complete, stop heat, stop stir, and stop vacuum. Let the atmosphere into the system. Be sure to properly store your distillate as exposure to air and light can cause oxidation. ***Note: This entire setup will ship via motor freight.*** ***Note: All units are inspected for broken glass or parts before unit is shipped. If unit arrives damaged or glass is broken (this does not include minor imperfections or scuffs in glassware), Customer MUST contact BVV™ within 3 days of delivery to file a claim and receive a replacement part. If customer DOES NOT contact BVV™ within 3 days of delivery responsibility for replacement parts falls on the customer and they must pay for replacement pieces.*** ***Glassware Safety Disclaimer: BVV™ is not responsible for failure of glassware which must be inspected before and after every use because it may eventually develop imperfections or damage through normal usage, mishandling, and stress caused by temperature variations. If an imperfection or damage is noted while inspecting the glassware DO NOT use the glassware because it can fail causing bodily harm or damage to the surrounding area.***

    $6,000.00 - $7,650.00

  • 5L Short Path Distillation Kit with P5 Distillation Head Shop All Categories BVV Default Title

    5L Short Path Distillation Kit with P5 Distillation Head

    5L Short Path Distillation Kit with P5 Distillation Head This unit carries a 2 day lead time. The 5L Distillation Kit includes everything needed to perform distillation excluding the vacuum pump and chiller. This kit features our USA made P5 Distillation Head, as well as USA, made glass. This Kit is designed for high volume production with the highest quality components for precise, repeatable results time and again. This Kit Does NOT include a vacuum pump or chiller. Please see the below recommendations for both as well as recommended add-ons. Recommended Vacuum Pumps: Pro Series 11.3CFM Corrosion Resistant Two Stage Vacuum Pump (recommended option) Just Better 6 CFM 2 Stage Deep Vacuum Pump (economy option) Recommended Chillers: Polyscience 7 Liter MX Heated Circulator (economy option) Polyscience 7 Liter Refrigerated Circulator (premium option with chilling capability) Recommended Add-Ons: Glass Dewar Style Cold Trap (recommended cold trap) Bullseye Precision Vacuum Gauge (premium vacuum gauge for measuing depth) CT40 or CT80 Electronic Cold Trap (electronic cold trap, dry ice replacement) J-KEM Digital Vapor Temp Monitor (digital vapor temp monitor with data-logging capabilites) Specifications: Boiling Flask Size: 5L Receiving Flask Size: 2x 500mL, 1000mL Batch Capacity approximate: 1000-2500 grams Run time: 4 to 8 hours dependent upon material composition and throughput Distillation Temperature Range: 140-250C (Do not exceed 250C) Recommended Condenser Temperature: 40-50C This Kit Includes: Glass components: 5L Boiling Flask P5V6 Distillation Head Triple Neck Cow 2x 500mL Receiving Flask 1L Receiving Flask 120mm Glass Funnel Accessories: PTFE Magnetic Stir Bar Retriever 5 Pack of Metal Keck Clips Dow Corning High Vacuum Silicone Grease Tripod Stand 5L Digital Heating and Stirring Mantle 3-Finger Adjustable Clamp 0-77mm 6" x 6" Scissor Jack 500-1000mL Cork Stand 2x 24/40 ChemglassPTFE Thermometer Inlet Adapter 10ft of Gum Rubber Vacuum Hose 10ft of Silicone Chiller Hose 1/4" Vacuum Manifold Traceable Kangaroo Thermometer - Digital 10 Pack of Adjustable Stainless Steel Tubing Clamps Fiberglass Insulation Rope 10 Feet 1.5 Gallon Cold Trap (2QT Tank) Dry Ice, Liquid Nitrogen w/ 2x 1/4" Barb Adapters Distillation Quick Start Guide This guide gives basic quick start instructions for distillation systems. It is intended to provide a starting point for learning the process. Parameters should be adjusted to suit specific needs, Before beginning distillation, ensure the following steps have been taken: Vacuum Pump is in good working order. Pump should be run against dry load to allow internals to warm up. Oil should be clear. Cloudy or dark oil should be changed. All glass components are in good working order and ready to be assembled A winterization and degassing procedure has been done to prepare oil for distillation Once all three of these steps have been completed, you are ready to begin distilling. Begin by placing stir bar in boiling flask and then load your material. This should be done using a funnel. A small amount of alcohol in the oil will give it a thinner consistency making it easier to transfer. Assemble all glassware and ensure each joint is properly greased. Do not use too much, as the vacuum pressure might pull some grease into the system. To ensure a full seal, spread grease in a circular motion by rotating glassware Attach circulator to condenser and set temperature to 50C. Allow circulator to reach temperature before beginning distillation. Connect vacuum pump to manifold. The manifold will allow you to isolate each individual component as well as let atmosphere into and out of the system. Connect receiving cow to cold trap. Connect cold trap to manifold. Connect vacuum gauge to manifold. At this point, ensure all connections are correct. Also ensure receiving cow is positioned to collect the first fraction in the far-left receiving flask. Circulator should be at its set temperature. Turn on vacuum pump to begin process. Turn on heat and set to 60C. Vacuum pump will begin to pull down and temperature will begin to rise. Watch the gauge to monitor vacuum pressure and stability. Start stir slower and increase speed with temperature. Once you are close to 60C, increase the temperature 20 degrees. Continue to raise the heat incrementally in 20-degree steps, increasing the set temperature as you near your set point. Increase temperatures incrementally until you reach 220C. You will see your first fraction somewhere between 180C and 190C or slightly before. This is the “heads” fraction. You will move to your second fraction when you see an increased reaction in the head, a slight color change toward golden, as well as a thickening of distillate. When this fraction hits, allow the distillate to “self-clean” the head for a minute or two then, rotate the cow to the middle receiving flask. Collect your “main body” fraction. You will see temps between 190-220C during this fraction. Continue to increase stirring speed as necessary. Reaction in the head may vary but it should never stop. As fluid level in the boiling flask decreases, increase stir speed. The final “tails” fraction is a mixture of the first and second fractions and should be saved for re-distillation later. Ideally, you want to turn the cow to the final flask before the tails fraction hits. The “tails” fraction has an obvious color change and will be darker than the “main body” fraction. You will see temps between 200-250C during this fraction. As fluid level in the boiling flask decreases even more, set stirring RPM higher (1000+ RPM). You may need to compensate with a bit more heat to finish of the final fraction as well. Once process is complete, stop heat, stop stir, and stop vacuum. Let atmosphere into the system. Be sure to properly store your distillate as exposure to air and light can cause oxidation. *Notice to Customers: All units are inspected for broken glassware or parts before leaving BVV™. If the unit arrives damaged (this does not include minor imperfections or scuffs in glassware), the customer MUST contact BVV™ within 72 hours from carrier delivery to file a claim. If the customer DOES NOT contact BVV™ within 72 hours from carrier delivery, then BVV™ cannot issue any replacement(s) or compensation for the item; a new purchase will need to be made for a replacement.  BVV™ is not responsible for the failure of glassware which must be inspected before and after every use because it may eventually develop imperfections or damage through normal usage, mishandling, and stress caused by temperature variations. If an imperfection or damage is noted while inspecting the glassware DO NOT use the glassware because it can fail, which can cause bodily harm or damage to the surrounding area.

    $2,200.00

  • 5L Premium Short Path Distillation Turnkey Setup Shop All Categories BVV

    5L Premium Short Path Distillation Turnkey Setup

    5L Premium Distillation Kit This unit carries a 2 day lead time. The 5L Premium Short Path Distillation Turnkey Setup features our 5L Distillation Kit with P5 Distillation Head and USA made glass. Every component in this turnkey is made for precision, throughput, and repeatable results. Also included is our Pro Series 11.3CFM Corrosion Resistant Two Stage Vacuum Pump giving you extreme power and depth with a long lifespan, the Bullseye Precision Vacuum Gauge from Digivac which is the most rugged and dependable vacuum gauge on the market, and a BVV 19L Heated Circulator for maximum condensation of vapors. You will also receive a Dewar Style Glass Cold Trap to keep all volatiles and solvents out of your vacuum system. This Turnkey Setup gives you everything needed to perform distillation at the highest level. The Premium Short Path Distillation Turnkey Kit Includes: 5L Distillation Kit with P5 Distillation Head KF-25 x 1/4" Barb Adapter Dewar Style Glass Cold Trap Bullseye Precision Vacuum Gauge Polyscience 7L MX Heated Circulator Pro Series 14.1CFM Corrosion Resistant Two Stage Vacuum Pump   Short Path Distillation Quick Start Guide This guide gives basic quick start instructions for distillation systems. It is intended to provide a starting point for learning the process. Parameters should be adjusted to suit specific needs, Before beginning distillation, ensure the following steps have been taken: Vacuum Pump is in good working order. Pump should be run against dry load to allow internals to warm up. Oil should be clear. Cloudy or dark oil should be changed. All glass components are in good working order and ready to be assembled A winterization and degassing procedure has been done to prepare oil for distillation Once all three of these steps have been completed, you are ready to begin distilling. Begin by placing stir bar in boiling flask and then load your material. This should be done using a funnel. A small amount of alcohol in the oil will give it a thinner consistency making it easier to transfer. Assemble all glassware and ensure each joint is properly greased. Do not use too much, as the vacuum pressure might pull some grease into the system. To ensure a full seal, spread grease in a circular motion by rotating glassware Attach circulator to condenser and set temperature to 50C. Allow circulator to reach temperature before beginning distillation. Connect vacuum pump to manifold. The manifold will allow you to isolate each individual component as well as let atmosphere into and out of the system. Connect receiving cow to cold trap. Connect cold trap to manifold. Connect vacuum gauge to manifold. At this point, ensure all connections are correct. Also ensure receiving cow is positioned to collect the first fraction in the far-left receiving flask. Circulator should be at its set temperature. Turn on vacuum pump to begin process. Turn on heat and set to 60C. Vacuum pump will begin to pull down and temperature will begin to rise. Watch the gauge to monitor vacuum pressure and stability. Start stir slower and increase speed with temperature. Once you are close to 60C, increase the temperature 20 degrees. Continue to raise the heat incrementally in 20-degree steps, increasing the set temperature as you near your set point. Increase temperatures incrementally until you reach 220C. You will see your first fraction somewhere between 180C and 190C or slightly before. This is the “heads” fraction. You will move to your second fraction when you see an increased reaction in the head, a slight color change toward golden, as well as a thickening of distillate. When this fraction hits, allow the distillate to “self-clean” the head for a minute or two then, rotate the cow to the middle receiving flask. Collect your “main body” fraction. You will see temps between 190-220C during this fraction. Continue to increase stirring speed as necessary. Reaction in the head may vary but it should never stop. As fluid level in the boiling flask decreases, increase stir speed. The final “tails” fraction is a mixture of the first and second fractions and should be saved for re-distillation later. Ideally, you want to turn the cow to the final flask before the tails fraction hits. The “tails” fraction has an obvious color change and will be darker than the “main body” fraction. You will see temps between 200-250C during this fraction. As fluid level in the boiling flask decreases even more, set stirring RPM higher (1000+ RPM). You may need to compensate with a bit more heat to finish of the final fraction as well. Once the process is complete, stop heat, stop stir, and stop vacuum. Let atmosphere into the system. Be sure to properly store your distillate as exposure to air and light can cause oxidation. ***Note: This entire setup will ship via motor freight.*** ***Note: All units are inspected for broken glass or parts before unit is shipped. If unit arrives damaged or glass is broken (this does not include minor imperfections or scuffs in glassware), Customer MUST contact BVV™ within 3 days of delivery to file a claim and receive a replacement part. If customer DOES NOT contact BVV™ within 3 days of delivery responsibility for replacement parts falls on the customer and they must pay for replacement pieces.*** ***Glassware Safety Disclaimer: BVV™ is not responsible for failure of glassware which must be inspected before and after every use because it may eventually develop imperfections or damage through normal usage, mishandling, and stress caused by temperature variations. If an imperfection or damage is noted while inspecting the glassware DO NOT use the glassware because it can fail causing bodily harm or damage to the surrounding area.***

    $5,500.00

  • 5L Neocision Short Path Distillation Turnkey Kit Shop All Categories Neocision

    5L Neocision Short Path Distillation Turnkey Kit

    5L Neocision Short Path Distillation Turnkey Kit This unit carries a 2 day lead time. The 5L Premium Distillation Turnkey Setup features our 5L Distillation Kit with P5 Distillation Head and USA made glass. Every component in this turnkey is made for precision, throughput, and repeatable results. Also included is our Pro Series Corrosion Resistant Two Stage Vacuum Pump giving you extreme power and depth with a long lifespan, the Bullseye Precision Vacuum Gauge from Digivac which is the most rugged and dependable vacuum gauge on the market, and a BVV 19L Heated Circulator for maximum condensation of vapors. You will also receive a Dewar Style Glass Cold Trap to keep all volatiles and solvents out of your vacuum system. This Turnkey Setup gives you everything needed to perform distillation at the highest level. The Premium Turnkey Kit Includes: 5L Neocision Kit with P5 Distillation Head KF-25 x 1/4" Barb Adapter Dewar Style Glass Cold Trap Bullseye Precision Vacuum Gauge BVV 19L MX Heated Circulator Pro Series 21.2CFM Corrosion Resistant Two Stage Vacuum Pump Distillation Quick Start Guide This guide gives basic quick start instructions for distillation systems. It is intended to provide a starting point for learning the process. Parameters should be adjusted to suit specific needs, Before beginning distillation, ensure the following steps have been taken: Vacuum Pump is in good working order. Pump should be run against dry load to allow internals to warm up. Oil should be clear. Cloudy or dark oil should be changed. All glass components are in good working order and ready to be assembled A winterization and degassing procedure has been done to prepare oil for distillation Once all three of these steps have been completed, you are ready to begin distilling. Begin by placing stir bar in boiling flask and then load your material. This should be done using a funnel. A small amount of alcohol in the oil will give it a thinner consistency making it easier to transfer. Assemble all glassware and ensure each joint is properly greased. Do not use too much, as the vacuum pressure might pull some grease into the system. To ensure a full seal, spread grease in a circular motion by rotating glassware Attach circulator to condenser and set temperature to 50C. Allow circulator to reach temperature before beginning distillation. Connect vacuum pump to manifold. The manifold will allow you to isolate each individual component as well as let atmosphere into and out of the system. Connect receiving cow to cold trap. Connect cold trap to manifold. Connect vacuum gauge to manifold. At this point, ensure all connections are correct. Also ensure receiving cow is positioned to collect the first fraction in the far-left receiving flask. Circulator should be at its set temperature. Turn on vacuum pump to begin process. Turn on heat and set to 60C. Vacuum pump will begin to pull down and temperature will begin to rise. Watch the gauge to monitor vacuum pressure and stability. Start stir slower and increase speed with temperature. Once you are close to 60C, increase the temperature 20 degrees. Continue to raise the heat incrementally in 20-degree steps, increasing the set temperature as you near your set point. Increase temperatures incrementally until you reach 220C. You will see your first fraction somewhere between 180C and 190C or slightly before. This is the “heads” fraction. You will move to your second fraction when you see an increased reaction in the head, a slight color change toward golden, as well as a thickening of distillate. When this fraction hits, allow the distillate to “self-clean” the head for a minute or two then, rotate the cow to the middle receiving flask. Collect your “main body” fraction. You will see temps between 190-220C during this fraction. Continue to increase stirring speed as necessary. Reaction in the head may vary but it should never stop. As fluid level in the boiling flask decreases, increase stir speed. The final “tails” fraction is a mixture of the first and second fractions and should be saved for re-distillation later. Ideally, you want to turn the cow to the final flask before the tails fraction hits. The “tails” fraction has an obvious color change and will be darker than the “main body” fraction. You will see temps between 200-250C during this fraction. As fluid level in the boiling flask decreases even more, set stirring RPM higher (1000+ RPM). You may need to compensate with a bit more heat to finish of the final fraction as well. Once process is complete, stop heat, stop stir, and stop vacuum. Let atmosphere into the system. Be sure to properly store your distillate as exposure to air and light can cause oxidation. ***Note: This entire setup will ship via motor freight.*** ***Note: All units are inspected for broken glass or parts before unit is shipped. If unit arrives damaged or glass is broken (this does not include minor imperfections or scuffs in glassware), Customer MUST contact BVV™ within 3 days of delivery to file a claim and receive a replacement part. If customer DOES NOT contact BVV™ within 3 days of delivery responsibility for replacement parts falls on the customer and they must pay for replacement pieces.*** ***Glassware Safety Disclaimer: BVV™ is not responsible for failure of glassware which must be inspected before and after every use because it may eventually develop imperfections or damage through normal usage, mishandling, and stress caused by temperature variations. If an imperfection or damage is noted while inspecting the glassware DO NOT use the glassware because it can fail causing bodily harm or damage to the surrounding area.***

    $10,500.00 - $14,750.00

  • 10L Premium Short Path Distillation Kit with P10 Distillation Head Shop All Categories BVV

    10L Premium Short Path Distillation Kit with P10 Distillation Head

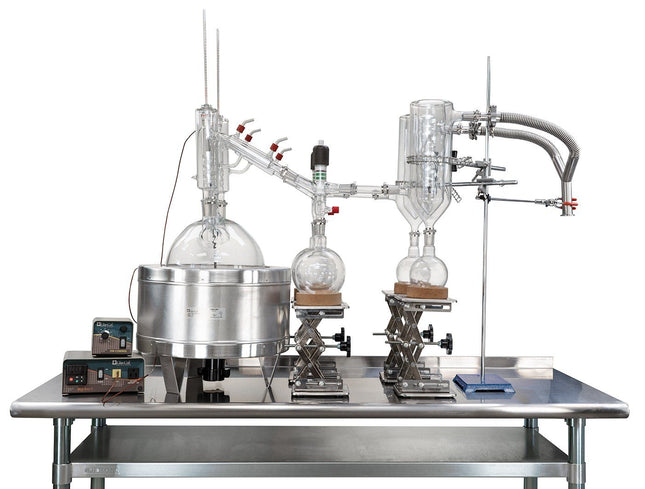
    10L Short Path Distillation Kit with P10 Distillation Head This unit carries a 2 day lead time. (Note: Stainless Steel Table NOT Included.) The 10L Short Path Distillation Kit features our USA made P10 Distillation Head. Every component in this turnkey is made for precision, throughput, and repeatable results. Also included the Kangaroo digital thermometer which is very rugged and reliable. You will also receive a Ribbed Dewar Style Glass Cold Trap to keep all volatiles and solvents out of your vacuum system. This Kit gives you the basic necessities of a short path distillation system and allows you to add on a temperature control system and vacuum pump to fit your needs. The 10L Neo Kit Includes: 10L Short Path Distillation Kit including glassware, labware, and P10 Distillation Head. 10L Digital Heating and Stirring Mantle. Valved Vacuum Adapter. Ribbed Dewar Style Glass Cold Trap. Kangaroo Digital Thermometer. Distillation Quick Start Guide This guide gives basic quick start instructions for distillation systems. It is intended to provide a starting point for learning the process. Parameters should be adjusted to suit specific needs, Before beginning distillation, ensure the following steps have been taken: Vacuum Pump is in good working order. Pump should be run against dry load to allow internals to warm up. Oil should be clear. Cloudy or dark oil should be changed. All glass components are in good working order and ready to be assembled A winterization and degassing procedure has been done to prepare oil for distillation Once all three of these steps have been completed, you are ready to begin distilling. Begin by placing stir bar in boiling flask and then load your material. This should be done using a funnel. A small amount of alcohol in the oil will give it a thinner consistency making it easier to transfer. Assemble all glassware and ensure each joint is properly greased. Do not use too much, as the vacuum pressure might pull some grease into the system. To ensure a full seal, spread grease in a circular motion by rotating glassware Attach circulator to condenser and set temperature to 50C. Allow circulator to reach temperature before beginning distillation. Connect vacuum pump to manifold. The manifold will allow you to isolate each individual component as well as let atmosphere into and out of the system. Connect receiving cow to cold trap. Connect cold trap to manifold. Connect vacuum gauge to manifold. At this point, ensure all connections are correct. Also ensure receiving cow is positioned to collect the first fraction in the far-left receiving flask. Circulator should be at its set temperature. Turn on vacuum pump to begin process. Turn on heat and set to 60C. Vacuum pump will begin to pull down and temperature will begin to rise. Watch the gauge to monitor vacuum pressure and stability. Start stir slower and increase speed with temperature. Once you are close to 60C, increase the temperature 20 degrees. Continue to raise the heat incrementally in 20-degree steps, increasing the set temperature as you near your set point. Increase temperatures incrementally until you reach 220C. You will see your first fraction somewhere between 180C and 190C or slightly before. This is the “heads” fraction. You will move to your second fraction when you see an increased reaction in the head, a slight color change toward golden, as well as a thickening of distillate. When this fraction hits, allow the distillate to “self-clean” the head for a minute or two then, rotate the cow to the middle receiving flask. Collect your “main body” fraction. You will see temps between 190-220C during this fraction. Continue to increase stirring speed as necessary. Reaction in the head may vary but it should never stop. As fluid level in the boiling flask decreases, increase stir speed. The final “tails” fraction is a mixture of the first and second fractions and should be saved for re-distillation later. Ideally, you want to turn the cow to the final flask before the tails fraction hits. The “tails” fraction has an obvious color change and will be darker than the “main body” fraction. You will see temps between 200-250C during this fraction. As fluid level in the boiling flask decreases even more, set stirring RPM higher (1000+ RPM). You may need to compensate with a bit more heat to finish of the final fraction as well. Once process is complete, stop heat, stop stir, and stop vacuum. Let atmosphere into the system. Be sure to properly store your distillate as exposure to air and light can cause oxidation. ***Note: This entire setup will ship via motor freight.*** *Notice to Customers: All units are inspected for broken glassware or parts before leaving BVV™. If the unit arrives damaged (this does not include minor imperfections or scuffs in glassware), the customer MUST contact BVV™ within 72 hours from carrier delivery to file a claim. If the customer DOES NOT contact BVV™ within 72 hours from carrier delivery, then BVV™ cannot issue any replacement(s) or compensation for the item; a new purchase will need to be made for a replacement.  BVV™ is not responsible for the failure of glassware which must be inspected before and after every use because it may eventually develop imperfections or damage through normal usage, mishandling, and stress caused by temperature variations. If an imperfection or damage is noted while inspecting the glassware DO NOT use the glassware because it can fail, which can cause bodily harm or damage to the surrounding area.

    $4,100.00

  • 10L Premium Short Path Distillation Turnkey System Shop All Categories BVV

    10L Premium Short Path Distillation Turnkey System

    10L Premium Short Path Distillation Turnkey System This unit carries a 2 day lead time. (Note: Stainless Steel Table NOT Included.) The 10L Premium Short Path Distillation Turnkey System features our USA made P10 Distillation Head. Every component in this turnkey is made for precision, throughput, and repeatable results. Also included the Kangaroo digital thermometer which is very rugged and reliable. You will also receive a Ribbed Dewar Style Glass Cold Trap to keep all volatiles and solvents out of your vacuum system. This Turnkey Setup gives you everything needed to perform distillation at the highest level. The 10L Neo Kit Includes: 10L Short Path Distillation Kit including glassware, labware, and P10 Distillation Head. 10L Digital Heating and Stirring Mantle. Polyscience 15 Liter Advanced Digital Heated Circulator BVV™ 21.2CFM Pro Series Corrosion Resistant Vacuum Pump Valved Vacuum Adapter. Ribbed Dewar Style Glass Cold Trap. Kangaroo Digital Thermometer. Distillation Quick Start Guide This guide gives basic quick start instructions for distillation systems. It is intended to provide a starting point for learning the process. Parameters should be adjusted to suit specific needs, Before beginning distillation, ensure the following steps have been taken: Vacuum Pump is in good working order. Pump should be run against dry load to allow internals to warm up. Oil should be clear. Cloudy or dark oil should be changed. All glass components are in good working order and ready to be assembled A winterization and degassing procedure has been done to prepare oil for distillation Once all three of these steps have been completed, you are ready to begin distilling. Begin by placing stir bar in boiling flask and then load your material. This should be done using a funnel. A small amount of alcohol in the oil will give it a thinner consistency making it easier to transfer. Assemble all glassware and ensure each joint is properly greased. Do not use too much, as the vacuum pressure might pull some grease into the system. To ensure a full seal, spread grease in a circular motion by rotating glassware Attach circulator to condenser and set temperature to 50C. Allow circulator to reach temperature before beginning distillation. Connect vacuum pump to manifold. The manifold will allow you to isolate each individual component as well as let atmosphere into and out of the system. Connect receiving cow to cold trap. Connect cold trap to manifold. Connect vacuum gauge to manifold. At this point, ensure all connections are correct. Also ensure receiving cow is positioned to collect the first fraction in the far-left receiving flask. Circulator should be at its set temperature. Turn on vacuum pump to begin process. Turn on heat and set to 60C. Vacuum pump will begin to pull down and temperature will begin to rise. Watch the gauge to monitor vacuum pressure and stability. Start stir slower and increase speed with temperature. Once you are close to 60C, increase the temperature 20 degrees. Continue to raise the heat incrementally in 20-degree steps, increasing the set temperature as you near your set point. Increase temperatures incrementally until you reach 220C. You will see your first fraction somewhere between 180C and 190C or slightly before. This is the “heads” fraction. You will move to your second fraction when you see an increased reaction in the head, a slight color change toward golden, as well as a thickening of distillate. When this fraction hits, allow the distillate to “self-clean” the head for a minute or two then, rotate the cow to the middle receiving flask. Collect your “main body” fraction. You will see temps between 190-220C during this fraction. Continue to increase stirring speed as necessary. Reaction in the head may vary but it should never stop. As fluid level in the boiling flask decreases, increase stir speed. The final “tails” fraction is a mixture of the first and second fractions and should be saved for re-distillation later. Ideally, you want to turn the cow to the final flask before the tails fraction hits. The “tails” fraction has an obvious color change and will be darker than the “main body” fraction. You will see temps between 200-250C during this fraction. As fluid level in the boiling flask decreases even more, set stirring RPM higher (1000+ RPM). You may need to compensate with a bit more heat to finish of the final fraction as well. Once process is complete, stop heat, stop stir, and stop vacuum. Let atmosphere into the system. Be sure to properly store your distillate as exposure to air and light can cause oxidation. ***Note: This entire setup will ship via motor freight.*** ***Note: All units are inspected for broken glass or parts before unit is shipped. If unit arrives damaged or glass is broken (this does not include minor imperfections or scuffs in glassware), Customer MUST contact BVV™ within 3 days of delivery to file a claim and receive a replacement part. If customer DOES NOT contact BVV™ within 3 days of delivery responsibility for replacement parts falls on the customer and they must pay for replacement pieces.*** ***Glassware Safety Disclaimer: BVV™ is not responsible for failure of glassware which must be inspected before and after every use because it may eventually develop imperfections or damage through normal usage, mishandling, and stress caused by temperature variations. If an imperfection or damage is noted while inspecting the glassware DO NOT use the glassware because it can fail causing bodily harm or damage to the surrounding area.***

    $11,500.00

  • 10L Neocision Dual Head Short Path Distillation Kit Shop All Categories Neocision Without Stainless Steel Table

    10L Neocision Dual Head Short Path Distillation Kit

    10L Neocision Dual Head Short Path Distillation Kit This unit carries a 2 day lead time. The 10L Neocision Distillation Turnkey Setup features our Dual 10L P5 Distillation Heads and USA made glass. Every component in this turnkey is made for precision, throughput, and repeatable results. Also included the Bullseye Precision Vacuum Gauge from Digivac which is the most rugged and dependable vacuum gauge on the market. You will also receive a Dual Dewar Style Glass Cold Trap to keep all volatiles and solvents out of your vacuum system. This Turnkey Setup gives you everything needed to perform distillation at the highest level. The 10L Neo Kit Includes: 10L Neocision Kit with Dual P5 Distillation Heads KF-25 90 Degree Long Manifold and Metering Valve Dual Dewar Style Glass Cold Trap Bullseye Precision Vacuum Gauge Distillation Quick Start Guide This guide gives basic quick start instructions for distillation systems. It is intended to provide a starting point for learning the process. Parameters should be adjusted to suit specific needs, Before beginning distillation, ensure the following steps have been taken: Vacuum Pump is in good working order. Pump should be run against dry load to allow internals to warm up. Oil should be clear. Cloudy or dark oil should be changed. All glass components are in good working order and ready to be assembled A winterization and degassing procedure has been done to prepare oil for distillation Once all three of these steps have been completed, you are ready to begin distilling. Begin by placing stir bar in boiling flask and then load your material. This should be done using a funnel. A small amount of alcohol in the oil will give it a thinner consistency making it easier to transfer. Assemble all glassware and ensure each joint is properly greased. Do not use too much, as the vacuum pressure might pull some grease into the system. To ensure a full seal, spread grease in a circular motion by rotating glassware Attach circulator to condenser and set temperature to 50C. Allow circulator to reach temperature before beginning distillation. Connect vacuum pump to manifold. The manifold will allow you to isolate each individual component as well as let atmosphere into and out of the system. Connect receiving cow to cold trap. Connect cold trap to manifold. Connect vacuum gauge to manifold. At this point, ensure all connections are correct. Also ensure receiving cow is positioned to collect the first fraction in the far-left receiving flask. Circulator should be at its set temperature. Turn on vacuum pump to begin process. Turn on heat and set to 60C. Vacuum pump will begin to pull down and temperature will begin to rise. Watch the gauge to monitor vacuum pressure and stability. Start stir slower and increase speed with temperature. Once you are close to 60C, increase the temperature 20 degrees. Continue to raise the heat incrementally in 20-degree steps, increasing the set temperature as you near your set point. Increase temperatures incrementally until you reach 220C. You will see your first fraction somewhere between 180C and 190C or slightly before. This is the “heads” fraction. You will move to your second fraction when you see an increased reaction in the head, a slight color change toward golden, as well as a thickening of distillate. When this fraction hits, allow the distillate to “self-clean” the head for a minute or two then, rotate the cow to the middle receiving flask. Collect your “main body” fraction. You will see temps between 190-220C during this fraction. Continue to increase stirring speed as necessary. Reaction in the head may vary but it should never stop. As fluid level in the boiling flask decreases, increase stir speed. The final “tails” fraction is a mixture of the first and second fractions and should be saved for re-distillation later. Ideally, you want to turn the cow to the final flask before the tails fraction hits. The “tails” fraction has an obvious color change and will be darker than the “main body” fraction. You will see temps between 200-250C during this fraction. As fluid level in the boiling flask decreases even more, set stirring RPM higher (1000+ RPM). You may need to compensate with a bit more heat to finish of the final fraction as well. Once process is complete, stop heat, stop stir, and stop vacuum. Let atmosphere into the system. Be sure to properly store your distillate as exposure to air and light can cause oxidation. ***Note: This entire setup will ship via motor freight.*** *Notice to Customers: All units are inspected for broken glassware or parts before leaving BVV™. If the unit arrives damaged (this does not include minor imperfections or scuffs in glassware), the customer MUST contact BVV™ within 72 hours from carrier delivery to file a claim. If the customer DOES NOT contact BVV™ within 72 hours from carrier delivery, then BVV™ cannot issue any replacement(s) or compensation for the item; a new purchase will need to be made for a replacement.  BVV™ is not responsible for the failure of glassware which must be inspected before and after every use because it may eventually develop imperfections or damage through normal usage, mishandling, and stress caused by temperature variations. If an imperfection or damage is noted while inspecting the glassware DO NOT use the glassware because it can fail, which can cause bodily harm or damage to the surrounding area.

    $9,200.00

  • 10L Neocision Dual Head Short Path Distillation Turnkey System Shop All Categories Neocision

    10L Neocision Dual Head Short Path Distillation Turnkey System

    10L Neocision Dual Head Short Path Distillation Turnkey System This unit carries a 2 day lead time. The 10L Neocision Distillation Turnkey Setup features our Dual 10L P5 Distillation Heads and USA made glass. Every component in this turnkey is made for precision, throughput, and repeatable results. Also included is a KF-25 Vacuum Pump giving you extreme power and depth with a long lifespan, the Bullseye Precision Vacuum Gauge from Digivac which is the most rugged and dependable vacuum gauge on the market, and a BVV 19L Heated Circulator for maximum condensation of vapors. You will also receive a Dual Dewar Style Glass Cold Trap to keep all volatiles and solvents out of your vacuum system. This Turnkey Setup gives you everything needed to perform distillation at the highest level. The Premium Turnkey Kit Includes: 10L Neocision Kit with Dual P5 Distillation Heads KF-25 2 Meter Bellows Dual Dewar Style Glass Cold Trap Bullseye Precision Vacuum Gauge BVV 19L Heated Circulator Your Choice Of KF-25 Vacuum Pump Distillation Quick Start Guide This guide gives basic quick start instructions for distillation systems. It is intended to provide a starting point for learning the process. Parameters should be adjusted to suit specific needs, Before beginning distillation, ensure the following steps have been taken: Vacuum Pump is in good working order. Pump should be run against dry load to allow internals to warm up. Oil should be clear. Cloudy or dark oil should be changed. All glass components are in good working order and ready to be assembled A winterization and degassing procedure has been done to prepare oil for distillation Once all three of these steps have been completed, you are ready to begin distilling. Begin by placing stir bar in boiling flask and then load your material. This should be done using a funnel. A small amount of alcohol in the oil will give it a thinner consistency making it easier to transfer. Assemble all glassware and ensure each joint is properly greased. Do not use too much, as the vacuum pressure might pull some grease into the system. To ensure a full seal, spread grease in a circular motion by rotating glassware Attach circulator to condenser and set temperature to 50C. Allow circulator to reach temperature before beginning distillation. Connect vacuum pump to manifold. The manifold will allow you to isolate each individual component as well as let atmosphere into and out of the system. Connect receiving cow to cold trap. Connect cold trap to manifold. Connect vacuum gauge to manifold. At this point, ensure all connections are correct. Also ensure receiving cow is positioned to collect the first fraction in the far-left receiving flask. Circulator should be at its set temperature. Turn on vacuum pump to begin process. Turn on heat and set to 60C. Vacuum pump will begin to pull down and temperature will begin to rise. Watch the gauge to monitor vacuum pressure and stability. Start stir slower and increase speed with temperature. Once you are close to 60C, increase the temperature 20 degrees. Continue to raise the heat incrementally in 20-degree steps, increasing the set temperature as you near your set point. Increase temperatures incrementally until you reach 220C. You will see your first fraction somewhere between 180C and 190C or slightly before. This is the “heads” fraction. You will move to your second fraction when you see an increased reaction in the head, a slight color change toward golden, as well as a thickening of distillate. When this fraction hits, allow the distillate to “self-clean” the head for a minute or two then, rotate the cow to the middle receiving flask. Collect your “main body” fraction. You will see temps between 190-220C during this fraction. Continue to increase stirring speed as necessary. Reaction in the head may vary but it should never stop. As fluid level in the boiling flask decreases, increase stir speed. The final “tails” fraction is a mixture of the first and second fractions and should be saved for re-distillation later. Ideally, you want to turn the cow to the final flask before the tails fraction hits. The “tails” fraction has an obvious color change and will be darker than the “main body” fraction. You will see temps between 200-250C during this fraction. As fluid level in the boiling flask decreases even more, set stirring RPM higher (1000+ RPM). You may need to compensate with a bit more heat to finish of the final fraction as well. Once process is complete, stop heat, stop stir, and stop vacuum. Let atmosphere into the system. Be sure to properly store your distillate as exposure to air and light can cause oxidation. ***Note: This entire setup will ship via motor freight.*** ***Note: All units are inspected for broken glass or parts before unit is shipped. If unit arrives damaged or glass is broken (this does not include minor imperfections or scuffs in glassware), Customer MUST contact BVV™ within 3 days of delivery to file a claim and receive a replacement part. If customer DOES NOT contact BVV™ within 3 days of delivery responsibility for replacement parts falls on the customer and they must pay for replacement pieces.*** ***Glassware Safety Disclaimer: BVV™ is not responsible for failure of glassware which must be inspected before and after every use because it may eventually develop imperfections or damage through normal usage, mishandling, and stress caused by temperature variations. If an imperfection or damage is noted while inspecting the glassware DO NOT use the glassware because it can fail causing bodily harm or damage to the surrounding area.***

    $13,250.00 - $17,750.00

  • 20L Neocision Dual Head Short Path Distillation Kit Shop All Categories Neocision

    20L Neocision Dual Head Short Path Distillation Kit

    20L Neocision Dual Head Short Path Distillation Kit This unit carries a 2 day lead time. (Note: This kit does NOT include the stainless steel table.) The 20L Neocision Distillation Kit Setup features our Dual P10V6 Distillation Heads and USA made glass. Every component in this distillation kit is made for precision, throughput, and repeatable results. You will also receive Dual Dewar Style Ribbed Glass Cold Traps to keep all volatiles and solvents out of your vacuum system. This kit gives you the essentials of a short path distillation system and allows you to add a pump and temperature control system of your choosing. The 20L Neo Kit Includes: 20L Neocision Kit with glassware, labware, and Dual P10V6 Distillation Heads. KF-25 Bellow Y Manifold Dual Ribbed Dewar Style Glass Cold Trap Non-Mercury Glass Thermometers 20L Digital Heating and Stirring Mantle Distillation Quick Start Guide This guide gives basic quick start instructions for distillation systems. It is intended to provide a starting point for learning the process. Parameters should be adjusted to suit specific needs, Before beginning distillation, ensure the following steps have been taken: Vacuum Pump is in good working order. Pump should be run against dry load to allow internals to warm up. Oil should be clear. Cloudy or dark oil should be changed. All glass components are in good working order and ready to be assembled A winterization and degassing procedure has been done to prepare oil for distillation Once all three of these steps have been completed, you are ready to begin distilling. Begin by placing stir bar in the boiling flask and then load your material. This should be done using a funnel. A small amount of alcohol in the oil will give it a thinner consistency making it easier to transfer. Assemble all glassware and ensure each joint is properly greased. Do not use too much, as the vacuum pressure might pull some grease into the system. To ensure a full seal, spread grease in a circular motion by rotating glassware Attach circulator to condenser and set temperature to 50C. Allow circulator to reach temperature before beginning distillation. Connect vacuum pump to manifold. The manifold will allow you to isolate each individual component as well as let atmosphere into and out of the system. Connect receiving cow to cold trap. Connect cold trap to manifold. Connect vacuum gauge to manifold. At this point, ensure all connections are correct. Also ensure receiving cow is positioned to collect the first fraction in the far-left receiving flask. Circulator should be at its set temperature. Turn on vacuum pump to begin process. Turn on heat and set to 60C. Vacuum pump will begin to pull down and temperature will begin to rise. Watch the gauge to monitor vacuum pressure and stability. Start stir slower and increase speed with temperature. Once you are close to 60C, increase the temperature 20 degrees. Continue to raise the heat incrementally in 20-degree steps, increasing the set temperature as you near your set point. Increase temperatures incrementally until you reach 220C. You will see your first fraction somewhere between 180C and 190C or slightly before. This is the “heads” fraction. You will move to your second fraction when you see an increased reaction in the head, a slight color change toward golden, as well as a thickening of distillate. When this fraction hits, allow the distillate to “self-clean” the head for a minute or two then, rotate the cow to the middle receiving flask. Collect your “main body” fraction. You will see temps between 190-220C during this fraction. Continue to increase stirring speed as necessary. Reaction in the head may vary but it should never stop. As fluid level in the boiling flask decreases, increase stir speed. The final “tails” fraction is a mixture of the first and second fractions and should be saved for re-distillation later. Ideally, you want to turn the cow to the final flask before the tails fraction hits. The “tails” fraction has an obvious color change and will be darker than the “main body” fraction. You will see temps between 200-250C during this fraction. As fluid level in the boiling flask decreases even more, set stirring RPM higher (1000+ RPM). You may need to compensate with a bit more heat to finish of the final fraction as well. Once process is complete, stop heat, stop stir, and stop vacuum. Let atmosphere into the system. Be sure to properly store your distillate as exposure to air and light can cause oxidation. *Note: This entire setup will ship via motor freight.*** *Notice to Customers: All units are inspected for broken glassware or parts before leaving BVV™. If the unit arrives damaged (this does not include minor imperfections or scuffs in glassware), the customer MUST contact BVV™ within 72 hours from carrier delivery to file a claim. If the customer DOES NOT contact BVV™ within 72 hours from carrier delivery, then BVV™ cannot issue any replacement(s) or compensation for the item; a new purchase will need to be made for a replacement.  BVV™ is not responsible for the failure of glassware which must be inspected before and after every use because it may eventually develop imperfections or damage through normal usage, mishandling, and stress caused by temperature variations. If an imperfection or damage is noted while inspecting the glassware DO NOT use the glassware because it can fail, which can cause bodily harm or damage to the surrounding area.

    $6,800.00 - $7,000.00

  • 20L Neocision Dual Short Path Distillation Turnkey System Shop All Categories Neocision

    20L Neocision Dual Short Path Distillation Turnkey System

    20L Neocision Dual Short Path Distillation Turnkey System This unit carries a 2 day lead time. (Note: This kit does NOT include the stainless steel table.) The 20L Neocision Distillation Turnkey Setup features our Dual USA made P10V6 Distillation Heads. Every component in this distillation kit is made for precision, throughput, and repeatable results. You will also receive Dual Dewar Style Ribbed Glass Cold Traps to keep all volatiles and solvents out of your vacuum system. This Turnkey Setup gives you everything needed to perform distillation at the highest level. The 20L Neo Kit Includes: 20L Neocision Kit with glassware, labware, and Dual P10V6 Distillation Heads. BVV 15 Liter Advanced Digital Heated Circulator Choice of Vacuum Pump  KF-25 Bellow Y Manifold Dual Ribbed Dewar Style Glass Cold Trap Non-Mercury Glass Thermometers 20L Digital Heating and Stirring Mantle Distillation Quick Start Guide This guide gives basic quick start instructions for distillation systems. It is intended to provide a starting point for learning the process. Parameters should be adjusted to suit specific needs, Before beginning distillation, ensure the following steps have been taken: Vacuum Pump is in good working order. Pump should be run against dry load to allow internals to warm up. Oil should be clear. Cloudy or dark oil should be changed. All glass components are in good working order and ready to be assembled A winterization and degassing procedure has been done to prepare oil for distillation Once all three of these steps have been completed, you are ready to begin distilling. Begin by placing stir bar in the boiling flask and then load your material. This should be done using a funnel. A small amount of alcohol in the oil will give it a thinner consistency making it easier to transfer. Assemble all glassware and ensure each joint is properly greased. Do not use too much, as the vacuum pressure might pull some grease into the system. To ensure a full seal, spread grease in a circular motion by rotating glassware Attach circulator to condenser and set temperature to 50C. Allow circulator to reach temperature before beginning distillation. Connect vacuum pump to manifold. The manifold will allow you to isolate each individual component as well as let atmosphere into and out of the system. Connect receiving cow to cold trap. Connect cold trap to manifold. Connect vacuum gauge to manifold. At this point, ensure all connections are correct. Also ensure receiving cow is positioned to collect the first fraction in the far-left receiving flask. Circulator should be at its set temperature. Turn on vacuum pump to begin process. Turn on heat and set to 60C. Vacuum pump will begin to pull down and temperature will begin to rise. Watch the gauge to monitor vacuum pressure and stability. Start stir slower and increase speed with temperature. Once you are close to 60C, increase the temperature 20 degrees. Continue to raise the heat incrementally in 20-degree steps, increasing the set temperature as you near your set point. Increase temperatures incrementally until you reach 220C. You will see your first fraction somewhere between 180C and 190C or slightly before. This is the “heads” fraction. You will move to your second fraction when you see an increased reaction in the head, a slight color change toward golden, as well as a thickening of distillate. When this fraction hits, allow the distillate to “self-clean” the head for a minute or two then, rotate the cow to the middle receiving flask. Collect your “main body” fraction. You will see temps between 190-220C during this fraction. Continue to increase stirring speed as necessary. Reaction in the head may vary but it should never stop. As fluid level in the boiling flask decreases, increase stir speed. The final “tails” fraction is a mixture of the first and second fractions and should be saved for re-distillation later. Ideally, you want to turn the cow to the final flask before the tails fraction hits. The “tails” fraction has an obvious color change and will be darker than the “main body” fraction. You will see temps between 200-250C during this fraction. As fluid level in the boiling flask decreases even more, set stirring RPM higher (1000+ RPM). You may need to compensate with a bit more heat to finish of the final fraction as well. Once process is complete, stop heat, stop stir, and stop vacuum. Let atmosphere into the system. Be sure to properly store your distillate as exposure to air and light can cause oxidation. ***Note: This entire setup will ship via motor freight.*** *Notice to Customers: All units are inspected for broken glassware or parts before leaving BVV™. If the unit arrives damaged (this does not include minor imperfections or scuffs in glassware), the customer MUST contact BVV™ within 72 hours from carrier delivery to file a claim. If the customer DOES NOT contact BVV™ within 72 hours from carrier delivery, then BVV™ cannot issue any replacement(s) or compensation for the item; a new purchase will need to be made for a replacement.  BVV™ is not responsible for the failure of glassware which must be inspected before and after every use because it may eventually develop imperfections or damage through normal usage, mishandling, and stress caused by temperature variations. If an imperfection or damage is noted while inspecting the glassware DO NOT use the glassware because it can fail, which can cause bodily harm or damage to the surrounding area.

    $13,000.00 - $17,000.00

  • 5L Neocision Short Path Distillation Kit Shop All Categories Neocision

    5L Neocision Short Path Distillation Kit

    5L Neocision Short Path Distillation Kit This unit carries a 2 day lead time. The 5L Neocision Short Path Distillation Kit features our 5L Distillation Kit with P5 Distillation Head and USA made glass. Every component in this turnkey is made for precision, throughput, and repeatable results. You will also receive a Dewar Style Glass Cold Trap to keep all volatiles and solvents out of your vacuum system.  The Premium Turnkey Kit Includes: 5L Neocision Kit with P5 Distillation Head KF-25 x 1/4" Barb Adapter Dewar Style Glass Cold Trap Distillation Quick Start Guide This guide gives basic quick start instructions for distillation systems. It is intended to provide a starting point for learning the process. Parameters should be adjusted to suit specific needs, Before beginning distillation, ensure the following steps have been taken: Vacuum Pump is in good working order. Pump should be run against dry load to allow internals to warm up. Oil should be clear. Cloudy or dark oil should be changed. All glass components are in good working order and ready to be assembled A winterization and degassing procedure has been done to prepare oil for distillation Once all three of these steps have been completed, you are ready to begin distilling. Begin by placing stir bar in boiling flask and then load your material. This should be done using a funnel. A small amount of alcohol in the oil will give it a thinner consistency making it easier to transfer. Assemble all glassware and ensure each joint is properly greased. Do not use too much, as the vacuum pressure might pull some grease into the system. To ensure a full seal, spread grease in a circular motion by rotating glassware Attach circulator to condenser and set temperature to 50C. Allow circulator to reach temperature before beginning distillation. Connect vacuum pump to manifold. The manifold will allow you to isolate each individual component as well as let atmosphere into and out of the system. Connect receiving cow to cold trap. Connect cold trap to manifold. Connect vacuum gauge to manifold. At this point, ensure all connections are correct. Also ensure receiving cow is positioned to collect the first fraction in the far-left receiving flask. Circulator should be at its set temperature. Turn on vacuum pump to begin process. Turn on heat and set to 60C. Vacuum pump will begin to pull down and temperature will begin to rise. Watch the gauge to monitor vacuum pressure and stability. Start stir slower and increase speed with temperature. Once you are close to 60C, increase the temperature 20 degrees. Continue to raise the heat incrementally in 20-degree steps, increasing the set temperature as you near your set point. Increase temperatures incrementally until you reach 220C. You will see your first fraction somewhere between 180C and 190C or slightly before. This is the “heads” fraction. You will move to your second fraction when you see an increased reaction in the head, a slight color change toward golden, as well as a thickening of distillate. When this fraction hits, allow the distillate to “self-clean” the head for a minute or two then, rotate the cow to the middle receiving flask. Collect your “main body” fraction. You will see temps between 190-220C during this fraction. Continue to increase stirring speed as necessary. Reaction in the head may vary but it should never stop. As fluid level in the boiling flask decreases, increase stir speed. The final “tails” fraction is a mixture of the first and second fractions and should be saved for re-distillation later. Ideally, you want to turn the cow to the final flask before the tails fraction hits. The “tails” fraction has an obvious color change and will be darker than the “main body” fraction. You will see temps between 200-250C during this fraction. As fluid level in the boiling flask decreases even more, set stirring RPM higher (1000+ RPM). You may need to compensate with a bit more heat to finish of the final fraction as well. Once process is complete, stop heat, stop stir, and stop vacuum. Let atmosphere into the system. Be sure to properly store your distillate as exposure to air and light can cause oxidation. ***Note: This entire setup will ship via motor freight.*** *Notice to Customers: All units are inspected for broken glassware or parts before leaving BVV™. If the unit arrives damaged (this does not include minor imperfections or scuffs in glassware), the customer MUST contact BVV™ within 72 hours from carrier delivery to file a claim. If the customer DOES NOT contact BVV™ within 72 hours from carrier delivery, then BVV™ cannot issue any replacement(s) or compensation for the item; a new purchase will need to be made for a replacement.  BVV™ is not responsible for the failure of glassware which must be inspected before and after every use because it may eventually develop imperfections or damage through normal usage, mishandling, and stress caused by temperature variations. If an imperfection or damage is noted while inspecting the glassware DO NOT use the glassware because it can fail, which can cause bodily harm or damage to the surrounding area.

    $6,950.00

  • Julabo FP51-SL Shop All Categories Julabo

    Julabo FP51-SL

    Julabo FP51-SL JULABO Ultra-Low Refrigerated Circulators for heating and cooling are suitable for external temperature tasks. Powerful circulating pump systems and high heating and cooling capacities guarantee short heat-up and cool-down times. ACC ‘Active Cooling Control‘ provides active cooling control across the whole temperature range. An energy saving feature with only minor loss of heat is provided by the proportional cooling capacity control in the ‘FP’ refrigeration units. The inevitable dust accumulation that occurs in refrigeration systems is solved by means of an easily removed venting grill, which allows for easy cleaning. The units are equipped with handles or castors for an easy transportation. All models have a drain tap on the front allowing the fluid to be drained easily. Additionally the instruments are equipped with an improved insulation to help avoid ice-formation, and have a visual liquid level display.   Specifications Order No. 9352751 Model Series HighTech Working Temperature Range (°C) -51°... +200° Temperature Stability (°C) ±0.05 Temperature Control ICC intelligent cascade control, TCF temperature control features, Absolute temperature calibration 3-point Display Resolution 0.01 °C Integrated Programmer 6x60 steps Temperature Display VFD, LCD Heating Capacity (kW) 3 Cooling Capacity 0.26 kW @ -40 °C, 1 kW @ 20 °C,1.5 kW @ 0 °C, 2 kW @ 20 °C Pump capacity Flow Rate (l/min) 22-26 Pump Capacity Flow Pressure (psi) 5.8-10.2 Pump Capacity Flow Suction (psi) 2.9-5.8 Pump Connections M16x1 Filling Volume Liters 11 Bath opening / bath depth (W x L / D inch) 7.1 x 4.7 / 7.9 Barbed fittings diameter (inner dia. / mm) 8/12 Refrigerant R507 External Pt100 Intergrated Digital Interface RS232, RS485, Optional Profibus Ambient Temperature 5…40 °C Noise Level (dBA) 53 Classification Classification III (FL)according to DIN 12876-1 Included with 2 barbed fittings for tubing 8 and 12mm inner dia (pump connections M16x1) Analog Connection Input/Output Optional Cooling Coil optional Accessory (8970243) Cooling of Compressor Air Power requirement V / Hz / A 3x 230/60/14 Heaters 3kW Cooling capacity °C 2kW (@ 20°C), 1.5kW (@ 0°C), 1kW (@ -20°C), 260W (@ -40°C) Alarm Signal acoustically & optical Temperature Selection / Display °C / °F Volumetric Capacity Liters 11 Outer dimensions W x L x H inch 18.1 x 23.6 x 35.4 Available Voltage Versions 208 V / 3 Ph. / 60 Hz, 230 V / 3 Ph. / 50 Hz, 400 V / 3 Ph. / 50 Hz Other Characteristics Optional: Electronic module with analog connections for external programming, temperature recorder, standby, alarm (Order no. 8 900 100). Characteristics / Display Additional plain textinformation: LCD dialog display for interactive operation with plain textdisplay, Easy to read VFD Comfort display for simultaneous display of 3 values, warning functions, high temperature cut-off, pump stages (resolution 0.01 °C), Pump stage and liquid level: Backlit indicator for selected pump stages and filling volume Characteristics / Operation Comfortable and detailed: Comfortable keypad with additional menu functions for pump stages, calibration, control parameters, programmer, warnings, etc. Characteristics / Temperature Control For perfect results: Intelligent Cascade Control, automatic & self optimizing adjustment of PID control parameters, temperature stability ±0.005 °C internal, Characteristics / Refrigeration Technology 100 % Cooling capacity: Active Cooling Control for cooling available throughout the entire working temperature range, fast cool-down even at higher temperatures, Condensation and ice protection: A heated cover plate prevents condensation or ice build-up in the bath, Consistent cooling capacity: Easily removable venting grid for quick and easy cleaning, Energy saving cooling: Proportional cooling control for automatic adjustment of cooling power or temporary switch-off of compressor as needed to save up to 90 % energy in comparison to unregulated co. Characteristics / Technical Features Clever pump system: Reliable and consistent pump capacity, electronically adjustable pump stages, Control from the external application: External Pt100 sensor connection for precisemeasurement and control directly in the external application, Connection compliant to standard: RS232/RS485 dual-interface for serial data transmission according to EIA-485 industry standard (2-wire bus technology), upgradable with Profibus DP, Optimal program control: For the execution of time and temperature dependant profiles, 6 temperature profiles with 60 steps max., with real time clock, Automatic control of operating time: Electronic countdown-timer function for timer-programmed unit shut-down, standby mode after programmed time expires. Characteristics / Warning & Safety Functions Early warning system for high/low temperature limits: Maximum safety for applications, optical and audible alarm, convertible to automated cut-off function, Early warning system for low liquid level: Maximum safety for applications, optical and audible alarm, allows user to refill bath fluid before the unit shuts down, Enhanced protective functions : Maximum safety, adjustable high temperature cut-off or dry-running protection, additional display of setpoints permits easy and precise adjustments, For flammable bath fluids: Classification III (FL) according to DIN 12876-1

    $0.00

  • BVV™ Premium Vacuum Pump Oil Shop All Categories BVV

    BVV™ Premium Vacuum Pump Oil

    BVV™ Premium Vacuum Pump Oil For Maximum performance and pump efficiency, change the oil after every evacuation. After evacuation, oil contains contaminants which limit pump efficiency. Premium vacuum pump oil can be used in any vacuum pump to maintain and prolong the life of the pump. Drain immediately after evacuation while pump is warm. Slowly add oil to top of "oil level" line. If oil is to low, you will hear the exhaust baffle chatter. If oil level is too high, excess oil will be blown out of the exhaust. Non detergent-Extra Pure-Hydroprocessed-ISO 400   BVV™ Premium Vacuum Pump Oil Safety Data Sheet .PDF

    $20.00 - $1,200.00

  • Polyscience 15 Liter Advanced Digital Refrigerated Circulator (-30°C/200°C) Shop All Categories Polyscience Default Title

    Polyscience 15 Liter Advanced Digital Refrigerated Circulator (-30°C/200°C)

    Polyscience 15 Liter Advanced Digital Refrigerated Circulator (-30°C/200°C) ***Note: This item has a lead time of 2-3 weeks depending on stock availability.***   Description: -30, 15 L Ref. Circulator Controller Type: Advanced Digital  Display: 3.75" Touch-Pad LCD Connectivity:  Ethernet, USB A & B, RS232/addressable RS485, External Temperature Probe Languages Supported: 4: French, German, Spanish, English Swivel 180 Rotating Controller: Yes Working Temperature Range °C: -30° to 200° Temperature Stability °C: ±0.01° Fluid Optimization/Specific Heat Tuning: Automatic and/or user-adjustable Temperature Calibration Capability: 1-point Working Access (L x W x D) (cm): 21.2 x 27.6 x 14 cm  Pump Type: Pressure/Suction External Temperature Control Capability: Yes Flammability Class (DIN 12876-1): III (FL)       Specifications Working Temperature Range °F -22° to 392° Working Temperature Range °C -30° to 200° Nominal Cooling Capacity @ +20C (W) 915 Reservoir Capacity (gallons) 3.96 Reservoir Capacity (liters) 15 Reservoir/Tank Material Stainless Steel Reservoir Cover Included DuraTop Yes LidDock Yes Cleanable Air Filter Yes Working Access (L x W x D) (inches) 8.35 x 10.88 x 5.5 in Working Access (L x W x D) (cm) 21.2 x 27.6 x 14 cm Temperature Stability °F ±0.02° Temperature Stability °C ±0.01° Display 3.75" Touch-Pad LCD Display Resolution (Set) 0.01 Display Resolution (Read) 0.01 Pump Type Pressure/Suction Pump Speed Variable Process Connections 1/4" (F) NPT External Temperature Control Capability Yes Flammability Class (DIN 12876-1) III (FL) Over-Temperature Protection / Failsafe Heater Control Yes Low Liquid Level Protection Yes WhisperCool Environmental Control Technology Yes Cool Command Refrigeration Technology Yes Reservoir Drain Yes Included Software PolyTemp Viewer, USB driver Maximum Ambient Temperature °F 95° Maximum Ambient Temperature °C 35° Overall Dimensions (L x W x H) (inches) 22.4 x 14.5 x 26.9 in Overall Dimensions (L x W x H) (cm) 56.9 x 36.8 x 68.3 cm Refrigerant R404A Environmental Compliance RoHS, WEEE Shipping Weight (pounds) 118.0 Shipping Weight (kilograms) 53.5 60Hz Part Number AD15R-30-A11B Maximum Pressure (psi) 4.3 Maximum Pressure (bar) 0.30 Maximum Pressure Flow Rate (gpm) 5.30 Maximum Pressure Flow Rate (l/min) 20.1 Maximum Suction Flow Rate (gpm) 3.9 Maximum Suction Flow Rate (l/min) 14.7 Cooling Capacity @ -20°C (W) 165 Cooling Capacity @ 0°C (W) 505 Cooling Capacity @ +20°C (W) 915 Included Hardware Nylon hose adapters for 3/8", 1/4", and 3/16" Heater Wattage 1100 Electrical Requirements (VAC/Hz/Ph/A) 120/60/1/13 Regulatory Approvals ETL   Certifications: Regulatory Approvals: ETL   Circulating Bath Operator's Manual 

    $6,350.00

  • Polyscience 28 Liter Advanced Digital Refrigerated Circulator (-30°C/200°C) Shop All Categories Polyscience Default Title

    Polyscience 28 Liter Advanced Digital Refrigerated Circulator (-30°C/200°C)

    Polyscience 28 Liter Advanced Digital Refrigerated Circulator (-30°C/200°C)     Specification Description -30, 28 L Ref. Circulator Controller Type Advanced Digital Display 3.75" Touch-Pad LCD Connectivity Ethernet, USB A & B, RS232/addressable RS485, External Temperature Probe Languages Supported 4: French, German, Spanish, English Swivel 180 Rotating Controller Yes Working Temperature Range °C -30° to 200° Temperature Stability °C ±0.01° Fluid Optimization/Specific Heat Tuning Automatic and/or user-adjustable Temperature Calibration Capability 1-point Working Access (L x W x D) (cm) 31.4 x 35.9 x 14 cm Pump Type Pressure/Suction External Temperature Control Capability Yes Flammability Class (DIN 12876-1) III (FL) Working Temperature Range °F -22° to 392° Working Temperature Range °C -30° to 200° Nominal Cooling Capacity @ +20C (W) 915 Reservoir Capacity (gallons) 7.4 Reservoir Capacity (liters) 28 Reservoir/Tank Material Stainless Steel Reservoir Cover Included DuraTop Yes LidDock Yes Cleanable Air Filter Yes Working Access (L x W x D) (inches) 12.35 x 14.13 x 5.5 in Working Access (L x W x D) (cm) 31.4 x 35.9 x 14 cm Temperature Stability °F ±0.02° Temperature Stability °C ±0.01° Display 3.75" Touch-Pad LCD Display Resolution (Set) 0.01 Display Resolution (Read) 0.01 Pump Type Pressure/Suction Pump Speed Variable Process Connections 1/4" (F) NPT External Temperature Control Capability Yes Flammability Class (DIN 12876-1) III (FL) Over-Temperature Protection / Failsafe Heater Control Yes Low Liquid Level Protection Yes Reservoir Drain Yes Cooling Coil Yes Included Software PolyTemp Viewer, USB driver Maximum Ambient Temperature °F 95° Maximum Ambient Temperature °C 35° Overall Dimensions (L x W x H) (inches) 26.5 x 18 x 26.9 in Overall Dimensions (L x W x H) (cm) 67.2 x 45.7 x 68.3 cm Refrigerant R404A Environmental Compliance RoHS, WEEE Shipping Weight (pounds) 146.0 Shipping Weight (kilograms) 66.1 Catalog Page Number 40-41 60 Hz Only Part Number AD28R-30-A11B Maximum Pressure (psi) 4.3 Maximum Pressure (bar) 0.30 Maximum Pressure Flow Rate (gpm) 5.30 Maximum Pressure Flow Rate (l/min) 20.1 Maximum Suction Flow Rate (gpm) 3.9 Maximum Suction Flow Rate (l/min) 14.7 Cooling Capacity @ -20°C (W) 165 Cooling Capacity @ 0°C (W) 505 Cooling Capacity @ +20°C (W) 915 Cooling Capacity @ +100°C (W) 915 Included Hardware Nylon hose adapters for 3/8", 1/4", and 3/16" Heater Wattage 1100 Electrical Requirements (VAC/Hz/Ph/A) 120/60/1/10 Regulatory Approvals ETL   Key Features: Intuitive 3.75" (9.5cm) display with touch-pad control 4 Languages: French, German, Spanish, English Swivel 180 Rotating Controller On-board connectivity: Ethernet, USB A & B, RS232/addressable RS485, External Temperature Probe On-screen prompts Automatic performance optimization and specific heat tuning Single-point calibration capability   Certifications Regulatory Approvals: CE Regulatory Approvals: ETL Operator's Manual

    $7,000.00

  • Polyscience 7 Liter Low Profile MX Refrigerated Circulator (-20°C/135°C) Shop All Categories Polyscience

    Polyscience 7 Liter Low Profile MX Refrigerated Circulator

    Polyscience 7 Liter Low Profile MX Refrigerated Circulator  Note: This item may carry up to a 4-6 week lead time.     The Polyscience 7 Liter Low Profile MX Refrigerated Circulator is an more ergonomic version of the standard 7L Refrigerated Circulator. It is the ideal low temperature cooler for short path distillation and can also be used to heat jacketed bases and chill jacketed columns for small capacity extraction systems.   Specification Description -20, 7 L Low Ref. Circulator Controller Type MX Display 3.75" Touch-Pad LCD Working Temperature Range °C -20° to 135° Temperature Stability °C ±0.07° Temperature Calibration Capability 1-point Working Access (L x W x D) (cm) 15.7 x 14.2 x 12.7 cm Pump Type Pressure Flammability Class (DIN 12876-1) I (NFL) Working Temperature Range °F -4° to 275° Working Temperature Range °C -20° to 135° Nominal Cooling Capacity @ +20C (W) 200 Reservoir Capacity (gallons) 1.85 Reservoir Capacity (liters) 7 Reservoir/Tank Material Stainless Steel Reservoir Cover Included DuraTop Yes LidDock Yes Cleanable Air Filter Yes Working Access (L x W x D) (inches) 6.18 x 5.59 x 5 in Working Access (L x W x D) (cm) 15.7 x 14.2 x 12.7 cm Temperature Stability °F ±0.13° Temperature Stability °C ±0.07° Display 3.25" LCD Display Resolution (Set) 0.01 Display Resolution (Read) 0.01 Pump Type Pressure Pump Speed One Process Connections 1/2" O.D. Barbed Tubes Flammability Class (DIN 12876-1) I (NFL) Over-Temperature Protection / Failsafe Heater Control Yes Low Liquid Level Protection Yes Reservoir Drain Yes Maximum Ambient Temperature °F 95° Maximum Ambient Temperature °C 35° Overall Dimensions (L x W x H) (inches) 23.2 x 16.2 x 17.3 in Overall Dimensions (L x W x H) (cm) 23.2 x 16.2 x 17.3 in Refrigerant R134a Environmental Compliance RoHS, WEEE Shipping Weight (pounds) 84.0 Shipping Weight (kilograms) 38.1 Catalog Page Number 44-45 60 Hz Only Part Number MX7LR-20-A11B Maximum Pressure (psi) 2.3 Maximum Pressure (bar) 0.16 Maximum Pressure Flow Rate (gpm) 3.60 Maximum Pressure Flow Rate (l/min) 13.5 Cooling Capacity @ -20°C (W) 30 Cooling Capacity @ 0°C (W) 120 Cooling Capacity @ +20°C (W) 200 Cooling Capacity @ +100°C (W) 200 Included Hardware Fitting Kit for External Applications Heater Wattage 1100 Electrical Requirements (VAC/Hz/Ph/A) 120/60/1/12 Regulatory Approvals ETL     Key Features: Large, universal icon and English display On-screen prompts Single-point calibration capability   Certifications:  Regulatory Approvals: ETL   Operator's Manual         

    $3,837.00

  • Traceable Kangaroo Thermometer - Digital Shop All Categories Thermo Scientific Default Title

    Traceable Kangaroo Thermometer - Digital

    Digital Thermometer Traceable Kangaroo™ Thermometer comes equipped with the 42-inch probe cable in a reel-compartment pouch in the back of the unit. As a perfect “carry-around” unit, this thermometer can fit easily in any pocket, or you can use the convenient flip-open stand to place upright. The dual-range digital thermometer measures temperature in test tubes, beakers, and other scientific laboratory equipment and is especially effective for rugged applications with high-impact ABS cases. Additionally, digital thermometers can measure the temperature of many substances from air to liquids to surfaces—all electronically.  The best thing about this thermometer? It’s easy to use! Any user can record identical results with this intuitive unit. The range is –58.0 to 572°F and –50.0 to 300°C with a resolution of 0.1° (between –19.9 to 199.9°) otherwise 1° and an accuracy of ±1°C (between –30 and 250°C) otherwise ±2°C. This unit automatically captures and recalls minimum and maximum temperature readings over any time period. Its high and low alarm may be programmed in 1° increments. The alarm sounds every minute until temperature returns to non-alarm condition. Pressing the HOLD key freezes the display to record a current reading. To assure accuracy, an individually serial-numbered Traceable® Certificate is provided from its ISO 17025 calibration laboratory accredited by A2LA. It indicates traceability to standards provided by NIST (National Institute of Standards and Technology).  The stainless-steel probe has a diameter of 0.14 inches x 7-1/2 inch length and is resistant to most chemicals. The supplied silver-oxide battery runs continuously for one year. Large 3/4-inch digits are readable from 20 feet. Compact size is 2-1/2 x 4-3/4 x 1/2 inches, and weight is 2-3/4 ounces. Each product goes through an intense vetting process before carrying the Traceable name, which means you’ll save both time and money by not having to calibrate separately. The Traceable Kangaroo Thermometer applies to various unique applications such as the storage, laboratory, and medical industries. Specifications: Temperature Range F: -58 - 572F Temperature Range C: -50 - 300C Temperature Resolution: 0.1C Temperature Accuracy: +/-1C Programmable High and Low Alarm ISO 17025 Calibration Stainless Steel Probe Diameter of Probe: 0.14 in Length of Probe: 7.5 in Size: 2.5x4.75x.5 in Weight: 2.75 ounces

    $60.00

  • Boss Head - 16mm Shop All Categories BVV

    Boss Head - 16mm

    Boss Head - 16mm This Boss head is made out of Die-Cast alloy and has nickel plated Wing Screws and will fit rod diameters up to 16mm.

    $10.00

  • 3 Finger Clamp Adjustable 0-70mm  BVV

    3 Finger Clamp Adjustable 0-70mm

    3 Finger Clamp Adjustable Up to 70mm 3 Finger Clamp has an adjustable diameter of up to 70mm. Ideal for holding workpieces, lab equipment, beakers, flasks, flashlights, webcams, etc. Three-finger clamps are used to hold larger pieces of glassware.

    $15.00

  • 5 Pack of Metal Keck Clips for 24/40 Joints Shop All Categories BVV

    5 Pack of Metal Keck Clips for 24/40 Joints

    5 Pack of Metal Keck Clips for 24/40 Joints 5 Pack of Metal Keck Clips for 24/40 joints. Universal clips for ground joints manufactured from high-grade stainless steel. These clips fit snugly and are not overly difficult to slide on and off.

    $10.00

  • 5 Pack of Plastic Keck Clips for 24/40 Joints Shop All Categories BVV

    5 Pack of Plastic Keck Clips for 24/40 Joints

    5 Pack of Plastic Keck Clips for 24/40 Joints 5 Pack of Plastic Keck Clips for 24/40 joints.

    $7.50

  • Straight GL-14 Barb Shop All Categories BVV

    Straight GL-14 Barb

    Straight GL14 Barb Straight GL14 Barb connection. Specifications: 8MM GL14 Female Connection Straight Style

    $5.00

  • 120mm Glass Funnel Shop All Categories BVV

    120mm Glass Funnel

    120mm Glass Funnel 120mm Glass Funnel with 24/40 joint. *Notice to customers: All units are inspected for broken glassware or parts before leaving BVV™. If the unit arrives damaged (this does not include minor imperfections or scuffs in glassware), the customer MUST contact BVV™ within 72 hours from carrier delivery to file a claim. If the customer DOES NOT contact BVV™ within 72 hours from carrier delivery, then BVV™ cannot issue any replacement(s) or compensation for the item; a new purchase will need to be made for a replacement.

    $22.00

  • Polyscience 15 Liter Advanced Digital Refrigerated Circulator (-40°C/200°C) Shop All Categories Polyscience

    Polyscience 15 Liter Advanced Digital Refrigerated Circulator (-40°C/200°C)

    Polyscience 15 Liter Advanced Digital Refrigerated Circulator (-40°C/200°C)   Specification Description -40, 15 L Ref. Circulator Controller Type Advanced Digital Display 3.75" Touch-Pad LCD Connectivity Ethernet, USB A & B, RS232/addressable RS485, External Temperature Probe Languages Supported 4: French, German, Spanish, English Swivel 180 Rotating Controller Yes Working Temperature Range °C -40° to 200° Temperature Stability °C ±0.01° Fluid Optimization/Specific Heat Tuning Automatic and/or user-adjustable Temperature Calibration Capability 1-point Working Access (L x W x D) (cm) 21.2 x 27.6 x 14 cm Pump Type Pressure/Suction External Temperature Control Capability Yes Flammability Class (DIN 12876-1) III (FL) Working Temperature Range °F -40° to 392° Working Temperature Range °C -40° to 200° Nominal Cooling Capacity @ +20C (W) 1000 Reservoir Capacity (gallons) 3.96 Reservoir Capacity (liters) 15 Reservoir/Tank Material Stainless Steel Reservoir Cover Included DuraTop Yes LidDock Yes Cleanable Air Filter Yes Working Access (L x W x D) (inches) 8.35 x 10.88 x 5.5 in Working Access (L x W x D) (cm) 21.2 x 27.6 x 14 cm Temperature Stability °F ±0.02° Temperature Stability °C ±0.01° Display 3.75" Touch-Pad LCD Display Resolution (Set) 0.01 Display Resolution (Read) 0.01 Pump Type Pressure/Suction Pump Speed Variable Process Connections 1/4" (F) NPT Flammability Class (DIN 12876-1) III (FL) Over-Temperature Protection / Failsafe Heater Control Yes Low Liquid Level Protection Yes WhisperCool Environmental Control Technology Yes Cool Command Refrigeration Technology Yes Reservoir Drain Yes Included Software PolyTemp Viewer, USB driver Maximum Ambient Temperature °F 95° Maximum Ambient Temperature °C 35° Overall Dimensions (L x W x H) (inches) 22.4 x 14.5 x 26.9 in Overall Dimensions (L x W x H) (cm) 56.9 x 36.8 x 68.3 cm Refrigerant R452A Environmental Compliance RoHS, WEEE Shipping Weight (pounds) 118.0 Shipping Weight (kilograms) 53.5 Catalog Page Number 40-41 60 Hz Only Part Number AD15R-40-A11B Maximum Pressure (psi) 4.3 Maximum Pressure (bar) 0.30 Maximum Pressure Flow Rate (gpm) 5.30 Maximum Pressure Flow Rate (l/min) 20.1 Maximum Suction Flow Rate (gpm) 3.9 Maximum Suction Flow Rate (l/min) 14.7 Cooling Capacity @ -20°C (W) 265 Cooling Capacity @ 0°C (W) 650 Cooling Capacity @ +20°C (W) 1000 Cooling Capacity @ +100°C (W) 1000 Included Hardware Nylon hose adapters for 3/8", 1/4", and 3/16" Heater Wattage 1100 Electrical Requirements (VAC/Hz/Ph/A) 120/60/1/13 Regulatory Approvals ETL     Key Features: Intuitive 3.75" (9.5cm) display with touch-pad control 4 Languages: French, German, Spanish, English Swivel 180 Rotating Controller On-board connectivity: Ethernet, USB A & B, RS232/addressable RS485, External Temperature Probe On-screen prompts Automatic performance optimization and specific heat tuning Single-point calibration capability Operators Manual

    $5,850.00

  • MOLYKOTE® High Vacuum Grease 150g Shop All Categories Dow Corning

    MOLYKOTE® High Vacuum Grease 150g

    Key Properties: NLGI Grade 3-4, translucent white, used primarily in sealing vacuum and pressure systems. Molykote Technical Data Sheet Molykote Safety Data Sheet Applications:  Seals and lubricates chemical processing equipment. Lubricating plug valves, control valves, flow meter bearings, ceramic plug cocks, fire extinguisher valves, water treating equipment, synthetic rubber gaskets and seals in high-temperature applications. Sealing vacuum and pressure systems. Lubricating O-rings in binoculars and telescopes; prevents fogging of delicate lenses.  Performance Benefits: Reduces wear in plastic-to-metal and rubber-to-metal contact Low volatility Excellent resistance to water, chemicals, and high and low temperatures Meets requirements of FDA 21 CFR 175.300 Good chemical resistance Good oxidation resistance Good plastic & rubber compatibility Good water resistance High tack & adhesion High temperature performance Low temperature performance Wide temperature range Product Details: Product type: Compounds Technology: Silicone NLGI Grade: 3-4 Thickener: Silica Low Temp: (C) -40 High Temp: (C) 204 Color Translucent: White

    $46.00

  • Polyscience 7 Liter MX Refrigerated Circulator (-20°C/135°C) Shop All Categories Polyscience Default Title

    Polyscience 7 Liter MX Refrigerated Circulator (-20°C to 135°C)

    Polyscience 7 Liter MX Refrigerated Circulator (-20°C/135°C)   Specification Description -20, 7 L Ref. Circulator Controller Type MX Display 3.25" LCD Working Temperature Range °C -20° to 135° Temperature Stability °C ±0.07° Temperature Calibration Capability 1-point Working Access (L x W x D) (cm) 15.7 x 14.2 x 12.7 cm Pump Type Pressure Flammability Class (DIN 12876-1) I (NFL) Working Temperature Range °F -4° to 275° Working Temperature Range °C -20° to 135° Nominal Cooling Capacity @ +20C (W) 200 Reservoir Capacity (gallons) 1.85 Reservoir Capacity (liters) 7 Reservoir/Tank Material Stainless Steel Reservoir Cover Included DuraTop Yes LidDock Yes Cleanable Air Filter Yes Working Access (L x W x D) (inches) 6.18 x 5.59 x 5 in Working Access (L x W x D) (cm) 15.7 x 14.2 x 12.7 cm Temperature Stability °F ±0.13° Temperature Stability °C ±0.07° Display 3.25" LCD Display Resolution (Set) 0.01 Display Resolution (Read) 0.01 Pump Type Pressure Pump Speed One Process Connections 1/2" O.D. Barbed Tubes Flammability Class (DIN 12876-1) I (NFL) Over-Temperature Protection / Failsafe Heater Control Yes Low Liquid Level Protection Yes Reservoir Drain Yes Included Software PolyTemp Viewer, USB driver Maximum Ambient Temperature °F 95° Maximum Ambient Temperature °C 35° Overall Dimensions (L x W x H) (inches) 21.3 x 8.7 x 25.4 in Overall Dimensions (L x W x H) (cm) 54.1 x 22.1 x 64.5 cm Refrigerant R134a Environmental Compliance RoHS, WEEE Shipping Weight (pounds) 84.0 Shipping Weight (kilograms) 38.1 Catalog Page Number 44-45 60 Hz Only Part Number MX07R-20-A11B Maximum Pressure (psi) 2.3 Maximum Pressure (bar) 0.16 Maximum Pressure Flow Rate (gpm) 3.60 Maximum Pressure Flow Rate (l/min) 13.5 Cooling Capacity @ -20°C (W) 30 Cooling Capacity @ 0°C (W) 120 Cooling Capacity @ +20°C (W) 200 Cooling Capacity @ +100°C (W) 200 Included Hardware Fitting Kit for External Applications Heater Wattage 1100 Electrical Requirements (VAC/Hz/Ph/A) 120/60/1/12 Regulatory Approvals ETL Key Features: Large, Universal icon and English display  On-screen prompts  Single-point calibration capability    Certifications:  Regulatory Approvals: ETL Operator's Manual

    $3,951.00

  • Edwards E2M28 21 CFM Dual-Stage High Capacity Vacuum Pump Shop All Categories Edwards Default Title

    Edwards E2M28 21 CFM Dual-Stage High Capacity Vacuum Pump

      Edwards E2M28 21 CFM Dual-Stage High Capacity Vacuum Pump ***Note: This item Will Ship by Freight only***   The EM range of oil‑sealed rotary pumps – renowned for their high ultimate vacuum, rapid pumping speed, quiet operation and ability to handle vapor – have become the industry standard for laboratory and light industrial applications. The pump is a freestanding unit with the drive provided through a flexible coupling by either a single‑phase or three‑phase (four pole) air cooled motor.Each EM pump is supplied with 2 x 1 liter of Ultragrade 19 oil, O ring and centering ring, two Allen keys and spares seal for oil drain and filter plugs. For PFPE prepared FX pumps Fomblin® to be ordered separately.   Technology  The motor is totally enclosed and is cooled by the motor-cooling fan which directs air along the motor fins. The motors are fitted with a thermal overload device. When the motor is too hot, the thermal overload device switches off the pump. The thermal overload device has an automatic reset; when the motor cools down, the device resets and the motor will restart.An oil pressure system lubricates the pump shaft bearing surfaces and rotor sealing faces. The pump has an oil distribution valve which prevents discharge of oil to the pump interior after the pump stops. The pumping chambers are air-tight, so this arrangement also prevents suckback unless the gas ballast valve is open.You can inspect the level and condition of oil in the oil box reservoir through the oil sight-glass. An oil filler-plug is fitted to the top of the oil box. The pump has two oil drain-plugs to allow either gravity oil drain or pressure oil drain.   Features and Benefits  The pump is designed for reliable, long‑term operation. Thermal overload device prevents overheating (single phase only). The drive is provided through a flexible coupling by a single‑phase or three‑phase (four pole) motor. The motors are totally enclosed and are cooled by the motor cooling fan. Full height O ring sealed oil sight glass for easy checking of oil level and condition. Large sight glass and operating oil range. IE3 energy efficient 3 phase motor used with E2M28.   Edwards E2M28 21 CFM Dual-Stage High Capacity Vacuum Pump. The EM range of oil-sealed rotary pumps - renowned for its high ultimate vacuum, rapid pumping speed, quiet operation and ability to handle vapour - has become the industry standard laboratory and light industrial applications. The E2M28 pump is a two-stage, direct drive, sliding vane pump. The pump is oil sealed and designed for reliable, long-term operation in both laboratory and industrial environments. The pump is a freestanding unit with the drive provided through a flexible coupling by either a single-phase or three-phase (four-pole) motor.     Specifications Displacement 50Hz 32.2 m3h-1 / 19 ft3min-1 60Hz 38.9 m3h-1 / 22.3 ft3min-1 Speed (Pneurop 6602) 50Hz 27.5 m3h-1 / 16.2 ft3min-1 60Hz 33.0 m3h-1 / 19.5 ft3min-1 Ultimate vacuum (total pressure) without gas ballast 1 x 10⁻³ mbar / 7.5 x 10⁻⁴ Torr with gas ballast 1.5 x 10⁻² mbar / 1.1 x 10⁻² Torr with Fomblin® 1 x 10⁻² mbar / 7.5 x 10⁻³ Torr Inlet connection NW25 flange Outlet connection** Nozzle 15 mm external Ø removable from 3/4 in BSP tapped hole Max allowed pressure at outlet 0.5 bar gauge / 7 psig Max water vapour pumping rate – GB II 220 gh-1 Max inlet pressure for water vapour 30 mbar / 23 Torr Max water vapour pumping rate 0.7 kg h-1 Operating temperature range 13 – 40 °C Nominal rotation speed 1440 / 1720 rpm Motor power 50 Hz 0.75 kW Motor power 60 Hz 0.90 kW Power Connector 1-ph* IEC EN60320 C19 Weight 44 kg / 97 lbs Noise 57 dB(A) @ 50 Hz Oil capacity - max 1.5 litre Oil capacity - min 1.2 litre Recommended oil (supplied) Ultragrade 19     * Pumps listed with IEC connector only ** The FX are supplied with NW25 outlet connection    ** POWER CORD NOT INCLUDED. RECOMMEND FOR CUSTOMER TO WIRE PUMP TO OUTLET WITH EXACT LENGTH. DO NOT USE EXTENSIONS**   **RECOMMEND FOR CUSTOMER TO HAVE ELECTRICIAN WIRE PUMP TO OUTLET WITH EXACT LENGTH**       Pump Warranty Information Customers using solvents such as stabilization resins (MinWax™, Gator Venom™ etc.), alcohol and other polar solvents must use the vacuum pumps in conjunction with a cold trap for evacuations in excess of 5 minutes. (Excludes Cactus Juice™) If the consumer is using the pump for prolonged periods of time exceeding 5 minutes we require that a cold trap is used or the pump warranty is void. These stabilization resins have the ability to break down the internal components of the pump that are plastic resulting in a seized motor voiding all warranties.  When evacuation exceeds 5 minutes these solvents begin to vaporize and then re-condense in the vacuum pump reservoir. Once enough solvent re-condenses in the pump displacing the oil the plastic internal components may begin to warp, melt or seize. The use of a cold trap will condense the vapors prior to making their way to the vacuum pump preventing pump damage due to excessive use. Furthermore, Minwax Wood Hardener™ is not to be used with any vacuum pumps, EVER. (A seized motor will result within the first use.) To prevent these issues from happening to your process, change the Oil after each vacuum pump use, Even if the use time is only 5min.

    $8,653.00 - $10,402.00

  • BUNA-N 10 Mesh (2000 Micron)  BVV 1.5-inch

    BUNA-N 10 Mesh (2000 Micron)

    BUNA-N 10 mesh (2000 micron) Tri-Clamp Tri Clover Gasket MADE IN THE U.S.A Mesh / Micron Filter Chart Note: 'Cinnamon' Smelling Gaskets are Chinese made and are not standardized or regulated Disclaimer: BVV™ recommends no more than a -40F operating temperature and is not responsible for the user running their system with incompatible chemicals Why BUNA-N over Viton? Lower Temperature Range Lower Costs Better Compressibility and Springiness Excellent Resistance to Major/Popular Solvents(Butane/Propane) Better Tear Resistance Better Abrasion Resistance Specifications Materials: BUNA-N (Nitrile) 316 Stainless Steel Mesh Overmold Conformance FDA Compliant / Meets 3A Standards Thermal Properties: Low-Temperature Range: -70°F Minimum for Continuous Use(Static): -40°F Brittle Point: -70°F High-Temperature Range: +210°F to +250°F Maximum for Continous Use (Static): +250°F Gas Permeability: Excellent Durometer or Hardness Range: 20-95 Shore A Tensile Strength Range: 200-3,500 PSI Elongation Range(%): 350%-650% Abrasion Resistance: Excellent Resilience / Rebound: Good         Chemical Compatibility Butane A - Excellent Propane A - Excellent Alcohols: Amyl B - Good Benzyl D-Severe Effect Butyl C-Fair Diacetone D-Severe Effect Ethyl C-Fair Hexyl A - Excellent Isobutyl B - Good Isopropyl B - Good Methyl A - Excellent Octyl B - Good Propyl A - Excellent

    $15.00 - $118.00

  • BUNA-N 50 Mesh (300 Micron) Shop All Categories BVV 1.5-inch

    BUNA-N 50 Mesh (300 Micron)

    BUNA-N 50 Mesh (300 Micron) Tri-Clamp Gasket MADE IN THE U.S.A Mesh / Micron Filter Chart Note: 'Cinnamon' Smelling Gaskets are Chinese made and are not standardized or regulated Disclaimer: BVV™ recommends no more than a -40F operating temperature and is not responsible for the user running their system with incompatible chemicals Why BUNA-N over Viton? Lower Temperature Range Lower Costs Better Compressibility and Springiness Excellent Resistance to Major/Popular Solvents(Butane/Propane) Better Tear Resistance Better Abrasion Resistance Specifications Materials: BUNA-N (Nitrile) 316 Stainless Steel Mesh Overmold Conformance FDA Compliant / Meets 3A Standards Thermal Properties: Low-Temperature Range: -70°F Minimum for Continuous Use(Static): -40°F Brittle Point: -70°F High-Temperature Range: +210°F to +250°F Maximum for Continous Use (Static): +250°F Gas Permeability: Excellent Durometer or Hardness Range: 20-95 Shore A Tensile Strength Range: 200-3,500 PSI Elongation Range(%): 350%-650% Abrasion Resistance: Excellent Resilience / Rebound: Good Chemical Compatibility Butane A - Excellent Propane A - Excellent Alcohols: Amyl B - Good Benzyl D-Severe Effect Butyl C-Fair Diacetone D-Severe Effect Ethyl C-Fair Hexyl A - Excellent Isobutyl B - Good Isopropyl B - Good Methyl A - Excellent Octyl B - Good Propyl A - Excellent

    $16.00 - $121.00

  • BUNA-N 100 Mesh (150 Micron) Shop All Categories BVV 1.5-inch

    BUNA-N 100 Mesh (150 Micron)

    BUNA-N 100 Mesh (150 Micron) Tri-Clamp Gasket MADE IN THE U.S.A Mesh / Micron Filter Chart Note: 'Cinnamon' Smelling Gaskets are Chinese made and are not standardized or regulated Disclaimer: BVV™ recommends no more than a -40F operating temperature and is not responsible for the user running their system with incompatible chemicals Why BUNA-N over Viton? Lower Temperature Range Lower Costs Better Compressibility and Springiness Excellent Resistance to Major/Popular Solvents(Butane/Propane) Better Tear Resistance Better Abrasion Resistance Specifications Materials: BUNA-N (Nitrile) 316 Stainless Steel Mesh Overmold Conformance FDA Compliant / Meets 3A Standards Thermal Properties: Low-Temperature Range: -70°F Minimum for Continuous Use(Static): -40°F Brittle Point: -70°F High-Temperature Range: +210°F to +250°F Maximum for Continous Use (Static): +250°F Gas Permeability: Excellent Durometer or Hardness Range: 20-95 Shore A Tensile Strength Range: 200-3,500 PSI Elongation Range(%): 350%-650% Abrasion Resistance: Excellent Resilience / Rebound: Good Chemical Compatibility Butane A - Excellent Propane A - Excellent Alcohols: Amyl B - Good Benzyl D-Severe Effect Butyl C-Fair Diacetone D-Severe Effect Ethyl C-Fair Hexyl A - Excellent Isobutyl B - Good Isopropyl B - Good Methyl A - Excellent Octyl B - Good Propyl A - Excellent

    $17.00 - $122.00

  • BUNA-N 550 Mesh (25 Micron) Shop All Categories BVV 1.5-inch

    BUNA-N 550 Mesh (25 Micron)

    BUNA-N 550 Mesh (25 Micron) Tri-Clamp/ Tri Clover Gasket MADE IN THE U.S.A Mesh / Micron Filter Chart Note: 'Cinnamon' Smelling Gaskets are Chinese made and are not standardized or regulated Disclaimer: BVV™ recommends no more than a -40F operating temperature and is not responsible for the user running their system with incompatible chemicals Why BUNA-N over Viton? Lower Temperature Range Lower Costs Better Compressibility and Springiness Excellent Resistance to Major/Popular Solvents(Butane/Propane) Better Tear Resistance Better Abrasion Resistance Specifications Materials: BUNA-N (Nitrile) 316 Stainless Steel Mesh Overmold Conformance FDA Compliant / Meets 3A Standards Thermal Properties: Low-Temperature Range: -70°F Minimum for Continuous Use(Static): -40°F Brittle Point: -70°F High-Temperature Range: +210°F to +250°F Maximum for Continous Use (Static): +250°F Gas Permeability: Excellent Durometer or Hardness Range: 20-95 Shore A Tensile Strength Range: 200-3,500 PSI Elongation Range(%): 350%-650% Abrasion Resistance: Excellent Resilience / Rebound: Good Chemical Compatibility Butane A - Excellent Propane A - Excellent Alcohols: Amyl B - Good Benzyl D-Severe Effect Butyl C-Fair Diacetone D-Severe Effect Ethyl C-Fair Hexyl A - Excellent Isobutyl B - Good Isopropyl B - Good Methyl A - Excellent Octyl B - Good Propyl A - Excellent

    $24.00 - $144.00

  • BUNA-N 300 Mesh (50 Micron) Shop All Categories BVV 1.5-inch

    BUNA-N 300 Mesh (50 Micron)

    BUNA-N 300 Mesh (50 Micron) Tri-Clamp/ Tri Clover Gasket MADE IN THE U.S.A Mesh / Micron Filter Chart Note: 'Cinnamon' Smelling Gaskets are Chinese made and are not standardized or regulated Disclaimer: BVV™ recommends no more than a -40F operating temperature and is not responsible for the user running their system with incompatible chemicals Why BUNA-N over Viton? Lower Temperature Range Lower Costs Better Compressibility and Springiness Excellent Resistance to Major/Popular Solvents(Butane/Propane) Better Tear Resistance Better Abrasion Resistance Specifications Materials: BUNA-N (Nitrile) 316 Stainless Steel Mesh Overmold Conformance FDA Compliant / Meets 3A Standards Thermal Properties: Low-Temperature Range: -70°F Minimum for Continuous Use(Static): -40°F Brittle Point: -70°F High-Temperature Range: +210°F to +250°F Maximum for Continous Use (Static): +250°F Gas Permeability: Excellent Durometer or Hardness Range: 20-95 Shore A Tensile Strength Range: 200-3,500 PSI Elongation Range(%): 350%-650% Abrasion Resistance: Excellent Resilience / Rebound: Good Chemical Compatibility Butane A - Excellent Propane A - Excellent Alcohols: Amyl B - Good Benzyl D-Severe Effect Butyl C-Fair Diacetone D-Severe Effect Ethyl C-Fair Hexyl A - Excellent Isobutyl B - Good Isopropyl B - Good Methyl A - Excellent Octyl B - Good Propyl A - Excellent

    $20.00 - $140.00

  • BUNA-N 2500 Mesh (5 Micron) Shop All Categories BVV 1.5-inch

    BUNA-N 2500 Mesh (5 Micron)

    BUNA-N 2500 Mesh (5 Micron) Tri-Clamp/ Tri Clover Gasket MADE IN THE U.S.A Mesh / Micron Filter Chart Note: 'Cinnamon' Smelling Gaskets are Chinese made and are not standardized or regulated Disclaimer: BVV™ recommends no more than a -40F operating temperature and is not responsible for the user running their system with incompatible chemicals Why BUNA-N over Viton? Lower Temperature Range Lower Costs Better Compressibility and Springiness Excellent Resistance to Major/Popular Solvents(Butane/Propane) Better Tear Resistance Better Abrasion Resistance Specifications Materials: BUNA-N (Nitrile) 316 Stainless Steel Mesh Overmold Conformance FDA Compliant / Meets 3A Standards Thermal Properties: Low-Temperature Range: -70°F Minimum for Continuous Use(Static): -40°F Brittle Point: -70°F High-Temperature Range: +210°F to +250°F Maximum for Continous Use (Static): +250°F Gas Permeability: Excellent Durometer or Hardness Range: 20-95 Shore A Tensile Strength Range: 200-3,500 PSI Elongation Range(%): 350%-650% Abrasion Resistance: Excellent Resilience / Rebound: Good Chemical Compatibility Butane A - Excellent Propane A - Excellent Alcohols: Amyl B - Good Benzyl D-Severe Effect Butyl C-Fair Diacetone D-Severe Effect Ethyl C-Fair Hexyl A - Excellent Isobutyl B - Good Isopropyl B - Good Methyl A - Excellent Octyl B - Good Propyl A - Excellent

    $32.00 - $155.00

  • Silicone Tri-Clamp Gaskets Shop All Categories BVV 3-inch

    Silicone Tri-Clamp Gaskets

    Silicone Tri-Clamp/ Tri Clover Gaskets Silicone Tri-Clamp Gaskets are intended to be used when using alcohol as an extraction solvent instead of butane or propane. Silicone has an excellent chemical resistance to alcohols and is the preferred gasket material when using Jacketed Reactors or Tri-Clamp Buchner funnels for post-processing winterization because they have very low extractable characteristics. Silicone gaskets also offer a very good temperature range and will retain their original shape even when compressed for a long duration. ***Note: Silicone is not recommended for use with butane or propane solvents. Key Features: Excellent resistance to Alcohols Excellent Temperature Range Excellent Rebound and Memory Very Low extractable characteristics Sizes Available: 1.5" 2" 3" 4" 6" 10" Easy On - Flanged 12" Easy On - Flanged Specifications: Material Silicone Color White Connection Type Tri-Clamp Conformance USP Class VI, FDA and 3A Compliance Thermal Properties: -Low Temperature Range -58°F -Minimum Continous Use (Static) -40°F -Brittle Point -58°F -High Temperature Range +446°F -Maximum for Continous Use (Static) +446°F Durometer or Hardness Range 65 Shore A Abrasion Resistance Excellent Tear Resistance Excellent Compression Resistance Excellent Chemical Compatibility: Butane D - Poor Propane (liquified) D - Poor Alcohols: -Amyl D - Poor -Benzyl N/A -Butyl B - Good -Diacetone D - Poor -Ethyl B - Good -Hexyl B - Good -Isobutyl A - Excellent -Isopropyl A - Excellent -Methyl A - Excellent -Octyl B - Good -Propyl A - Excellent   Disclaimer: Best Value Vacs Recommends no more than a -40F Operating Temperature and is not responsible for the user running their system with incompatible chemicals.

    $2.25 - $57.00

  • Ashless Filter Papers - 110MM - Quantitative Shop All Categories BVV Grade 42 - Slow - 2.5um

    Ashless Filter Papers - 110MM - Quantitative

    Ashless Filter Papers - 110MM - Quantitative Ashless quantitative and qualitative filter papers provide laboratory grade filtration for extraction systems and are specifically used in combination with a Buchner funnel to remove fats, waxes and any other unwanted contaminants from your solution. These filter papers are used in the pre-processing stage of short path distillation to clean up the material prior to processing. Key Features: ISO 9001 Approved Manufactured from alpha-cellulose and cotton linters High Purity and low background Consistent performance Low ashless content: <0.007% (Quantitative Filter Paper) Whatman equivalent quality Pre-Cut for ease of use Specifications: Classification Quantitative Sizes Available: BIO-40 8um - Medium BIO-41 20-25um - Fast BIO-42 2.5um - Slow BIO-44 3um - Slow Ash Content <0.007% Quantity per Pack 100 Diameter 110mm (4.33")   Technical Data: Grade Particle Retention Appearance Speed Ash Content (%) Basis Weight (g/m2) Wet burst (mm H2O) BIO-1 11um Smooth Medium <0.1 80.0±4.0 >140 BIO-2 8um Smooth Medium <0.1 80.0±4.0 >140 BIO-4 20um Smooth Fast <0.1 80.0±4.0 >120 BIO-5 2.5um Smooth Slow <0.1 80.0±4.0 >180 BIO-6 3um Smooth Slow <0.1 80.0±4.0 >180 BIO-40 8um Smooth Medium <0.007 80.0±4.0 >140 BIO-41 20-25um Smooth Fast <0.007 80.0±4.0 >120 BIO-42 2.5um Smooth Slow <0.007 80.0±4.0 >180 BIO-43 16um Smooth Medium to Fast <0.007 80.0±4.0 >120 BIO-44 3um Smooth Slow <0.007 80.0±4.0 >180

    $32.00 - $39.00

  • PTFE Envelope Tri-Clamp Gaskets with Viton Filler Shop All Categories BVV 3-inch

    PTFE Envelope Tri-Clamp Gaskets with Viton Filler - USA Made

    PTFE Envelope Tri-Clamp/Tri-Clover Gaskets with Viton Filler PTFE Envelope Tri-Clamp Gaskets are the only choice when needing extreme chemical resistance and temperature range. These gaskets are extremely unique in their construction because they have a Viton filler for compressibility surrounded by an 'Envelope' of PTFE which creates a unique combination of chemical resistance while providing an exceptional sealing characteristic. Normal solid PTFE gaskets are very tough to seal on their own and are usually not recommended in vacuum applications due to the gasket being very rigid because PTFE is not very compressible by itself.  Tri-Clamp/ Tri-Clover Sanitary Fittings Gaskets create a pressure-tight seam between multiple stationary components, relying on a compression seal to prevent unwanted gas or liquid emissions. ***Note: Best Value Vacs ONLY recommends the use of PTFE Envelope gaskets with High Pressure clamps to ensure a positive seal on the system. Key Features: Excellent resistance to almost all chemicals Excellent Temperature Range Excellent Cleanability due to PTFE (Teflon) Envelope No Chemical Leaching Sizes Available: 1.5" 2" 3" 4" 6" 8" 10" 12"   Chemical Compatibility: Material PTFE(Teflon)/Viton Filler(FKM) Color White/Black Connection Type Tri-Clamp Conformance U.S.P. CLASS VI COMPLIANCEPasses USP Class VI Cytotoxicity Testing and is suitable for high purity pharmaceutical grade applications.PTFE is FDA 21, 177,1550 compliant and the FKM(Viton) inner cores are FDA CFR 21, 177.2600 compliant. Thermal Properties: Low Temperature Range -100°F Minimum Continous Use (Static) -65°F Brittle Point -100°F High Temperature Range +400°F Maximum for Continous Use (Static) +400°F         Chemical Compatibility: Butane A - Excellent Propane (liquified) A - Excellent Alcohols: Amyl A - Excellent Benzyl A - Excellent Butyl A - Excellent Diacetone A - Excellent Ethyl A - Excellent Hexyl A - Excellent Isobutyl A - Excellent Isopropyl A - Excellent Methyl A - Excellent Octyl A - Excellent Propyl A - Excellent BVV™ PTFE Gasket With Viton Filter - Data Sheet    Disclaimer: BVV Recommends no more than a -40F Operating Temperature and is not responsible for the user running their system with incompatible chemicals.

    $5.00 - $99.00

  • Ashless Filter Papers - 125MM - Quantitative Shop All Categories BVV Grade 42 - Slow - 2.5um

    Ashless Filter Papers - 125MM - Quantitative

    Ashless Filter Papers - 125MM - Quantitative Ashless quantitative and qualitative filter papers provide laboratory grade filtration for extraction systems and are specifically used in combination with a Buchner funnel to remove fats, waxes and any other unwanted contaminants from your solution. These filter papers are used in the pre-processing stage of short path distillation to clean up the material prior to processing. Key Features: ISO 9001 Approved Manufactured from alpha-cellulose and cotton linters High Purity and low background Consistent performance Low ashless content: <0.007% (Quantitative Filter Paper) Whatman equivalent quality Pre-Cut for ease of use Specifications: Classification Quantitative Sizes Available: BIO-40 8um - Medium BIO-41 20-25um - Fast BIO-42 2.5um - Slow BIO-44 3um - Slow Ash Content <0.007% Quantity per Pack 100 Diameter 125mm (4.92")   Technical Data: Grade Particle Retention Appearance Speed Ash Content (%) Basis Weight (g/m2) Wet burst (mm H2O) BIO-1 11um Smooth Medium <0.1 80.0±4.0 >140 BIO-2 8um Smooth Medium <0.1 80.0±4.0 >140 BIO-4 20um Smooth Fast <0.1 80.0±4.0 >120 BIO-5 2.5um Smooth Slow <0.1 80.0±4.0 >180 BIO-6 3um Smooth Slow <0.1 80.0±4.0 >180 BIO-40 8um Smooth Medium <0.007 80.0±4.0 >140 BIO-41 20-25um Smooth Fast <0.007 80.0±4.0 >120 BIO-42 2.5um Smooth Slow <0.007 80.0±4.0 >180 BIO-43 16um Smooth Medium to Fast <0.007 80.0±4.0 >120 BIO-44 3um Smooth Slow <0.007 80.0±4.0 >180

    $45.00 - $50.00

  • Ashless Filter Papers - 180MM - Qualitative Shop All Categories BVV Grade 5 - Slow - 2.5um

    Ashless Filter Papers - 180MM - Qualitative

    Ashless Filter Papers - 180MM - Qualitative Ashless quantitative and qualitative filter papers provide laboratory grade filtration for extraction systems and are specifically used in combination with a Buchner funnel to remove fats, waxes and any other unwanted contaminants from your solution. These filter papers are used in the pre-processing stage of short path distillation to clean up the material prior to processing. Key Features: ISO 9001 Approved Manufactured from alpha-cellulose and cotton linters High Purity and low background Consistent performance Low ashless content: <0.1% Whatman equivalent quality Pre-Cut for ease of use Specifications: Classification Qualitative Sizes Available: BIO-1 11um - Medium BIO-4 20um - Fast BIO-5 2.5um - Slow BIO-6 3um - Slow Ash Content <0.1% Quantity per Pack 100 Diameter 180mm (7.09")   Technical Data: Grade Particle Retention Appearance Speed Ash Content (%) Basis Weight (g/m2) Wet burst (mm H2O) BIO-1 11um Smooth Medium <0.1 80.0±4.0 >140 BIO-2 8um Smooth Medium <0.1 80.0±4.0 >140 BIO-4 20um Smooth Fast <0.1 80.0±4.0 >120 BIO-5 2.5um Smooth Slow <0.1 80.0±4.0 >180 BIO-6 3um Smooth Slow <0.1 80.0±4.0 >180 BIO-40 8um Smooth Medium <0.007 80.0±4.0 >140 BIO-41 20-25um Smooth Fast <0.007 80.0±4.0 >120 BIO-42 2.5um Smooth Slow <0.007 80.0±4.0 >180 BIO-43 16um Smooth Medium to Fast <0.007 80.0±4.0 >120 BIO-44 3um Smooth Slow <0.007 80.0±4.0 >180

    $30.00 - $39.00

  • Vacuum Trap

    Vacuum Trap

    Vacuum/Cold Trap - 24/40 Male Joint w/ GL-14 8mm hose barb port. Place the vacuum trap in dry ice or another source of extreme cold for use as a cold trap. Trap is openable to remove trapped condensate. For increased efficieny, tandem multiple traps together inline. *Notice to customers: All units are inspected for broken glassware or parts before leaving BVV™. If the unit arrives damaged (this does not include minor imperfections or scuffs in glassware), the customer MUST contact BVV™ within 72 hours from carrier delivery to file a claim. If the customer DOES NOT contact BVV™ within 72 hours from carrier delivery, then BVV™ cannot issue any replacement(s) or compensation for the item; a new purchase will need to be made for a replacement.  **Glassware Safety Disclaimer: BVV™ is not responsible for failure of glassware which must be inspected before and after every use because it may eventually develop imperfections or damage through normal usage, mishandling, and stress caused by temperature variations. If an imperfection or damage is noted while inspecting the glassware DO NOT use the glassware because it can fail causing bodily harm or damage to the surrounding area.**

    $30.00

  • Cork Stand Shop All Categories BVV 250-500ml

    Cork Stand

    Cork Stands Cork stands are used with laboratory glassware to help balance round bottom flasks or prevent damage or support a piece of glassware that is put on it. ***Note: Sizes correlate to round bottom flasks ml sizes. Sizes Available:     250-500ml 500-1000ml 1000-2000ml

    $6.50 - $9.50

  • Thermometer Adapter Shop All Categories BVV

    Thermometer Adapter

    Glass Thermometer Adapters Glass thermometer adapters are used in conjunction with 1/4" temperature probes, these adapters allow the user to maintain a vacuum on their glassware system while being able to have a consistent readout of the internal temperature of the system. These adapters have a puncture gasket to create the perfect seal around most temperature probes on the market. Joint Sizes Available: 14/20 Joint Size 24/40 Joint Size *Notice to customers: All units are inspected for broken glassware or parts before leaving BVV™. If the unit arrives damaged (this does not include minor imperfections or scuffs in glassware), the customer MUST contact BVV™ within 72 hours from carrier delivery to file a claim. If the customer DOES NOT contact BVV™ within 72 hours from carrier delivery, then BVV™ cannot issue any replacement(s) or compensation for the item; a new purchase will need to be made for a replacement.  **Glassware Safety Disclaimer: BVV™ is not responsible for failure of glassware which must be inspected before and after every use because it may eventually develop imperfections or damage through normal usage, mishandling, and stress caused by temperature variations. If an imperfection or damage is noted while inspecting the glassware DO NOT use the glassware because it can fail causing bodily harm or damage to the surrounding area.**

    $15.00 - $17.00

  • Male Hollow Stopper Shop All Categories BVV 14/20

    Male Hollow Stopper

    Male Hollow Stopper Male Hollow Stoppers are used for capping off or plugging a female join to prevent contamination or close off a port on a glassware system. These glass stoppers are hollow on the inside and require vacuum grease to create a seal when having 2 ground surfaces touching in a vacuum application. Joint Sizes Available: 14/20 Ground Joint 24/40 Ground Joint *Notice to customers: All units are inspected for broken glassware or parts before leaving BVV™. If the unit arrives damaged (this does not include minor imperfections or scuffs in glassware), the customer MUST contact BVV™ within 72 hours from carrier delivery to file a claim. If the customer DOES NOT contact BVV™ within 72 hours from carrier delivery, then BVV™ cannot issue any replacement(s) or compensation for the item; a new purchase will need to be made for a replacement.  **Glassware Safety Disclaimer: BVV™ is not responsible for failure of glassware which must be inspected before and after every use because it may eventually develop imperfections or damage through normal usage, mishandling, and stress caused by temperature variations. If an imperfection or damage is noted while inspecting the glassware DO NOT use the glassware because it can fail causing bodily harm or damage to the surrounding area.**

    $5.00 - $10.00


You have seen 48 out of 436 products

Login

Forgot your password?

Don't have an account yet?
Create account