New Products
-
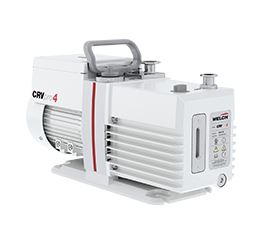
Welch Vacuum - Gardner Denver Welch Explosion Proof CRVpro4 Direct Drive Rotary Vane Vacuum Pump
Welch Explosion Proof CRVpro4 Direct Drive Rotary Vane Vacuum Pump ***Note: This item has a possible 1-2 week lead time depending on stock availability*** Product Details Explosion Proof Motor 110-120V/208-240V 60Hz 1 Phase The new CRVpro family of direct drive vacuum pumps offers increased reliability and longer service interval vs. other direct drive rotary vane vacuum pumps. The CRVpro family consumes up to 36% less oil than comparable pumps. Three features drive these benefits: Runs 10°C cooler than comparable pumps. Slows corrosion. Has a 40% larger oil capacity than comparable pumps. Dilutes aggressive chemicals. Has a chemical resistant coating in the oil case and pump module. Protects non-moving parts. The CRVpro family includes all the features you'd expect in a direct drive rotary vane pump: gas ballast, forced oil lubrication, anti-suckback mechanism and thermal overload protection. Suitable applications include freeze drying, degassing, vacuum ovens and concentrators. 3046E-01 comes with an explosion proof motor. Conduit wiring installation required. No cord, plug, or switch provided. Direct drive pumps are not recommended for filtration, aspiration, drying electrophoresis gels, or other applications requiring sustained operation above 30 torr. Specifications Application CRVpro4 Free Air Displacement @ 60 Hz, cfm (L/min) 2.8 (78) Free Air Displacement @ 50 Hz, m³/hr (L/min) 4 (67) Ultimate Pressure, torr (mbar) 5x10⁻⁴ (4x10⁻⁴) Noise Level, dBA 50 Motor Speed, RPM, @60Hz, @50Hz 1740 (1450) Motor Power, HP (kW) 0.4 (0.5) Oil Capacity, mL 1150 Connection Flanges NW 16 Inlet Hose Connection* 5/8" to 3/4" Weight, lbs (kg) 46.3 (21) Dimensions, LxWxH, in (mm) 18.2x6.1x9.1 (463x157x230)
$5,100.00
-
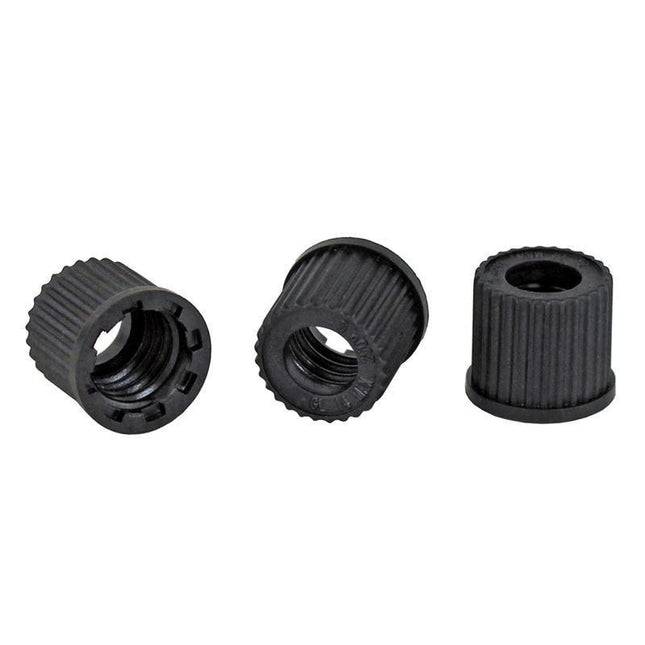
Chemglass Chemglass Caps With Aperture GL Threads High Temperatures
Chemglass Caps With Aperture GL Threads High Temperatures Open top cap for use with GL screw threads. Cap is made from PPS (polyphenylsiloxan) and will withstand temperatures up to 250°C.
$11.00
-
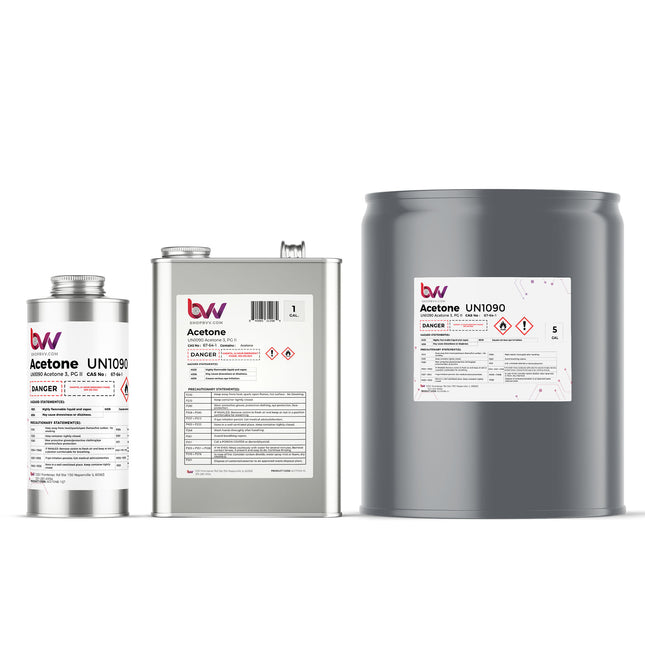

Acetone Technical Grade 99%
High Purity Acetone 99% (Note: Container style and color may vary) Explore our top-quality Acetone, a versatile solvent that meets the highest standards of quality and purity. Our Acetone is ideal for a wide range of applications, whether you're in the pharmaceutical, cosmetic or industrial sector. With its exceptional solvent properties, Acetone serves as a reliable solution for cleaning, degreasing, and dissolving various substances. Our Acetone is carefully sourced to ensure consistency and effectiveness, making it a popular choice for professionals and businesses alike. Our Acetone is subjected to stringent quality control measures, ensuring exceptional purity that's perfect for various processes, from extraction to cleaning and stripping applications. Discover the exceptional performance and dependability of our Acetone, specially created to surpass your rigorous requirements. Unleash the potential of this top-notch solvent, and enhance the efficiency and efficacy of your processes to a whole new level. Opt for our Acetone for unparalleled outcomes and make the most of its adaptability in a variety of crucial tasks. Chemical Formula: C3H6O Molecular Weight: 58.080 g·mol−1 CAS Registry Number: 67-64-1 Appearance Colorless Liquid Odor: Pungent, fruity Density 0.7845 g/cm3 (25 °C) Boiling Point: 56.08 °C /132.94 °F Solubility in water: Miscible GHS Pictograms: GHS Signal Word: Danger GHS Hazard Statements: H225, H302, H319, H336, H373 GHS Precautionary Statements P210, P235, P260, P305+P351+P338 UN Identification Number: 1090 Proper Shipping Name: Acetone Transport Hazard Class: 3 Packing Group: II DOT Placard: What is Acetone? Acetone is a clear, colorless, and highly flammable liquid with a distinctive sweet, fruity odor. It is a simple organic compound with the chemical formula C3H6O, belonging to the ketone family. Acetone is widely used as a solvent in various industries due to its excellent solubility and fast evaporation rate. In addition to its solvent properties, acetone has many other applications. It is commonly used as a cleaning agent, degreaser, and paint thinner. It is also a key ingredient in nail polish removers and some cosmetic products. Acetone is utilized in the production of plastics, fibers, resins, and various chemicals. Additionally, it serves as a fuel additive and is used for scientific and laboratory purposes. As a highly versatile and effective solvent, acetone plays a vital role in numerous industrial, commercial, and domestic applications, making it an essential component in various processes. What Are The Properties of Acetone? Acetone is a colorless, volatile, and highly flammable liquid with several notable properties: Physical State: Acetone is a liquid at room temperature and pressure, with a boiling point of 132.8F/56C and a melting point of -94.9°C (-138.8°F). Odor: It has a distinct and characteristic odor that is often described as sweet or fruity. Solubility: Acetone is highly soluble in water, alcohols, ethers, and many other organic solvents. This high solubility contributes to its effectiveness as a cleaning agent and solvent. Density: The density of acetone is about 0.79 g/cm³, making it less dense than water. Vapor Pressure: Acetone has a relatively high vapor pressure, which means that it readily evaporates into the air at room temperature. Flammability: Acetone is highly flammable and has a low flash point of -20.8°C (-5.4°F). This means that it can easily ignite when exposed to an open flame, spark, or other sources of ignition. Reactivity: Acetone is a reactive compound and can participate in various chemical reactions. It can react with strong acids, bases, and oxidizing agents. Acidity: Acetone is a weak acid, and its aqueous solutions can exhibit slightly acidic properties. Miscibility: Acetone is miscible with water and many organic solvents. This property makes it suitable for various applications in different industries. Polarity: Acetone is a polar solvent, meaning that it has a partial positive and partial negative charge distribution within its molecule. This polarity allows it to dissolve a wide range of polar and nonpolar compounds. Boiling Point: Acetone has a relatively low boiling point 132.8F/56C, which makes it easy to evaporate and separate from other substances during distillation processes. Evaporation Rate: Acetone has a fast evaporation rate, which makes it suitable for applications where rapid drying is necessary. It's important to note that acetone's properties contribute to its versatility and wide range of applications in various industries, including cleaning, manufacturing, laboratory work, cosmetics, and more. However, due to its flammability and reactivity, proper safety precautions should always be followed when working with acetone. What Is The Structure Of Acetone? The chemical structure of acetone consists of three atoms: one carbon (C) atom, one oxygen (O) atom, and three hydrogen (H) atoms. It is a simple organic compound with the molecular formula C3H6O. The structural formula of acetone can be represented as: In this structural representation: The central carbon (C) atom is bonded to two hydrogen (H) atoms and one oxygen (O) atom. The oxygen atom is double-bonded to the central carbon atom, forming a carbonyl group (C=O). The remaining valences of the carbon atom are filled by single bonds to the two hydrogen atoms. This arrangement of atoms gives acetone its distinctive chemical properties, including its solubility in water, high vapor pressure, and reactivity as a solvent and chemical reagent. How Is Acetone Produced? Acetone is produced through various industrial processes, with the most common method being the catalytic dehydrogenation of isopropanol. Here's an overview of the primary process used to produce acetone: 1. Dehydrogenation of Isopropanol: The most widely used method to produce acetone is the dehydrogenation of isopropanol, also known as the "cumene process." This process involves several steps: a. Production of Cumene: Cumene (isopropylbenzene) is produced from benzene and propylene in the presence of a catalyst such as aluminum chloride. This results in the formation of cumene and hydrogen chloride as byproducts. b. Oxidation of Cumene to Cumene Hydroperoxide: Cumene is then oxidized using air to form cumene hydroperoxide, typically using a catalytic process with acid or base catalysts. c. Cleavage of Cumene Hydroperoxide: Cumene hydroperoxide is cleaved using acid catalysts to yield phenol and acetone. This reaction results in the simultaneous production of phenol, which is used as a valuable chemical in various industries. d. Distillation and Separation: The mixture of phenol and acetone is then separated using distillation techniques. Acetone is obtained as a separate product from the mixture. 2. Other Processes: Apart from the cumene process, there are alternative methods for acetone production, including: a. Propylene Oxidation: Acetone can be produced through the direct oxidation of propylene using air or oxygen as the oxidizing agent. This method yields propylene oxide and acetone as products. b. Acetaldehyde Condensation: In this method, acetaldehyde is condensed and dehydrated to form acetone. This process is less common compared to the cumene process. c. Bio-based Production: Research is ongoing to develop bio-based methods of acetone production, using renewable resources like biomass or microorganisms that can convert sugars into acetone. d. Repurposing Byproducts: Acetone can also be obtained as a byproduct in various industrial processes, such as the production of phenol, where acetone is produced alongside phenol from cumene hydroperoxide. The cumene process remains the most dominant and economical method for producing acetone on an industrial scale. The choice of production method depends on factors such as availability of feedstocks, economics, environmental considerations, and desired product yields. Is Acetone Safe? Acetone is generally recognized as safe (GRAS) when used in appropriate amounts and under proper conditions. However, like any chemical substance, it should be handled with care and used according to safety guidelines. Here are some important points to consider regarding the safety of acetone: Ventilation: Acetone has a strong odor and can release fumes that may be irritating to the eyes, nose, and throat. When using acetone, make sure you are in a well-ventilated area to minimize inhalation of the fumes. Skin Contact: Acetone can be drying to the skin and may cause irritation, especially with prolonged or frequent exposure. It's advisable to wear gloves when handling acetone to protect your skin. Eye Contact: Avoid getting acetone in your eyes, as it can cause irritation and discomfort. If accidental eye contact occurs, rinse your eyes thoroughly with water and seek medical attention if irritation persists. Ingestion: Acetone is not intended for ingestion and should not be consumed. Ingesting acetone can be harmful and may lead to adverse health effects. Flammability: Acetone is highly flammable and should be kept away from open flames, sparks, and heat sources. Store acetone in a cool, dry place and away from direct sunlight. Sensitive Individuals: Some individuals may be more sensitive to the effects of acetone, experiencing skin irritation, allergic reactions, or respiratory discomfort. If you have a history of sensitivities or allergies, exercise caution when using acetone. Use as Directed: When using acetone for specific applications such as nail polish removal, adhesive removal, or cleaning, follow the recommended instructions on the product label or recipe. Avoid excessive or prolonged exposure. Alternative Options: If you are concerned about the potential risks of using acetone, you can consider using alternative products that are specifically formulated for the task at hand. For example, there are acetone-free nail polish removers available that may be gentler on the nails and cuticles. If you have specific health concerns or are unsure about the safety of using acetone, it's always a good idea to consult with a healthcare professional or seek advice from experts in the field. Additionally, reading and following safety information provided on product labels and material safety data sheets (MSDS) is crucial to ensure safe handling and use of acetone and other chemicals. What are the hazards of Acetone? Acetone is a commonly used chemical solvent, but like any chemical substance, it poses certain hazards that need to be considered when handling and using it. Some of the hazards associated with acetone include: Flammability: Acetone is highly flammable and can catch fire easily. Its low flash point makes it volatile and prone to ignition when exposed to open flames, sparks, or heat sources. It's important to store and use acetone away from potential sources of ignition. Inhalation Hazards: Acetone can release strong vapors that are irritating to the respiratory system. Prolonged or repeated inhalation of these vapors can lead to headaches, dizziness, nausea, and respiratory discomfort. Adequate ventilation is essential when using acetone to minimize exposure to its fumes. Skin and Eye Irritation: Acetone can be drying to the skin and may cause irritation or redness upon direct contact. It can also irritate the eyes and lead to discomfort if splashed or accidentally introduced into the eyes. Central Nervous System Effects: Acetone vapor exposure can affect the central nervous system, leading to symptoms like dizziness, confusion, and even unconsciousness at high concentrations. Toxic Effects: While acetone is generally considered to have low toxicity, exposure to large amounts or prolonged exposure can have toxic effects on the body. Ingesting acetone can lead to nausea, vomiting, abdominal pain, and even coma in severe cases. Health Risks: Long-term or chronic exposure to acetone can potentially have adverse health effects, including damage to the liver, kidneys, and respiratory system. Repeated skin contact can cause dryness and irritation. Environmental Impact: Improper disposal of acetone can lead to environmental contamination. Acetone is volatile and can easily evaporate into the air, contributing to air pollution. It can also be harmful to aquatic life if introduced into water bodies. Allergic Reactions: Some individuals may be sensitive or allergic to acetone, experiencing skin reactions or respiratory discomfort even at lower concentrations. It's important to take appropriate safety precautions when using acetone, including wearing protective gear such as gloves and safety goggles, working in a well-ventilated area, and avoiding open flames or heat sources. If working with acetone in an industrial or laboratory setting, it's crucial to follow established safety protocols and guidelines, as well as refer to the material safety data sheet (MSDS) provided by the manufacturer. Overall, while acetone is a valuable solvent with various applications, it should be handled with care and respect for its potential hazards. If you have any concerns or questions about the safe use of acetone, it's recommended to consult with experts in the field or seek guidance from health and safety professionals. How Flammable Is Acetone? Acetone is highly flammable and poses a significant fire and explosion hazard. It has a low flash point of -20.8°C (-5.4°F), which means that it can easily vaporize and form flammable mixtures with air at temperatures above its flash point. Acetone's wide flammability range (2.5% to 12.8% in air) indicates that even small concentrations of acetone vapor in the air can be ignited by a spark, open flame, or other sources of ignition. Due to its low flash point and flammable nature, acetone should be handled with extreme caution and stored away from sources of heat, sparks, and flames. When using acetone, it's important to follow proper safety practices, such as working in well-ventilated areas, using appropriate protective equipment, and avoiding activities that can generate sparks or heat. Acetone's high flammability also makes it necessary to take precautions when storing and transporting the solvent. Flammable liquids like acetone should be stored in approved containers and away from incompatible materials, such as oxidizing agents, to prevent potential chemical reactions and fires. It's essential to be aware of acetone's flammability and take all necessary safety measures to minimize the risk of fire and ensure a safe working environment when handling this solvent. How Is Acetone Used? Acetone is a versatile organic compound with a wide range of industrial, commercial, and household applications due to its excellent solvent properties and low toxicity. Here are some common uses of acetone: Solvent: Acetone is primarily known for its effectiveness as a solvent. It dissolves a variety of substances, making it useful for cleaning, degreasing, and removing residues from surfaces, equipment, and materials. It is commonly used in industrial settings to clean machinery and equipment. Nail Polish Remover: Acetone is a key ingredient in many nail polish removers. It effectively dissolves nail polish and helps remove it from the nails. Paint and Coating Removal: Acetone is used to remove paint, varnishes, lacquers, and other coatings from surfaces like wood, metal, and plastic. It's particularly useful for removing paint spills or overspray. Adhesive Remover: Acetone can be used to soften and remove adhesives, glues, and tapes from surfaces without causing damage. Chemical Intermediate: Acetone is used as an intermediate in the production of other chemicals. It's a precursor in the manufacturing of products like methyl methacrylate, bisphenol A (used in polycarbonate plastics and epoxy resins), and isopropyl alcohol. Laboratory Reagent: Acetone is used in laboratories as a reagent in various chemical reactions and as a solvent for analytical techniques like chromatography. Thinner for Paints and Inks: Acetone is used as a thinning agent for paints, inks, and varnishes to adjust their viscosity and improve their application. Cosmetics and Personal Care Products: Apart from nail polish remover, acetone is used in the production of cosmetics, skincare products, and perfumes. Medical and Pharmaceutical Uses: Acetone is used in some medical and pharmaceutical applications, such as cleaning medical equipment and removing residues from glassware in laboratories. Cleaning Agent: Acetone is effective at removing greasy or sticky residues from various surfaces. It's often used for cleaning electronics, removing ink stains, and cleaning glass surfaces. Fuel Additive: In some instances, acetone is used as an additive in fuel to improve its combustion efficiency, although this application is less common. Aerosol Propellant: Acetone's ability to vaporize quickly makes it useful as a propellant in aerosol products like air fresheners, deodorants, and cleaning sprays. It's important to note that while acetone is versatile and widely used, it should be handled with care due to its flammable nature. Proper ventilation and safety precautions should be taken when using acetone in any application. How Is Acetone Used In Extraction? Acetone is occasionally used in extraction processes, particularly in the field of chemistry and research, where it serves as a solvent to extract certain compounds from various materials. However, it's important to note that acetone has limitations and risks when used for extraction, and its use should be approached cautiously and with proper safety measures. Here's how acetone can be used in extraction processes: Extraction of Essential Oils and Fragrances: Acetone can be used to extract essential oils and fragrances from plant materials. The solvent's low boiling point allows it to evaporate quickly, leaving behind the extracted aromatic compounds. Extraction of Active Compounds: Acetone can be used to extract active compounds from natural sources, such as medicinal plants or herbs. The solvent's polarity can help dissolve and extract specific compounds like alkaloids, flavonoids, and phenolic compounds. Extraction of Lipids and Fats: Acetone is sometimes used to extract lipids and fats from materials like seeds, nuts, or plant tissues. Its ability to dissolve fats and oils makes it suitable for this purpose. Research and Analysis: In laboratories, acetone is sometimes used as a solvent to prepare samples for analysis by techniques like chromatography or spectroscopy. It can help solubilize compounds of interest for further investigation. Cleaning and Preparing Samples: Acetone can be used to clean surfaces and equipment in preparation for various chemical processes, ensuring that surfaces are free from contaminants that could affect the extraction. Recrystallization: Acetone can also be used for recrystallization processes in the lab, where impure solid compounds are dissolved in acetone and then allowed to crystallize out in a more purified form. It's important to exercise caution when using acetone in extraction processes: Flammability: Acetone is highly flammable and should never be used near open flames or in poorly ventilated areas. Toxicity: Acetone can be harmful if inhaled, ingested, or absorbed through the skin. Proper personal protective equipment (PPE) should be worn, and work should be conducted in a well-ventilated area. Chemical Compatibility: Acetone may not be suitable for extracting all types of compounds, as it can degrade certain materials and might not effectively extract specific compounds. Due to these risks and limitations, alternative solvents or extraction methods are often preferred in various extraction processes. When considering using acetone in an extraction, it's crucial to assess the specific requirements of the extraction and ensure that proper safety measures are in place. What Gaskets Are Compatible With Acetone? Acetone is a powerful solvent that can degrade certain materials, including both silicone and Nitrile/BUNA-N gaskets. When choosing gaskets for use with acetone, it's essential to select materials that are resistant to the solvent's effects to ensure safe and effective sealing. The following gasket materials are generally considered compatible with acetone: PTFE (Polytetrafluoroethylene): PTFE gaskets, also known as Teflon gaskets, are highly resistant to acetone and a wide range of other chemicals. They have excellent chemical stability and can withstand the corrosive nature of acetone. Viton (Fluoroelastomer): Viton gaskets are resistant to a variety of chemicals, including acetone. They are often used in applications where high-temperature and chemical resistance are required. EPDM (Ethylene Propylene Diene Monomer): EPDM gaskets are compatible with acetone for short exposure periods. However, their compatibility may be limited in extended contact with acetone or under specific conditions. It's important to note that the compatibility of gasket materials with acetone can vary based on factors such as temperature, concentration, and exposure duration. Before selecting gaskets for use with acetone, it's advisable to also consider the temperature and pressure range of your application to ensure that the chosen material is suitable for your specific application. Additionally, when working with acetone or any other chemical, it's crucial to follow proper safety protocols, including wearing appropriate personal protective equipment (PPE), working in a well-ventilated area, and observing all relevant safety guidelines. How do I clean with Acetone? Cleaning with acetone involves a few simple steps, but it's important to exercise caution due to its flammable nature and strong odor. Here's how to clean with acetone safely and effectively: Materials Needed: Acetone Clean, lint-free cloth or paper towels Ventilated area or protective mask Gloves Eye protection Steps: Choose a Well-Ventilated Area: Before you begin, make sure you're in a well-ventilated space. Acetone has strong fumes, so working outdoors or in a well-ventilated room is recommended. If ventilation is limited, consider wearing a protective mask and eye protection. Put on Protective Gear: While not always necessary for small cleaning tasks, wearing gloves and eye protection can help prevent skin and eye irritation. Test in an Inconspicuous Area: Before using acetone on a larger surface, test it in a small, inconspicuous area to ensure it doesn't damage or discolor the material you're cleaning. Apply Acetone: Moisten a clean, lint-free cloth or paper towel with a small amount of acetone. Gently blot or rub the area you want to clean. Start with a light touch and gradually increase pressure if needed. Avoid scrubbing vigorously, as this could damage surfaces or spread stains. Wipe Clean: As you blot or rub, you'll notice that dirt, residue, or certain stains are lifted onto the cloth. Continue until the area looks clean. For stubborn stains, you may need to repeat the process or use a slightly more concentrated amount of acetone. Dry the Area: After cleaning, use a separate clean cloth or paper towel to dry the area thoroughly. This helps prevent any remaining acetone from evaporating and leaving streaks. Dispose of Materials Safely: Dispose of used cloths, paper towels, and other materials soaked in acetone responsibly. Place them in a sealed container or bag and dispose of them according to your local regulations for hazardous waste. Wash Hands: After you're finished, wash your hands with soap and water to remove any traces of acetone. Important Tips: Acetone can damage certain plastics, paints, and finishes, so always test it in an inconspicuous area first. Do not use acetone on leather, acetate fabrics, or materials with printed designs, as it can cause fading or damage. Keep acetone away from open flames, sparks, or heat sources, as it is highly flammable. Always work in a well-ventilated area or use appropriate personal protective equipment. Remember that acetone is a powerful solvent, so it's best suited for specific cleaning tasks like removing certain adhesives, paint splatters, or sticky residues. If you're uncertain about using acetone on a particular material or surface, consider seeking professional advice or trying an alternative cleaning method. How Do I Make My Own Acetone-Based Nail Polish Remover? Cleaning with acetone involves a few simple steps, but it's important to exercise caution due to its flammable nature and strong odor. Here's how to clean with acetone safely and effectively: Materials Needed: Acetone Clean, lint-free cloth or paper towels Ventilated area or protective mask Gloves (optional) Eye protection (optional) Steps: Choose a Well-Ventilated Area: Before you begin, make sure you're in a well-ventilated space. Acetone has strong fumes, so working outdoors or in a well-ventilated room is recommended. If ventilation is limited, consider wearing a protective mask and eye protection. Put on Protective Gear: While not always necessary for small cleaning tasks, wearing gloves and eye protection can help prevent skin and eye irritation. Test in an Inconspicuous Area: Before using acetone on a larger surface, test it in a small, inconspicuous area to ensure it doesn't damage or discolor the material you're cleaning. Apply Acetone: Moisten a clean, lint-free cloth or paper towel with a small amount of acetone. Gently blot or rub the area you want to clean. Start with a light touch and gradually increase pressure if needed. Avoid scrubbing vigorously, as this could damage surfaces or spread stains. Wipe Clean: As you blot or rub, you'll notice that dirt, residue, or certain stains are lifted onto the cloth. Continue until the area looks clean. For stubborn stains, you may need to repeat the process or use a slightly more concentrated amount of acetone. Dry the Area: After cleaning, use a separate clean cloth or paper towel to dry the area thoroughly. This helps prevent any remaining acetone from evaporating and leaving streaks. Dispose of Materials Safely: Dispose of used cloths, paper towels, and other materials soaked in acetone responsibly. Place them in a sealed container or bag and dispose of them according to your local regulations for hazardous waste. Wash Hands: After you're finished, wash your hands with soap and water to remove any traces of acetone. Important Tips: Acetone can damage certain plastics, paints, and finishes, so always test it in an inconspicuous area first. Do not use acetone on leather, acetate fabrics, or materials with printed designs, as it can cause fading or damage. Keep acetone away from open flames, sparks, or heat sources, as it is highly flammable. Always work in a well-ventilated area or use appropriate personal protective equipment. Remember that acetone is a powerful solvent, so it's best suited for specific cleaning tasks like removing certain adhesives, paint splatters, or sticky residues. If you're uncertain about using acetone on a particular material or surface, consider seeking professional advice or trying an alternative cleaning method. What Is The Average Amount Of Acetone Used in Nail Polish Remover? The average amount of acetone used in commercial nail polish remover products typically ranges from 30% to 50%. This means that the nail polish remover solution contains 30% to 50% acetone, along with other ingredients such as water, emollients, and fragrances. The exact percentage can vary depending on the brand and formulation of the nail polish remover. When making your own nail polish remover at home, you can use pure acetone or a solution with a similar acetone concentration. Keep in mind that using pure acetone can be harsh on your nails and cuticles, potentially causing dryness and irritation with frequent use. It's a good idea to experiment with different acetone concentrations and observe how your nails and skin react to find the right balance between effective nail polish removal and gentle care for your nails. How Do you Dispose of Acetone? Disposing of acetone properly is important to ensure environmental and personal safety. Here are the steps to follow for proper acetone disposal: Check Local Regulations: Before disposing of acetone, check your local regulations and guidelines for hazardous waste disposal. Different regions may have specific requirements and disposal methods. Use a Secure Container: Transfer the acetone to a tightly sealed, labeled, and non-reactive container. Glass or metal containers with a secure lid are recommended. Label the Container: Clearly label the container with the contents ("Acetone"), the hazard symbol, and any other relevant information. Do Not Mix: Do not mix acetone with other chemicals, as this could lead to hazardous reactions. Contact Local Waste Disposal Facility: Contact your local hazardous waste disposal facility or municipality to inquire about drop-off locations and collection programs for hazardous materials. Do Not Pour Down the Drain: Do not pour acetone down the drain, toilet, or any other water source, as it can contaminate water systems and harm the environment. Evaporate in a Controlled Setting: If allowed by local regulations, you can let a small amount of acetone evaporate in a well-ventilated outdoor area. Ensure it's away from open flames, sparks, or ignition sources. Recycle or Reuse: Some regions may offer recycling or reclamation programs for acetone or other solvents. Research if any such programs are available in your area. Professional Disposal: If you have a large amount of acetone or are uncertain about the proper disposal method, consider contacting a professional hazardous waste disposal service. Remember, improper disposal of hazardous materials like acetone can harm the environment, human health, and local communities. Always prioritize safety and follow the regulations set by your local authorities for proper disposal. Acetone 99% Safety Data Sheet (SDS) Acetone 99% Certificate of Analysis (COA)
$17.00 - $800.00
-
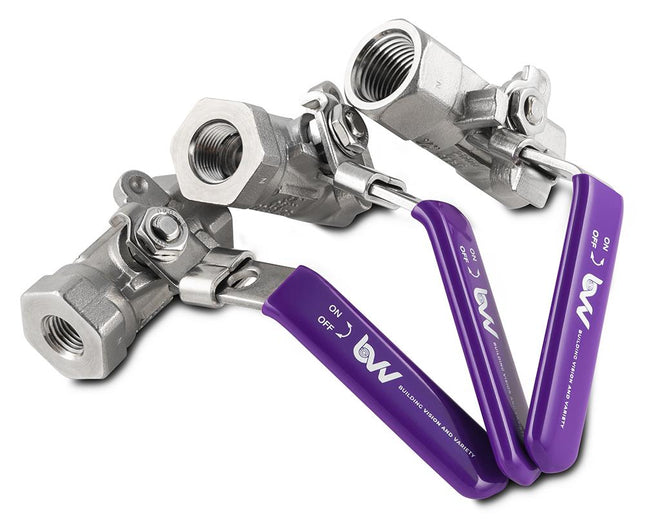

316SS FNPT Full Bore Ball Valve -40F to 450F
316SS FNPT Full Bore Ball Valve This BVV 316 stainless steel full bore ball valve is a fire safe ball valve and is 1 piece ball valve construction. It also features a straight body style with Female NPT x Female NPT threaded connections with one side being pinned into place for zero movement during installation. The fire safe ball valve features a maximum pressure rating of 2000 PSI CWP and has a blowout proof stem made of 316SS and the temperature range of this ball valve is -40F° to 450F°. Standard: ASTM A351 Pressure Tested in compliance with API 598 Ninth Edition 2009: Sec.5 and Sec.6 Technical Data Sheet Valve Specifications Sizes Available: 1/4" FNPT 1/2" FNPT Pressure Rating 2000 WOG Temperature Range -40 to 450F° Sizes Available: 1" (Fits 1.5" Tri-Clamp) Torque Specifications Do not Exceed 14.46ft-lbs when tightening.(Note: Overtightening the valve can cause damage to the pin. Doing this will void the valve warranty.) Valve Materials: Body 316SS / CF8M Ball 316 Stainless Steel Stem 316 Stainless Steel Stem Nut 304 Stainless Steel Insert 316 Stainless Steel Seat PTFE / Dyneon TFM1600 Thrust Washer PTFE / Dyneon TFM1600 Stem Packing PTFE / Dyneon TFM1600 Handle 304 Stainless Steel Handle Cov VINYL GRIP Handle Washer (1/2") 304 Stainless Steel Handle Nut 304 Stainless Steel Belleville Washer 304 Stainless Steel PIN 304 Stainless Steel
$70.00 - $75.00
-
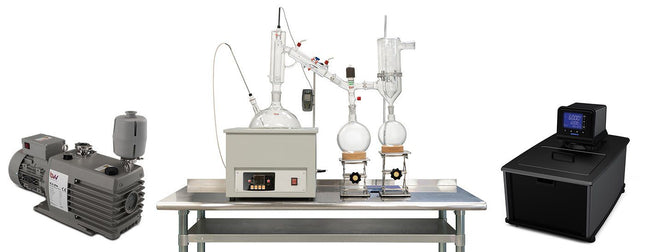
10L Premium Short Path Distillation Turnkey System
10L Premium Short Path Distillation Turnkey System This unit carries a 2 day lead time. (Note: Stainless Steel Table NOT Included.) The 10L Premium Short Path Distillation Turnkey System features our USA made P10 Distillation Head. Every component in this turnkey is made for precision, throughput, and repeatable results. Also included the Kangaroo digital thermometer which is very rugged and reliable. You will also receive a Ribbed Dewar Style Glass Cold Trap to keep all volatiles and solvents out of your vacuum system. This Turnkey Setup gives you everything needed to perform distillation at the highest level. The 10L Neo Kit Includes: 10L Short Path Distillation Kit including glassware, labware, and P10 Distillation Head. 10L Digital Heating and Stirring Mantle. Polyscience 15 Liter Advanced Digital Heated Circulator BVV™ 21.2CFM Pro Series Corrosion Resistant Vacuum Pump Valved Vacuum Adapter. Ribbed Dewar Style Glass Cold Trap. Kangaroo Digital Thermometer. Distillation Quick Start Guide This guide gives basic quick start instructions for distillation systems. It is intended to provide a starting point for learning the process. Parameters should be adjusted to suit specific needs, Before beginning distillation, ensure the following steps have been taken: Vacuum Pump is in good working order. Pump should be run against dry load to allow internals to warm up. Oil should be clear. Cloudy or dark oil should be changed. All glass components are in good working order and ready to be assembled A winterization and degassing procedure has been done to prepare oil for distillation The unit's max internal temperature cannot exceed 380C. The recommended max set temperature should not exceed 250C Once all three of these steps have been completed, you are ready to begin distilling. Begin by placing stir bar in boiling flask and then load your material. This should be done using a funnel. A small amount of alcohol in the oil will give it a thinner consistency making it easier to transfer. Assemble all glassware and ensure each joint is properly greased. Do not use too much, as the vacuum pressure might pull some grease into the system. To ensure a full seal, spread grease in a circular motion by rotating glassware Attach circulator to condenser and set temperature to 50C. Allow circulator to reach temperature before beginning distillation. Connect vacuum pump to manifold. The manifold will allow you to isolate each individual component as well as let atmosphere into and out of the system. Connect receiving cow to cold trap. Connect cold trap to manifold. Connect vacuum gauge to manifold. At this point, ensure all connections are correct. Also ensure receiving cow is positioned to collect the first fraction in the far-left receiving flask. Circulator should be at its set temperature. Turn on vacuum pump to begin process. Turn on heat and set to 60C. Vacuum pump will begin to pull down and temperature will begin to rise. Watch the gauge to monitor vacuum pressure and stability. Start stir slower and increase speed with temperature. Once you are close to 60C, increase the temperature 20 degrees. Continue to raise the heat incrementally in 20-degree steps, increasing the set temperature as you near your set point. Increase temperatures incrementally until you reach 220C. You will see your first fraction somewhere between 180C and 190C or slightly before. This is the “heads” fraction. You will move to your second fraction when you see an increased reaction in the head, a slight color change toward golden, as well as a thickening of distillate. When this fraction hits, allow the distillate to “self-clean” the head for a minute or two then, rotate the cow to the middle receiving flask. Collect your “main body” fraction. You will see temps between 190-220C during this fraction. Continue to increase stirring speed as necessary. Reaction in the head may vary but it should never stop. As fluid level in the boiling flask decreases, increase stir speed. The final “tails” fraction is a mixture of the first and second fractions and should be saved for re-distillation later. Ideally, you want to turn the cow to the final flask before the tails fraction hits. The “tails” fraction has an obvious color change and will be darker than the “main body” fraction. You will see temps between 200-250C during this fraction. As fluid level in the boiling flask decreases even more, set stirring RPM higher (1000+ RPM). You may need to compensate with a bit more heat to finish of the final fraction as well. Once process is complete, stop heat, stop stir, and stop vacuum. Let atmosphere into the system. Be sure to properly store your distillate as exposure to air and light can cause oxidation. ***Note: This entire setup will ship via motor freight.*** ***Note: All units are inspected for broken glass or parts before unit is shipped. If unit arrives damaged or glass is broken (this does not include minor imperfections or scuffs in glassware), Customer MUST contact BVV™ within 3 days of delivery to file a claim and receive a replacement part. If customer DOES NOT contact BVV™ within 3 days of delivery responsibility for replacement parts falls on the customer and they must pay for replacement pieces.*** ***Glassware Safety Disclaimer: BVV™ is not responsible for failure of glassware which must be inspected before and after every use because it may eventually develop imperfections or damage through normal usage, mishandling, and stress caused by temperature variations. If an imperfection or damage is noted while inspecting the glassware DO NOT use the glassware because it can fail causing bodily harm or damage to the surrounding area.***
$12,100.00
-
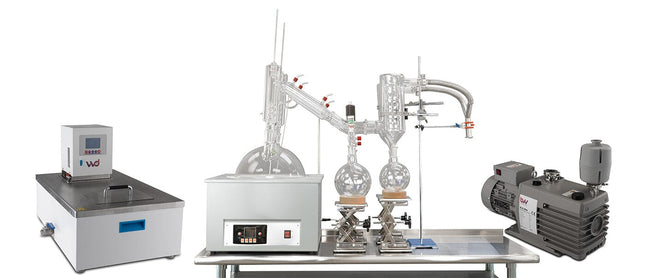

Neocision 20L Neocision Dual Short Path Distillation Turnkey System
20L Neocision Dual Short Path Distillation Turnkey System This unit carries a 2 day lead time. (Note: This kit does NOT include the stainless steel table.) The 20L Neocision Distillation Turnkey Setup features our Dual USA made P10V6 Distillation Heads. Every component in this distillation kit is made for precision, throughput, and repeatable results. You will also receive Dual Dewar Style Ribbed Glass Cold Traps to keep all volatiles and solvents out of your vacuum system. This Turnkey Setup gives you everything needed to perform distillation at the highest level. The 20L Neo Kit Includes: 20L Neocision Kit with glassware, labware, and Dual P10V6 Distillation Heads. BVV 15 Liter Advanced Digital Heated Circulator Choice of Vacuum Pump KF-25 Bellow Y Manifold Dual Ribbed Dewar Style Glass Cold Trap Non-Mercury Glass Thermometers 20L Digital Heating and Stirring Mantle Distillation Quick Start Guide This guide gives basic quick start instructions for distillation systems. It is intended to provide a starting point for learning the process. Parameters should be adjusted to suit specific needs, Before beginning distillation, ensure the following steps have been taken: Vacuum Pump is in good working order. Pump should be run against dry load to allow internals to warm up. Oil should be clear. Cloudy or dark oil should be changed. All glass components are in good working order and ready to be assembled A winterization and degassing procedure has been done to prepare oil for distillation The unit's max internal temperature cannot exceed 380C. The recommended max set temperature should not exceed 250C Once all three of these steps have been completed, you are ready to begin distilling. Begin by placing stir bar in the boiling flask and then load your material. This should be done using a funnel. A small amount of alcohol in the oil will give it a thinner consistency making it easier to transfer. Assemble all glassware and ensure each joint is properly greased. Do not use too much, as the vacuum pressure might pull some grease into the system. To ensure a full seal, spread grease in a circular motion by rotating glassware Attach circulator to condenser and set temperature to 50C. Allow circulator to reach temperature before beginning distillation. Connect vacuum pump to manifold. The manifold will allow you to isolate each individual component as well as let atmosphere into and out of the system. Connect receiving cow to cold trap. Connect cold trap to manifold. Connect vacuum gauge to manifold. At this point, ensure all connections are correct. Also ensure receiving cow is positioned to collect the first fraction in the far-left receiving flask. Circulator should be at its set temperature. Turn on vacuum pump to begin process. Turn on heat and set to 60C. Vacuum pump will begin to pull down and temperature will begin to rise. Watch the gauge to monitor vacuum pressure and stability. Start stir slower and increase speed with temperature. Once you are close to 60C, increase the temperature 20 degrees. Continue to raise the heat incrementally in 20-degree steps, increasing the set temperature as you near your set point. Increase temperatures incrementally until you reach 220C. You will see your first fraction somewhere between 180C and 190C or slightly before. This is the “heads” fraction. You will move to your second fraction when you see an increased reaction in the head, a slight color change toward golden, as well as a thickening of distillate. When this fraction hits, allow the distillate to “self-clean” the head for a minute or two then, rotate the cow to the middle receiving flask. Collect your “main body” fraction. You will see temps between 190-220C during this fraction. Continue to increase stirring speed as necessary. Reaction in the head may vary but it should never stop. As fluid level in the boiling flask decreases, increase stir speed. The final “tails” fraction is a mixture of the first and second fractions and should be saved for re-distillation later. Ideally, you want to turn the cow to the final flask before the tails fraction hits. The “tails” fraction has an obvious color change and will be darker than the “main body” fraction. You will see temps between 200-250C during this fraction. As fluid level in the boiling flask decreases even more, set stirring RPM higher (1000+ RPM). You may need to compensate with a bit more heat to finish of the final fraction as well. Once process is complete, stop heat, stop stir, and stop vacuum. Let atmosphere into the system. Be sure to properly store your distillate as exposure to air and light can cause oxidation. ***Note: This entire setup will ship via motor freight.*** *Notice to Customers: All units are inspected for broken glassware or parts before leaving BVV™. If the unit arrives damaged (this does not include minor imperfections or scuffs in glassware), the customer MUST contact BVV™ within 72 hours from carrier delivery to file a claim. If the customer DOES NOT contact BVV™ within 72 hours from carrier delivery, then BVV™ cannot issue any replacement(s) or compensation for the item; a new purchase will need to be made for a replacement. BVV™ is not responsible for the failure of glassware which must be inspected before and after every use because it may eventually develop imperfections or damage through normal usage, mishandling, and stress caused by temperature variations. If an imperfection or damage is noted while inspecting the glassware DO NOT use the glassware because it can fail, which can cause bodily harm or damage to the surrounding area.
$13,000.00 - $17,000.00
-
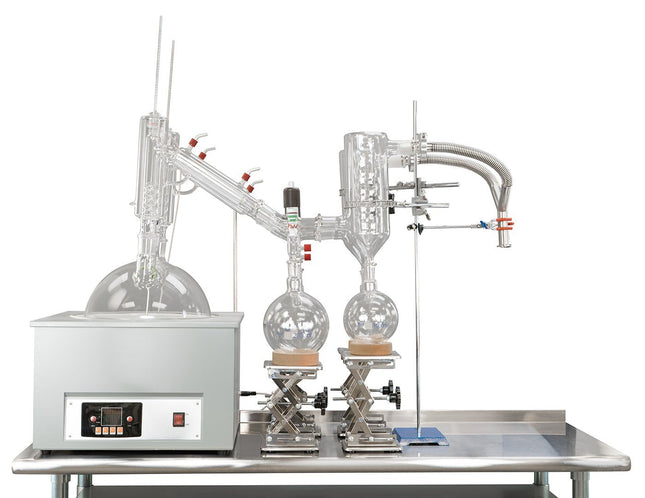
Neocision 20L Neocision Dual Head Short Path Distillation Kit
20L Neocision Dual Head Short Path Distillation Kit This unit carries a 2 day lead time. (Note: This kit does NOT include the stainless steel table.) The 20L Neocision Distillation Kit Setup features our Dual P10V6 Distillation Heads and USA made glass. Every component in this distillation kit is made for precision, throughput, and repeatable results. You will also receive Dual Dewar Style Ribbed Glass Cold Traps to keep all volatiles and solvents out of your vacuum system. This kit gives you the essentials of a short path distillation system and allows you to add a pump and temperature control system of your choosing. The 20L Neo Kit Includes: 20L Neocision Kit with glassware, labware, and Dual P10V6 Distillation Heads. KF-25 Bellow Y Manifold Dual Ribbed Dewar Style Glass Cold Trap Non-Mercury Glass Thermometers 20L Digital Heating and Stirring Mantle Distillation Quick Start Guide This guide gives basic quick start instructions for distillation systems. It is intended to provide a starting point for learning the process. Parameters should be adjusted to suit specific needs, Before beginning distillation, ensure the following steps have been taken: Vacuum Pump is in good working order. Pump should be run against dry load to allow internals to warm up. Oil should be clear. Cloudy or dark oil should be changed. All glass components are in good working order and ready to be assembled A winterization and degassing procedure has been done to prepare oil for distillation The unit's max internal temperature cannot exceed 380C. The recommended max set temperature should not exceed 250C Once all three of these steps have been completed, you are ready to begin distilling. Begin by placing stir bar in the boiling flask and then load your material. This should be done using a funnel. A small amount of alcohol in the oil will give it a thinner consistency making it easier to transfer. Assemble all glassware and ensure each joint is properly greased. Do not use too much, as the vacuum pressure might pull some grease into the system. To ensure a full seal, spread grease in a circular motion by rotating glassware Attach circulator to condenser and set temperature to 50C. Allow circulator to reach temperature before beginning distillation. Connect vacuum pump to manifold. The manifold will allow you to isolate each individual component as well as let atmosphere into and out of the system. Connect receiving cow to cold trap. Connect cold trap to manifold. Connect vacuum gauge to manifold. At this point, ensure all connections are correct. Also ensure receiving cow is positioned to collect the first fraction in the far-left receiving flask. Circulator should be at its set temperature. Turn on vacuum pump to begin process. Turn on heat and set to 60C. Vacuum pump will begin to pull down and temperature will begin to rise. Watch the gauge to monitor vacuum pressure and stability. Start stir slower and increase speed with temperature. Once you are close to 60C, increase the temperature 20 degrees. Continue to raise the heat incrementally in 20-degree steps, increasing the set temperature as you near your set point. Increase temperatures incrementally until you reach 220C. You will see your first fraction somewhere between 180C and 190C or slightly before. This is the “heads” fraction. You will move to your second fraction when you see an increased reaction in the head, a slight color change toward golden, as well as a thickening of distillate. When this fraction hits, allow the distillate to “self-clean” the head for a minute or two then, rotate the cow to the middle receiving flask. Collect your “main body” fraction. You will see temps between 190-220C during this fraction. Continue to increase stirring speed as necessary. Reaction in the head may vary but it should never stop. As fluid level in the boiling flask decreases, increase stir speed. The final “tails” fraction is a mixture of the first and second fractions and should be saved for re-distillation later. Ideally, you want to turn the cow to the final flask before the tails fraction hits. The “tails” fraction has an obvious color change and will be darker than the “main body” fraction. You will see temps between 200-250C during this fraction. As fluid level in the boiling flask decreases even more, set stirring RPM higher (1000+ RPM). You may need to compensate with a bit more heat to finish of the final fraction as well. Once process is complete, stop heat, stop stir, and stop vacuum. Let atmosphere into the system. Be sure to properly store your distillate as exposure to air and light can cause oxidation. *Note: This entire setup will ship via motor freight.*** *Notice to Customers: All units are inspected for broken glassware or parts before leaving BVV™. If the unit arrives damaged (this does not include minor imperfections or scuffs in glassware), the customer MUST contact BVV™ within 72 hours from carrier delivery to file a claim. If the customer DOES NOT contact BVV™ within 72 hours from carrier delivery, then BVV™ cannot issue any replacement(s) or compensation for the item; a new purchase will need to be made for a replacement. BVV™ is not responsible for the failure of glassware which must be inspected before and after every use because it may eventually develop imperfections or damage through normal usage, mishandling, and stress caused by temperature variations. If an imperfection or damage is noted while inspecting the glassware DO NOT use the glassware because it can fail, which can cause bodily harm or damage to the surrounding area.
$6,800.00 - $7,000.00
-
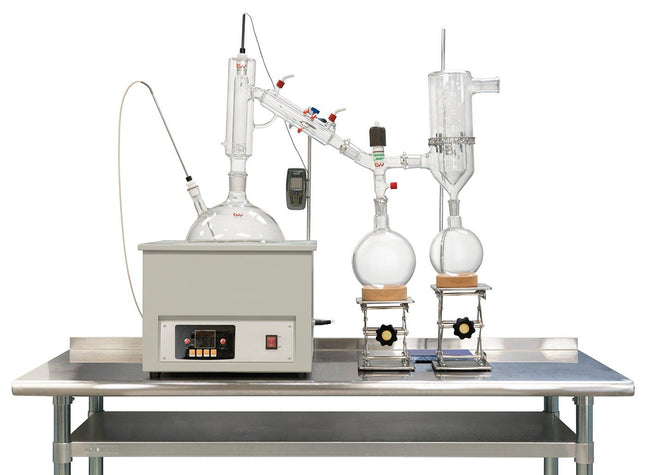
10L Premium Short Path Distillation Kit with P10 Distillation Head
10L Short Path Distillation Kit with P10 Distillation Head This unit carries a 2 day lead time. (Note: Stainless Steel Table NOT Included.) The 10L Short Path Distillation Kit features our USA made P10 Distillation Head. Every component in this turnkey is made for precision, throughput, and repeatable results. Also included the Kangaroo digital thermometer which is very rugged and reliable. You will also receive a Ribbed Dewar Style Glass Cold Trap to keep all volatiles and solvents out of your vacuum system. This Kit gives you the basic necessities of a short path distillation system and allows you to add on a temperature control system and vacuum pump to fit your needs. The 10L Neo Kit Includes: 10L Short Path Distillation Kit including glassware, labware, and P10 Distillation Head. 10L Digital Heating and Stirring Mantle. Valved Vacuum Adapter. Ribbed Dewar Style Glass Cold Trap. Kangaroo Digital Thermometer. Distillation Quick Start Guide This guide gives basic quick start instructions for distillation systems. It is intended to provide a starting point for learning the process. Parameters should be adjusted to suit specific needs, Before beginning distillation, ensure the following steps have been taken: Vacuum Pump is in good working order. Pump should be run against dry load to allow internals to warm up. Oil should be clear. Cloudy or dark oil should be changed. All glass components are in good working order and ready to be assembled A winterization and degassing procedure has been done to prepare oil for distillation The unit's max internal temperature cannot exceed 380C. The recommended max set temperature should not exceed 250C Once all three of these steps have been completed, you are ready to begin distilling. Begin by placing stir bar in boiling flask and then load your material. This should be done using a funnel. A small amount of alcohol in the oil will give it a thinner consistency making it easier to transfer. Assemble all glassware and ensure each joint is properly greased. Do not use too much, as the vacuum pressure might pull some grease into the system. To ensure a full seal, spread grease in a circular motion by rotating glassware Attach circulator to condenser and set temperature to 50C. Allow circulator to reach temperature before beginning distillation. Connect vacuum pump to manifold. The manifold will allow you to isolate each individual component as well as let atmosphere into and out of the system. Connect receiving cow to cold trap. Connect cold trap to manifold. Connect vacuum gauge to manifold. At this point, ensure all connections are correct. Also ensure receiving cow is positioned to collect the first fraction in the far-left receiving flask. Circulator should be at its set temperature. Turn on vacuum pump to begin process. Turn on heat and set to 60C. Vacuum pump will begin to pull down and temperature will begin to rise. Watch the gauge to monitor vacuum pressure and stability. Start stir slower and increase speed with temperature. Once you are close to 60C, increase the temperature 20 degrees. Continue to raise the heat incrementally in 20-degree steps, increasing the set temperature as you near your set point. Increase temperatures incrementally until you reach 220C. You will see your first fraction somewhere between 180C and 190C or slightly before. This is the “heads” fraction. You will move to your second fraction when you see an increased reaction in the head, a slight color change toward golden, as well as a thickening of distillate. When this fraction hits, allow the distillate to “self-clean” the head for a minute or two then, rotate the cow to the middle receiving flask. Collect your “main body” fraction. You will see temps between 190-220C during this fraction. Continue to increase stirring speed as necessary. Reaction in the head may vary but it should never stop. As fluid level in the boiling flask decreases, increase stir speed. The final “tails” fraction is a mixture of the first and second fractions and should be saved for re-distillation later. Ideally, you want to turn the cow to the final flask before the tails fraction hits. The “tails” fraction has an obvious color change and will be darker than the “main body” fraction. You will see temps between 200-250C during this fraction. As fluid level in the boiling flask decreases even more, set stirring RPM higher (1000+ RPM). You may need to compensate with a bit more heat to finish of the final fraction as well. Once process is complete, stop heat, stop stir, and stop vacuum. Let atmosphere into the system. Be sure to properly store your distillate as exposure to air and light can cause oxidation. ***Note: This entire setup will ship via motor freight.*** *Notice to Customers: All units are inspected for broken glassware or parts before leaving BVV™. If the unit arrives damaged (this does not include minor imperfections or scuffs in glassware), the customer MUST contact BVV™ within 72 hours from carrier delivery to file a claim. If the customer DOES NOT contact BVV™ within 72 hours from carrier delivery, then BVV™ cannot issue any replacement(s) or compensation for the item; a new purchase will need to be made for a replacement. BVV™ is not responsible for the failure of glassware which must be inspected before and after every use because it may eventually develop imperfections or damage through normal usage, mishandling, and stress caused by temperature variations. If an imperfection or damage is noted while inspecting the glassware DO NOT use the glassware because it can fail, which can cause bodily harm or damage to the surrounding area.
$4,100.00
-
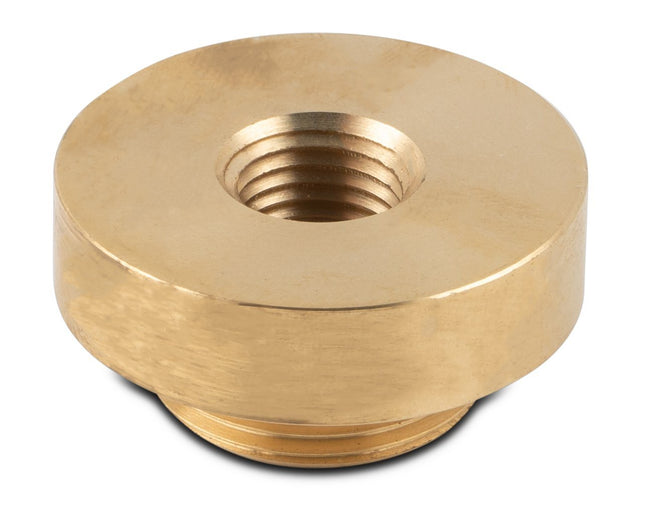
Mastercool 1/4" FNPT Vacuum Pump Exhaust Adapter
Mastercool 1/4" FNPT Vacuum Pump Exhaust Adapter This fitting allows the user to connect a 1/4" NPT fitting to the exhaust for the desired application such as a carbon exhaust filter. It is made of brass and comes with a Viton O-ring. This item will also fit VE115 Vacuum pumps
$15.00
-
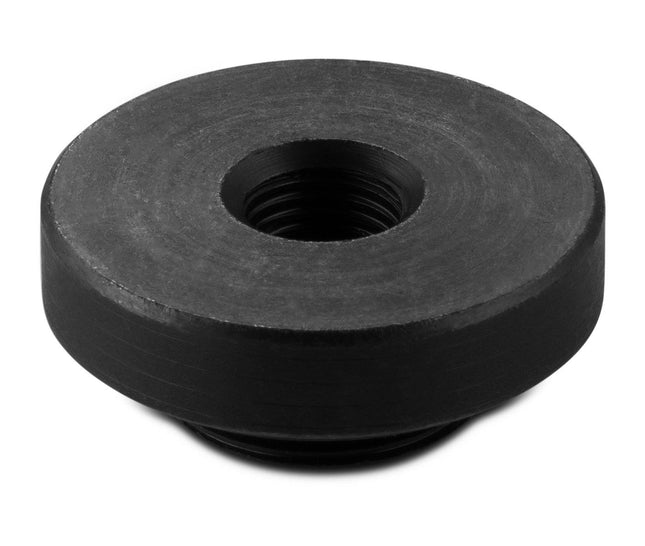
BVV/CPS 1/4" FNPT Vacuum Pump Exhaust Adapter
BVV/CPS 1/4" FNPT Vacuum Pump Exhaust Adapter This fitting allows the user to connect a 1/4" NPT fitting to the exhaust for the desired application such as a carbon exhaust filter. It is made of steel and comes with a Viton O-ring.
$20.00
-
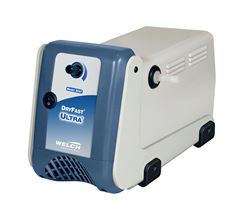
Welch Vacuum - Gardner Denver Welch DryFast Ultra Diaphragm Pump 2042
Welch DryFast Ultra Diaphragm Pump 2042 This item may carry up to a 5 day lead time. Product Details Chemical Resistant Oil-Free Tuneable Vacuum Welch DryFastTM PTFE Diaphragm Vacuum Pumps enable precise vacuum control for organic evaporations with exclusive Advanced Vapor Management (AVM). Oil-Free, portable, chemical resistant, 2 head diaphragm design simplifies maintenance. Choose from seven dry PTFE vacuum pump models with flows up to 70 L / min and adjustable vacuum down to 2 Torr. Economical DryFastTM vacuum pumps are perfect for tough lab applications. Specifications Model Number 2042 Application Rotary Evaporation/Distillation (lowvolatility solvents <160oC B.P., ~ 2 Liter), Centrifugal Concentrators, Vacuum ovens (mid- size), pumping harsh vapors & gases Type Laboratory Vacuum Pump Free Air Displacement cfm (l/min.) @60Hz 1.2(35) Free Air Displacement m3/hr (l/min.) @50Hz 1.75(29) Ultimate Pressure 2(2.7) Maximum Vacuum 29.85 Motor Horsepower (watts) 1/5(150) Adjustable Vac. / Gas Ballast Yes Tubing Needed 1/4(7) Intake Thread NPT M14(1/8) Overall Dimensions LxWxH in. (cm) 13.8x6.8x8.8(35.2x7.2x22.3) Ship Weight 25(11.3) Shipping Carton Dimensions LxWxH in. (cm) 21x14x15 (52x35x37) Adjustable Vacuum Knob
$4,525.00
-
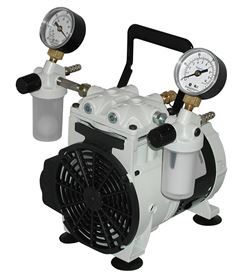
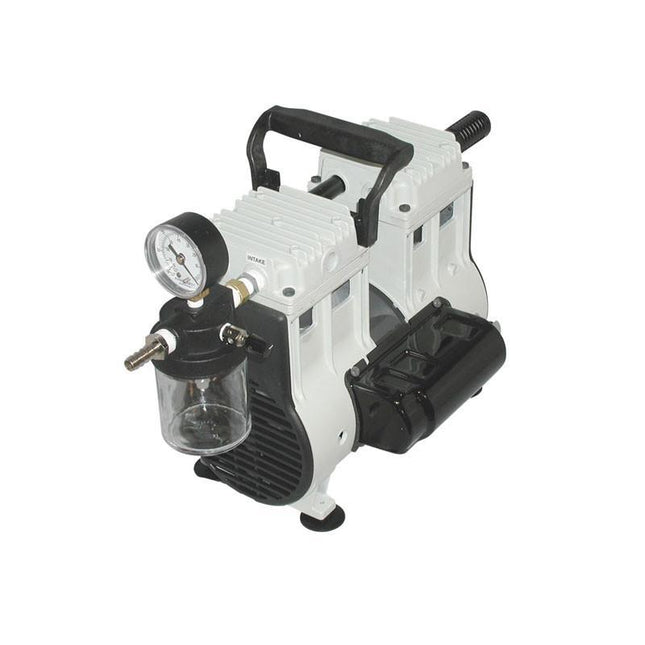
Welch Vacuum - Gardner Denver Welch WOB-L Pump 2546
Welch WOB-L Pump 2546 Product Details Economical Oil Free Adjustable Vacuum / Pressure Reliable WOB-L Piston pumps are perfect for many common laboratory vacuum applications. Features: Vacuum and Pressure - to 60 Torr (27.6"Hg). Includes Vacuum and Pressure Regulators and Gauges - simple to adjust and monitor vacuum level and delivery pressure. Inlet Water Trap - float ball rises to seal off pump from accidental ingestion of water. Muffler quiets pump and filters discharge air. For use with dry or aqueous vapor applications only. Specifications Model Number 2546 Application Filtration (1 to 6 funnels), Aspiration, Desiccation, SPE, Replace water aspirator, Vacuum Drying Type Laboratory Vacuum Pump Free Air Displacement cfm (l/min.) @60Hz 1.6(45) Free Air Displacement m3/hr (l/min.) @50Hz 2.3(38) Ultimate Pressure 60(80) Maximum Vacuum 27.6 Max Pressure PSIG (pascal) 100(106) Motor Horsepower (watts) 1/4(190) Adjustable Vac. / Gas Ballast Yes Tubing Needed 3/16(5) Intake Thread NPT 1/4 Overall Dimensions LxWxH in. (cm) 10x7.5x9 (25.4x19.1x7.7) Ship Weight 17(7.7) Shipping Carton Dimensions LxWxH in. (cm) 15.3x12.3x12.7 (39x31x32) Intake Catch Jar Yes Exhaust Catch Jar Yes Adjustable Vacuum Knob Adjustable Pressure Yes Vacuum Gauge Dial Pressure Gauge Dial
$1,056.00
-

Welch Vacuum - Gardner Denver Welch WOB-L Pump 2522
Welch WOB-L Pump 2522 Product Details Economical Oil Free Adjustable Vacuum / Pressure Reliable WOB-L Piston pumps are perfect for many common laboratory vacuum applications. Features: Vacuum and Pressure - to 100 Torr (26"Hg). Includes Vacuum and Pressure Regulators and Gauges - simple to adjust and monitor vacuum level and delivery pressure. Inlet Water Trap - float ball rises to seal off pump from accidental ingestion of water. Muffler quiets pump and filters discharge air. For use with dry or aqueous vapor applications only. Specifications Model Number 2522 Application Filtration (1 to 2 funnels), Aspiration, Desiccation, SPE, Replace water aspirator, Vacuum Drying Type Laboratory Vacuum Pump Free Air Displacement cfm (l/min.) @60Hz 0.76(22) Free Air Displacement m3/hr (l/min.) @50Hz 1.1(18) Ultimate Pressure 100(133) Maximum Vacuum 26 Max Pressure PSIG (pascal) 100(106) Motor Horsepower (watts) 1/8(93) Adjustable Vac. / Gas Ballast Yes Tubing Needed 3/16(5) Intake Thread NPT 1/4 Overall Dimensions LxWxH in. (cm) 8.1x8.8x10 (20.6x22.4x25.4) Ship Weight 17(7.7) Shipping Carton Dimensions LxWxH in. (cm) 15.3x12.3x12.7 (39x31x32) Intake Catch Jar Yes Exhaust Catch Jar Yes Adjustable Vacuum Knob Adjustable Pressure Yes Vacuum Gauge Dial Pressure Gauge Dial
$825.00
-
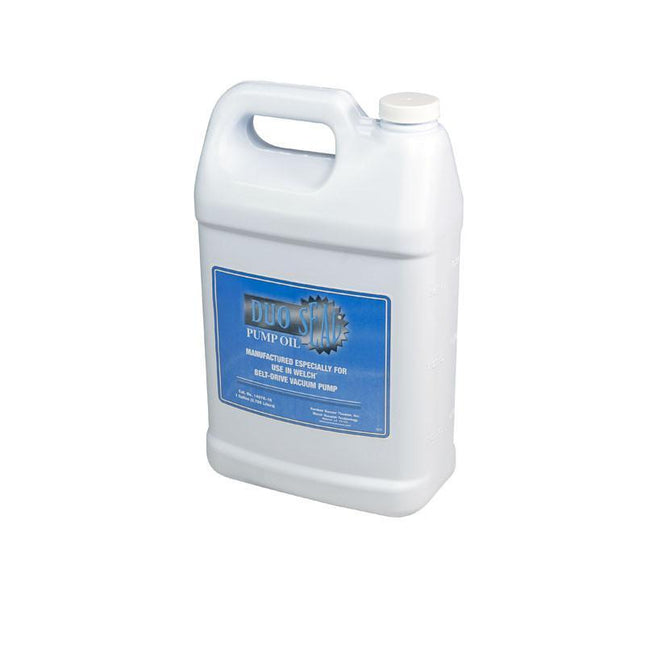
Welch Vacuum - Gardner Denver Welch DuoSeal Vacuum Pump Oil, Gallon 1407K-15
Welch DuoSeal Vacuum Pump Oil, Gallon 1407K-15 ***Note: This item has a possible 1-2 week lead time depending on stock availability*** Welch fractionated oil for DuoSeal belt-driven pumps to ensure the highest vacuum performance. DuoSeal Oil performs to rigid standards for vapor pressure, vacuum level stability, and viscosity -the lubrication that helps enable renowned DuoSeal pump durability.
$105.00
-
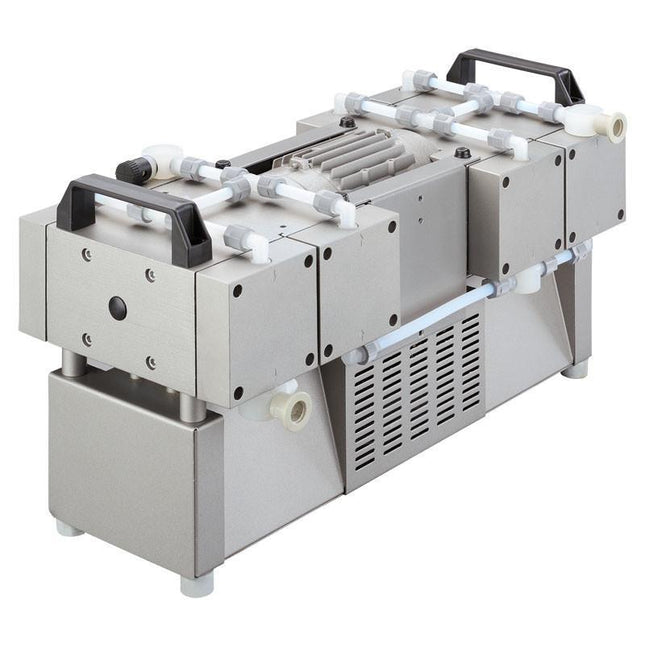
Welch Vacuum - Gardner Denver Welch High Capacity Diaphragm Pumps 2062
Welch High Capacity Diaphragm Pumps 2062 High Capacity dry diaphragm vacuum pump. PTFE contact surfaces, deep vacuum at with high flow. PTFE Pump, 8 heads. 115V 60HZ 1.5 TORR 119 LPM Specifications Includes 1/4" OD hose barb Common accessory, not included Vacuum Controller Pumping Speed 119 Lit/min. (4.2 CFM) Max. Vacuum 1.5 Torr (2 mbar) 29.9" Hg Tubing Needed 1/4" ID Inlet Connection UNIBARB Exhaust 1/4" OD Dimensions LxWxH inches 21x11x12 Weight 72 LBS Wiring 115V, 60 hz
$6,550.00
-
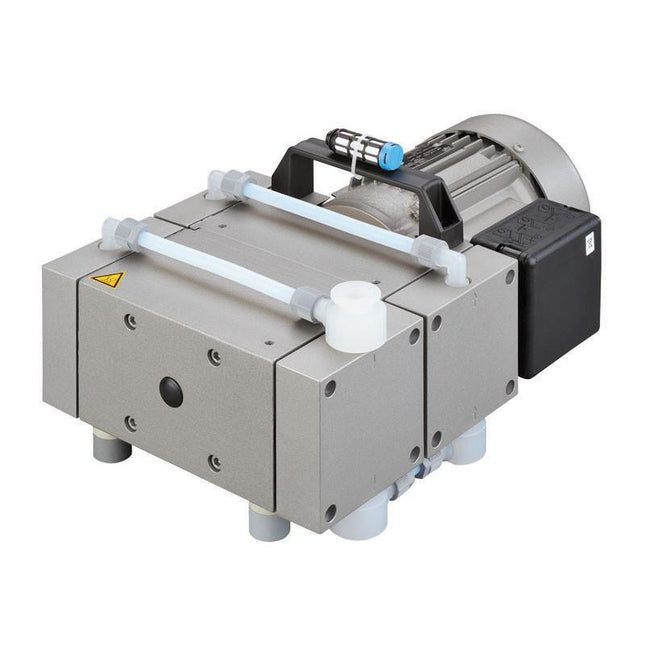
Welch Vacuum - Gardner Denver Welch High Capacity PTFE Diaphragm Pump 2052
Welch High Capacity Diaphragm Pump 2052 High Capacity dry diaphragm vacuum pump. PTFE contact surfaces, deep vacuum at with high flow. PTFE PUMP 115V 60HZ 1.5 TORR 64 LPM Free Air Displacement cfm (L min.) 2.3 Ult. Vac. Pressure, torr (mbar) 1.5 (2) Maximum Vacuum, in. Hg 29.9 Motor Horsepower - HP (wattS) 0.53 (390) Adjustable Vac J Gas Ballast No Tubing Nftftriftri. J.D. m. (mm) 1/4 (8) fntake (Exhaust) Thread NPT NW 16-1/4" MPT Weight Ibs. (kg) 40.3 (18.3) Overall Dimensions L x W x H in. (cm) 9 x 15 x 7 (22.8 x 38.1 x 17.8) Slip Weight, lbs. (kg) 49.8 (22.6) Snipping Carton Dimensions L x W x H in. (cm) 10.2 x 16.6 x 7.5 (26 x 42 x 19)
$4,336.00
-

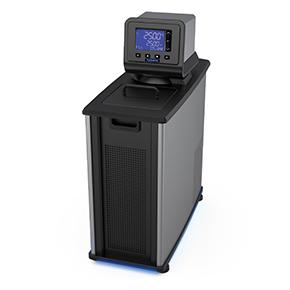
Polyscience Polyscience 7 Liter Heated Circulator
Polyscience 7 Liter Heated Circulator ***Note: This item has a lead time of 2-3 weeks depending on stock availability.*** Description: 200, 7 L Htg. Circulator Controller Type: Advanced Digital Display: 3.75" Touch-Pad LCD Connectivity: Ethernet, USB A & B, RS232/addressable RS485, External Temperature Probe Languages Supported: 4: French, German, Spanish, English Swivel 180 Rotating Controller: Yes Working Temperature Range °C: +10° to 200° Temperature Stability °C: ±0.01° Fluid Optimization/Specific Heat Tuning: Automatic and/or user-adjustable Temperature Calibration Capability: 1-point Working Access (L x W x D) (cm): 15.7 x 14.2 x 12.7 cm Pump Type: Pressure/Suction External Temperature Control Capability: Yes Flammability Class (DIN 12876-1): III (FL) Specifications Working Temperature Range °F Ambient + 20° to 392° Working Temperature Range °C Ambient +10° to 200° Reservoir Capacity (gallons) 1.85 Reservoir Capacity (liters) 7 Reservoir/Tank Material Stainless Steel Reservoir Cover Included DuraTop Yes LidDock Yes Working Access (L x W x D) (inches) 6.18 x 5.59 x 5 in Working Access (L x W x D) (cm) 15.7 x 14.2 x 12.7 cm Temperature Stability °F ±0.02° Temperature Stability °C ±0.01° Display 3.75" Touch-Pad LCD Display Resolution (Set) 0.01 Display Resolution (Read) 0.01 Pump Type Pressure/Suction Pump Speed Variable Process Connections 1/4" (F) NPT External Temperature Control Capability Yes Flammability Class (DIN 12876-1) III (FL) Coiling Coil Yes Over-Temperature Protection / Failsafe Heater Control Yes WhisperCool Environmental Control Technology Yes Low Liquid Level Protection Yes Reservoir Drain Yes Included Software PolyTemp Viewer, USB driver Maximum Ambient Temperature °F 95° Maximum Ambient Temperature °C 35° Overall Dimensions (L x W x H) (inches) 19.6 x 8.7 x 16.1 in Overall Dimensions (L x W x H) (cm) 49.9 x 22.1 x 40.9cm Environmental Compliance RoHS, WEEE Shipping Weight (pounds) 42.0 Shipping Weight (kilograms) 19.0 60Hz Part Number AD07H200-A11B Maximum Pressure (psi) 4.3 Maximum Pressure (bar) 0.30 Maximum Pressure Flow Rate (gpm) 5.30 Maximum Pressure Flow Rate (l/min) 20.1 Maximum Suction Flow Rate (gpm) 3.9 Maximum Suction Flow Rate (l/min) 14.7 Included Hardware Nylon hose adapters for 3/8", 1/4", and 3/16" Heater Wattage 1100 Electrical Requirements (VAC/Hz/Ph/A) 120/60/1/10 Regulatory Approvals ETL Certifications: Regulatory Approvals: ETL Operator's Manual
$3,200.00
-
Polyscience Polyscience 7 Liter Refrigerated Circulator, -40°C
Polyscience 7 Liter Refrigerated Circulator, -40°C ***Note: This item has a lead time of 2-3 weeks depending on stock availability.*** Description: -40, 7 L Ref Circulator Controller Type: Advanced Digital Display: 3.75" Touch-Pad LCD Connectivity: Ethernet, USB A & B, RS232/addressable RS485, External Temperature Probe Languages Supported: 4: French, German, Spanish, English Swivel 180 Rotating Controller: Yes Working Temperature Range °C: -40° to 200° Temperature Stability °C: ±0.01° Fluid Optimization/Specific Heat Tuning: Automatic and/or user-adjustable Temperature Calibration Capability: 1- point Working Access (L x W x D) (cm): 15.7 x 14.2 x 12.7 cm Pump Type: Pressure/Suction External Temperature Control Capability: Yes Flammability Class (DIN 12876-1): III (FL) Specifications Working Temperature Range °F -40° to 392° Working Temperature Range °C -40° to 200° Nominal Cooling Capacity @ +20C (W) 360 Reservoir Capacity (gallons) 1.85 Reservoir Capacity (liters) 7 Reservoir/Tank Material Stainless Steel Reservoir Cover Included DuraTop Yes LidDock LidDock Cleanable Air Filter Yes Working Access (L x W x D) (inches) 6.18 x 5.59 x 5 in Working Access (L x W x D) (cm) 15.7 x 14.2 x 12.7 cm Temperature Stability °F ±0.02° Temperature Stability °C ±0.01° Display 3.75" Touch-Pad LCD Display Resolution (Set) 0.01 Display Resolution (Read) 0.01 Pump Type Pressure/Suction Pump Speed Variable Process Connections 1/4" (F) NPT External Temperature Control Capability Yes Flammability Class (DIN 12876-1) III (FL) Over-Temperature Protection / Failsafe Heater Control Yes Low Liquid Level Protection Yes WhisperCool Environmental Control Technology Yes Cool Command Refrigeration Technology Yes Reservoir Drain Yes Included Software PolyTemp Viewer, USB driver Maximum Ambient Temperature °F 95° Maximum Ambient Temperature °C 35° Overall Dimensions (L x W x H) (inches) 21.3 x 8.7 x 24.3 in Overall Dimensions (L x W x H) (cm) 54.1 x 22.1 x 61.7 cm Refrigerant R404A Environmental Compliance RoHS, WEEE Shipping Weight (pounds) 90.0 Shipping Weight (kilograms) 40.8 60Hz Part Number AD07R-40A11B Maximum Pressure (psi) 4.3 Maximum Pressure (bar) 0.30 Maximum Pressure Flow Rate (gpm) 5.30 Maximum Pressure Flow Rate (l/min) 20.1 Maximum Suction Flow Rate (gpm) 3.9 Maximum Suction Flow Rate (l/min) 14.7 Cooling Capacity @ -20°C (W) 115 Cooling Capacity @ 0°C (W) 250 Cooling Capacity @ +20°C (W) 360 Included Hardware Nylon hose adapters for 3/8", 1/4", and 3/16" Heater Wattage 1100 Electrical Requirements (VAC/Hz/Ph/A) 120/60/1/12 Regulatory Approvals ETL
$6,200.00
-
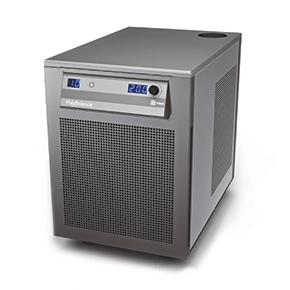
Polyscience Polyscience 1.5 HP Chiller, Positive Displacement Pump; Air-Cooled
Polyscience 1.5 HP Chiller, Positive Displacement Pump; Air-Cooled Description: 1.5 HP Chiller, Positive Displacement Pump; Air-Cooled Display: LED Connectivity: Optional: RS232, RS485 Working Temperature Range °C: 5° to 35° Temperature Stability °C: ±0.5° Temperature Calibration Capability: 1-point Pump Type: Positive Displacement Key Features High capacity cooling for lasers, electron microscopes, and other laboratory applications Small footprint conserves floor space Displays temperature and pressure or flow rate simultaneously User-adjustable temperature, pressure, and flow rate alarms Simple operation and maintenance Air- or water-cooled Positive displacement (PD) or turbine (T) pump; other pump options also available Common Specifications Working Temperature Range °F 41° to 95° Working Temperature Range °C 5° to 35° Reservoir Capacity (gallons) 3.5 Reservoir Capacity (liters) 13.25 Reservoir/Tank Material Polyethylene Reservoir Cover Screw-on Cap Cleanable Air Filter Yes Cleanable Fluid Filter Yes Temperature Stability °F ±0.9° Temperature Stability °C ±0.5° Display LED Display Resolution (Read) 0.1 Pump Type Positive Displacement Process Connections 1/2" (F) NPT Over-Temperature Protection / Failsafe Heater Control Yes Reservoir Liquid Level Indicator Yes Reservoir Drain Yes Maximum Ambient Temperature °F 95° Maximum Ambient Temperature °C 35° Overall Dimensions (L x W x H) (inches) 30.5 x 19 x 26 in Overall Dimensions (L x W x H) (cm) 78 x 48 x 66 cm Compressor Size (HP) 1.5 Refrigerant R134a Shipping Weight (pounds) 340.0 Shipping Weight (kilograms) 154.0 Catalog Page Number 104 Hz (Hertz) 60 Hz Only 50 Hz Only Part Number 6860P46A270D 6850P46A270E Maximum Pressure (psi) 100.0 83.0 Maximum Pressure (bar) 6.90 5.72 Maximum Pressure Flow Rate (gpm) 3.50 2.90 Maximum Pressure Flow Rate (l/min) 13.2 11.0 Cooling Capacity @ +10°C (W) 4420 3715 Cooling Capacity @ +20°C (W) 5200 4371 Cooling Capacity @ +30°C (W) 5980 5027 Heater Wattage 1000 1000 Electrical Requirements (VAC/Hz/Ph/A) 230/60/1/21.1 240/50/1/20.8 Regulatory Approvals TUV CSA, CUL, CE
$10,700.00
-
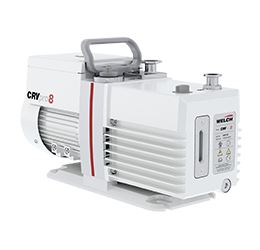
Welch Vacuum - Gardner Denver Welch CRVpro Direct Drive Rotary Vane Vacuum Pump CRVpro8
Welch CRVpro Direct Drive Rotary Vane Vacuum Pump CRVpro8 ***Note: This item has a possible 1-2 week lead time depending on stock availability*** Product Details The new CRVpro family of direct drive vacuum pumps offers increased reliability and longer service interval vs. other direct drive rotary vane vacuum pumps. The CRVpro family consumes up to 36% less oil than comparable pumps. Three features drive these benefits: Runs 10°C cooler than comparable pumps. Slows corrosion. Has a 40% larger oil capacity than comparable pumps. Dilutes aggressive chemicals. Has a chemical resistant coating in the oil case and pump module. Protects non-moving parts. The CRVpro family includes all the features you'd expect in a direct drive rotary vane pump: gas ballast, forced oil lubrication, anti-suckback mechanism and thermal overload protection. Suitable applications include freeze drying, degassing, vacuum ovens and concentrators. 3081-01 is wired for North American 115V, 60Hz operation. Includes North American line cord, vacuum inlet hose barb suitable for gum rubber hose from 5/8" to 3/4" ID, and a charge of oil. 3082-01 is wired for North American 230V, 60Hz operation. Includes 230V North American line cord, UK cord, and skuko cord, and a charge of oil. Direct drive pumps are not recommended for filtration, aspiration, drying electrophoresis gels, or other applications requiring sustained operation above 30 torr Specifications Application CRVpro8 Free Air Displacement @ 60 Hz, cfm (L/min) 5.6 (158) Free Air Displacement @ 50 Hz, m³/hr (L/min) 8 (133) Ultimate Pressure, torr (mbar) 5x10⁻⁴ (4x10⁻⁴) Noise Level, dBA 50 Motor Speed, RPM, @60Hz, @50Hz 1740 (1450) Motor Power, HP (kW) 0.4 (0.5) Oil Capacity, mL 1000 Connection Flanges NW 16 Inlet Hose Connection* 5/8" to 3/4" Weight, lbs (kg) 49.6 (22.5) Dimensions, LxWxH, in (mm) 18.2x6.1x9.1 (463x157x230)
$4,150.00
-
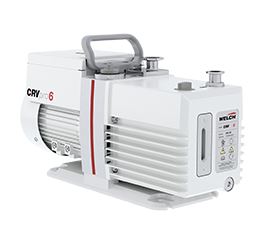
Welch Vacuum - Gardner Denver Welch CRVpro Direct Drive Rotary Vane Vacuum Pump CRVpro6
Welch CRVpro Direct Drive Rotary Vane Vacuum Pump CRVpro6 ***Note: This item has a possible 1-2 week lead time depending on stock availability*** Product Details The new CRVpro family of direct drive vacuum pumps offers increased reliability and longer service interval vs. other direct drive rotary vane vacuum pumps. The CRVpro family consumes up to 36% less oil than comparable pumps. Three features drive these benefits: Runs 10°C cooler than comparable pumps. Slows corrosion. Has a 40% larger oil capacity than comparable pumps. Dilutes aggressive chemicals. Has a chemical resistant coating in the oil case and pump module. Protects non-moving parts. The CRVpro family includes all the features you'd expect in a direct drive rotary vane pump: gas ballast, forced oil lubrication, anti-suckback mechanism and thermal overload protection. Suitable applications include freeze drying, degassing, vacuum ovens and concentrators. 3061-01 is wired for North American 115V, 60Hz operation. Includes North American line cord, vacuum inlet hose barb suitable for gum rubber hose from 5/8" to 3/4" ID, and a charge of oil. 3062-01 is wired for North American 230V, 60Hz operation. Includes 230V North American line cord, UK cord, and skuko cord, and a charge of oil. Direct drive pumps are not recommended for filtration, aspiration, drying electrophoresis gels, or other applications requiring sustained operation above 30 torr.
$3,825.00
-

Welch Vacuum - Gardner Denver Welch CRVpro Direct Drive Rotary Vane Vacuum Pump CRVpro4
Welch CRVpro Direct Drive Rotary Vane Vacuum Pump CRVpro4 ***Note: This item has a possible 1-2 week lead time depending on stock availability*** Product Details The new CRVpro family of direct drive vacuum pumps offers increased reliability and longer service interval vs. other direct drive rotary vane vacuum pumps. The CRVpro family consumes up to 36% less oil than comparable pumps. Three features drive these benefits: Runs 10°C cooler than comparable pumps. Slows corrosion. Has a 40% larger oil capacity than comparable pumps. Dilutes aggressive chemicals. Has a chemical resistant coating in the oil case and pump module. Protects non-moving parts. The CRVpro family includes all the features you'd expect in a direct drive rotary vane pump: gas ballast, forced oil lubrication, anti-suckback mechanism and thermal overload protection. Suitable applications include freeze drying, degassing, vacuum ovens and concentrators. 3041-01 is wired for North American 115V, 60Hz operation. Includes North American line cord, vacuum inlet hose barb suitable for gum rubber hose from 5/8" to 3/4" ID, and a charge of oil. 3042-01 is wired for North American 230V, 60Hz operation. Includes 230V North American line cord, UK cord, and skuko cord, and a charge of oil. 3046E-01 comes with an explosion proof motor. Conduit wiring installation required. No cord, plug, or switch provided. Direct drive pumps are not recommended for filtration, aspiration, drying electrophoresis gels, or other applications requiring sustained operation above 30 torr. Specifications Applications CRVpro4 Free Air Displacement @ 60 Hz, cfm (L/min) 2.8 (78) Free Air Displacement @ 50 Hz, m³/hr (L/min) 4 (67) Ultimate Pressure, torr (mbar) 5x10⁻⁴ (4x10⁻⁴) Noise Level, dBA 50 Motor Speed, RPM, @60Hz, @50Hz 1740 (1450) 1750 (1450) Motor Power, HP (kW) 0.4 (0.5) Oil Capacity, mL 1150 Connection Flanges NW 16 Inlet Hose Connection* 5/8" to 3/4" Weight, lbs (kg) 46.3 (21) Dimensions, LxWxH, in (mm) 18.2x6.1x9.1 (463x157x230)
$3,490.00
-
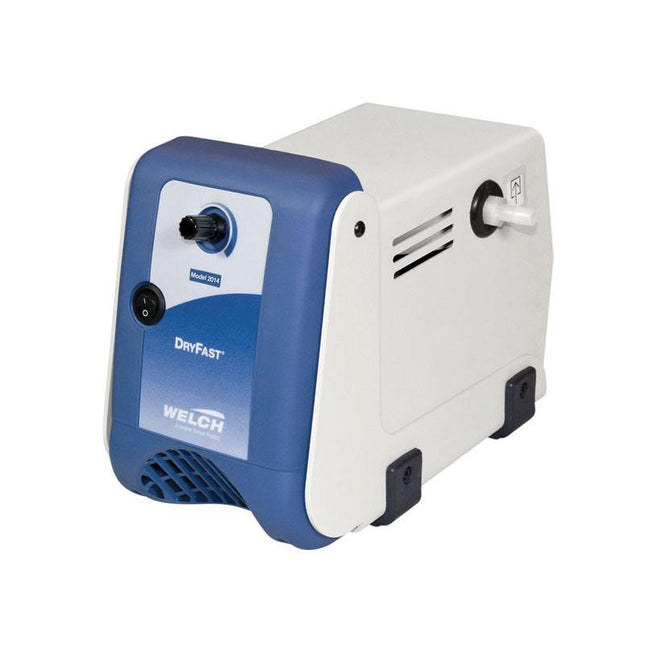
Welch Vacuum - Gardner Denver Welch DryFast Collegiate Diaphragm Pump 2014
DryFast Collegiate Diaphragm Pump 2014 ***Note: This item has a possible 1-2 week lead time depending on stock availability*** Product Details Chemical Resistant Oil-Free Tuneable Vacuum Welch DryFastTM PTFE Diaphragm Vacuum Pumps enable precise vacuum control for organic evaporations with exclusive Advanced Vapor Management (AVM). Oil-Free, portable, chemical resistant, 1 head diaphragm design simplifies maintenance. Choose from seven dry PTFE vacuum pump models with flows up to 70 L / min and adjustable vacuum down to 2 Torr. Economical DryFastTM vacuum pumps are perfect for tough lab applications. Model Number 2014 Applications Vacuum Filtration, SPE, Rotary Evaporations (volatile solvents <80oC B.P., volume <2 liters), pumping harsh vapors & gases, general laboratory vacuum Type Laboratory Vacuum Pump Free Air Displacement cfm (l/min.) @60Hz 1.2(35) Free Air Displacement m3/hr (l/min.) @50Hz 1.75(29) Ultimate Pressure 40(53) Maximum Vacuum 28.3 Motor Horsepower (watts) 1/5(150) Adjustable Vac. / Gas Ballast Yes Tubing Needed 1/4(7) Intake Thread NPT M14(1/8) Overall Dimensions LxWxH in. (cm) 12x7.0x8.3 (30.5x 17.8x21.1) Ship Weight 19(8.6) Shipping Carton Dimensions LxWxH in. (cm) 21x14x15 (52x35x37) Adjustable Vacuum Knob
$2,091.00
-
Welch Vacuum - Gardner Denver Welch WOB-L Pump 2581
Welch-L Pump 2581 Product Details Economical Oil Free Adjustable Vacuum Reliable WOB-L Piston pump is perfect for many common laboratory vacuum applications. Features: Vacuum to 5 Torr (29.8"Hg). Includes Vacuum Regulator and Gauge - simple to adjust and monitor vacuum level. Inlet Water Trap - float ball rises to seal off pump from accidental ingestion of water. Muffler quiets pump and filters discharge air. For use with dry or aqueous vapor applications only. Specifications Model 2581 Free Air Displacement @ 60 Hz, cfm (L/min) 3.5 (100) Ultimate Pressure, torr 5 Motor Power, HP (kW) at 60 Hz 1/3 (0.25) Inlet (Exhaust) Connection Thread NPT 3/8 Tubing Needed, I.D. in. (mm) 1/4 (7) Weight, lbs (kg) 24.5 (11.1) Dimensions, LxWxH, in (mm) 17x7.5x12 (430x420x190) 115V Order Number 2581B-50 / 2581B-24
$2,850.00 - $3,250.00
-
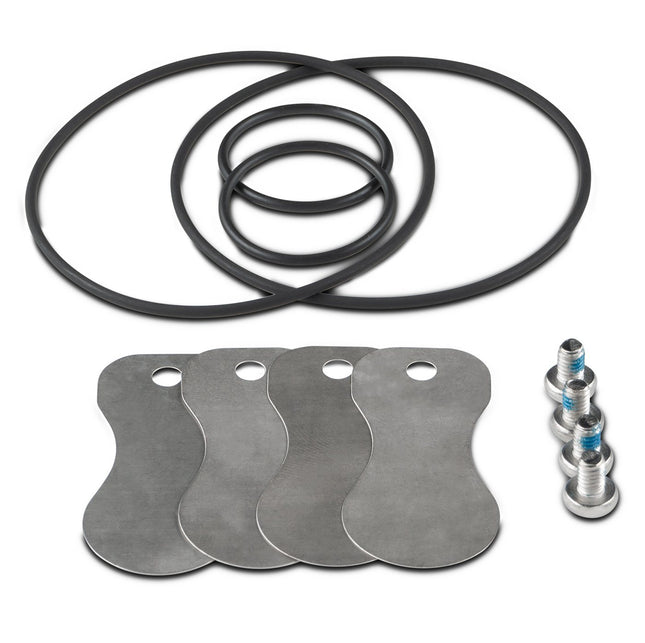
Master Vapor Pumps MVP 6CFM 60 PSI Check Valve Replacement Kit
MVP 6CFM 60 PSI Check Valve Replacement Kit This is a replacement check valve kit for the MVP 6CFM Explosion Proof Recovery Pump. It comes with 4 replacement O-rings, 4 replacement screws and 4 replacement shims. All sales final
$90.00
-
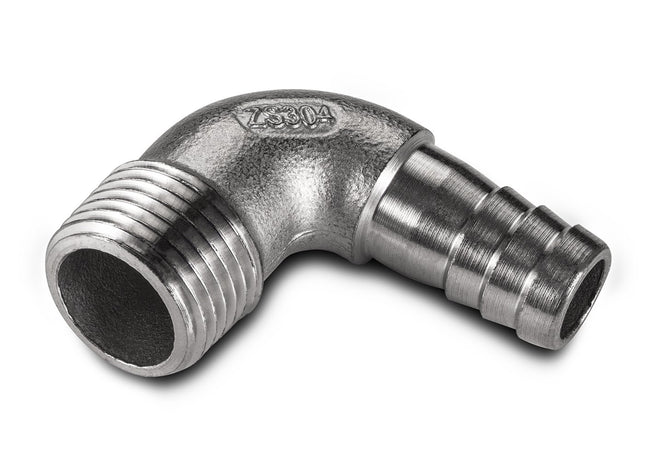

Hose Barb x MNPT Elbow
BVV™ Hose Barb x MNPT Elbow BVV™ brand stainless steel parts are made with precision 304 Grade Stainless Steel and are clean and free from burrs or debris. These fittings are Elbows with Hose Barb x NPT threads (National Pipe Taper) and will compress against other Female/Male NPT threads creating a tighter and tighter connection. All NPT threads require thread sealant to create a watertight and gas-tight seal between the threads. We recommend using Yellow Gas PTFE Tape because it is rated for gases and is UL listed and it is NOT recommended to use white PTFE tape because it is not rated for gas service. **NOTE: Pre-Taped option comes from BVV Pre-taped with Yellow UL Listed Gas PTFE Tape on the Male NPT threads ONLY for a +0.50c charge per male npt end. (JIC Threads DO NOT need to be taped.) Hose Barb connections will allow the user to connect flexible tubing to the Hose Barb and allow the user a variety of additional options for their extraction system such as circulating fluid through a jacketed base with silicone tubing or pull a vacuum with gum rubber tubing.
$7.50
-
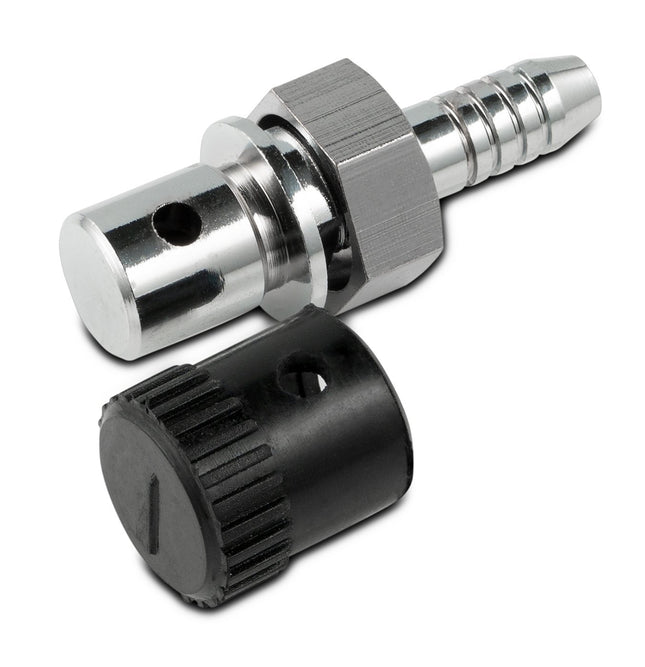

Vacuum Oven Vent Outlet Hole and Cap
Replacement outlet hole and cap for eco and neo oven vacuum release knobs. Note the vent release may require the fitting to be greased to hold vacuum.
$18.00
-
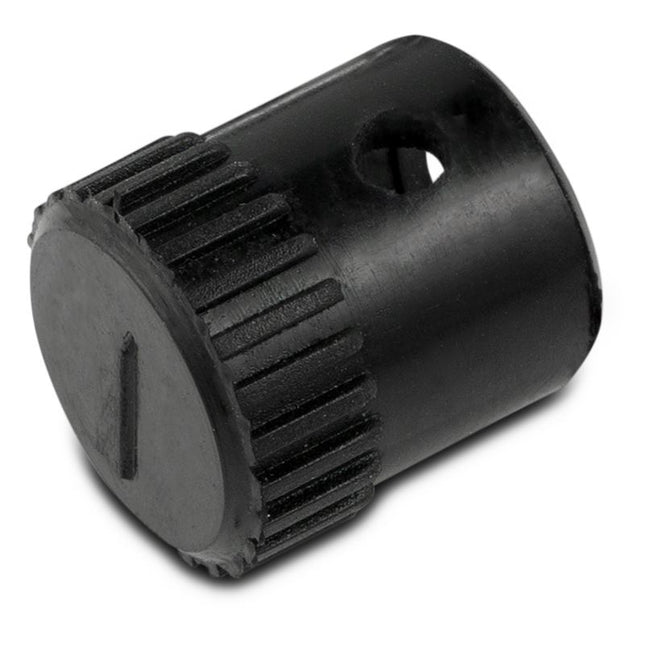
Vacuum Oven Vent Release Stopper
Replacement Cap for eco and neo oven vacuum release knobs. Note the vent release may require the fitting to be greased to hold vacuum.
$9.50
-
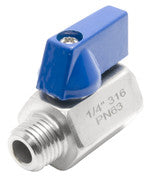
DuraChoice Stainless Steel (316) Mini Ball Valve - FxM NPT
DuraChoice Stainless Steel (316) Mini Ball Valve - FxM NPT Stainless Steel Mini Ball Valves (or miniature ball valves) are made for use in confined spaces. With a pressure rating of 1,000 PSI (water, oil or gas) and made out of SS 316, this line of valves outshines the rest of the mini ball valves available on this site.SS 316 (CF8M) body and ball - for extra strength and corrosion resistance Working on pressure of 1,000 PSI (WOG)Double seal system allows for flow can go in either directionHeavy duty Zinc Alloy handles (painted blue)Fast 1/4 turn open or closed operation Each valve individually tested for maximum safety Designation - Material Body - SS 316 (CF8M)Ball - SS 316 (CF8M)Bonnet - SS 316 (CF8M)Ball Seat - RPTFEValve Stem - SS 304/SS 316 Screw - SS 304 Lever - Aluminum Alloy O-Ring - NBR/Viton
$10.00 - $15.00
-
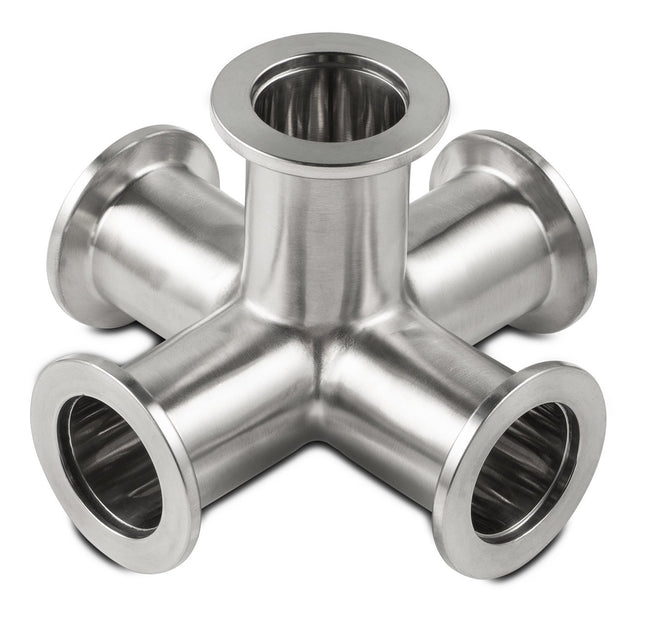
KF-25 5 Way Manifold
This is a KF-25 5 Way manifold for the splitting of vacuum applications especially vacuum ovens connected to a single Vacuum Pump in an array. The material is 304 Stainless Steel with a 10^-7 torr @ 72F Vacuum Rating. (Note: Does not include KF-25 Clamp or O-ring these items are sold separately.)
$59.00
-
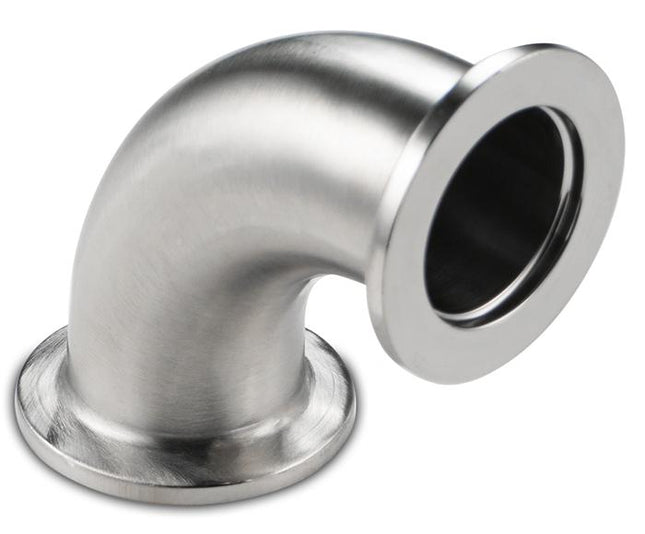
KF-25 90 Degree Stainless Steel Elbow
KF-25 90 Degree Stainless Steel Elbow This 90-degree elbow has KF-25 connections on the end and is made out of high polish 304-grade stainless steel.
$35.00
-
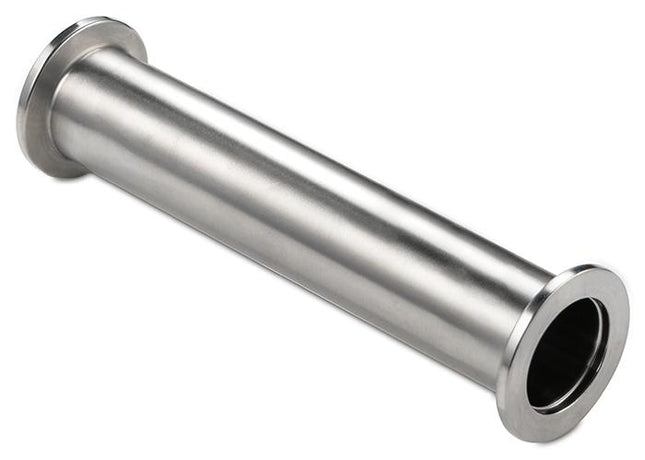
KF-25 Stainless Steel Spools
KF-25 Stainless Steel Spools This spool has KF-25 connections on the end and is made out of high polish 304-grade stainless steel.
$35.00 - $46.00
-
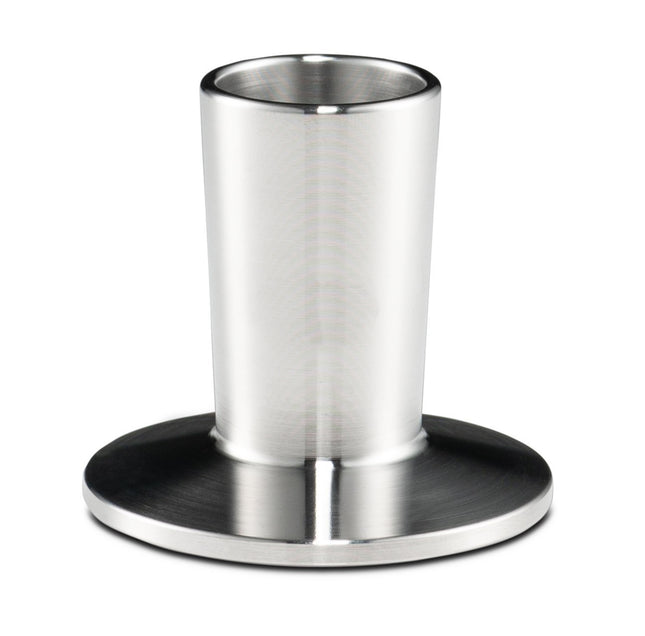

KF High Vacuum Stainless Steel Flange x Female Joint Adapter
This unique adapter allows the user to adapt a KF25 or KF40 High Vacuum Flange fitting to a male ground joint glass fitting and it is made out of 304 stainless steel.
$42.00
-
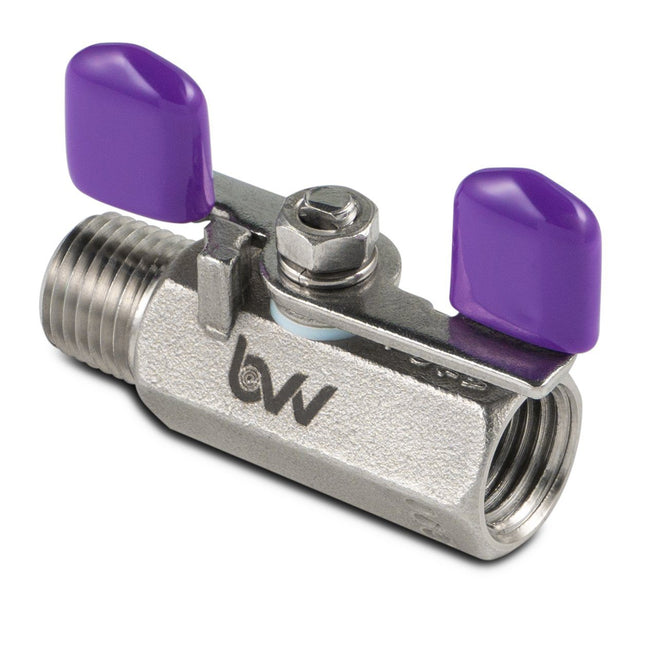
1/4" MNPT x 1/4" FNPT Stainless Steel Miniature Butterfly Handle Ball Valve -20 to 230C
1/4" MNPT x 1/4" FNPT Stainless Steel Miniature Butterfly Handle Ball Valve This 316 Stainless Steel Miniature Ball Valve features a stainless steel ball and Modified PTFE (Dyneon™ TFM1600) seats and packing on the inside. It has an overall length of 2-3/4" and has a 1/4 turn butterfly style valve. Technical Data Sheet Pressure Tested in compliance with API 598 Ninth Edition 2009: Sec.5 and Sec.6 Specification Standard: ASTM A351 Stem: 316 Stainless Steel Seat: PTFE Temperature Rating: -20C - 230C Pressure Rating: 1000 PSI (W.O.G. Water, Oil, Gas) Body: Cast 316 / CF8M Stainless Steel Cap: Cast 316 / CF8M Stainless Steel Ball Cast 316 / CF8M Stainless Steel Heat Treatment: Solutiom Annealed 1050-1100C Stem Packing: PTFE Thrust Washer: PTFE
$42.00
-
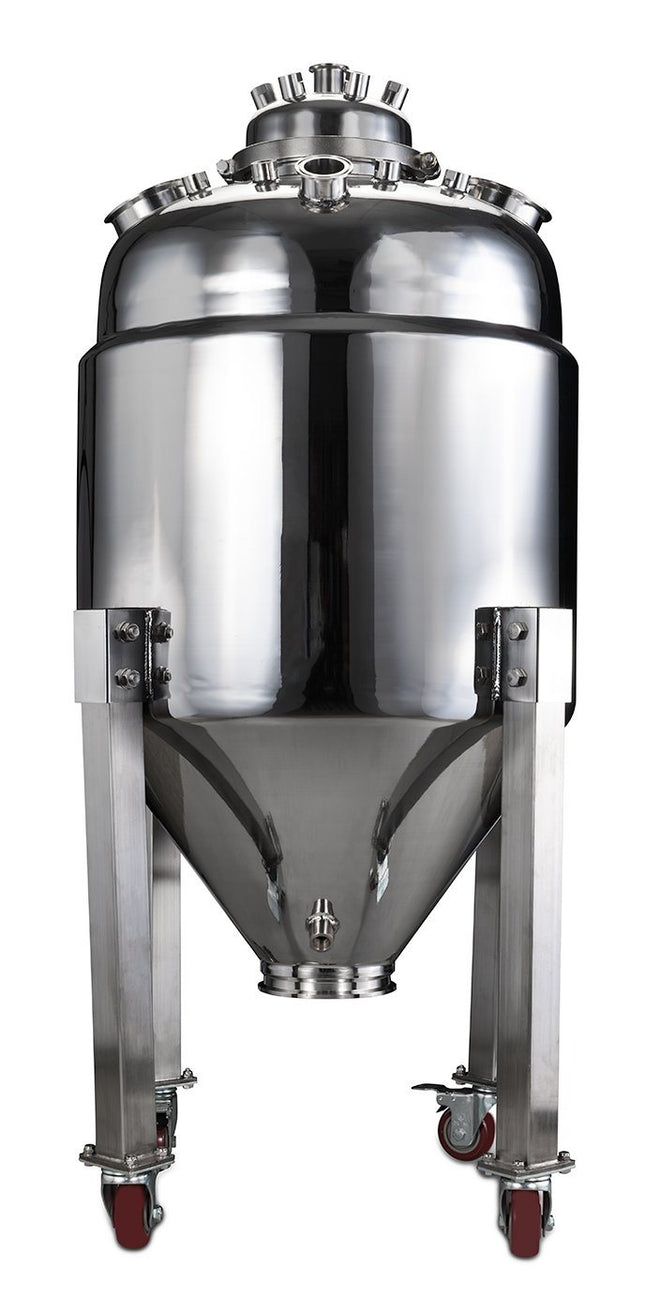
150 Liter Collection Vessel with Internal Coil, Coned Bottom, and Baffle in Jacket
150 Liter Collection Vessel with Coned Bottom and Baffle in Jacket (Note: this unit comes bare and does not include any fittings besides the legs with casters.) ***Note: This item will ship via freight ONLY. This massive 304 Stainless Steel Jacketed vessel can hold up to 150L of water (~40 gallons) and multiple connections on top of the vessel and lid. The outer jacket has large ports to allow the circulation of heat transfer fluids and can also be used a vacuum jacket and can hold 21.5L or 5.68 gallons of fluid in the outer jacket. This unit also features 4 stainless steel legs with locking casters to allow the vessel to be moved around easily. This Vessel is rated to 100 PSI MAX
$3,200.00
-
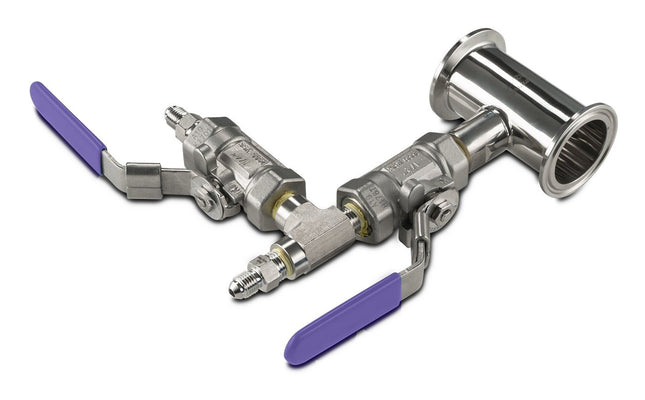
Pre-Built BIFLOW Manifold with BVV 316SS Full Bore Valves
Pre-Built BIFLOW Manifold with BVV 316SS Full Bore Valves (This part is fully assembled and Nitrogen Tested for Leaks at BVV™) This BVV™ BIFLOW Manifold is fully assembled and nitrogen tested for leaks at our warehouse. This manifold comes with 2 BVV 316SS Full Bore Valves with (2)1/4" 37° JIC Flares. This manifold is made out of 304 stainless steel with a Tri-Clamp end connection on either side. Key Features: Pre-built and Nitrogen Tested for Leaks BVV 316SS Full Bore Valves with 1/4" 37° JIC -40F to 450F 304 High Polish Stainless Steel 1.5" or 2" Tri-Clamp Connections Specifications Lid Material 304 Stainless Steel Valve Material 316SS Full Encapsulated PTFE Core - 1/4 Turn Flare Size (2) 1/4" 37° JIC Tri-Clamp Size(s) Selectable through Dropdown Nitrogen Tested Yes
$200.00 - $206.00
-

Carbon Chemistry LTD Carbon Chemistry MM Clay (T-41)
Carbon Chemistry MM Clay (T-41) A powerful combination powder media that pairs acid-activated bentonite clay with activated carbon for maximum adsorption capability. With an optimized pH (3.0-3.5) and enhanced surface area, this dual-action media excels at removing pigments, heavy metals, oxidizers, and other contaminants. Perfect for increasing filtration capacity and achieving superior removal of natural plant pigments like chlorophyll, carotenoids, and anthocyanin compounds. Carbon Chemistry T-41™ Acid Activated Bleaching Clay - SDS
$150.00 - $5,300.00
-
Carbon Chemistry LTD Carbon Chemistry MM Clay (T-5)
Carbon Chemistry MM Clay (T-5) A neutral powder media designed for best-in-class depth filtration and heavy metal removal. This thermally activated calcium bentonite clay provides superior support for separatory processes and excellent cation exchange capacity. The hardened clay structure and optimized surface chemistry make it ideal for both fine particulate removal and larger molecule capture. Carbon Chemistry T-5™ Neutral Activated Bentonite Clay - SDS Note: Bulk Bags and Bulk sizes are non-stocked items and will be ordered as needed and carry a several week lead time and require a forklift or pallet jack
$125.00 - $2,080.00
-
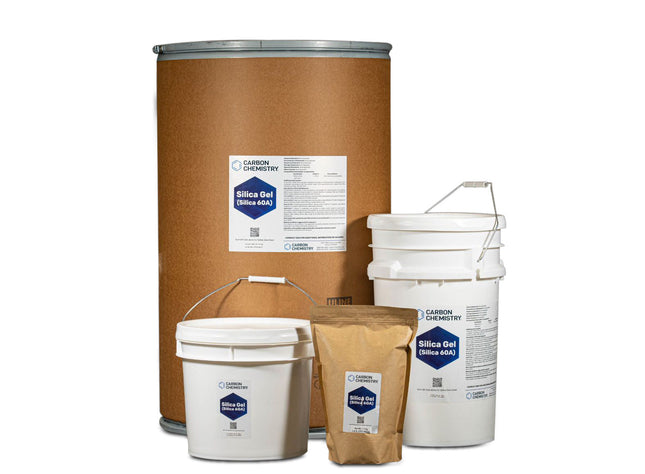

Carbon Chemistry LTD Carbon Chemistry SD (Silica 60A)
Carbon Chemistry SD (Silica Gel 60A) A high-purity silica powder media optimized for precise separation and purification processes. This carefully engineered adsorbent provides exceptional control in chromatographic applications and targeted compound removal. Its optimized surface chemistry makes it particularly effective for polar compound separation and analytical-grade purification needs. This powder is used often in Column Chromatography as the stationary phase. It is mixed together with the solvent in the column making a slurry, then letting the solvent drain leaving the Silica sitting evenly in the column. Silica Gel helps space out or separate the fractions of compounds being passed through the stationary phase. Carbon Chemistry Silica Gel 60A, 200-400 MESH - SDS Note: Bulk Bags and Bulk sizes are non-stocked items and will be ordered as needed and carry a several week lead time and require a forklift or pallet jack
$135.00 - $2,600.00
-
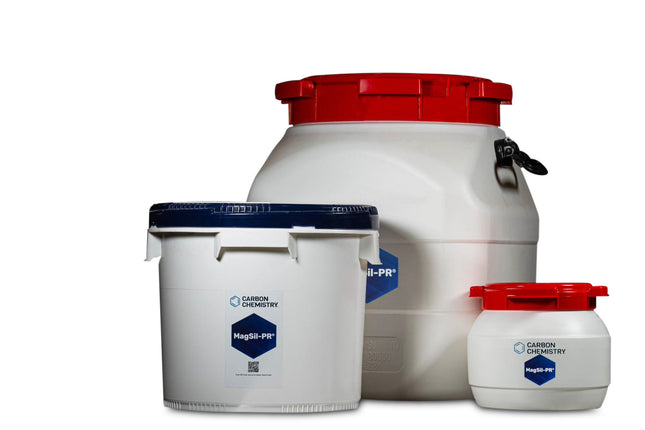
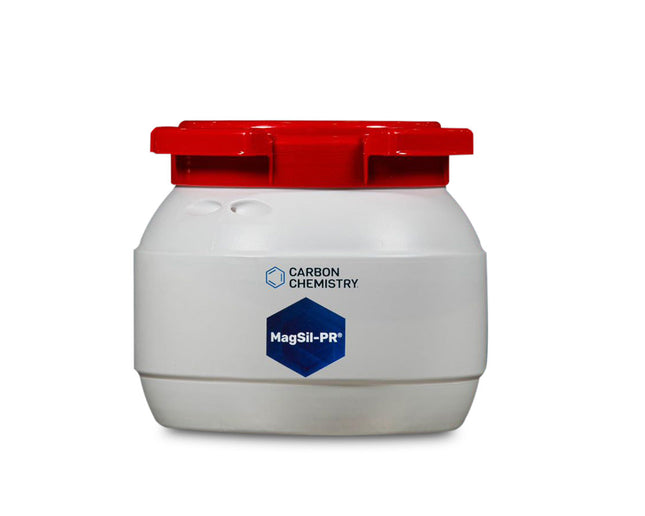
Carbon Chemistry LTD Carbon Chemistry MGS Activated (Mag-Sil PR)
Carbon Chemistry MGS Activated (MagSil-PR) Carbon Chemistry MagSil-PR® powder is some of the highest purity and quality MagSil-PR® on the market. Activated Magnesium Silicate (MagSil-PR®) lets you remove pesticides, improve color, and improve the clarity of your products, thanks to its powerful properties. Magnesium silicate will bind to polar, water-soluble compounds. Once these compounds have bonded with the MagSil, the solution can be filtered through a recommended, 20-micron mesh screen. Particle Mesh Size: 60/100 Carbon Chemistry MagSil-PR® - SDS
$240.00 - $7,200.00
-
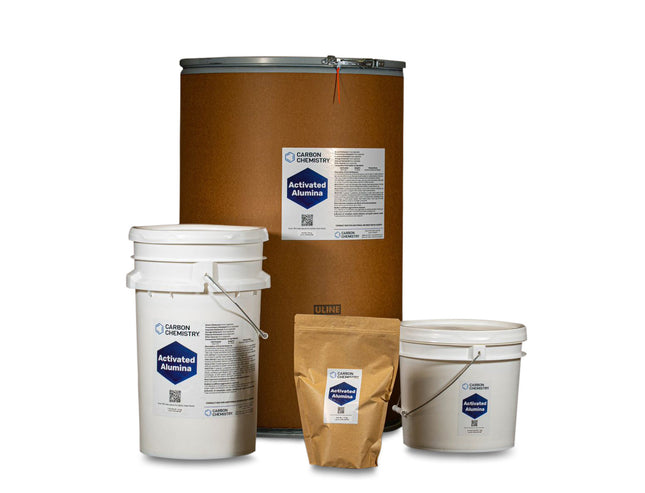

Carbon Chemistry LTD Carbon Chemistry ALX (Granular)
Carbon Chemistry ALX (Granular) Industrial-grade activated alumina for moisture removal and polar compound adsorption. 14x28 mesh granular media ideal for desiccant applications, gas drying, and process purification. Activated alumina can mainly be used as a filtration aid to remove fats, color, and polar compounds to produce a cleaner end product. Carbon Chemistry Activated Alumina - SDS Note: Bulk Bags and Bulk sizes are non-stocked items and will be ordered as needed and carry a several week lead time and require a forklift or pallet jack
$160.00 - $1,500.00
-
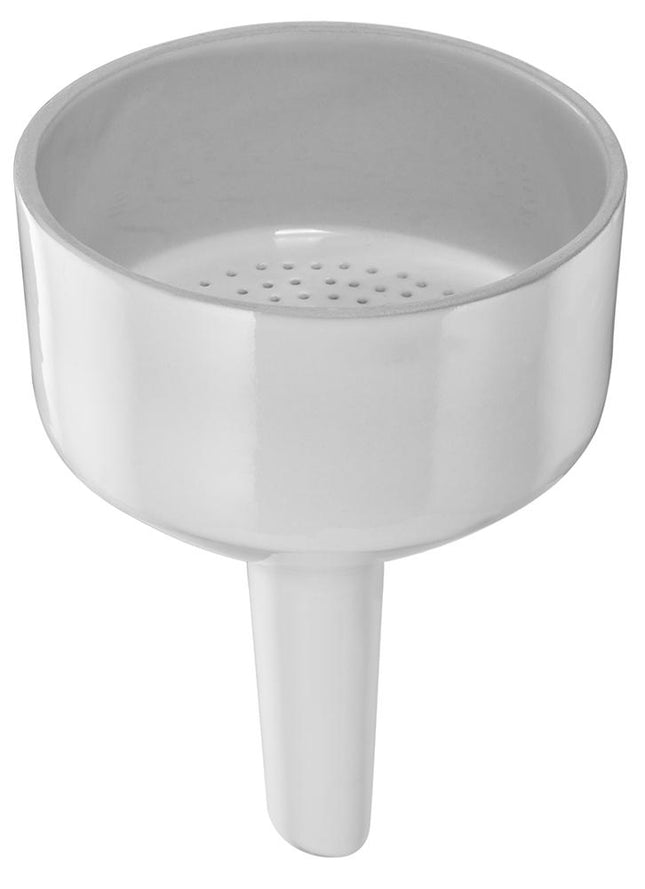

Porcelain Buchner Funnel
Porcelain Buchner Funnel Buchner funnel Porcelain Labware is used in the chemistry laboratory. It has exceptional resistance to all reagents except hydrofluoric acid and is highly resistant to thermal shock while having a very low coefficient of expansion. To prevent thermal stress cracks on porcelain ware do not exceed a heating/cooling rate of 200°C per hour. To prolong the life of porcelain products: · Follow gradual heating/cooling rates · Use an oven or hot plate and an intermediate step when quicker heating/cooling rates are required · Avoid contact of heated ware with a cold surface · Carefully check labware prior to each use and do not use any product that appears defective With straight sides above the perforated plate. Thick stem. Sizes Available: 1000ml - 5.5" (~140mm) Diameter 2000ml - 7-3/8" (~187mm) Diameter
$68.00 - $98.00
-
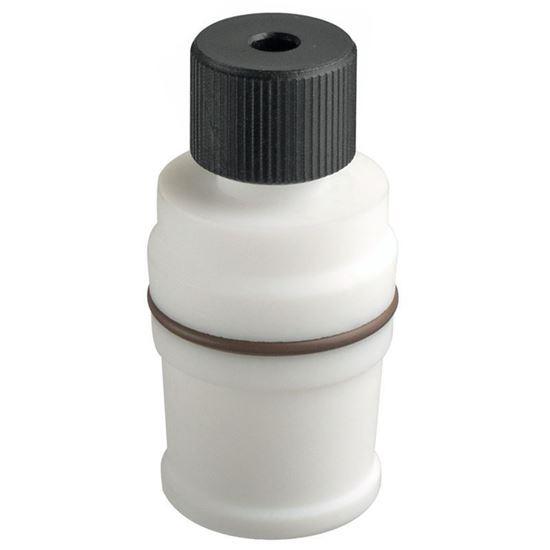
Chemglass Chemglass PTFE Thermocouple Adapters
PTFE Thermocouple Adapters CG-1048-A Chemglass PTFE adapters are for use with either 1/8” or 1/4” thermocouples. The adapter has an outer Viton® o-ring to form a grease-free, airtight seal between the adapter and the listed size of the outer joint. The compression nut works in conjunction with the upper Viton® to provide an airtight seal between the adapter and thermocouple. Adapter design permits use with CG-145 Keck clips.
$55.00
-
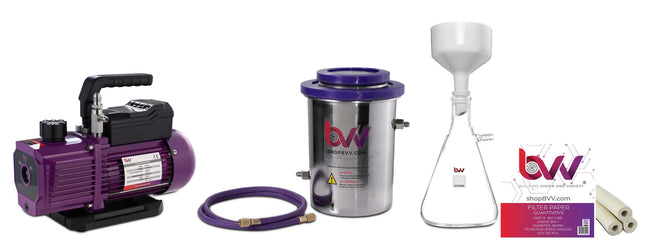
Porcelain Buchner Funnel Filtration Kit
Porcelain Buchner Funnel Filtration Kit This BVV™ Porcelain Buchner Funnel Filtration Kit was designed for continuous filtration of oils by using our large diameter porcelain Buchner funnel by increasing filtration area. Depending on the capacity needed you may select the size of the conical flask through a dropdown for 2500ml or 5000ml capacities. This Kit Includes the Following: (1) 1.5 Gallon Cold Trap with 1/4" Barbs (1) Rubber Cones, Set of 9 (1) Porcelain Buchner Funnel - 1000ml(When 2500ml Conical Flask is selected) or 2000ml(When 5000ml Conical Flask is selected) (1) BVV4D 4CFM Two Stage Vacuum Pump (1) Conical Flask with Filtering Side Arm - 2500ml or 5000ml (5') Gum Rubber Vacuum Tubing (1) HVAC hose (1) Ashless Filter Paper - 180mm Qualitative - Grade 1
$350.00 - $525.00
-
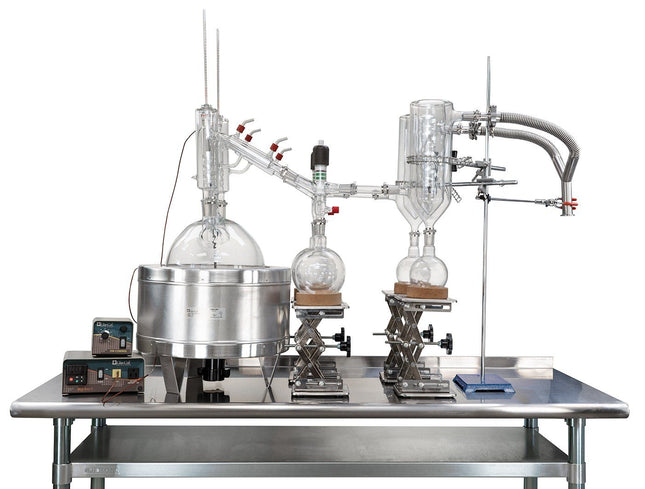
Neocision 10L Neocision Dual Head Short Path Distillation Kit
10L Neocision Dual Head Short Path Distillation Kit This unit carries a 2 day lead time. The 10L Neocision Distillation Turnkey Setup features our Dual 10L P5 Distillation Heads and USA made glass. Every component in this turnkey is made for precision, throughput, and repeatable results. Also included the Bullseye Precision Vacuum Gauge from Digivac which is the most rugged and dependable vacuum gauge on the market. You will also receive a Dual Dewar Style Glass Cold Trap to keep all volatiles and solvents out of your vacuum system. This Turnkey Setup gives you everything needed to perform distillation at the highest level. The 10L Neo Kit Includes: 10L Neocision Kit with Dual P5 Distillation Heads KF-25 90 Degree Long Manifold and Metering Valve Dual Dewar Style Glass Cold Trap Bullseye Precision Vacuum Gauge Distillation Quick Start Guide This guide gives basic quick start instructions for distillation systems. It is intended to provide a starting point for learning the process. Parameters should be adjusted to suit specific needs, Before beginning distillation, ensure the following steps have been taken: Vacuum Pump is in good working order. Pump should be run against dry load to allow internals to warm up. Oil should be clear. Cloudy or dark oil should be changed. All glass components are in good working order and ready to be assembled A winterization and degassing procedure has been done to prepare oil for distillation Once all three of these steps have been completed, you are ready to begin distilling. Begin by placing stir bar in boiling flask and then load your material. This should be done using a funnel. A small amount of alcohol in the oil will give it a thinner consistency making it easier to transfer. Assemble all glassware and ensure each joint is properly greased. Do not use too much, as the vacuum pressure might pull some grease into the system. To ensure a full seal, spread grease in a circular motion by rotating glassware Attach circulator to condenser and set temperature to 50C. Allow circulator to reach temperature before beginning distillation. Connect vacuum pump to manifold. The manifold will allow you to isolate each individual component as well as let atmosphere into and out of the system. Connect receiving cow to cold trap. Connect cold trap to manifold. Connect vacuum gauge to manifold. At this point, ensure all connections are correct. Also ensure receiving cow is positioned to collect the first fraction in the far-left receiving flask. Circulator should be at its set temperature. Turn on vacuum pump to begin process. Turn on heat and set to 60C. Vacuum pump will begin to pull down and temperature will begin to rise. Watch the gauge to monitor vacuum pressure and stability. Start stir slower and increase speed with temperature. Once you are close to 60C, increase the temperature 20 degrees. Continue to raise the heat incrementally in 20-degree steps, increasing the set temperature as you near your set point. Increase temperatures incrementally until you reach 220C. You will see your first fraction somewhere between 180C and 190C or slightly before. This is the “heads” fraction. You will move to your second fraction when you see an increased reaction in the head, a slight color change toward golden, as well as a thickening of distillate. When this fraction hits, allow the distillate to “self-clean” the head for a minute or two then, rotate the cow to the middle receiving flask. Collect your “main body” fraction. You will see temps between 190-220C during this fraction. Continue to increase stirring speed as necessary. Reaction in the head may vary but it should never stop. As fluid level in the boiling flask decreases, increase stir speed. The final “tails” fraction is a mixture of the first and second fractions and should be saved for re-distillation later. Ideally, you want to turn the cow to the final flask before the tails fraction hits. The “tails” fraction has an obvious color change and will be darker than the “main body” fraction. You will see temps between 200-250C during this fraction. As fluid level in the boiling flask decreases even more, set stirring RPM higher (1000+ RPM). You may need to compensate with a bit more heat to finish of the final fraction as well. Once process is complete, stop heat, stop stir, and stop vacuum. Let atmosphere into the system. Be sure to properly store your distillate as exposure to air and light can cause oxidation. ***Note: This entire setup will ship via motor freight.*** *Notice to Customers: All units are inspected for broken glassware or parts before leaving BVV™. If the unit arrives damaged (this does not include minor imperfections or scuffs in glassware), the customer MUST contact BVV™ within 72 hours from carrier delivery to file a claim. If the customer DOES NOT contact BVV™ within 72 hours from carrier delivery, then BVV™ cannot issue any replacement(s) or compensation for the item; a new purchase will need to be made for a replacement. BVV™ is not responsible for the failure of glassware which must be inspected before and after every use because it may eventually develop imperfections or damage through normal usage, mishandling, and stress caused by temperature variations. If an imperfection or damage is noted while inspecting the glassware DO NOT use the glassware because it can fail, which can cause bodily harm or damage to the surrounding area.
$8,500.00
-
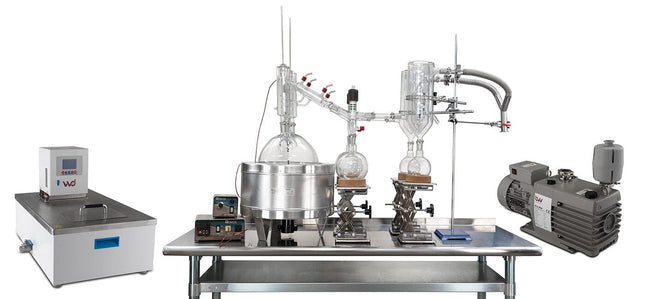

Neocision 10L Neocision Dual Head Short Path Distillation Turnkey System
10L Neocision Dual Head Short Path Distillation Turnkey System This unit carries a 2 day lead time. The 10L Neocision Distillation Turnkey Setup features our Dual 10L P5 Distillation Heads and USA made glass. Every component in this turnkey is made for precision, throughput, and repeatable results. Also included is a KF-25 Vacuum Pump giving you extreme power and depth with a long lifespan, the Bullseye Precision Vacuum Gauge from Digivac which is the most rugged and dependable vacuum gauge on the market, and a BVV 19L Heated Circulator for maximum condensation of vapors. You will also receive a Dual Dewar Style Glass Cold Trap to keep all volatiles and solvents out of your vacuum system. This Turnkey Setup gives you everything needed to perform distillation at the highest level. The Premium Turnkey Kit Includes: 10L Neocision Kit with Dual P5 Distillation Heads KF-25 2 Meter Bellows Dual Dewar Style Glass Cold Trap Bullseye Precision Vacuum Gauge BVV 19L Heated Circulator Your Choice Of KF-25 Vacuum Pump Distillation Quick Start Guide This guide gives basic quick start instructions for distillation systems. It is intended to provide a starting point for learning the process. Parameters should be adjusted to suit specific needs, Before beginning distillation, ensure the following steps have been taken: Vacuum Pump is in good working order. Pump should be run against dry load to allow internals to warm up. Oil should be clear. Cloudy or dark oil should be changed. All glass components are in good working order and ready to be assembled A winterization and degassing procedure has been done to prepare oil for distillation Once all three of these steps have been completed, you are ready to begin distilling. Begin by placing stir bar in boiling flask and then load your material. This should be done using a funnel. A small amount of alcohol in the oil will give it a thinner consistency making it easier to transfer. Assemble all glassware and ensure each joint is properly greased. Do not use too much, as the vacuum pressure might pull some grease into the system. To ensure a full seal, spread grease in a circular motion by rotating glassware Attach circulator to condenser and set temperature to 50C. Allow circulator to reach temperature before beginning distillation. Connect vacuum pump to manifold. The manifold will allow you to isolate each individual component as well as let atmosphere into and out of the system. Connect receiving cow to cold trap. Connect cold trap to manifold. Connect vacuum gauge to manifold. At this point, ensure all connections are correct. Also ensure receiving cow is positioned to collect the first fraction in the far-left receiving flask. Circulator should be at its set temperature. Turn on vacuum pump to begin process. Turn on heat and set to 60C. Vacuum pump will begin to pull down and temperature will begin to rise. Watch the gauge to monitor vacuum pressure and stability. Start stir slower and increase speed with temperature. Once you are close to 60C, increase the temperature 20 degrees. Continue to raise the heat incrementally in 20-degree steps, increasing the set temperature as you near your set point. Increase temperatures incrementally until you reach 220C. You will see your first fraction somewhere between 180C and 190C or slightly before. This is the “heads” fraction. You will move to your second fraction when you see an increased reaction in the head, a slight color change toward golden, as well as a thickening of distillate. When this fraction hits, allow the distillate to “self-clean” the head for a minute or two then, rotate the cow to the middle receiving flask. Collect your “main body” fraction. You will see temps between 190-220C during this fraction. Continue to increase stirring speed as necessary. Reaction in the head may vary but it should never stop. As fluid level in the boiling flask decreases, increase stir speed. The final “tails” fraction is a mixture of the first and second fractions and should be saved for re-distillation later. Ideally, you want to turn the cow to the final flask before the tails fraction hits. The “tails” fraction has an obvious color change and will be darker than the “main body” fraction. You will see temps between 200-250C during this fraction. As fluid level in the boiling flask decreases even more, set stirring RPM higher (1000+ RPM). You may need to compensate with a bit more heat to finish of the final fraction as well. Once process is complete, stop heat, stop stir, and stop vacuum. Let atmosphere into the system. Be sure to properly store your distillate as exposure to air and light can cause oxidation. ***Note: This entire setup will ship via motor freight.*** ***Note: All units are inspected for broken glass or parts before unit is shipped. If unit arrives damaged or glass is broken (this does not include minor imperfections or scuffs in glassware), Customer MUST contact BVV™ within 3 days of delivery to file a claim and receive a replacement part. If customer DOES NOT contact BVV™ within 3 days of delivery responsibility for replacement parts falls on the customer and they must pay for replacement pieces.*** ***Glassware Safety Disclaimer: BVV™ is not responsible for failure of glassware which must be inspected before and after every use because it may eventually develop imperfections or damage through normal usage, mishandling, and stress caused by temperature variations. If an imperfection or damage is noted while inspecting the glassware DO NOT use the glassware because it can fail causing bodily harm or damage to the surrounding area.***
$13,250.00 - $17,750.00
-


50L Double Jacketed Glass Reactor
The Double Jacketed Glass Reactors are ideal for reaction applications involving extreme temperatures. They include an inner jacket for cooling or heating and an outer jacket for vacuum insulation. The outer jacket also alleviates moisture buildup so you can always see exactly what's happening inside the system. Jacketed Reaction vessels are used for synthetic reaction of different types of materials in a controlled temperature and vacuum environment. Reaction Vessels can be used as an all in one tool for extraction, refinement, distillation, and homogenization. Consisting of an inner vessel with either one or two jackets, a reactor uses temperature differentials created by a chiller to change it's internal environment. Reaction vessels also operate under vacuum making them ideal for any atmospheric sensitive applications. They can be made out of glass or stainless steel and range in volume from 1L to 100L+. To run a reaction vessel most efficiently, you will need a chiller capable of bringing the internal temperature of the vessel to an extreme low, a chemical resistant vacuum pump, and a cold trap to catch any vapors that might pass through the condenser during operation. BVV™ Jacketed Reaction vessels are simple, cost-effective, and durable machines that allow you to process material quickly and efficiently. BVV 20L and 50L Glass Reactor Diagram Specifications: Glass Material: GG-17 High Borosilicate Glass Internal Volume: 50L 10.5L Jacket Capacity Shelf Material: Aluminum Alloy Homogenizer Power: 110V/60Hz Homogenizer Speed: 0-400 RPM Digital Homogenizer Control Digital temperature probe readout included Double Jacket 3/4" Jacket Connections 1/4" and 3/8" Vacuum Connections Length: 24 in. Width: 30 in. Height: 90 in. Does not include: Chiller, Vacuum System, Cold Trap Requires Assembly ***Note: All units are inspected for broken glass or parts before unit is shipped. If unit arrives damaged or glass is broken (this does not include minor imperfections or scuffs in glassware), Customer MUST contact BVV™ within 3 days of delivery to file a claim and receive a replacement part. If customer DOES NOT contact BVV™ within 3 days of delivery responsibility for replacement parts falls on the customer and they must pay for replacement pieces.*** ***Disclaimer: This unit is intended for LEGAL purposes only, to be used in accordance with local laws and ordinances. Use only in WELL VENTILATED AREAS!*** ***Glassware Safety Disclaimer: BVV™ is not responsible for failure of glassware which must be inspected before and after every use because it may eventually develop imperfections or damage through normal usage, mishandling, and stress caused by temperature variations. If an imperfection or damage is noted while inspecting the glassware DO NOT use the glassware because it can fail causing bodily harm or damage to the surrounding area.***
$5,000.00 - $5,400.00
-
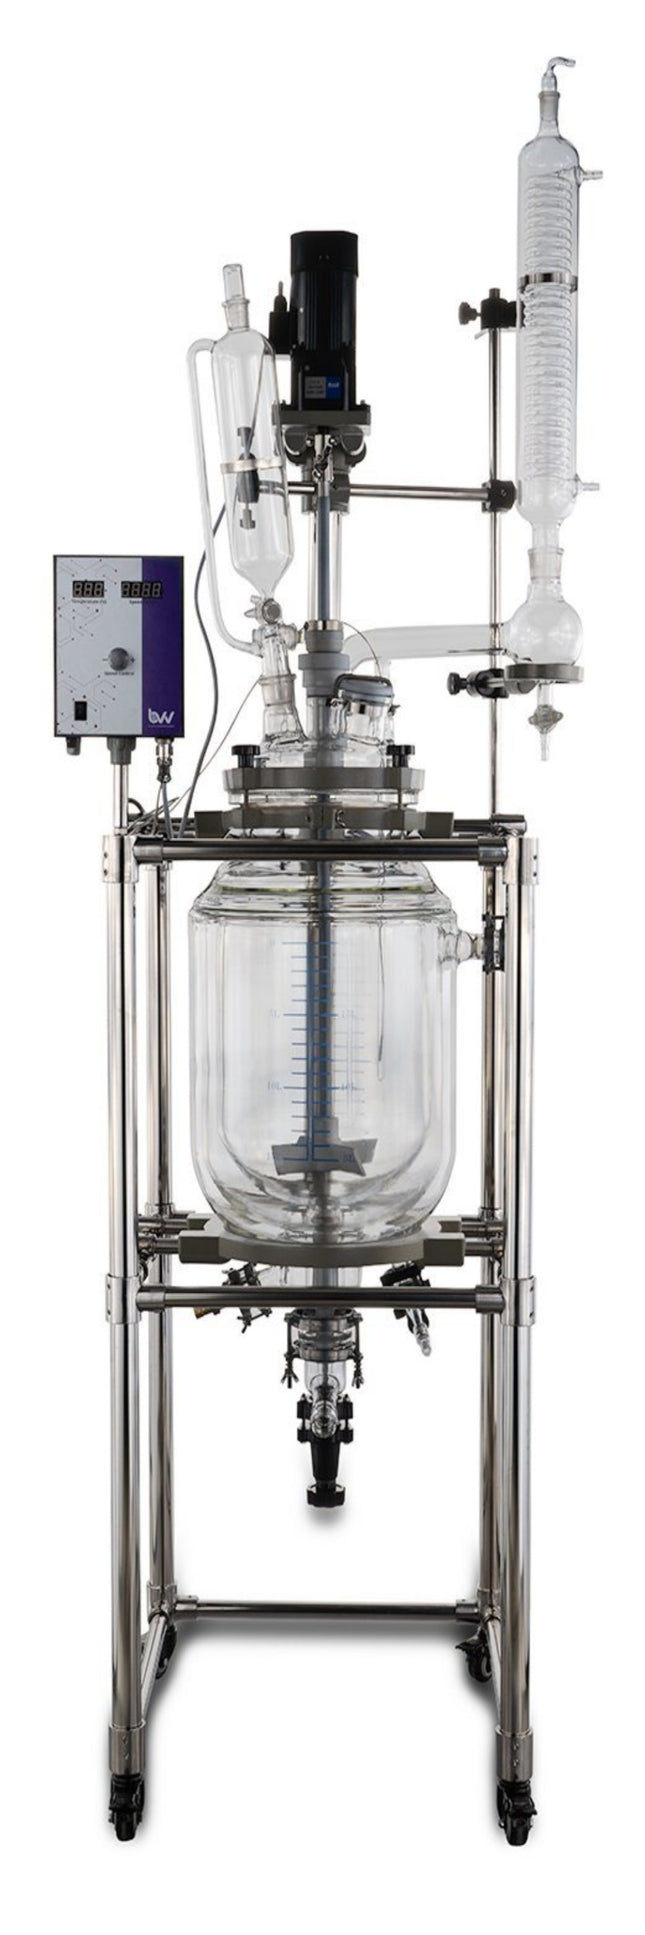

20L Double Jacketed Glass Reactor
The Double Jacketed Glass Reactors are ideal for reaction applications involving extreme temperatures. They include an inner jacket for cooling or heating and an outer jacket for vacuum insulation. The outer jacket also alleviates moisture buildup so you can always see exactly what's happening inside the system. Jacketed Reaction vessels are used for synthetic reaction of different types of materials in a controlled temperature and vacuum environment. Reaction Vessels can be used as an all in one tool for extraction, refinement, distillation, and homogenization. Consisting of an inner vessel with either one or two jackets, a reactor uses temperature differentials created by a chiller to change it's internal environment. Reaction vessels also operate under vacuum making them ideal for any atmospheric sensitive applications. They can be made out of glass or stainless steel and range in volume from 1L to 100L+. To run a reaction vessel most efficiently, you will need a chiller capable of bringing the internal temperature of the vessel to an extreme low, a chemical resistant vacuum pump, and a cold trap to catch any vapors that might pass through the condenser during operation. BVV™ Jacketed Reaction vessels are simple, cost-effective, and durable machines that allow you to process material quickly and efficiently. BVV 20L and 50L Glass Reactor Diagram Specifications: Glass Material: GG-17 High Borosilicate Glass Internal Volume: 20L 6.75L Jacket Capacity Shelf Material: Aluminum Alloy Homogenizer Power: 110V/60Hz Homogenizer Speed: 0-400 RPM Digital Homogenizer Control Digital temperature probe readout included Double Jacket 3/4" Jacket Connections 1/4" and 3/8" Vacuum Connections Length: 20 in. Width: 30 in. Height: 76 in. Does not include: Chiller, Vacuum System, Cold Trap Requires Assembly *Notice to customers: All units are inspected for broken glassware or parts before leaving BVV™. If the unit arrives damaged (this does not include minor imperfections or scuffs in glassware), the customer MUST contact BVV™ within 72 hours from carrier delivery to file a claim. If the customer DOES NOT contact BVV™ within 72 hours from carrier delivery, then BVV™ cannot issue any replacement(s) or compensation for the item; a new purchase will need to be made for a replacement. ***Disclaimer: This unit is intended for LEGAL purposes only, to be used in accordance with local laws and ordinances. Use only in WELL VENTILATED AREAS!*** ***Glassware Safety Disclaimer: BVV™ is not responsible for failure of glassware which must be inspected before and after every use because it may eventually develop imperfections or damage through normal usage, mishandling, and stress caused by temperature variations. If an imperfection or damage is noted while inspecting the glassware DO NOT use the glassware because it can fail causing bodily harm or damage to the surrounding area.***
$4,500.00 - $4,900.00


You have seen 1152 out of 1796 products