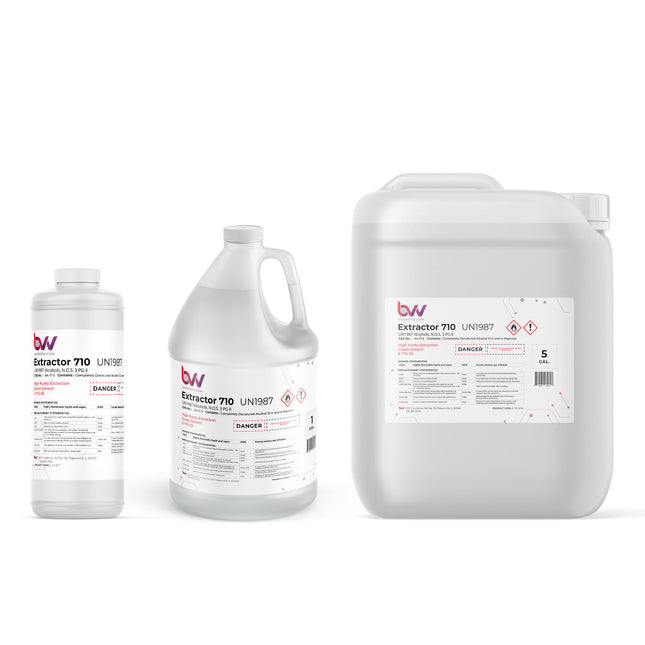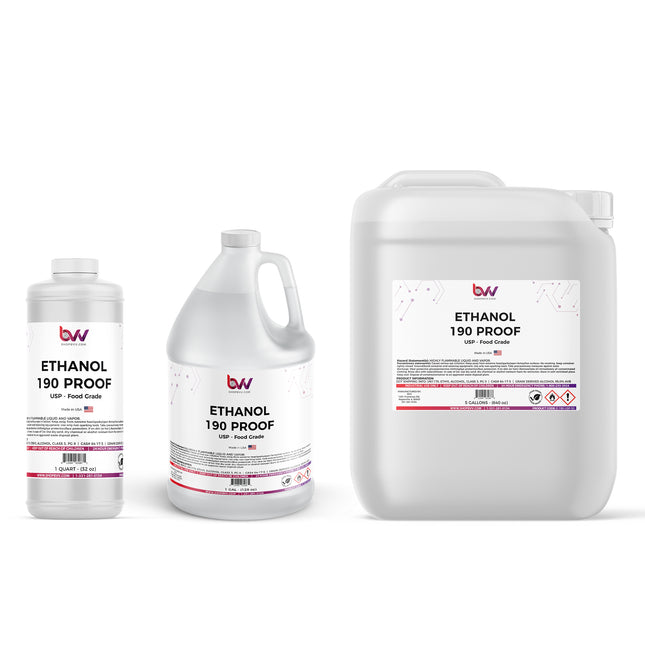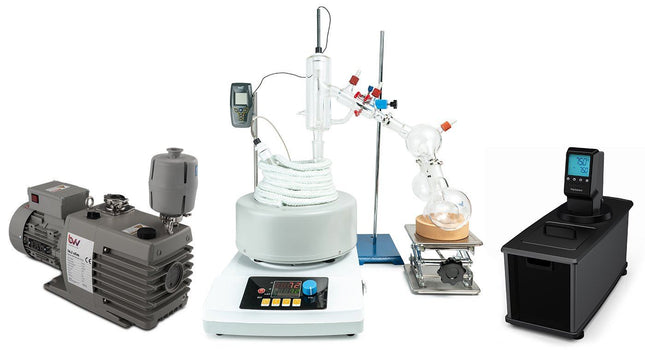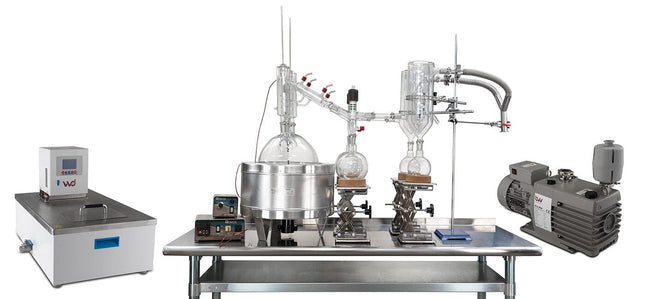
Meta ETOH
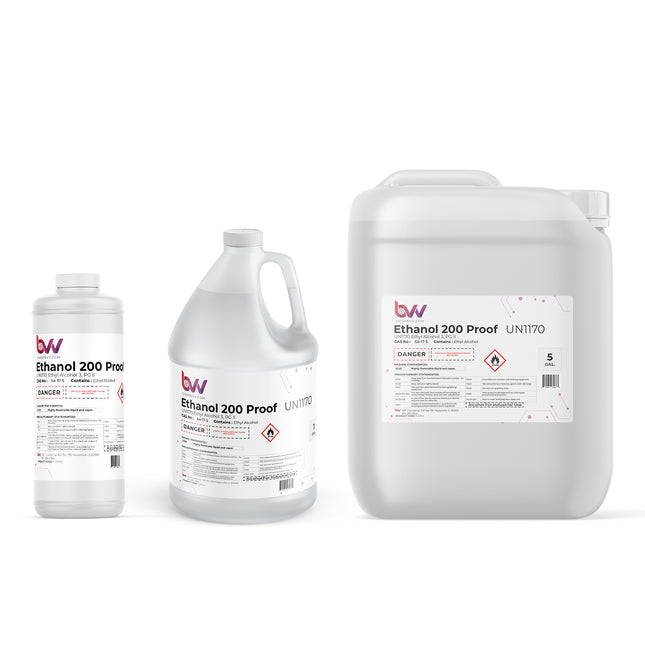
200 Proof Ethanol - USP Kosher - Excise Tax Included
Food Grade Alcohol - 200 Proof EXCISE TAX INCLUDED IN PRICING. HAZMAT ITEMS ARE NON-REFUNDABLE. ALL SALES ARE FINAL Food Grade Ethanol 200 Proof is USP-NF Certified & Kosher Certified. This product is the highest purity possible for extraction grade ethanol on the market, at 99.97% pure. Provides unmatched purity while performing extractions for crude oil or even cleaning equipment. 200 Proof Ethanol is a great choice when processing oil for short path distillation processes because it can be immediately winterized, filtered, and then rotary evaporated to recover the ethanol for later usage. United States Pharmacopeia (USP) and the National Formulary (NF) Certified. *Kosher Certified Product only comes in 270 gallon totes. Shop this product in sizes: 1 quart, one gallon, or 5 gallons. What Is Lab & Food Grade Ethanol? Pure Ethanol 200 Proof is also referred to as pure alcohol, absolute alcohol, grain alcohol, and pure grain alcohol. Due to its lack of additives, Food & Lab grade ethanol is considered a safe solvent, and is used in many processes: manufacturing processes, cosmetics processes, herbal tincture produce, food processing, and most commonly, botanical oils and extracts. Our product is safe for sanitizing, surface cleaning without streaking, sterilization, disinfecting, and antiseptic and tinctures. *Disclaimer(s): 1 Quart Bottles are exempt from additional Hazmat shipping charges and can ship immediately, Less paperwork for shipping is required for shipping only 1 single bottle per order. Spigots/Faucets are only compatible with 5 Gallon Plastic Jugs and must be purchased separately Shipments of this product require a 21+ signature at delivery Technical Data: BVV™ 200 Proof Ethanol SDS Certificate of Analysis Chemical Formula: C2H6O Molecular Weight: 46.069 CAS Registry Number: 64-17-5 Appearance Colorless Liquid Odor: wine-like, pungent Density 0.78945 g/cm3 @ 20 °C Boiling Point: 78.23C/172.81F Solubility in water: Miscible GHS Pictograms: GHS Signal Word: Danger GHS Hazard Statements: H225, H319, H360D GHS Precautionary Statements P210, P233, P240, P241, P242, P305+P351+P338 UN Identification Number: 1170 Proper Shipping Name: Ethyl Alcohol Transport Hazard Class: 3 Packing Group: II DOT Placard: Federal & State Law Requirements You must be the age of 21 or over to purchase this ethanol product. All Alcohol and Tobacco Tax Trade Bureau (TTB), federal, state and local laws must be complied with, and you may be required to provide BVV™ with your state or federal license. (Note: Container style and color may vary)
$24.00 - $6,600.00
CDA-12A Denatured Ethanol With N-Heptane 200 Proof
Ultra High Purity N-Heptane Denatured Ethanol - CDA 12A HAZMAT ITEMS ARE NON-REFUNDABLE. ALL SALES ARE FINAL (Note: Container style and color may vary) BVV's Ultra High Purity N-Heptane Denatured Ethanol (CDA 12A) is distinguished by its exceptional purity, Our CDA 12A formulation combines 95% Food Grade/USP/ACS 200 Proof Ethanol, derived from corn, with 5% high-purity N-Heptane. Adhering to stringent industry standards, ensuring it meets the precise requirements of our customers, our Ultra High Purity Heptane Denatured Ethanol excels across diverse applications widely adopted as an effective botanical extraction solvent and cleaning agent. Being that our Ultra High Purity Denatured Ethanol is made unfit for consumption when denatured with N-Heptane it is not subject to the Federal Excise Tax on alcohol saving you up to 72% without compromising on it suitability for top-tier extractions. Primarily utilized as pure ethanol in extraction processes, this solvent is favored for its cost-effectiveness and extraction efficiency. Reduce manufacturing costs and increase extraction efficiency with BVV's Ultra High Purity Heptane Denatured Ethanol. Spigots/Faucets are only compatible with 5 Gallon Plastic Jugs and must be purchased separately Key Features: Significantly Reduced Cost due to the absence of Federal Tax Produces Exceptional Quality Extractions Leaves No Residuals or Tastes Evaporates Completely in a Rotary Evaporator BVV™ 710 Extraction Solvent Safety Data Sheet Pure Ethyl Alcohol USP Product Data Sheet CDA-12 with nHeptane Certificate of Analysis Specifications Vapor Pressure: 40.9mmHg at 20°C UN Number 1170 Density: 0.7905g/cm³ Specific Gravity 0.7905 Flash Point: 13.9°C (57°F) Boiling Point: 78.5°C (173°F) Melting Point: -90.0°C (-130°F) Chemical Formula: Ethanol C2H6ON-Heptane C7H16 CAS#(s) Ethanol 64-17-5N-Heptane142-82-5 Chemical Formula: Ethanol C2H6ON-Heptane C7H16 Molecular Weight: 72.1057 CAS Registry Number: Ethanol 64-17-5N-Heptane142-82-5 Appearance Colorless Liquid Odor: Mint or acetone-like Density 0.7905g/cm³ Boiling Point: 78.5c/173.3F Solubility in water: Miscible GHS Pictograms: GHS Signal Word: Danger GHS Hazard Statements: H225, H319 GHS Precautionary Statements P210, P233, P240, P241, P242, P243, P261, P264, P271, P280, P303+P361+P353, P304+P340, P305+P351+P338, P312, P337+P313, P370+P378, P403+P233, P403+P235, P405, P501 UN Identification Number: 1987 Proper Shipping Name: Alcohols, N.O.S Transport Hazard Class: 3 Packing Group: I DOT Placard: What is Denatured Ethanol? Denatured ethanol, also known as denatured alcohol, is ethanol (ethyl alcohol) that has been rendered unfit for human consumption by the addition of denaturants. Denaturants are typically chemicals that make the ethanol taste bad or have toxic effects, and they are added to discourage people from drinking the substance. The denaturation process is done to avoid the high taxes and regulations associated with beverage alcohol, as denatured ethanol is intended for industrial, pharmaceutical, or cosmetic uses rather than for consumption. Common denaturants include heptane, methanol, isopropyl alcohol, acetone, and other chemicals. Denatured ethanol is widely used in various industries, such as in the production of paints, solvents, cleaning products, and as a fuel for alcohol burners. Why is Ethanol Denatured? Ethanol is denatured, or rendered undrinkable, for several reasons: Tax Purposes: Denaturing ethanol allows for the imposition of lower taxes on industrial or non-beverage alcohol compared to potable alcohol. Governments often place higher excise taxes on alcohol intended for human consumption. Regulatory Compliance: Denaturing ethanol is a regulatory requirement to discourage the illegal diversion of tax-free industrial alcohol for beverage use. The addition of denaturants makes it unpalatable and unsafe for consumption. Public Safety: Making ethanol undrinkable helps prevent accidental or intentional ingestion of industrial alcohol, which can be toxic. Denaturing agents are chosen to deter people from attempting to use denatured alcohol as a substitute for beverage alcohol. Industrial Use: Denatured ethanol is widely used in various industries, including pharmaceuticals, cosmetics, and manufacturing. It serves as a solvent, fuel, or raw material in these applications. Common denaturants include substances like heptane, methanol, isopropanol, and various chemicals that make the alcohol unsuitable for human consumption while maintaining its usability in industrial processes. The specific denaturing formulations, such as CDA 12-A mentioned earlier, are defined by regulatory agencies to ensure compliance with safety and tax regulations. What is denatured ethanol used for? Denatured ethanol is used for various industrial and commercial purposes where the alcohol is needed for its properties but should not be consumed. Here are some common applications: Industrial Solvent: Denatured ethanol is widely used as a solvent in industries such as pharmaceuticals, cosmetics, and manufacturing. It is effective in dissolving a variety of substances. Cleaning Agent: Due to its solvent properties, denatured ethanol is used as a cleaning agent for surfaces, equipment, and machinery in industrial and commercial settings. Fuel Additive: Denatured ethanol is sometimes used as a fuel additive, especially in the blending of gasoline. It can improve combustion efficiency and reduce emissions. Paint and Coating Industry: It is used as a solvent in the formulation of paints, varnishes, and coatings. Pharmaceuticals: Denatured ethanol is used in the pharmaceutical industry for various purposes, including the extraction of medicinal compounds. Laboratory Use: In laboratories, denatured ethanol is often used for tasks like sterilization and as a solvent for experiments. Inks and Dyes: It is employed in the production of inks and dyes due to its ability to dissolve pigments. Adhesives and Sealants: Denatured ethanol is used in the formulation of adhesives and sealants. Window Cleaning: It is used in commercial window cleaning solutions. Automotive Industry: In the automotive industry, denatured ethanol is used for cleaning and degreasing. What can be used to denature ethanol? Here are examples of common Completely Denatured Alcohol (CDA) formulations used to denature ethanol: CDA 12-A To every 100 gallons of alcohol, add either: Five gallons of heptane or 5 gallons of toluene. CDA-19 To every 100 gallons of ethyl alcohol (not less than 160 proof), add: 4.0 gallons of either methyl isobutyl ketone, mixed isomers of nitro propane, or methyln-butyl ketone 1.0 gallon of either kerosene, deodorized kerosene, gasoline, unleaded gasoline, rubber hydrocarbon solvent, or heptane. CDA-20 To every 100 gallons of ethyl alcohol (not less than 195 proof), add a total of: 2.0 gallons of either unleaded gasoline, rubber hydrocarbon solvent, kerosene, or deodorized kerosene, or any combination of these. What does CDA mean? Completely Denatured Alcohol (CDA) is a type of denatured alcohol that has been rendered unfit for human consumption by the addition of denaturing agents. Denatured alcohol is ethanol (ethyl alcohol) that has been intentionally adulterated to make it toxic, foul-tasting, or otherwise undrinkable. This denaturing process is done to exempt the alcohol from excise duty and other taxes, as it's not intended for use in beverages. The denaturing agents used in CDA can vary, but they often include chemicals such as methanol, isopropanol, or other substances that make the alcohol unpalatable and potentially harmful if ingested. The specific formulation of denatured alcohol may be regulated by government authorities to ensure it meets safety standards and legal requirements. CDA is commonly used in industrial applications, as a solvent, fuel, or as a cleaning agent. It's important to note that due to the addition of denaturing agents, CDA should not be used for purposes that involve contact with the human body or ingestion. Safety precautions, including proper ventilation, should be followed when working with denatured alcohol. What is CDA 12A? CDA 12-A is a formulation specified by the Alcohol and Tobacco Tax and Trade Bureau (TTB) for Completely Denatured Alcohol (CDA). The formula is defined under §21.26 as Formula No. 12-A. The composition of CDA 12-A is as follows: For every 100 gallons of alcohol, add either: 5 gallons of n-heptane or 5 gallons of toluene. This denaturing process renders the ethanol unfit for consumption while meeting regulatory requirements for various industrial applications. CDA formulations, including CDA 12-A, are used to denature ethanol for purposes such as industrial solvents, cleaning agents, and manufacturing processes. Can you remove heptane from CDA 12A? When n-Heptane is added to ethanol it creates an azeotrope between the ethanol and n-heptane. An azeotrope is defined as a mixture of two liquids that have a constant boiling point and composition through distillation. This azeotrope results in the ethanol and n-heptane evaporating at the same temperature, making it extremely difficult to separate the two through distillation. While these azeotropic solvents are still easily recovered from a botanical extract at a relatively low boiling point around 78C/173F using a rotary evaporator or falling film evaporator, it is near impossible to separate the two via distillation. What is an Azeotrope? An azeotrope is a mixture characterized by having identical concentrations in both its vapor and liquid phases. This stands in contrast to ideal solutions, where one component is usually more volatile than the other, allowing for separation through distillation. When an azeotrope forms, the concentrations in both phases remain the same, hindering separation through traditional distillation methods. Azeotropes consist of a blend of at least two different liquids, and this mixture can exhibit either a higher or lower boiling point than either of its individual components. Azeotropes become relevant when certain liquid fractions resist alteration through distillation processes. In typical mixtures, components can be extracted using Fractional Distillation, a process involving repeated distillation stages. The more volatile component vaporizes and is collected separately, while the less volatile component remains in the distillation container, resulting in two distinct, pure solutions.
$23.00 - $74,760.00
2L Electric Lift Rotary Evaporator
2L Electric Lift Rotary Evaporator The 2L BVV™ Electric Lift Rotary Evaporator is the ideal tabletop rotovap for small scale evaporation and recovery of solvents. Designed with ease of use in mind, the 2L allows users to separate solvents from a given mixture with minimal user input. The heating bath and temperature controls allow for precise, repeatable results. The double helix vertical condenser gives maximum surface area for condensation of vapors. PTFE seals on the entire system are made for maximum chemical resistance to ensure vacuum depth and lifespan of the system. Our rotovaps are a fraction of the price of more costly systems with the same functionaility and evaporation efficiency. 2L Best Value Electric Lift Rotovap Parts Diagram Features: Digital PID temperature and rotation speed control All PTFE valves for improved lifespan and chemical resistance Direct injection capability for continuous feeding of solution Small tabletop footprint Electric multi-level lifting mechanism for ease of use CE Listed 90-day limited warranty (excludes glassware, consumables & moving parts) Specifications: Model 2L Best Value Electric Lift Rotary Evaporator Optimum Ambient Temperature 5~25C / 41~105.8F Glass Material GG-17 High Borosilicate Power (V/Hz) 110V 60Hz Speed Regulation Digital Step-less Regulation Rotation Speed 20-198 RPM Set Temperature 0-99C / 0-210F Temperature Control Digital Temperature Control Maximum Vacuum Pressure -29.8 inHg Evaporating Flask Capacity 2L (2000mL) Receiving Flask Capacity 1L (1000mL) Condenser Style Vertical Double Helix Evaporation Capacity Alcohol >/= 1 L/H Heater Max Current Draw (Amps) 13.6 Water Bath Material Teflon Composite Water Bath Size 10 x 5 in. Lifting Function Electric Lifting Stroke 14cm / 5.5 in. Total Power Consumption (kW) 1.8 kW Dimensions 28 x 18 x 27 in. Weight 37.2 kg / 82 lbs Vacuum Connection 3/8” Barb Condenser Connection 3/8” Barb Warranty 90 days excluding glass parts Certifications CE Rotovap Quick Start Guide This guide gives basic quick start instructions for rotovaps. It is intended to provide a starting point for learning the process. Parameters should be adjusted to suit specific needs. Clean and assemble unit. Make sure all pieces are cleaned and sterilized using an alcohol solution. Connect chiller to condenser and set to 0C (32F). Always fill a rotovap condenser from the top down (chiller output to top of condenser, chiller input to bottom of condenser). Connect vacuum pump to cold trap and connect cold trap to vacuum port on rotovap. Turn on heat bath and set to 40C (113F). Once heat bath, chiller and cold trap have reached desired temperatures, turn on rotovap motor and set speed to approximately 100 RPM (does not have to be precise). Keep in mind, higher RPM’s will increase evaporation power but also increase heat load. Start vacuum pump and allow vacuum to pull down for a few minutes before injection. Once vacuum has been pulled to a sufficient level (does not have to be precise but should be below 100 Torr), using the injection valve, very slowly inject approximately 500 mL of solution into evaporating flask and then close the valve. Allow this small amount to begin evaporating. You may see the chiller begin to rise in temperature, this is called “priming” the rotovap. Once the temperature stops rising or all liquid is almost completely evaporated, open the injection valve again very slowly so that a small amount of liquid begins to enter the evaporating flask. Do not close injection valve this time but continue to allow solution to enter the evaporating flask. At this point you must try to match the input speed to the output speed. What this means is that you should be injecting the same amount of liquid into the rotovap that is equal to the amount of liquid dripping from the condenser into the receiving flask. You will know that the input speed and output speed are matched because the chiller will remain at a stable temperature. If the chiller begins to rise, then you are injecting too much liquid. Dial back the valve until the chiller stabilizes. Once everything is stabilized, you may walk away from the rotovap if necessary. Check every so often to make sure temperatures remain stable and evaporation continues efficiently. ***Note: All units are inspected for broken glass or parts before unit is shipped. If unit arrives damaged or glass is broken (this does not include minor imperfections or scuffs in glassware), Customer MUST contact BVV™ within 3 days of delivery to file a claim and receive a replacement part. If customer DOES NOT contact BVV™ within 3 days of delivery responsibility for replacement parts falls on the customer and they must pay for replacement pieces.*** ***Glassware Safety Disclaimer: BVV™ is not responsible for failure of glassware which must be inspected before and after every use because it may eventually develop imperfections or damage through normal usage, mishandling, and stress caused by temperature variations. If an imperfection or damage is noted while inspecting the glassware DO NOT use the glassware because it can fail causing bodily harm or damage to the surrounding area.***
$1,550.00 - $1,700.00
ExtractCraft Source Turbo
Source Turbo Extractor by ExtractCraft Introducing the Source Turbo, with improved processing time, Turbo Mode, altitude-specific tuning, and upgraded crucible design. Perfect for at-home botanical extractions and easy to use with Bluetooth smart-device app (app is not necessary for operation), Source Turbo is the only at-home extraction appliance in the world that is made simple, smart, and safe for all your extraction needs. A Source Turbo purchase includes the full unit similar to photo (phone not included) but with the newly designed nickel-plated crucible! It also includes an ice tray for cooling the lid and ships in discreet packaging. Disclaimer: Do not use 710 extraction solvent with Extract Craft Products. They can only be used with pure ethanol. Perfect for At-Home Botanical Extraction Source Turbo makes it easy for you to quickly and safely create botanical oils and concentrates in the comfort of your own home, and comes equipped with altitude-specific tuning, so you're good to go whether you're in the mountains or on the beach. Request Source Turbo at your local hydroponics store or smoke shop, or check out our Store Locator for a nearby retailer currently carrying Source Turbo. Be a trendsetter and show all your friends how the pros do it! ExtractCraft Source™ Turbo - USER MANUAL **iPhone pictured not included.
$615.00$585.00
Ethanol 190 Proof (95%) USP/FCC Food Grade, Kosher
USP / Food Grade 190 Proof Ethanol 95% AVB | Grain Derived Alcohol EXCISE TAX INCLUDED IN PRICING. HAZMAT ITEMS ARE NON-REFUNDABLE. ALL SALES ARE FINAL BVV™ Food / USP Ethanol 190 Proof, This product is the highest purity possible for extraction grade ethanol on the market, at 95% pure. Provides unmatched purity while performing extractions for crude oil or even cleaning equipment. 190 Proof Ethanol is a great choice when processing oil for short path distillation processes because it can be immediately winterized, filtered, and then rotary evaporated to recover the ethanol for later usage. Ethanol 190 Proof USP/Food Grade Certificate of Analysis COA Ethanol 190 Proof USP/Food Grade Safety Data Sheet SDS *Disclaimer(s): Spigots/Faucets are only compatible with 5 & 15 Gallon Plastic Jugs and must be purchased separately (Recommended Dispensing Spigot) A copy of your unexpired DRIVERS LICENSE, STATE ID CARD, or US PASSPORT and your completed and signed END-USER STATEMENT must be received before we ship out your order. End Users Agreement Technical Data: Chemical Formula: C2H6O Molecular Weight: 46.069 CAS Registry Number: 64-17-5 Appearance Colorless Liquid Odor: wine-like, pungent Density 0.78945 g/cm3 @ 20 °C Boiling Point: 78.23C/172.81F Solubility in water: Miscible GHS Pictograms: GHS Signal Word: Danger GHS Hazard Statements: H225, H319, H360D GHS Precautionary Statements P210, P233, P240, P241, P242, P305+P351+P338 UN Identification Number: 1170 Proper Shipping Name: Ethanol Solution Transport Hazard Class: 3 Packing Group: II DOT Placard: Federal & State Law Requirements You must be the age of 21 or over to purchase this ethanol product. All Alcohol and Tobacco Tax Trade Bureau (TTB), federal, state and local laws must be complied with, and you may be required to provide BVV™ with your state or federal license even when purchasing products that require a federal excise tax payment. (Note: Container style and color may vary)
$26.00 - $5,940.00
2L Electric Rotary Evaporator Kit with BVV Water Circulation Vacuum Pump
2L Electric Rotary Evaporator Kit with BVV™ Water Circulation Vacuum Pump 2L Electric Rotary Evaporator Kit with BVV™ Water Circulation Vacuum Pump setup includes all the neccessary components to successfully perform solvent recovery via rotary evaporation. A cold trap should always be used inline between your vacuum system and application to protect the pump from volatile vapors. 2L Rotary Evaporator Turnkey Setup includes: 2L Electric Lift Rotary Evaporator 90-day limited warranty (excludes glassware, consumables & moving parts) BVV™ Water Circulation Vacuum Pump Rotovap Quick Start Guide This guide gives basic quick start instructions for rotovaps. It is intended to provide a starting point for learning the process. Parameters should be adjusted to suit specific needs. Clean and assemble unit. Make sure all pieces are cleaned and sterilized using an alcohol solution. Connect chiller to the condenser and set to 0C (32F). Always fill a rotovap condenser from the top down (chiller output to top of the condenser, chiller input to bottom of the condenser). Connect vacuum pump to cold trap and connect cold trap to the vacuum port on rotovap. Turn on heat bath and set to 40C (113F). Once heat bath, chiller, and cold trap have reached desired temperatures, turn on the rotovap motor and set the speed to approximately 100 RPM (does not have to be precise). Keep in mind, higher RPM’s will increase evaporation power but also increase heat load. Start vacuum pump and allow vacuum to pull down for a few minutes before injection. Once the vacuum has been pulled to a sufficient level (does not have to be precise but should be below 100 Torr), using the injection valve, very slowly inject approximately 500 mL of solution into evaporating flask and then close the valve. Allow this small amount to begin evaporating. You may see the chiller begin to rise in temperature, this is called “priming” the rotovap. Once the temperature stops rising or all liquid is almost completely evaporated, open the injection valve again very slowly so that a small amount of liquid begins to enter the evaporating flask. Do not close injection valve this time but continue to allow the solution to enter the evaporating flask. At this point, you must try to match the input speed to the output speed. What this means is that you should be injecting the same amount of liquid into the rotovap that is equal to the amount of liquid dripping from the condenser into the receiving flask. You will know that the input speed and output speed are matched because the chiller will remain at a stable temperature. If the chiller begins to rise, then you are injecting too much liquid. Dial back the valve until the chiller stabilizes. Once everything is stabilized, you may walk away from the rotovap if necessary. Check every so often to make sure temperatures remain stable and evaporation continues efficiently. ***Glassware Safety Disclaimer: BVV™ is not responsible for failure of glassware which must be inspected before and after every use because it may eventually develop imperfections or damage through normal usage, mishandling, and stress caused by temperature variations. If an imperfection or damage is noted while inspecting the glassware DO NOT use the glassware because it can fail causing bodily harm or damage to the surrounding area.***
$1,750.00
Pressure Filtration System - 6 x 28
This filter system is designed for high flow rates to filter unwanted precipitates from your oleoresin. The housing provides full enclosure of your filter bags, which are fully supported by the strainer basket within the housing to prevent blowouts. Pressure and high flow rates may be applied to get the fastest flow through filter bags. Using the housing allows full exhaustion of a bag prior to changing it without the sacrifice in filtering time.These filter bag housings use an eye-bolt clamp style to allow for high pressure without leakage, while still maintaining an easy to remove cover. When one filter bag gets filled, it can easily be swapped out by removing the lid while not under pressure and pulling the old bag out. The main seal on the housing is Buna-n rubber. The liquid pump is of 316 Stainless Steel Construction with PTFE seals and runs on compressed air or nitrogen. Built options Include: 1x 304 Stainless Steel Filter Bag Housing 1x 304 Stainless Steel Basket 1x 304 Stainless Steel Displacement Cylinder With Pump options Include: 1x 304 Stainless Steel Filter Bag Housing 1x 304 Stainless Steel Basket 1x 304 Stainless Steel Displacement Cylinder 1x 316 Stainless Steel Liquid pump Connecting hose or hardline tubing 4x Nomex Filter Bags (1μm, 5μm, 25μm, and 100μm) Specifications PFS-790-15 PFS-790-45 Flow Rate (GPM) ≤15 ≤45 Max Pressure (PSI) 100 @28 CFM Volume (in^3) 790 Working Temperature (°C) -40 - 100 Air Hose Connection ¼” JIC Flare ½” JIC Flare Filter Bag Housing Dimensions (LxWxH) 14” x 11” x 41” Filter Bag Trade Size #8 Included PVC Hose size ID ¾” 1” *This unit requires an air compressor for operation (not included)
$850.00 - $10,000.00
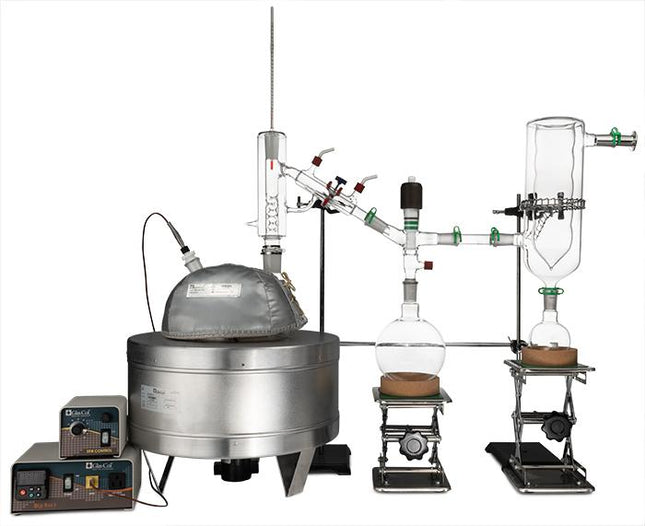
2L Premium Short Path Distillation Turnkey Setup with P2 Distillation Head
2L Premium Short Path Distillation Turnkey Setup with P2 Distillation Head The 2L Premium Distillation Turnkey Setup features our 2L Distillation Kit with P2 Distillation Head and USA made glass. Every component in this turnkey is made for precision, throughput, and repeatable results. Also included is our Pro Series 11.3CFM Corrosion Resistant Two Stage Vacuum Pump giving you extreme power and depth with long lifespan, the Bullseye Precision Vacuum Gauge from Digivac which is the most rugged and dependable vacuum gauge on the market, and a Polyscience 7L MX Heated Circulator for maximum condensation of vapors. You will also receive a Dewar Style Glass Cold Trap to keep all volatiles and solvents out of your vacuum system. This Turnkey Setup gives you everything needed to perform distillation at the highest level. The Premium Turnkey Kit Includes: 2L Distillation Kit w/ P2 Distillation Head KF-25 x 1/4" Barb Adapter Dewar Style Glass Cold Trap Bullseye precision Vacuum Gauge Polyscience 7L MX Heated Circulator Pro Series 14.1CFM Corrosion Resistant Two Stage Vacuum Pump Distillation Quick Start Guide This guide gives basic quick start instructions for distillation systems. It is intended to provide a starting point for learning the process. Parameters should be adjusted to suit specific needs, Before beginning distillation, ensure the following steps have been taken: Vacuum Pump is in good working order. Pump should be run against dry load to allow internals to warm up. Oil should be clear. Cloudy or dark oil should be changed. All glass components are in good working order and ready to be assembled A winterization and degassing procedure has been done to prepare oil for distillation Once all three of these steps have been completed, you are ready to begin distilling. Begin by placing stir bar in boiling flask and then load your material. This should be done using a funnel. A small amount of alcohol in the oil will give it a thinner consistency making it easier to transfer. Assemble all glassware and ensure each joint is properly greased. Do not use too much, as the vacuum pressure might pull some grease into the system. To ensure a full seal, spread grease in a circular motion by rotating glassware Attach circulator to condenser and set temperature to 50C. Allow circulator to reach temperature before beginning distillation. Connect vacuum pump to manifold. The manifold will allow you to isolate each individual component as well as let atmosphere into and out of the system. Connect receiving cow to cold trap. Connect cold trap to manifold. Connect vacuum gauge to manifold. At this point, ensure all connections are correct. Also ensure receiving cow is positioned to collect the first fraction in the far-left receiving flask. Circulator should be at its set temperature. Turn on vacuum pump to begin process. Turn on heat and set to 60C. Vacuum pump will begin to pull down and temperature will begin to rise. Watch the gauge to monitor vacuum pressure and stability. Start stir slower and increase speed with temperature. Once you are close to 60C, increase the temperature 20 degrees. Continue to raise the heat incrementally in 20-degree steps, increasing the set temperature as you near your set point. Increase temperatures incrementally until you reach 220C. You will see your first fraction somewhere between 180C and 190C or slightly before. This is the “heads” fraction. You will move to your second fraction when you see an increased reaction in the head, a slight color change toward golden, as well as a thickening of distillate. When this fraction hits, allow the distillate to “self-clean” the head for a minute or two then, rotate the cow to the middle receiving flask. Collect your “main body” fraction. You will see temps between 190-220C during this fraction. Continue to increase stirring speed as necessary. Reaction in the head may vary but it should never stop. As fluid level in the boiling flask decreases, increase stir speed. The final “tails” fraction is a mixture of the first and second fractions and should be saved for re-distillation later. Ideally, you want to turn the cow to the final flask before the tails fraction hits. The “tails” fraction has an obvious color change and will be darker than the “main body” fraction. You will see temps between 200-250C during this fraction. As fluid level in the boiling flask decreases even more, set stirring RPM higher (1000+ RPM). You may need to compensate with a bit more heat to finish of the final fraction as well. Once the process is complete, stop heat, stop stir, and stop vacuum. Let the atmosphere into the system. Be sure to properly store your distillate as exposure to air and light can cause oxidation. ***Note: This entire setup will ship via motor freight.*** ***Note: All units are inspected for broken glass or parts before unit is shipped. If unit arrives damaged or glass is broken (this does not include minor imperfections or scuffs in glassware), Customer MUST contact BVV™ within 3 days of delivery to file a claim and receive a replacement part. If customer DOES NOT contact BVV™ within 3 days of delivery responsibility for replacement parts falls on the customer and they must pay for replacement pieces.*** ***Glassware Safety Disclaimer: BVV™ is not responsible for failure of glassware which must be inspected before and after every use because it may eventually develop imperfections or damage through normal usage, mishandling, and stress caused by temperature variations. If an imperfection or damage is noted while inspecting the glassware DO NOT use the glassware because it can fail causing bodily harm or damage to the surrounding area.***
$6,000.00 - $7,650.00
Certified 45L Jacketed Stainless Steel Centrifuge with Explosion Proof Motor and Siemens Controller - 15LB Max Capacity
Certified 45L Ethanol Wash/Dry Centrifuge with Explosion Proof Motor and Controller Notice to Customer: This unit has 4 lift points (one in each corner) and requires a forklift to lift it. It will also ship via freight only. Industrial Centrifuges are used to separating liquids from solids and this style of centrifuge excels at alcohol extraction by forcefully separating the alcohol from the biomass. Key Features: Siemens Touch Screen Controller Explosion Proof Controller Housing and Motor Agitation and Spin Dry Modes Max 1500 RPM with Gradual Speed Stepping 566 Separation Factor Multiple Connection Ports/Sizes High Polish Stainless Steel Components Shock absorbing legs Vacuum Jacket with Two 1" Tri-Clamp Fittings Pre-wired and Tested for Easy Installation *BVV Centrifuges are now available certified by PRV Engineers. Field visits/verification letters are an additional $4,000 + travel expenses.* Specifications Capacity 45L Drum Dimensions 17.7" (450mm) Diameter x 11-7/8" (300mm) Deep Max Capacity 15lbs (6.8Kg) Speed 1500 rpm Separation Factor 566 Electrical 240V 1Ø (10.58A) Weight 794lbs (360Kg) Exterior Dimensions 50" x 27.6" x 28.7" (1280mm x 700mm x 730mm) Viewport Diameter 5.5" Connection Size(s): 2" Tri-Clamp Drain Port 1" Tri-clamp Side Port X 2 1" Tri-Clamp Top Port 1.5" Tri-Clamp Top Port 1/4" FNPT Top Port KF25 Top Port
$19,500.00 - $23,500.00
Certified 475L Jacketed Stainless Steel Centrifuge with Explosion Proof Motor and Siemens Controller - 150Lbs Max Capacity
Certified 475L Ethanol Wash/Dry Centrifuge with Explosion Proof Motor and Controller Notice to Customer: This unit has 4 lift points (one in each corner) and requires a forklift with a 6000lb+ rating to lift it. Due to the size and weight of this item a custom freight quote will be required. If purchased, BVV will contact the customer to provide shipping options and their price. Confirming logistics will require a 2-3 week lead time. Industrial Centrifuges are used to separating liquids from solids and this style of centrifuge excels at alcohol extraction by forcefully separating the alcohol from the biomass. Key Features: Siemens Touch Screen Controller Explosion Proof Controller Housing and Motor Agitation and Spin Dry Modes Max 800 RPM with Gradual Speed Stepping 430 Separation Factor Multiple Connection Ports/Sizes. High Polish Stainless Steel Components Shock absorbing legs Vacuum Jacket with Two 1.5" Tri-Clamp Fittings Pre-wired and Tested for Easy Installation *BVV Centrifuges are now available certified by PRV Engineers. Field visits/verification letters are an additional $4,000 + travel expenses.* Specifications Capacity 475L Drum Dimensions 47.24" (1200mm) Diameter x 16-3/4" (425mm) Deep Max Capacity 440lbs (200Kg) Speed 800 rpm Separation Factor 430 Electrical 240V 3Ø Weight 5600lbs (2540Kg) Exterior Dimensions 85" x 65" x 49" (2150mm x 1650mm x 1250mm) Viewport Diameter Dual 9" Viewing Ports Connection Size(s): 4" Tri-Clamp Drain Port 1.5" Tri-clamp Jacket Port x 2 1.5" / 2.5" Tri-Clamp Top Ports 1/4" FNPT Top Port KF25 Top Port
$39,500.00 - $43,500.00
5L Neocision Short Path Distillation Turnkey Kit
5L Neocision Short Path Distillation Turnkey Kit This unit carries a 2 day lead time. The 5L Premium Distillation Turnkey Setup features our 5L Distillation Kit with P5 Distillation Head and USA made glass. Every component in this turnkey is made for precision, throughput, and repeatable results. Also included is our Pro Series Corrosion Resistant Two Stage Vacuum Pump giving you extreme power and depth with a long lifespan, the Bullseye Precision Vacuum Gauge from Digivac which is the most rugged and dependable vacuum gauge on the market, and a BVV 19L Heated Circulator for maximum condensation of vapors. You will also receive a Dewar Style Glass Cold Trap to keep all volatiles and solvents out of your vacuum system. This Turnkey Setup gives you everything needed to perform distillation at the highest level. The Premium Turnkey Kit Includes: 5L Neocision Kit with P5 Distillation Head KF-25 x 1/4" Barb Adapter Dewar Style Glass Cold Trap Bullseye Precision Vacuum Gauge BVV 19L MX Heated Circulator Pro Series 21.2CFM Corrosion Resistant Two Stage Vacuum Pump Distillation Quick Start Guide This guide gives basic quick start instructions for distillation systems. It is intended to provide a starting point for learning the process. Parameters should be adjusted to suit specific needs, Before beginning distillation, ensure the following steps have been taken: Vacuum Pump is in good working order. Pump should be run against dry load to allow internals to warm up. Oil should be clear. Cloudy or dark oil should be changed. All glass components are in good working order and ready to be assembled A winterization and degassing procedure has been done to prepare oil for distillation Once all three of these steps have been completed, you are ready to begin distilling. Begin by placing stir bar in boiling flask and then load your material. This should be done using a funnel. A small amount of alcohol in the oil will give it a thinner consistency making it easier to transfer. Assemble all glassware and ensure each joint is properly greased. Do not use too much, as the vacuum pressure might pull some grease into the system. To ensure a full seal, spread grease in a circular motion by rotating glassware Attach circulator to condenser and set temperature to 50C. Allow circulator to reach temperature before beginning distillation. Connect vacuum pump to manifold. The manifold will allow you to isolate each individual component as well as let atmosphere into and out of the system. Connect receiving cow to cold trap. Connect cold trap to manifold. Connect vacuum gauge to manifold. At this point, ensure all connections are correct. Also ensure receiving cow is positioned to collect the first fraction in the far-left receiving flask. Circulator should be at its set temperature. Turn on vacuum pump to begin process. Turn on heat and set to 60C. Vacuum pump will begin to pull down and temperature will begin to rise. Watch the gauge to monitor vacuum pressure and stability. Start stir slower and increase speed with temperature. Once you are close to 60C, increase the temperature 20 degrees. Continue to raise the heat incrementally in 20-degree steps, increasing the set temperature as you near your set point. Increase temperatures incrementally until you reach 220C. You will see your first fraction somewhere between 180C and 190C or slightly before. This is the “heads” fraction. You will move to your second fraction when you see an increased reaction in the head, a slight color change toward golden, as well as a thickening of distillate. When this fraction hits, allow the distillate to “self-clean” the head for a minute or two then, rotate the cow to the middle receiving flask. Collect your “main body” fraction. You will see temps between 190-220C during this fraction. Continue to increase stirring speed as necessary. Reaction in the head may vary but it should never stop. As fluid level in the boiling flask decreases, increase stir speed. The final “tails” fraction is a mixture of the first and second fractions and should be saved for re-distillation later. Ideally, you want to turn the cow to the final flask before the tails fraction hits. The “tails” fraction has an obvious color change and will be darker than the “main body” fraction. You will see temps between 200-250C during this fraction. As fluid level in the boiling flask decreases even more, set stirring RPM higher (1000+ RPM). You may need to compensate with a bit more heat to finish of the final fraction as well. Once process is complete, stop heat, stop stir, and stop vacuum. Let atmosphere into the system. Be sure to properly store your distillate as exposure to air and light can cause oxidation. ***Note: This entire setup will ship via motor freight.*** ***Note: All units are inspected for broken glass or parts before unit is shipped. If unit arrives damaged or glass is broken (this does not include minor imperfections or scuffs in glassware), Customer MUST contact BVV™ within 3 days of delivery to file a claim and receive a replacement part. If customer DOES NOT contact BVV™ within 3 days of delivery responsibility for replacement parts falls on the customer and they must pay for replacement pieces.*** ***Glassware Safety Disclaimer: BVV™ is not responsible for failure of glassware which must be inspected before and after every use because it may eventually develop imperfections or damage through normal usage, mishandling, and stress caused by temperature variations. If an imperfection or damage is noted while inspecting the glassware DO NOT use the glassware because it can fail causing bodily harm or damage to the surrounding area.***
$10,500.00 - $14,750.00
10L Neocision Dual Head Short Path Distillation Turnkey System
10L Neocision Dual Head Short Path Distillation Turnkey System This unit carries a 2 day lead time. The 10L Neocision Distillation Turnkey Setup features our Dual 10L P5 Distillation Heads and USA made glass. Every component in this turnkey is made for precision, throughput, and repeatable results. Also included is a KF-25 Vacuum Pump giving you extreme power and depth with a long lifespan, the Bullseye Precision Vacuum Gauge from Digivac which is the most rugged and dependable vacuum gauge on the market, and a BVV 19L Heated Circulator for maximum condensation of vapors. You will also receive a Dual Dewar Style Glass Cold Trap to keep all volatiles and solvents out of your vacuum system. This Turnkey Setup gives you everything needed to perform distillation at the highest level. The Premium Turnkey Kit Includes: 10L Neocision Kit with Dual P5 Distillation Heads KF-25 2 Meter Bellows Dual Dewar Style Glass Cold Trap Bullseye Precision Vacuum Gauge BVV 19L Heated Circulator Your Choice Of KF-25 Vacuum Pump Distillation Quick Start Guide This guide gives basic quick start instructions for distillation systems. It is intended to provide a starting point for learning the process. Parameters should be adjusted to suit specific needs, Before beginning distillation, ensure the following steps have been taken: Vacuum Pump is in good working order. Pump should be run against dry load to allow internals to warm up. Oil should be clear. Cloudy or dark oil should be changed. All glass components are in good working order and ready to be assembled A winterization and degassing procedure has been done to prepare oil for distillation Once all three of these steps have been completed, you are ready to begin distilling. Begin by placing stir bar in boiling flask and then load your material. This should be done using a funnel. A small amount of alcohol in the oil will give it a thinner consistency making it easier to transfer. Assemble all glassware and ensure each joint is properly greased. Do not use too much, as the vacuum pressure might pull some grease into the system. To ensure a full seal, spread grease in a circular motion by rotating glassware Attach circulator to condenser and set temperature to 50C. Allow circulator to reach temperature before beginning distillation. Connect vacuum pump to manifold. The manifold will allow you to isolate each individual component as well as let atmosphere into and out of the system. Connect receiving cow to cold trap. Connect cold trap to manifold. Connect vacuum gauge to manifold. At this point, ensure all connections are correct. Also ensure receiving cow is positioned to collect the first fraction in the far-left receiving flask. Circulator should be at its set temperature. Turn on vacuum pump to begin process. Turn on heat and set to 60C. Vacuum pump will begin to pull down and temperature will begin to rise. Watch the gauge to monitor vacuum pressure and stability. Start stir slower and increase speed with temperature. Once you are close to 60C, increase the temperature 20 degrees. Continue to raise the heat incrementally in 20-degree steps, increasing the set temperature as you near your set point. Increase temperatures incrementally until you reach 220C. You will see your first fraction somewhere between 180C and 190C or slightly before. This is the “heads” fraction. You will move to your second fraction when you see an increased reaction in the head, a slight color change toward golden, as well as a thickening of distillate. When this fraction hits, allow the distillate to “self-clean” the head for a minute or two then, rotate the cow to the middle receiving flask. Collect your “main body” fraction. You will see temps between 190-220C during this fraction. Continue to increase stirring speed as necessary. Reaction in the head may vary but it should never stop. As fluid level in the boiling flask decreases, increase stir speed. The final “tails” fraction is a mixture of the first and second fractions and should be saved for re-distillation later. Ideally, you want to turn the cow to the final flask before the tails fraction hits. The “tails” fraction has an obvious color change and will be darker than the “main body” fraction. You will see temps between 200-250C during this fraction. As fluid level in the boiling flask decreases even more, set stirring RPM higher (1000+ RPM). You may need to compensate with a bit more heat to finish of the final fraction as well. Once process is complete, stop heat, stop stir, and stop vacuum. Let atmosphere into the system. Be sure to properly store your distillate as exposure to air and light can cause oxidation. ***Note: This entire setup will ship via motor freight.*** ***Note: All units are inspected for broken glass or parts before unit is shipped. If unit arrives damaged or glass is broken (this does not include minor imperfections or scuffs in glassware), Customer MUST contact BVV™ within 3 days of delivery to file a claim and receive a replacement part. If customer DOES NOT contact BVV™ within 3 days of delivery responsibility for replacement parts falls on the customer and they must pay for replacement pieces.*** ***Glassware Safety Disclaimer: BVV™ is not responsible for failure of glassware which must be inspected before and after every use because it may eventually develop imperfections or damage through normal usage, mishandling, and stress caused by temperature variations. If an imperfection or damage is noted while inspecting the glassware DO NOT use the glassware because it can fail causing bodily harm or damage to the surrounding area.***
$13,250.00 - $17,750.00
50L Neocision ETL Lab Certified Rotary Evaporator Turnkey System
50L Neocision ETL Lab Certified Rotary Evaporator Turnkey System 50L NEO Rotary Evaporator Turnkey System setup includes all the necessary components to successfully perform solvent recovery via rotary evaporation. A cold trap should always be used inline between your vacuum system and application to protect the pump from volatile vapors. 10-50L NEO and ECO Rotary Evaporator Diagram 50L NEO Rotary Evaporator Turnkey System setup includes: 50L Neocision ETL Lab Certified Rotary Evaporator Polyscience DuraChill 1.5HP Chiller w/ Turbine Pump 3/8" Gum Rubber - 100ft 3/8" Silicone Tubing - 25ft Welch BTpro100 Diaphragm Pump Adjustable Stainless Steel Hose Clamps This guide gives basic quick start instructions for rotovaps. It is intended to provide a starting point for learning the process. Parameters should be adjusted to suit specific needs. Clean and assemble unit. Make sure all pieces are cleaned and sterilized using an alcohol solution. Connect chiller to condenser and set to 0C (32F). Always fill a rotovap condenser from the top down (chiller output to top of condenser, chiller input to bottom of condenser). Connect vacuum pump to cold trap and connect cold trap to vacuum port on rotovap. Turn on heat bath and set to 40C (113F). Once heat bath, chiller and cold trap have reached desired temperatures, turn on rotovap motor and set speed to approximately 100 RPM (does not have to be precise). Keep in mind, higher RPM’s will increase evaporation power but also increase heat load. Start vacuum pump and allow vacuum to pull down for a few minutes before injection. Once vacuum has been pulled to a sufficient level (does not have to be precise but should be below 100 Torr), using the injection valve, very slowly inject approximately 500 mL of solution into evaporating flask and then close the valve. Allow this small amount to begin evaporating. You may see the chiller begin to rise in temperature, this is called “priming” the rotovap. Once the temperature stops rising or all liquid is almost completely evaporated, open the injection valve again very slowly so that a small amount of liquid begins to enter the evaporating flask. Do not close injection valve this time but continue to allow solution to enter the evaporating flask. At this point you must try to match the input speed to the output speed. What this means is that you should be injecting the same amount of liquid into the rotovap that is equal to the amount of liquid dripping from the condenser into the receiving flask. You will know that the input speed and output speed are matched because the chiller will remain at a stable temperature. If the chiller begins to rise, then you are injecting too much liquid. Dial back the valve until the chiller stabilizes. Once everything is stabilized, you may walk away from the rotovap if necessary. Check every so often to make sure temperatures remain stable and evaporation continues efficiently.
$21,200.00 - $24,250.00
5L Neocision ETL Lab Certified Rotary Evaporator Turnkey System
5L Neocision ETL Lab Certified Rotary Evaporator Turnkey System The 5L Neocision ETL Lab Certified Rotary Evaporator is a full-scale system meant to fulfill the needs of large volume production and meet the requirements of a certified laboratory with its ETL certification standards. Featuring an electric lift bath and all PTFE valves for extreme chemical resistance, the 5L Neocision gives users the ability to recover large amounts of solvent in a smaller footprint with highly improved functionality. All Neocision rotovaps feature high-efficiency valves and drain ports making it easy to directly inject solution continuously without the need to stop the system or release vacuum to drain. The temperature and rotation speed are easily controlled from a single digital interface. Our rotovaps are a fraction of the price of more costly systems with the same functionality and evaporation efficiency. 5L NEO Rotary Evaporator Turnkey System setup includes: 5L Neocision ETL Lab Certified Rotary Evaporator Polyscience LS -20C to 40C 1/2HP Chiller w/ Turbine Pump 1/4" Gum Rubber - 100ft 1/4" Silicone Tubing - 25ft Welch BTpro70 Adjustable Stainless Steel Hose Clamps Features: ETL Certified for Lab use. Digital temperature and speed control with simple user interface Electric Bath Lift Teflon Coated Bath for corrosion resistance High-efficiency drain port and injection valves Smaller footprint for improved workspace allocation Mobility with locking casters Shorter vapor path for faster evaporation and condensation Direct injection capability for continuous feeding of solution Continuous draining capability without the need to release vacuum or stop the system 1-year warranty on all mechanical parts. Does not include glassware. Specifications: Model 5L Solvent Pro Series Rotary Evaporator Optimum Ambient Temperature 5~25C / 41~105.8F Glass Material GG-17 High Borosilicate Power (V/Hz) 110V 50/60Hz Single Phase Speed Regulation Digital Step-less Regulation Rotation Speed 20-130 RPM Set Temperature RT+5 - 99C Temperature Control Digital Temperature Control Maximum Vacuum Pressure -29.8 inHg Evaporating Flask Capacity 5L (5000ml) Receiving Flask Capacity 5L (5000ml) Condenser Style Main + Auxiliary Vertical Double Helix Heater Max Current Draw (Amps) 25 Water Bath Material 304 Stainless Steel Water Bath Size 17.7 x 9.8 in. Lifting Function Electric Lifting Stroke 190mm / 7.5 in. Total Power Consumption (kW) 1800w Dimensions 45 x 32 x 15in Weight 155 lbs Vacuum Connection 14mm / .55 in. Barb Condenser Connection 18mm / .70 in. Barb Warranty 1 Year excluding glass parts Certifications ETL Rotovap Quick Start Guide This guide gives basic quick start instructions for rotovaps. It is intended to provide a starting point for learning the process. Parameters should be adjusted to suit specific needs. Clean and assemble unit. Make sure all pieces are cleaned and sterilized using an alcohol solution. Connect chiller to condenser and set to 0C (32F). Always fill a rotovap condenser from the top down (chiller output to top of condenser, chiller input to bottom of condenser). Connect vacuum pump to cold trap and connect cold trap to vacuum port on rotovap. Turn on heat bath and set to 40C (113F). Once heat bath, chiller and cold trap have reached desired temperatures, turn on rotovap motor and set speed to approximately 100 RPM (does not have to be precise). Keep in mind, higher RPM’s will increase evaporation power but also increase heat load. Start vacuum pump and allow vacuum to pull down for a few minutes before injection. Once vacuum has been pulled to a sufficient level (does not have to be precise but should be below 100 Torr), using the injection valve, very slowly inject approximately 500 mL of solution into evaporating flask and then close the valve. Allow this small amount to begin evaporating. You may see the chiller begin to rise in temperature, this is called “priming” the rotovap. Once the temperature stops rising or all liquid is almost completely evaporated, open the injection valve again very slowly so that a small amount of liquid begins to enter the evaporating flask. Do not close injection valve this time but continue to allow solution to enter the evaporating flask. At this point you must try to match the input speed to the output speed. What this means is that you should be injecting the same amount of liquid into the rotovap that is equal to the amount of liquid dripping from the condenser into the receiving flask. You will know that the input speed and output speed are matched because the chiller will remain at a stable temperature. If the chiller begins to rise, then you are injecting too much liquid. Dial back the valve until the chiller stabilizes. Once everything is stabilized, you may walk away from the rotovap if necessary. Check every so often to make sure temperatures remain stable and evaporation continues efficiently. ***Note: All units are inspected for broken glass or parts before unit is shipped. If unit arrives damaged or glass is broken (this does not include minor imperfections or scuffs in glassware), Customer MUST contact BVV™ within 3 days of delivery to file a claim and receive a replacement part. If customer DOES NOT contact BVV™ within 3 days of delivery responsibility for replacement parts falls on the customer and they must pay for replacement pieces.*** ***Note: This item will ship by freight only.*** ***Glassware Safety Disclaimer: BVV™ is not responsible for failure of glassware which must be inspected before and after every use because it may eventually develop imperfections or damage through normal usage, mishandling, and stress caused by temperature variations. If an imperfection or damage is noted while inspecting the glassware DO NOT use the glassware because it can fail causing bodily harm or damage to the surrounding area.***
$10,250.00 - $12,250.00
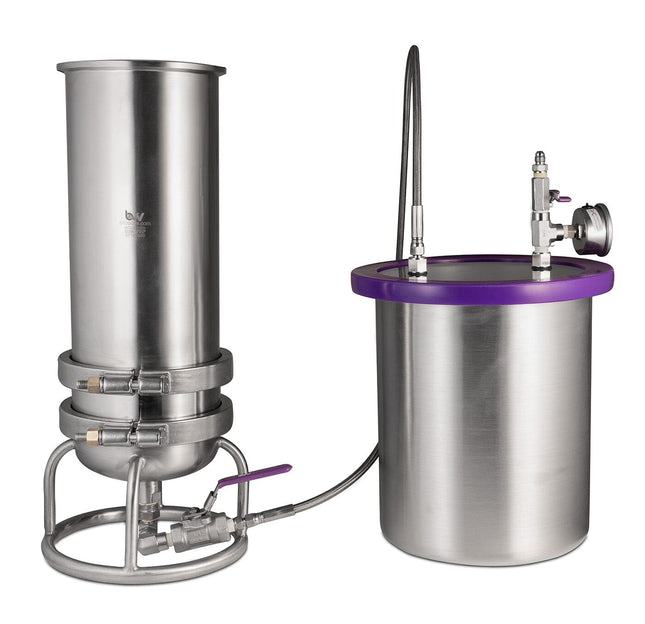
Nitrogen Pressure Filter
Nitrogen Pressure Filter Is vacuum filtration bottlenecking your processing? Filter faster with BVV's Nitrogen assisted pressure filters. Designed for versatility our prebuilt pressure filters come complete with our 1 micron Dutch Weave Sintered disk for ultra-fine filtration. Process continuous or batch-style solutions in half the time compared to most vacuum filtration applications. Specifications 6"x12" or 12"x12" filtration body 1um Dutch Weave Sintered disc Filter Plate Retention Ring Fast Flow Filter paper Included Solvent dispersal plate 2X Borosilicate Sight Glasses 1X 125 PSI ASME Safety Valves 1X -30hg-250PSI Compound Pressure Gauges 1X 1/2" JIC Lid Valve 2X 1/4" JIC Lid Valves 1X JIC Drain Valve (6NPS: 1/4" 12NPS: 1/2" JIC) Maximum Pressure Rating: 125PSI
$1,400.00 - $2,650.00
Certified 280L Jacketed Stainless Steel Centrifuge with Explosion Proof Motor and Siemens Controller - 85LB Max Capacity
Certified 280L Ethanol Wash/Dry Centrifuge NOTE: This item currently has a 2 week lead time. Industrial Centrifuges are used to separating liquids from solids and this style of centrifuge excels at alcohol extraction by forcefully separating the alcohol from the biomass. Notice to Customer: This unit has 4 lift points (one in each corner) and requires a forklift to lift it and will also ship via freight only. Key Features: Siemens Touch Screen Controller Explosion Proof Controller Housing and Motor Agitation and Spin Dry Modes Max 1000 RPM with Gradual Speed Stepping 559 Separation Factor Multiple Connection Ports/Sizes High Polish Stainless Steel Components Shock absorbing legs Vacuum Jacket with Two 1" Tri-Clamp Fittings Pre-wired and Tested for Easy Installation *BVV Centrifuges are now available certified by PRV Engineers. Field visits/verification letters are an additional $4,000 + travel expenses.* Specifications Capacity 280L Drum Dimensions 39.4" (1000mm) Diameter x 14.17" (360mm) Speed 0-1000r/min Weight 4,188lbs (1900KG) Exterior Dimensions 59.06" x 82.68" x 45.28" (1500x2100x1150mm) Material 304 Stainless Steel Motor Power 11KW Explosions Proof - 220v 60Hz 3 Phase
$36,000.00 - $40,000.00
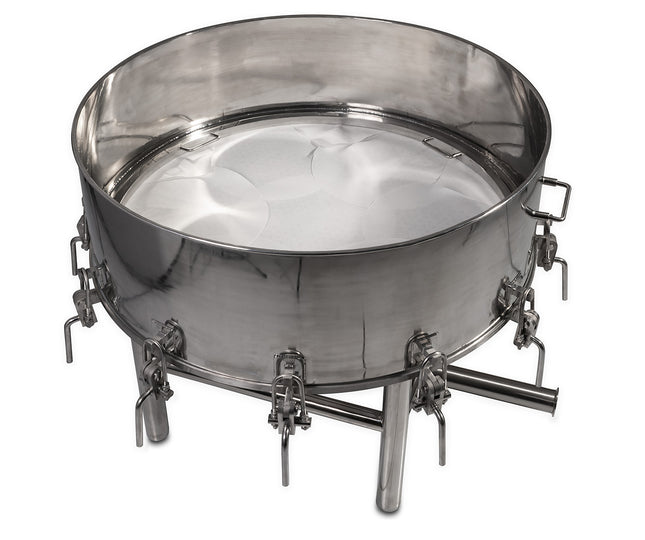
36 inch Filtration Funnel V2
Buchner Filtration Kit This filtration kit is operated by using a vacuum pump to pull the solution through the filter paper to remove particulate. The funnel has a 36" perforated plate to support the filter paper.
$7,600.00 - $8,180.00
10L Neocision ETL Lab Certified Rotary Evaporator Turnkey System
10L NEO Rotary Evaporator Turnkey System 10L NEO Rotary Evaporator Turnkey System setup includes all the necessary components to successfully perform solvent recovery via rotary evaporation. A cold trap should always be used inline between your vacuum system and application to protect the pump from volatile vapors. To keep your bath heating properly, this unit should only be used with RO or DI water. 10-50L NEO and ECO Rotary Evaporator Diagram 10L NEO Rotary Evaporator Turnkey System setup includes: 10L Neocision ETL Lab Certified Rotary Evaporator Polyscience 6160T 1HP Chiller 3/8" Gum Rubber - 100ft 3/8" Silicone Tubing - 25ft Welch BTpro100 Diaphragm Pump Adjustable Stainless Steel Hose Clamps This guide gives basic quick start instructions for rotovaps. It is intended to provide a starting point for learning the process. Parameters should be adjusted to suit specific needs. Clean and assemble unit. Make sure all pieces are cleaned and sterilized using an alcohol solution. Connect chiller to condenser and set to 0C (32F). Always fill a rotovap condenser from the top down (chiller output to top of condenser, chiller input to bottom of condenser). Connect vacuum pump to cold trap and connect cold trap to vacuum port on rotovap. Turn on heat bath and set to 40C (113F). Once heat bath, chiller and cold trap have reached desired temperatures, turn on rotovap motor and set speed to approximately 100 RPM (does not have to be precise). Keep in mind, higher RPM’s will increase evaporation power but also increase heat load. Start vacuum pump and allow vacuum to pull down for a few minutes before injection. Once vacuum has been pulled to a sufficient level (does not have to be precise but should be below 100 Torr), using the injection valve, very slowly inject approximately 500 mL of solution into evaporating flask and then close the valve. Allow this small amount to begin evaporating. You may see the chiller begin to rise in temperature, this is called “priming” the rotovap. Once the temperature stops rising or all liquid is almost completely evaporated, open the injection valve again very slowly so that a small amount of liquid begins to enter the evaporating flask. Do not close injection valve this time but continue to allow solution to enter the evaporating flask. At this point you must try to match the input speed to the output speed. What this means is that you should be injecting the same amount of liquid into the rotovap that is equal to the amount of liquid dripping from the condenser into the receiving flask. You will know that the input speed and output speed are matched because the chiller will remain at a stable temperature. If the chiller begins to rise, then you are injecting too much liquid. Dial back the valve until the chiller stabilizes. Once everything is stabilized, you may walk away from the rotovap if necessary. Check every so often to make sure temperatures remain stable and evaporation continues efficiently. **Note: All units are inspected for broken glass or parts before unit is shipped. If unit arrives damaged or glass is broken (this does not include minor imperfections or scuffs in glassware), Customer MUST contact BVV™ within 3 days of delivery to file a claim and receive a replacement part. If customer DOES NOT contact BVV™ within 3 days of delivery responsibility for replacement parts falls on the customer and they must pay for replacement pieces.*** ***Note: This item will ship by freight only.*** ***Glassware Safety Disclaimer: BVV™ is not responsible for failure of glassware which must be inspected before and after every use because it may eventually develop imperfections or damage through normal usage, mishandling, and stress caused by temperature variations. If an imperfection or damage is noted while inspecting the glassware DO NOT use the glassware because it can fail causing bodily harm or damage to the surrounding area.***
$16,950.00 - $19,000.00
BVV 6" Turnkey Falling Film Evaporator
BVV 6" Turnkey Falling Film Evaporator Cutsheet Is your lab floor filled with a fleet of rotary evaporators? Looking to increase solvent recovery throughput? Our new and compact 20GPH Falling Film Evaporator (FFE) has the capability to maximize throughput and replace up to five 50L Rotary Evaporators. The BVV™ 20GPH Falling Film Evaporator is designed to evaporate ethanol that has been diluted in crude oil during a filtration or extraction process. By reducing the vapor pressure inside the system and metering the injection valve, the user can set the heat exchangers to the appropriate temperatures to efficiently evaporate solvent from their crude oil. We paired our FFE with reliable equipment that will keep operations running. End users are required to plumb the process inlet and outlet connections for both heat exchangers. They are supplied with 1.5” sanitary tri-clamp connections. BVV™ can assist with necessary parts needed for a permanent or temporary installation. Temporary installations may be necessary if your lab has limited fume hoods or space which is shared with other processing equipment. Below you will find key features, additional equipment included with the system and the power requirements for each, and real-life efficiencies that were tested. Key Features: · Compact rack design for use in fume hoods (39”x30”x75.5”) · Vernier scale metering valve for controlled injection · Accurate heater and chiller temperature control · Deep vacuum for effective solvent removal · Discharge pumps to eliminate constant reservoir draining and down time · Chemical resistant vacuum pump · Adaptable discharge outlets to customer preference · Insulation to limit thermal loses and reduce condensation (Not Pictured) · Sanitary tri-clamp and compression fittings · Pre-heat injection coil · Injection distribution plate · Tube in shell heat exchanger for efficient evaporation and condensation · Packable vapor path for reduction of contaminants and cleaner separation · Water reservoir for priming the heating system and expansion during operation · The certified model is 22 State certified by PRV Engineers and includes an Infield Verification by PRV Engineers within the purchase price. States include but are not limited to: Alabama, Arizona, Arkansas, California, Colorado, Connecticut, Florida, Illinois, Kansas, Louisiana, Maine, Massachusetts, Missouri, Nevada, North Carolina, Oklahoma, Oregon, Texas, Vermont, Washington, West Virginia, and Wyoming Crude Discharge Pump Easily control discharge speed and collect your extract directly from the 3/8" tube via a collection vessel or swage on a fitting of your preference to pump collected extract to a secondary location. Eliminate constant reservoir draining and operate continuously. Metered Solvent Injection Effectively repeat efficiency and throughput with our vernier scale metering valve. Easy to dial in the desired efficiency and throughput desired by the user. Distribution Plate Directs the injected solvent to be evenly distributed across all tubes in the heat exchanger which maximizes the effective heating surface area. Solvent Discharge and Vacuum Pump The solvent discharge pump eliminates the need for a reservoir and allows you to pump recovered solvent to any desired secondary location. The vacuum pump manifold gives you easy vacuum control during the complete operation. POWER REQUIREMENTS The equipment listed below is included with the system. Check power requirements and amp draw prior to purchasing. Equipment Purpose Power Requirement Amp Draw Notes Hubbell Process Water Heater Heater for Heat Exchanger Column (Evaporation) 240V 3-Phase 87 36kW Heating Capacity Taco ECM High-Efficiency Circulator Water Circulator for Heater 115V 1-Phase 2.5 Max flow rate 52GPM 10 Ton Low Temp Glycol Chiller Chiller for Heat Exchanger Column (Condensation) 230V 3-Phase 64 10 ton Cooling Capacity 2GPM Ethanol Recovery Pump for Vacuum Pump for Ethanol Recovery Discharge 230V 1-Phase 2.4 2GPM Max Flow Rate, Vacuum Check Valve Beaker and Wrench Explosion Proof Oil Pump Pump for Oil Recovery Discharge 230V 1-Phase 1.1 90L/hr. Max Flow Rate, Vacuum Check Valve Welch BTpro100 Diaphragm Pump Vacuum Pump for System 115 1-Phase 3.4 3.5 CFM, 6 Torr Ultimate Vacuum Total Amp Draw 174.4 EFFICIENCY We are proud to present real data with running parameters and efficiencies that reflect the actual operation of our system. Below you will find the tested throughputs and efficiencies that our FFE is capable of handling. Throughput 11 GPH 18 GPH 20 GPH 22 GPH 24 GPH Efficiency 98% 97% 94% 90% 85% ** Efficiency calculated at 10:1 ratio (Ethanol : Crude Oil) with heater temperature of 160°F. Crude is fully dewaxed when going into the falling film evaporator. Solution starts at room temperature. Speeds may differ based on dilution ratio, crude quality, and running parameters. **
$72,000.00 - $75,200.00
Benchtop 1 Micron Refinement Filter
Benchtop 1 Micron Refinement Filter Eliminate suspended particles with ease with our 1-micron Refinement filters. Complete with our 1-micron Dutch Weave sintered disk filter plate, these refinement filters provide complete retention of the filter paper,making it impossible for particulate to bypass the paper. Made from the highest-quality 304 stainless steel parts, these benchtop refinement filters are infinitely more robust than your typical porcelain Buchner funnels. They pair nicely with diaphragm vacuum pumps or our spark-free vacuum pumps paired with a cold trap. Processing Power Funnel Capacity: 5.5 Liters/1.45 Gallons Collection Capacity: 11.35 Liters/3 Gallons Specifications 6"x12" Funnel Body 6" 1um Dutch Weave Sintered Disk 6" Hemispherical Ring stand 1/4" Full Bore Ball valve with 1/4" JIC Drain port 3 Gallon Stainless Steel Collection Base with Glass Lid Back Mount Vacuum Gauge 1/4" JIC Butterfly Vacuum Valve 2.5UM 180MM Ashless Filter Paper Nitrile BUNA-N gaskets
$850.00
4" Wiped Film Evaporator (WFE) Distillation Turn Key System - USA MADE
4" Wiped Film Evaporator This model has been discontinued and updated to the hybrid Stainless steel / glass system shown HERE. For a full list of ancillary equipment included in the kits please see the table below: KIT Part of System Component Electrical Requirements (V / Ph / A) WFE04-TK-01 Standard Model Wiper Assembly BVV™ Stirring motor 120V / 1Φ Vacuum System BVV™ Pro Series 35.3CFM Rotary Vane Vacuum Pump* DigiVac Bullseye Precision Vacuum Gauge 220V / 3Φ AA Batteries (4x) Temperature Controlled Circulators Polyscience 7L Polyscience 15L (2x) 120V / 1Φ / 10A 220V / 1Φ / 10A Injection Beaker and Wrench 7LPH Peristaltic Heated Hose 120V / 1Φ 120V / 1Φ WFE04-TK-02 Upgraded Vacuum System Upgraded Cold Trap Wiper Assembly BVV™ Stirring motor 120V / 1Φ Vacuum System BVV™ Pro Series 35.3CFM Rotary Vane Vacuum Pump* Summit Research Diffusion Pump (SR-DP04A)** DigiVac Bullseye Precision Vacuum Gauge 220V / 3Φ 180/264V / 1Φ / 10.5A AA Batteries (4x) Temperature Controlled Circulators Polyscience 7L Polyscience 15L (2x) 120V / 1Φ / 10A 220V / 1Φ / 10A Injection Beaker and Wrench 7LPH Peristaltic Heated Hose 120V / 1Φ 120V / 1Φ Cold Trap Polyscience IP100 120V / 1Φ / 11.5A WFE04-TK-03 Upgraded Vacuum System Upgraded Cold Trap Outlet Pumps Wiper Assembly BVV™ Stirring motor 120V / 1Φ Vacuum System BVV™ Pro Series 35.3CFM Rotary Vane Vacuum Pump* Summit Research Diffusion Pump (SR-DP04A)** DigiVac Bullseye Precision Vacuum Gauge 220V / 3Φ 180/264V / 1Φ / 10.5A AA Batteries (4x) Temperature Controlled Circulators Polyscience 7L Polyscience 15L (2x) 120V / 1Φ / 10A 220V / 1Φ / 10A Injection Beaker and Wrench 7LPH Peristaltic Heated Hose 120V / 1Φ 120V / 1Φ Cold Trap Polyscience IP100 120V / 1Φ / 11.5A Outlet Pumps Beaker and Wrench Gear Pump (2x) Beaker and Wrench Heat Pad PID Controller 120V / 1Φ 120V / 1Φ Notes: *The Rotary vane vacuum pump paired with this kit uses 3Φ power, a smaller single phase pump can be substituted if needed. Substitution will have an impact the performance versus the standard unit. **The Summit Research diffusion pump must be water cooled, if facility water cooling is not an option an additional chiller may be needed, a Polyscience 1HP Durachill is recommended. An air cooled diffusion pump can be provided as a substitute. Substitution will have an impact the performance versus the standard unit.
$50,000.00 - $79,000.00
Certified 160L Jacketed Stainless Steel Centrifuge with Explosion Proof Motor and Siemens Controller - 55LB Max Capacity
Certified 160L Ethanol Wash/Dry Centrifuge with Explosion Proof Motor and Controller Notice to Customer: This unit has 4 lift points (one in each corner) and requires a forklift to lift it. It will also ship via freight only. Industrial Centrifuges are used to separating liquids from solids and this style of centrifuge excels at alcohol extraction by forcefully separating the alcohol from the biomass. Key Features: Siemens Touch Screen Controller Explosion Proof Controller Housing and Motor Agitation and Spin Dry Modes Max 1200 RPM with Gradual Speed Stepping 643 Separation Factor Multiple Connection Ports/Sizes High Polish Stainless Steel Components Shock absorbing legs Vacuum Jacket with Two 1" Tri-Clamp Fittings Pre-wired and Tested for Easy Installation *BVV Centrifuges are now available certified by PRV Engineers. Field visits/verification letters are an additional $4,000 + travel expenses.* Specifications Capacity 160L Drum Dimensions 31.5" (800mm) Diameter x 12.6" (320mm) Depth Speed 0-1200r/min Weight 3307lbs (1500KG) Exterior Dimensions 51.2" x 72.8" x 43.3" (1300 x 1850 x 1100mm) Material 304 Stainless Steel Motor Power 7.5KW Explosion Proof - 220v 60Hz 3 Phase
$33,500.00 - $37,500.00
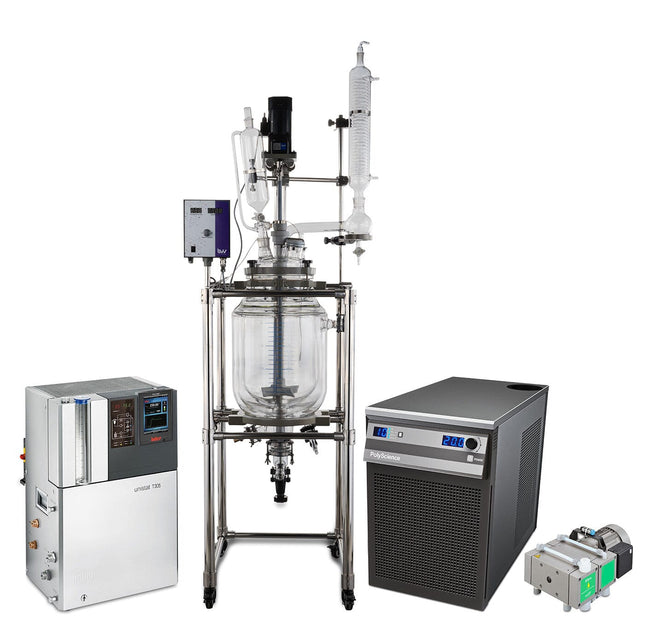
50L Turnkey Reactor Kit
50L Turnkey Reactor Kit The BVV 50L Double Jacketed Glass Reactor Kit is the ideal solution for small to medium-sized solvent recovery and decarboxylation applications. This kit includes everything to get you up and running including a Single 50L triple-layer Glass Reactor with Condenser, either a BVV 19L Heated circulator capable of heating to 220C or a UL-listed Huber T305 Capable of heating up to 300C, a 1HP Polyscience 6160T for chilling the condenser, a Welch BTpro100 for vacuum, 25ft of 3/8" Gum rubber tubing for vacuum connections, 20ft of reinforced PVC hose for the chiller, 1/2" Stainless Steel JIC Hoses for the heater, 5 Gallons of Therminol Heat transfer fluid and 5 Gallons of Propylene glycol. 50L Double Jacketed Glass Reactor Specifications Glass Material: GG-17 High Borosilicate Glass Internal Volume: 50L 10.5L Jacket Capacity Shelf Material: Aluminum Alloy Homogenizer Power: 110V/60Hz Homogenizer Speed: 0-400 RPM Digital Homogenizer Control Digital temperature probe readout included Double Jacket 3/4" Jacket Connections 1/4" and 3/8" Vacuum Connections Length: 24 in. Width: 30 in. Height: 90 in. Polyscience 6100 1 HP Chiller Specifications 6100 Series 1 HP Chiller with Turbine Pump, 100psi; 13.2l/min Display: LED Working Temperature Range C: -10 to 40 Temperature Stability: +/-0.1 Temperature Calibration Capability: 1-point Pump Type: Turbine Working Temperature Range F: 14 to 104 Working Temperature Range C: -10 to 40 Reservoir Capacity (gallons): 1.11 Reservoir Capacity (liters): 4.2 Reservoir Cover: Screw-on cap Cleanable Air Filter: Yes Cleanable Fluid Filter: Yes Temperature Stability F: +/-0.2 Temperature Stability C: +/-0.1 Display: LED Display Resolution (Read): 0.1 Pump Type: Turbine Process Connections: 1/2" FNPT Over-Temperature Protection / Failsafe Heater Control: Yes Reservoir Liquid Level Indicator: Yes Reservoir Drain: Yes Cool Command Refrigeration Technology: Yes WhisperCool Environmental Control Technology: Yes Maximum Ambient Temperature F: 95 Maximum Ambient Temperature C: 35 Overall Dimensions (LxWxH inches): 27.6 x 14.5 x 22.6 Overall Dimensions (LxWxH cm): 70 x 36.8 x 57.5 Compressor Size (HP): 1 Refrigerant: R134a Shipping Weight (pounds): 199 Shipping Weight (kilograms): 90 Welch BTpro100 Specifications Model BTpro100 Free Air Displacement@60Hz,lpm(CFM) 100(3.5) Ultimate Vacuum Pressure, Torr 6 Maximum Vacuum, in. Hg 29.7 Horsepower, HP (watts) 0.5(390) Built-in adjustable vacuum - Gas Ballast Yes Head Material PTFE Diaphragm PTFE Inlet/outlet Connection NW16 flange1 Agency (National Recognized Lab) cUL Weight, lbs (kg) 40.3(18.3) Overall DimensionsLxWxH in.(cm) 9x15x7(23x38x18) Shipping Weight, lbs(kg) 48.5 (22) Shipping Carton DimensionsLxWxH in.(cm) 18.9x12.6x11.8(48x32x30) HUBER T305 Specifications General Information & Temperature Controller Temperature range 65...300 °C Temperature stability ±0,02 °C Temperature control TAC, self-optimizing (True Adaptive Control) Controller Pilot ONE (E-grade "Basic") Safety class III / FL Protection class IP20 Dimensions (W x D x H) 425 x 250 x 631 mm | 16.73 x 9.84 x 24.84 inches Weight 37 kg | 81.59 pounds Heating / Cooling Capacity Heating capacity 4,8 kW Circulation Pump Pressure pump max. 45 lpm ; 0.9 bar | 11.89 gpm ; 13.05 psi Pump connection M24x1,5 AG male Permissible viscosity 50 mm²/s Connections Pt100 connection Pt100 Analogue input via optional Com.G@te Analogue output via optional Com.G@te Digital interface RS232, Ethernet, USB Device, USB Host Operating Data Old sku 1003.0022.01 Permissible ambient temp. 5 to 40 °C Filling volume min. 1.45 Liters | 0.38 gal Volume of expansion 2.8 Liters | 0.74 gal Power supply 208V 3~ 60Hz Current max. 15 A Fusing 15,5 A
$23,500.00 - $42,000.00
20L Neocision ETL Lab Certified Rotary Evaporator Turnkey System
20L Neocision ETL Lab Certified Rotary Evaporator Turnkey System 20L NEO Rotary Evaporator Turnkey System setup includes all the necessary components to successfully perform solvent recovery via rotary evaporation. A cold trap should always be used inline between your vacuum system and application to protect the pump from volatile vapors. To keep your bath heating properly, this unit should only be used with RO or DI water. 10-50L NEO and ECO Rotary Evaporator Diagram 20L NEO Rotary Evaporator Turnkey System setup includes: 20L Neocision ETL Lab Certified Rotary Evaporator Polyscience 6160T 1HP Chiller 3/8" Gum Rubber - 25ft 3/8" Tubing - 25ft Welch BTpro100 Diaphragm Pump Adjustable Stainless Steel Hose Clamps Rotovap Quick Start Guide This guide gives basic quick start instructions for rotovaps. It is intended to provide a starting point for learning the process. Parameters should be adjusted to suit specific needs. Clean and assemble unit. Make sure all pieces are cleaned and sterilized using an alcohol solution. Connect chiller to condenser and set to 0C (32F). Always fill a rotovap condenser from the top down (chiller output to top of condenser, chiller input to bottom of condenser). Connect vacuum pump to cold trap and connect cold trap to vacuum port on rotovap. Turn on heat bath and set to 40C (113F). Once heat bath, chiller and cold trap have reached desired temperatures, turn on rotovap motor and set speed to approximately 100 RPM (does not have to be precise). Keep in mind, higher RPM’s will increase evaporation power but also increase heat load. Start vacuum pump and allow vacuum to pull down for a few minutes before injection. Once vacuum has been pulled to a sufficient level (does not have to be precise but should be below 100 Torr), using the injection valve, very slowly inject approximately 500 mL of solution into evaporating flask and then close the valve. Allow this small amount to begin evaporating. You may see the chiller begin to rise in temperature, this is called “priming” the rotovap. Once the temperature stops rising or all liquid is almost completely evaporated, open the injection valve again very slowly so that a small amount of liquid begins to enter the evaporating flask. Do not close injection valve this time but continue to allow solution to enter the evaporating flask. At this point you must try to match the input speed to the output speed. What this means is that you should be injecting the same amount of liquid into the rotovap that is equal to the amount of liquid dripping from the condenser into the receiving flask. You will know that the input speed and output speed are matched because the chiller will remain at a stable temperature. If the chiller begins to rise, then you are injecting too much liquid. Dial back the valve until the chiller stabilizes. Once everything is stabilized, you may walk away from the rotovap if necessary. Check every so often to make sure temperatures remain stable and evaporation continues efficiently. ***Note: All units are inspected for broken glass or parts before unit is shipped. If unit arrives damaged or glass is broken (this does not include minor imperfections or scuffs in glassware), Customer MUST contact BVV™ within 3 days of delivery to file a claim and receive a replacement part. If customer DOES NOT contact BVV™ within 3 days of delivery responsibility for replacement parts falls on the customer and they must pay for replacement pieces.*** ***Note: This item will ship by freight only.*** ***Glassware Safety Disclaimer: BVV™ is not responsible for failure of glassware which must be inspected before and after every use because it may eventually develop imperfections or damage through normal usage, mishandling, and stress caused by temperature variations. If an imperfection or damage is noted while inspecting the glassware DO NOT use the glassware because it can fail causing bodily harm or damage to the surrounding area.***
$19,450.00 - $22,500.00
2L BVV™ Rotary Evaporator Turnkey Setup
2L BVV™ Rotary Evaporator Turnkey Setup 2L Electric Lift Rotary Evaporator turnkey setup includes all the necessary components to successfully perform solvent recovery via rotary evaporation. A cold trap should always be used inline between your vacuum system and application to protect the pump from volatile vapors. 2L Rotary Evaporator Turnkey Setup includes: 2L Electric Lift Rotary Evaporator 90-day limited warranty (excludes glassware, consumables & moving parts) BVV NEO 1.4 CFM Diaphragm Pump ETL Rated OR. 3.5CFM Dry Floating Scroll Vacuum Pump Polyscience LS -20C to 40C 1/2HP Chiller w/ Turbine Pump OR BVV NEOCISION 20L Chiller (-40C) - ETL Rated 10ft of Vacuum Tubing 20ft of Chiller Tubing 10 Pack of Adjustable stainless steel hose clamps 3/8" Vacuum Manifold Optional add-on : BVV™ CT40 -40°F 300ml x 3 Cold Trap, BVV™ CT80 -112°F 300ml x 3 Cold Trap Optional add-on: J-KEM DVR-200 Digital Vacuum Regulator Optional add-on: Heat Transfer Fluid -- NuTherm PF-50 or Dynalene HC-50 Rotovap Quick Start Guide This guide gives basic quick start instructions for rotovaps. It is intended to provide a starting point for learning the process. Parameters should be adjusted to suit specific needs. Clean and assemble unit. Make sure all pieces are cleaned and sterilized using an alcohol solution. Connect chiller to the condenser and set to 0C (32F). Always fill a rotovap condenser from the top down (chiller output to top of the condenser, chiller input to bottom of the condenser). Connect vacuum pump to cold trap and connect cold trap to the vacuum port on rotovap. Turn on heat bath and set to 40C (113F). Once heat bath, chiller, and cold trap have reached desired temperatures, turn on the rotovap motor and set the speed to approximately 100 RPM (does not have to be precise). Keep in mind, higher RPM’s will increase evaporation power but also increase heat load. Start vacuum pump and allow vacuum to pull down for a few minutes before injection. Once the vacuum has been pulled to a sufficient level (does not have to be precise but should be below 100 Torr), using the injection valve, very slowly inject approximately 500 mL of solution into evaporating flask and then close the valve. Allow this small amount to begin evaporating. You may see the chiller begin to rise in temperature, this is called “priming” the rotovap. Once the temperature stops rising or all liquid is almost completely evaporated, open the injection valve again very slowly so that a small amount of liquid begins to enter the evaporating flask. Do not close injection valve this time but continue to allow the solution to enter the evaporating flask. At this point, you must try to match the input speed to the output speed. What this means is that you should be injecting the same amount of liquid into the rotovap that is equal to the amount of liquid dripping from the condenser into the receiving flask. You will know that the input speed and output speed are matched because the chiller will remain at a stable temperature. If the chiller begins to rise, then you are injecting too much liquid. Dial back the valve until the chiller stabilizes. Once everything is stabilized, you may walk away from the rotovap if necessary. Check every so often to make sure temperatures remain stable and evaporation continues efficiently. ***Glassware Safety Disclaimer: BVV™ is not responsible for failure of glassware which must be inspected before and after every use because it may eventually develop imperfections or damage through normal usage, mishandling, and stress caused by temperature variations. If an imperfection or damage is noted while inspecting the glassware DO NOT use the glassware because it can fail causing bodily harm or damage to the surrounding area.***
$7,000.00 - $13,500.00
Large 1-Micron Refinement Filter
Large 1-Micron Refinement Filter Filter large volumes of solutions with ease with our Large 1-micron Refinement filter. complete with our 1-micron Dutch Weave sintered disk these refinement filters provide complete retention of the filter paper making it impossible for suspended particles to bypass the filter paper. Made from the highest quality 304 stainless steel parts this large refinement filter is built to last making it a great alternative to polypropylene filter trolleys. Our Large 1-Micron Refinement filter is available as a complete kit with and without the a Welch BTpro100 Diaphragm Pump. Processing Power Funnel Capacity: 22.24 Liters/5.88 Gallons Collection Capacity: 50 Liters/13.2 Gallons Specifications 12"x12" Funnel Body 12" 1um Dutch Weave Sintered Disk 12" Hemispherical Ring stand 1/2" JIC Drain Valve 50L Stainless Steel Carboy Collection base -30Hg Vacuum Gauge 1/2" JIC Vacuum Port 3/8" JIC Diptube Valve 1/4" JIC Butterfly Accessory Valve 350MM Ashless Filter Paper Silicone Gaskets
$2,300.00 - $5,600.00
5L Neocision Short Path Distillation Kit
5L Neocision Short Path Distillation Kit This unit carries a 2 day lead time. The 5L Neocision Short Path Distillation Kit features our 5L Distillation Kit with P5 Distillation Head and USA made glass. Every component in this turnkey is made for precision, throughput, and repeatable results. You will also receive a Dewar Style Glass Cold Trap to keep all volatiles and solvents out of your vacuum system. The Premium Turnkey Kit Includes: 5L Neocision Kit with P5 Distillation Head KF-25 x 1/4" Barb Adapter Dewar Style Glass Cold Trap Distillation Quick Start Guide This guide gives basic quick start instructions for distillation systems. It is intended to provide a starting point for learning the process. Parameters should be adjusted to suit specific needs, Before beginning distillation, ensure the following steps have been taken: Vacuum Pump is in good working order. Pump should be run against dry load to allow internals to warm up. Oil should be clear. Cloudy or dark oil should be changed. All glass components are in good working order and ready to be assembled A winterization and degassing procedure has been done to prepare oil for distillation Once all three of these steps have been completed, you are ready to begin distilling. Begin by placing stir bar in boiling flask and then load your material. This should be done using a funnel. A small amount of alcohol in the oil will give it a thinner consistency making it easier to transfer. Assemble all glassware and ensure each joint is properly greased. Do not use too much, as the vacuum pressure might pull some grease into the system. To ensure a full seal, spread grease in a circular motion by rotating glassware Attach circulator to condenser and set temperature to 50C. Allow circulator to reach temperature before beginning distillation. Connect vacuum pump to manifold. The manifold will allow you to isolate each individual component as well as let atmosphere into and out of the system. Connect receiving cow to cold trap. Connect cold trap to manifold. Connect vacuum gauge to manifold. At this point, ensure all connections are correct. Also ensure receiving cow is positioned to collect the first fraction in the far-left receiving flask. Circulator should be at its set temperature. Turn on vacuum pump to begin process. Turn on heat and set to 60C. Vacuum pump will begin to pull down and temperature will begin to rise. Watch the gauge to monitor vacuum pressure and stability. Start stir slower and increase speed with temperature. Once you are close to 60C, increase the temperature 20 degrees. Continue to raise the heat incrementally in 20-degree steps, increasing the set temperature as you near your set point. Increase temperatures incrementally until you reach 220C. You will see your first fraction somewhere between 180C and 190C or slightly before. This is the “heads” fraction. You will move to your second fraction when you see an increased reaction in the head, a slight color change toward golden, as well as a thickening of distillate. When this fraction hits, allow the distillate to “self-clean” the head for a minute or two then, rotate the cow to the middle receiving flask. Collect your “main body” fraction. You will see temps between 190-220C during this fraction. Continue to increase stirring speed as necessary. Reaction in the head may vary but it should never stop. As fluid level in the boiling flask decreases, increase stir speed. The final “tails” fraction is a mixture of the first and second fractions and should be saved for re-distillation later. Ideally, you want to turn the cow to the final flask before the tails fraction hits. The “tails” fraction has an obvious color change and will be darker than the “main body” fraction. You will see temps between 200-250C during this fraction. As fluid level in the boiling flask decreases even more, set stirring RPM higher (1000+ RPM). You may need to compensate with a bit more heat to finish of the final fraction as well. Once process is complete, stop heat, stop stir, and stop vacuum. Let atmosphere into the system. Be sure to properly store your distillate as exposure to air and light can cause oxidation. ***Note: This entire setup will ship via motor freight.*** *Notice to Customers: All units are inspected for broken glassware or parts before leaving BVV™. If the unit arrives damaged (this does not include minor imperfections or scuffs in glassware), the customer MUST contact BVV™ within 72 hours from carrier delivery to file a claim. If the customer DOES NOT contact BVV™ within 72 hours from carrier delivery, then BVV™ cannot issue any replacement(s) or compensation for the item; a new purchase will need to be made for a replacement. BVV™ is not responsible for the failure of glassware which must be inspected before and after every use because it may eventually develop imperfections or damage through normal usage, mishandling, and stress caused by temperature variations. If an imperfection or damage is noted while inspecting the glassware DO NOT use the glassware because it can fail, which can cause bodily harm or damage to the surrounding area.
$6,950.00
BVV 2540 Nanofiltration Skid
BVV 2540 Nanofiltration Skid Note: This product carries 8 - 12 week lead time Perform organic solvent recovery or botanical extract decolorization with ease with our 2540 nanofiltration skid. BVV's 2540 Nanofiltration Skid is designed to meet Class 1 Division 1 standards. With the ability to recover 30 gallons of ethanol per hour without the application of heat preserving target compounds and utilizing a fraction of the energy consumption of a traditional falling film. Processing Power Capacity: 15 GPH or 30 GPH of solvent recovery. Solvents: Ethanol, Methanol Specifications 4X 2540 nanofiltration housings Stainless steel 6GPM pump with PTFE seals 7.5HP C1D1 1750 RPM Motor 7.5HP VFD 1/60/230 NEMA 4X enclosure (13A) Insulated 2"x18" Heat Exchanger Polyscience 1.5HP Chiller 230/60/1/23.1 700PSI Pressure Relief Valve C1D1 Flowmeter 2X 0-1000 PSI Pressure Gauges 1.5" Intake & Retentate Lines 1/2" Permeate & Pressure Relief Lines Footprint (DxWxH) 30"x39"x79" Weight: 400 lb Maximum Pressure Rating: 700PSI Performance Variable Frequency Drive-based flow control Complete pressure control with manual pressure controls Retentate cooling with inline Heat exchanger & chiller 700PSI pressure relief valve with diversion line *Components shown are subject to change**This unit is meant for bulk solvent recovery, 90% of the total volume of solvent an additional solvent recovery apparatus is recommended to evaporate to dryness*
$41,000.00 - $45,000.00
2L Full Bore Short Path Distillation Turnkey Kit with P2 Distillation Head
2L Full Bore Short Path Distillation Turnkey Kit with P2 Distillation Head This unit carries a 2-day lead time The 2L Full Bore Short Path Distillation Turnkey Kit with P2 Distillation Head is a great setup for smaller scale processors that want a budget friendly system without sacrificing quality on the main components that make a short path great. We understand that as an operator our customers want to be able to start their system and operate in ideal conditions run after run. That is why we paired a full-bore setup with a 14.1CFM pump that will assure the lowest vacuum depth will be pulled every time. Main components such as the distillation head, vacuum valve adapter, and cold trap are all American blown glass. These components allow us to present this system that will repeat in performance time after time. For a in depth analysis of this system please view the following videos. Here you will see the system setup, component explanation, and even see it perform in a first and second distillation pass. These runs were all performed in our lab and the data was used to help fine tune the system. The unit's max internal temperature cannot exceed 380C. The recommended max set temperature should not exceed 250C Video 1 - Setup and Component Explanation Video 2 - Setup Addendum Video 3 - Fist pass Distillation Video 4 - Second Pass Distillation The 2L Full Bore Short Path Distillation Turnkey Kit with P2 Distillation Head Includes: 1 First Pass Distillation Operating Procedure 1 P2 Distillation Kit 1 2L Double Neck Boiling Flask 1 Full Bore Vacuum Valve Adapter 1 BVV MP7H Heater 1 2L Heating Mantle 1 Ribbed Glass Cold Trap 1 Bullseye Precision Vacuum Gauge 1 BVV Pro Series 14.1CFM Rotary Vane Pump (Comes filled with oil. Recommend purchasing additional Ultra 19 Vacuum Pump Oil. SKU: INLAND19-ULTRS-1G) 1 Oil Mist Filter Trap for Rotary Vane Pump 1 24/40 250ml Single Neck Round Bottom Flask 3 24/40 500ml Single Neck Round Bottom Flask 1 24/40 Glass Funnel 1 Vacuum Manifold for Rotary Vane Pump 1 1 Meter Bellow Hose 1 PTFE Magnetic Stirring Bar Retriever 1 24/40 Metal Keck Clip 6 24/40 Plastic Keck Clips 3 250-500ml Cork Stands 2 Chain Clamps 1 Boss Head with 3 Finger Clamp 1 BVV Lab Stand 10 Fiber Glass Insulation Rope 1 Dow Corning High Vacuum Grease 1 10/30 Non-Mercury Glass Thermometers 1 24/40 – 10/30 Glass Adapter Bushing 1 24/40 – 1/8” Thermometer Adapter 1 24/40 Straight Adapter 2 6”x6” Scissor Jack 3 36” Threaded Lab Stand Rod 2 Gl14 – 8mm Barb 6 ¼” Silicone Tubing 2 PTFE Magnetic Stirring Bar 4 Hose Clamp with Butterfly Key ***Note: This entire setup will ship via motor freight.*** ***Note: All units are inspected for broken glass or parts before unit is shipped. If unit arrives damaged or glass is broken (this does not include minor imperfections or scuffs in glassware), Customer MUST contact BVV™ within 3 days of delivery to file a claim and receive a replacement part. If customer DOES NOT contact BVV™ within 3 days of delivery responsibility for replacement parts falls on the customer and they must pay for replacement pieces.*** ***Glassware Safety Disclaimer: BVV™ is not responsible for failure of glassware which must be inspected before and after every use because it may eventually develop imperfections or damage through normal usage, mishandling, and stress caused by temperature variations. If an imperfection or damage is noted while inspecting the glassware DO NOT use the glassware because it can fail causing bodily harm or damage to the surrounding area.***
$7,500.00
4" Hybrid Wiped Film Evaporator (WFE) Distillation Turn Key System - USA MADE
4" Hybrid Wiped Film Evaporator The BVV™ 4" Wiped Film Evaporator (WFE) is a full turnkey distillation kit that will allow anyone to run a molecular distillation. With the magnetically driven wiper and high vacuum seals this system is able to achieve vacuum levels below 10 mtorr. The system has multiple temperature control apparatuses that allow the user to dial in specific settings that works best for their application. The maximum operating temperature of the outer jacket is 200°C with the standard circulators shown below. The maximum feed rate is up to 7LPH. On average, you can expect to flow 500-1000ml per hour. All heated circulators can be tailored to your specific needs, just ask our team of experienced account representatives! The temperature controlled circulators will need thermal fluid that corresponds with the temperatures needed. Click here to browse fluids. *Heating and Chilling Fluids are not included* Duratherm S - 7 Gallons - Bottom heater (wiper body) Therminol XP Heat Transfer Fluid - 5 Gallons - Top and middle heater *Propylene Glycol - 5 Gallons - Fluid for the diffusion pump option chiller. Ethanol 99% or Isopropyl 99% - 2 Gallons - Cold Trap / Cold Finger. This listing picture reflects the upgraded vacuum/ outlet systems. For a full list of ancillary equipment included in each kit please see the table below: KIT Part of System Component Electrical Requirements (V / Ph / A) WFE04HYB-TK-01 -Standard Model Wiper Assembly BVV™ Stirring motor 120V / 1Φ Vacuum System BVV™ Pro Series 35.3CFM Rotary Vane Vacuum PumpDigiVac Bullseye Precision Vacuum Gauge 220V / 1ΦAA Batteries (4x) Temperature Controlled Circulators BVV 5 LiterBVV 19 Liter (2x) 120V / 1Φ / 8.3A 220V / 1Φ / 18.1A Injection Beaker and Wrench 7LPH PeristalticHeated Hose 120V / 1Φ120V / 1Φ WFE04HYB-TK-02 -Upgraded Vacuum System -Upgraded Cold Trap Wiper Assembly BVV™ Stirring motor 120V / 1Φ Vacuum System BVV™ Pro Series 35.3CFM Rotary Vane Vacuum PumpULVAC Diffusion Pump (ULK-04A)*DigiVac Bullseye Precision Vacuum Gauge 220V / 1Φ 180-264V / 1Φ / 10.5 AAA Batteries (4x) Temperature Controlled Circulators BVV 5 Liter BVV 19 Liter (2x) 120V / 1Φ / 8.3A 220V / 1Φ / 18.1A Injection Beaker and Wrench 7LPH PeristalticHeated Hose 120V / 1Φ 120V / 1Φ Cold Trap Polyscience IP100 120V / 1Φ / 11.5A WFE04HYB-TK-03 -Upgraded Vacuum System -Upgraded Cold Trap -Outlet Pumps Wiper Assembly BVV™ Stirring motor 120V / 1Φ Temperature Controlled Circulators BVV 5 Liter BVV 19 Liter (2x) 120V / 1Φ / 8.3A 220V / 1Φ / 18.1A Injection Beaker and Wrench 7LPH PeristalticHeated Hose 120V / 1Φ 120V / 1Φ Cold Trap Polyscience IP100 120V / 1Φ / 11.5A Outlet Pumps Beaker and Wrench Gear Pump (2x)Beaker and Wrench Heat Pad PID Controller 120V / 1Φ 120V / 1Φ Notes: *The ULVAC diffusion pump must be water cooled, if facility water cooling is not an option an additional chiller may be needed, a Polyscience 1HP Durachill is recommended as a recirculating option. Filtered well water is typically sufficient as a cooling method if available.
$42,500.00 - $71,000.00
12" Wiped-Film
Beaker & Wrench 12" Wiped-Film Beaker & Wrench continues to be an industry leader, bringing together scientific expertise and real-world industry experience. Take the guess-work out of large scale distillation with their Wiped-Film Evaporation Turn-Key System. It arrives fully functional, meaning you can take advantage of the latest technology immediately and without additional installation or training costs. Other control processes can be subjective and vulnerable to user error, but their automated Wiped-Film Evaporation Turn-Key System will help maximize your product outcomes with greater productivity and maximum purity. 12” Wiped Film Measurements:76”[1.9m] x 30”[0.762m] x 85”[2.16m] Integrated 23″ Touch-Screen Control 200LFeed Tank ACS 100 60 CFMDry Screw Vacuum Pump Dual Stage Cold Trap-50/-100C Inlet and Outlet Gear Pumps(continuous flow) Single-Plug 240V Three-Phase to power the entire machine Six Zone Evaporator Body(1.1m² evaporative area) Consistency is Key Get greater consistency, purity, and confidence in every cannabis oil distillation when you use our system to monitor and optimize flow rate, temperature, pressure, and wiper speed (RPM) in real time. Then… NRTL Certified Each system is 6“ or 12” and constructed with fully compliant USA NRTL-certified components, including a display unit and two sensors to track the contents of both streams of fluid as it continuously travels through the glassware. Get started rapidly with… Set it and Forget it Fully continuous flow leaves behind less advanced methods with a dependable output of 15-30 liters per hour; maximizing efficiency and minimizing complications. Be assured of the quality of your system because we’re… Easy Installation Your system arrives ready to use immediately with all components primed for use. Just roll it off the lift gate and let it get to work. Meet demand and feel confident in the quality of your output with this turn-key system. Don’t make it complicated. Get it right. Lead time: 8-12 weeks from date of payment of 50% deposit, 50% due prior to shipping Specifications Skid Frame: + Dimensions (LxWxH): 76”[1.9m] x 30”[0.762m] x 85”[2.16m] + Weight:1,000 lbs [450Kg] + Material: Extruded Aluminum + 6” castors w/ brakes Shipping Information: + Dimensions (LxWxH): 82.5”[2.01m] x 36.5”[0.93m] x 87.5”[2.22m] + Total Weight: 1200 lbs [545Kg] Electrical Power Distribution Box: + Plug: SCAME SCM563P6W + Input Voltage: 240VAC 3 Phase with Neutral 60 Hz + External Circuit breaker: 60 amp + Nominal current: 24 amps Control Interface + Custom 27” high definition touch screen interface + automated controls + recipe folder +automated sensors and safeties +Error reporting +Software controlled Emergency shutdown Feed Tank: + Volume: 200 Liter + Material: 316 Stainless Steel + double jacketed + Max Temp: [95°C] + Heater: water jacket with 2500kW heater Feed Hose: + Length: 7’-0” [2.13m] + Voltage: 120VAC + Amps: 4.5 Amps + Max Temp: 450°F[220°C] + K-type sensor Rotor: + Wipers: PTFE (Polytetrafluoroethylene) + Mesh Baffles: 316 Stainless Steel + Motor Voltage: 240VAC + Motor Amps: 4(Max) + Motor Watts: 1kw (Continuous) + Speed: 0-400RPM + Dust and Splash Resistant Still Body / Wiped Film Evaporator: + Evaporation Surface Area: 1.1m² + Materials: 316 Stainless Steel + Heat Source: multi-zone Heat Band with independent thermocouples and control + Maximum Power: 12kWatts + Feed Inlet: KF25 + Top and Bottom Connections: 12” sanitary flange + Insulation jacket included Internal condenser: + multi-finger hairpin condenser + Materials: 316 Stainless Steel + Vacuum port: NW80 + Distillate port: KF25 + Residue port: 1.50” Tri-clamp + 2,500w heater + Cooling capacity 8,000w @80c Residue heater: 120VAC, 0.78 amp, 150°C Max Temp, K-type sensor 90W, UR Recognized Heat Pad Residue Outlet Conical shaped Mesh cleanable filter Dual heat pads Clog SensorLiquid level sensor Led lights Condenser Circulator: + Model: BWC-A120 + Bath Volume: ~12L + Bath Fluid: Beaker Kool + multi-fan & Radiator cooling system + Temperature range: 25 to 90°C + Temperature stability: ±1 °C + Heating capacity: 2.5 kW +Cooling capacity: 8kw @80c Gear Pumps: + Voltage: 48VDC + Amperage: 5A + Max Rate: 50.0 L/Hr + Heater: 120v, 0.5amp, 120°C Max Temp, K-type sensor + 45w, UL Recognized Heat Pad + Check Valve Included Dual Stage Cold Trap: + 2 stage cold trap optimized for maximum vacuum protection + Model: Huber TC100 & -100C + CC 508 -50C (1.5kw cooling @ 0c) + Temperature Range: -100 to 100°C Vacuum Gauge: + Model: KJ Lesker
$475,000.00
20L Turnkey Reactor Kit
20L Turnkey Reactor Kit The BVV 20L Double Jacketed Glass Reactor Kit is the ideal solution for small to medium-sized solvent recovery and decarboxylation applications. This kit includes everything to get you up and running including a Single 20L triple-layer Glass Reactor with Condenser, either a BVV 19L Heated circulator capable of heating to 220C or a UL-listed Huber CC-315B capable of heating up to 300C, a 1HP Polyscience 6160T for chilling the condenser, a Welch BTpro100 for vacuum, 25ft of 3/8" Gum rubber tubing for vacuum connections, 20ft of reinforced PVC hose for the chiller, 1/2" Stainless Steel JIC Hoses for the heater, 5 Gallons of Therminol Heat transfer fluid and 5 Gallons of Propylene glycol. 20L Double Jacketed Glass Reactor Specifications Glass Material: GG-17 High Borosilicate Glass Internal Volume: 20L 6.75L Jacket Capacity Shelf Material: Aluminum Alloy Homogenizer Power: 110V/60Hz Homogenizer Speed: 0-400 RPM Digital Homogenizer Control Digital temperature probe readout included Double Jacket 3/4" Jacket Connections 1/4" and 3/8" Vacuum Connections Length: 20 in. Width: 30 in. Height: 76 in. Polyscience 6100 1 HP Chiller Specifications 6100 Series 1 HP Chiller with Turbine Pump, 100psi; 13.2l/min Display: LED Working Temperature Range C: -10 to 40 Temperature Stability: +/-0.1 Temperature Calibration Capability: 1-point Pump Type: Turbine Working Temperature Range F: 14 to 104 Working Temperature Range C: -10 to 40 Reservoir Capacity (gallons): 1.11 Reservoir Capacity (liters): 4.2 Reservoir Cover: Screw-on cap Cleanable Air Filter: Yes Cleanable Fluid Filter: Yes Temperature Stability F: +/-0.2 Temperature Stability C: +/-0.1 Display: LED Display Resolution (Read): 0.1 Pump Type: Turbine Process Connections: 1/2" FNPT Over-Temperature Protection / Failsafe Heater Control: Yes Reservoir Liquid Level Indicator: Yes Reservoir Drain: Yes Cool Command Refrigeration Technology: Yes WhisperCool Environmental Control Technology: Yes Maximum Ambient Temperature F: 95 Maximum Ambient Temperature C: 35 Overall Dimensions (LxWxH inches): 27.6 x 14.5 x 22.6 Overall Dimensions (LxWxH cm): 70 x 36.8 x 57.5 Compressor Size (HP): 1 Refrigerant: R134a Shipping Weight (pounds): 199 Shipping Weight (kilograms): 90 Welch BTpro100 Specifications Model BTpro100 Free Air Displacement@60Hz,lpm(CFM) 100(3.5) Ultimate Vacuum Pressure, Torr 6 Maximum Vacuum, in. Hg 29.7 Horsepower, HP (watts) 0.5(390) Built-in adjustable vacuum - Gas Ballast Yes Head Material PTFE Diaphragm PTFE Inlet/outlet Connection NW16 flange1 Agency (National Recognized Lab) cUL Weight, lbs (kg) 40.3(18.3) Overall DimensionsLxWxH in.(cm) 9x15x7(23x38x18) Shipping Weight, lbs(kg) 48.5 (22) Shipping Carton DimensionsLxWxH in.(cm) 18.9x12.6x11.8(48x32x30) HUBER CC-315B Specifications Common Specifications Temperature range (-20) 28...300 °C Temperature stability ±0.02 °C Temperature control TAC, self-optimizing (True Adaptive Control) Controller Pilot ONE (E-grade "basic") Safety class III / FL Protection class IP20 Dimensions (W x D x H) 13.19 x 15.04 x 17.05 inches Weight 48.51 pounds Heating / cooling capacity Heating capacity 3 - 3,5 kW Circulation pump Pressure pump max. 25 lpm : 0,7 bar | 6.6 gpm ; 10.15 psi Suction pump max. 18.5 lpm : 0,4 bar | bar 4.89 gpm ; 5.8 psi Pump connection M16x1 AG male Permissible viscosity 50 mm²/s Connections Pt100 connection Pt100 Digital interface RS232, Ethernet, USB Device, USB Host Operating data Old sku 2007.0003.01 Permissible ambient temp. 5...40 °C Bath opening W x D / BD 10.63 x 5.71 / 7.87 inches Bath volume 15 Liters | 3.96 gal Filling volume min. 11.5 Liters | 3.04 gal Power supply 208V 2~ 60Hz Current max. 16 A Fusing 20 A
$23,000.00 - $31,000.00
BVV 6" Falling Film Evaporator
BVV 6" Falling Film Evaporator Cutsheet Is your lab floor filled with a fleet of rotary evaporators? Looking to increase solvent recovery throughput? Our new and compact 20GPH Falling Film Evaporator (FFE) has the capability to maximize throughput and replace up to five 50L Rotary Evaporators. The BVV™ 20GPH Falling Film Evaporator is designed to evaporate ethanol that has been diluted in crude oil during a filtration or extraction process. By reducing the vapor pressure inside the system and metering the injection valve, the user can set the heat exchangers to the appropriate temperatures to efficiently evaporate solvent from their crude oil. We paired our FFE with reliable equipment that will keep operations running. End users are required to plumb the process inlet and outlet connections for both heat exchangers. They are supplied with 1.5” sanitary tri-clamp connections. BVV™ can assist with necessary parts needed for a permanent or temporary installation. Temporary installations may be necessary if your lab has limited fume hoods or space which is shared with other processing equipment. Below you will find key features, additional equipment included with the system and the power requirements for each, and real-life efficiencies that were tested. Key Features: · Compact rack design for use in fume hoods (39”x30”x75.5”) · Vernier scale metering valve for controlled injection · Accurate heater and chiller temperature control · Deep vacuum for effective solvent removal · Discharge pumps to eliminate constant reservoir draining and down time · Chemical resistant vacuum pump · Adaptable discharge outlets to customer preference · Insulation to limit thermal loses and reduce condensation (Not Pictured) · Sanitary tri-clamp and compression fittings · Pre-heat injection coil · Injection distribution plate · Tube in shell heat exchanger for efficient evaporation and condensation · Packable vapor path for reduction of contaminants and cleaner separation · Water reservoir for priming the heating system and expansion during operation Crude Discharge Pump Easily control discharge speed and collect your extract directly from the 3/8" tube via a collection vessel or swage on a fitting of your preference to pump collected extract to a secondary location. Eliminate constant reservoir draining and operate continuously. Metered Solvent Injection Effectively repeat efficiency and throughput with our vernier scale metering valve. Easy to dial in the desired efficiency and throughput desired by the user. Distribution Plate Directs the injected solvent to be evenly distributed across all tubes in the heat exchanger which maximizes the effective heating surface area. Solvent Discharge and Vacuum Pump The solvent discharge pump eliminates the need for a reservoir and allows you to pump recovered solvent to any desired secondary location. The vacuum pump manifold gives you easy vacuum control during the complete operation. POWER REQUIREMENTS The equipment listed below is included with the system. Check power requirements and amp draw prior to purchasing. Equipment Purpose Power Requirement Amp Draw Notes 2GPM Ethanol Recovery Pump for Vacuum Pump for Ethanol Recovery Discharge 230V 1-Phase 2.4 2GPM Max Flow Rate, Vacuum Check Valve Beaker and Wrench Explosion Proof Oil Pump Pump for Oil Recovery Discharge 230V 1-Phase 1.1 90L/hr. Max Flow Rate, Vacuum Check Valve Welch BTpro100 Diaphragm Pump Vacuum Pump for System 115 1-Phase 3.4 3.5 CFM, 6 Torr Ultimate Vacuum Total Amp Draw 6.9 EFFICIENCY We are proud to present real data with running parameters and efficiencies that reflect the actual operation of our system. Below you will find the tested throughputs and efficiencies that our FFE is capable of handling. Throughput 11 GPH 18 GPH 20 GPH 22 GPH 24 GPH Efficiency 98% 97% 94% 90% 85% ** Efficiency calculated at 10:1 ratio (Ethanol : Crude Oil) with heater temperature of 160°F. Crude is fully dewaxed when going into the falling film evaporator. Solution starts at room temperature. Speeds may differ based on dilution ratio, crude quality, and running parameters. **
$35,000.00
Beaker & Wrench Turn-key System 6"
Beaker & Wrench Turn-key System Please Note: Lead time 0-4 weeks Get greater consistency, purity, and confidence in every Flower oil distillation when you use our system to monitor and optimize flow rate, temperature, pressure, and wiper speed (RPM) in real time. Fully continuous flow leaves behind less advanced methods with a dependable output of 3-5 liters per hour; maximizing efficiency and minimizing complications. Be assured of the quality of your system. Each system is 6 inch and constructed with fully compliant USA NRTL-certified components, including a display unit and two sensors to track the contents of both streams of fluid as it continuously travels through the glassware. Your system arrives ready to use immediately with all components primed for use. Just roll it off the lift gate and let it get to work. Meet demand and feel confident in the quality of your output with this turn-key system. 6” Stainless Steel Wiped-Film Evaporator Delivers greater consistency, purity, and confidence in every Flower oil distillation. Continuous flow leaves behind less advanced and efficient methods with a dependable input up to 7 liters per hour. Throughput capability Up to 7.0 L/hr Average 3.0-5.0 L/hr True Continuous Feed Peristaltic Inlet pump allows addition of oil while machine is still under vacuum Outlet pumps allow dispensing of products directly into vessel of choice Feed rates adjustable from 10mL to 10L/hr Jacketed body Thermal fluid circulating through jacketed body for consistent temperature Precise temperature control PID temperature controllers on body and all heated lines for creation of precise SOPs Expert On-Site Training and Installation Validation with YOUR oil on the day of install Consultation on how to generate the best SOP for your lab Sample SOP provided for internal use Potency up to 99.8% total Flower content Feed 20L stainless steel feed flask with vacuum inlet line Peristaltic dosing pump for precise, vacuum-held dosing Feed line to evaporator is jacketed and PID controlled Short-Path Evaporator Max evaporator temperature: 200 °C 316 Stainless Steel 316 Stainless Steel Internal condenser (cold finger) 6 rollers Easy to adjust drive system speed Distillate & Residue Discharge Pumps (2 pumps) Gear pump in PID controlled heated design (design temperature 100°C), digitally displayed pump speed. Calibration and secret menu options for optimal SOP development Check valves used as a pressure lock against the atmosphere Vacuum System 21 to 36 CFM Rotary Vane Vacuum pump equipped with vacuum pump oil Diffusion vacuum pump for achieving stable vacuum conditions at low pressures (oil included) Flanged cold trap & collection vessel for cold trap Heating & Cooling by Beaker & Wrench/ Polyscience 1 independent heating unit for the evaporator (oil circulator) 1 independent heating unit (silicone pad) for the residue & distillate line 1 independent heating unit for the feed tank (silicone pad) 1 independent cooling unit for the cold trap (immersion probe) 1 independent chilling unit for the internal condenser (water circulator) Rack/Frame Frame constructed of 80/20 aluminium extrusion and equipped with 4 wheels Power supply & power distribution system 1. Voltage: 120V or 220V Frequency: 60 Hz 3. Number of Phases: 1 (two hot wires) • Power distribution panel Control panel for pumps. Included spare parts. 1 set of rollers 1 set of static gaskets 1 set of shaft sealing for rotary transmission • 1 set of bearings for rotary transmission 1 set of O-rings Documentation Operating instructions Component Certifications See Below Heaters & Chillers CE/ISO9001 Vacuum Pumps Gear Pumps Wiper Drive Power Box Frequency Box Pressure Gauge
$195,000.00