Meta Purification
-

Cork Stand
Cork Stands Cork stands are used with laboratory glassware to help balance round bottom flasks or prevent damage or support a piece of glassware that is put on it. ***Note: Sizes correlate to round bottom flasks ml sizes. Sizes Available: 250-500ml 500-1000ml 1000-2000ml
$8.66 - $11.55
-

Color Remediation Column CRC
Color Remediation Column For BHO Extraction Color Remediation Columns are secondary columns used as a filtration cartridge for hydrocarbon and ethanol extraction systems. Removing impurities from extracted oils is aided by filter media, packed in the column above a triple filtration stack. The CRC features a bypass path, allowing the operator to skip the column in case of a clog. What simplifies the color remediation process is bundling the cartridge with the filter media. We have paired the unit with suggested media, supplied in the proper ratio, and a standard operating procedure. This makes filtration easy, allowing you to get it right the first time without having to guess. The CRC is a 4" x 12" spool with triple filter plates and rack mounting. Choose 1/4", 3/8" or 1/2" flares. This CRC Kit Includes: Color Remediation Column Rack Mounting Brackets 100 pack of 8 and 20-micron filter papers 1000g of Activated Alumina 1000g of Silica 60 1000g of Pure-Flo® B80 1000g of PurifiDE XG-12 Instruction Manual
$1,970.06 - $2,479.54
-
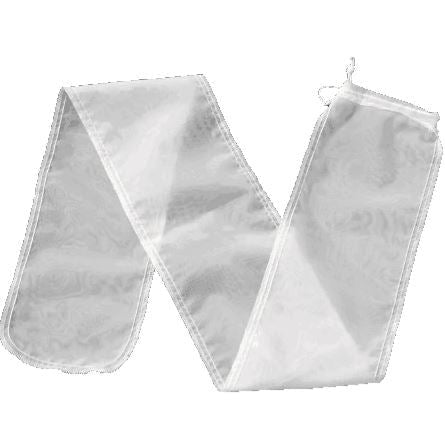
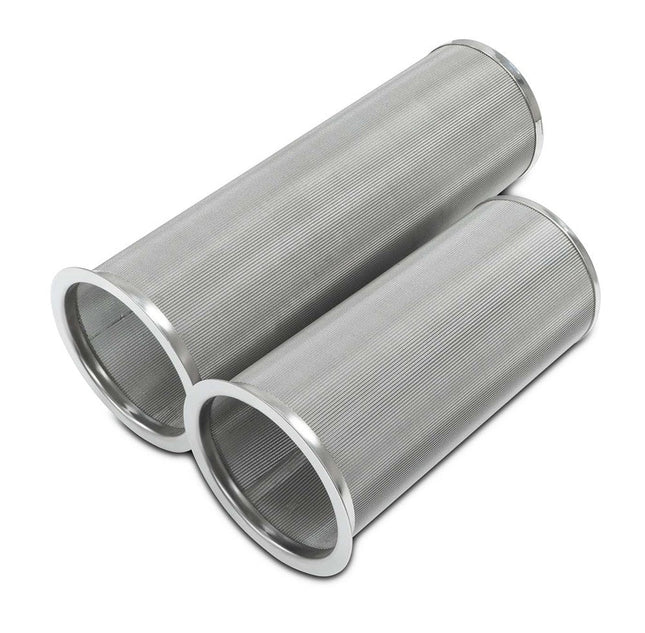
Nylon Filter Bag Socks
Nylon Filter Bag Socks Nylon Filter Bag Socks make loading and unloading spools way faster and easier. Keep production costs down by hot-swapping socks and continuing to process material with less downtime. The 90 micron socks are made of nylon and the 53 micron socks are made of monofilament polyester, both of which won't react to solvents and are very durable. For the 90 micron socks, we recommend getting socks that are 2" larger in diameter than the spool size, which is how we've sized them. **NOTICE** Unlike the 53 micron socks, the 90 micron socks do not feature extra material around the top collar which can stretch around the top of the column, they will only fit inside the column. The only exception to this is the FILTERBAG-10X60IN-90M. ** Quality Materials: The 90 micron bags are made of high quality Nylon, and the 53 micron Filter bags are made of monofilament polyester, both of which are durable, stable, rust and corrosive resistance and good for long time use. Precise Design: The filter bag is designed to fit Spool. Wide Range of Applications: The filter bag is used to filter impurities during the reaction process is suitable for different media with working highest Temperature at 248℉. Resistant to many chemicals, unaffected by metal fatigue or corrosion, and have high tensile strength. Convenient organization and storage: 1PC Packed in a small plastic bag. The filter bag life depends on the working environment and the frequency of using, Check it Regularly for aging, damaged or hardening. SKU BAG SIZE (in) FITS SPOOL(in) (90m will not stretch over top of column) MESH (micron) FILTERBAG-6X60IN-90M 6X60 4 90 FILTERBAG-8X60IN-90M 8X60 6 90 FILTERBAG-10X60IN-90M 10x60 8 90 FILTERBAG-12X36IN-90M 12x36 10 90 FILTERBAG-12X60IN-90M 12x60 10 90 FILTERBAG-12X60IN-90M 12X60 8 90 FILTERBAG-3IDx12L-53M 5x14 3x12 53 FILTERBAG-4IDx24L-53M 8x28 4x24 53 FILTERBAG-4IDx48L-53M 8x52 4x48 53 FILTERBAG-6IDx24L-53M 10x30 6x24 53 FILTERBAG-6IDx48L-53M 10x54 6x48 53 FILTERBAG-8IDx48L-53M 14x56 8x48 53 Chemically Compatible with: Acetone Amyl Alcohol (only up to 70°F) Butane Butyl Alcohol Diacetone Alcohol (only up to 70°F) Dowtherm (only up to 70°F) Ethanol Ether Ethyl Acetate Ethylene Glycol Glycol Glycol Monoether (only up to 70°F) Isopropyl Acete Isopropyl Alcohol Methane (only up to 70°F) Methyl Acetate Methyl Alcohol Methyl Cellosolve (only up to 70°F) Methylene Chloride (only up to 100°F) Nitrogen Propane (only up to 250°F) Propylene Glycol Sodium Carbonate Sodium Chlorate (only up to 180°F) Sodium Chloride 10% Sodium Cyanide Sodium Peroxide (only up to 70°F) Steam (only up to 220°F) Sulfuric Acid 5% Sulfuric Acid 50% (only up to 70°F) Sulfuric Acid 96% (only up to 70°F) Sulfuric Acid Fuming Sulfurous Acid
$27.42 - $57.73
-

Thermo Scientific Traceable Kangaroo Thermometer - Digital
Digital Thermometer Traceable Kangaroo™ Thermometer comes equipped with the 42-inch probe cable in a reel-compartment pouch in the back of the unit. As a perfect “carry-around” unit, this thermometer can fit easily in any pocket, or you can use the convenient flip-open stand to place upright. The dual-range digital thermometer measures temperature in test tubes, beakers, and other scientific laboratory equipment and is especially effective for rugged applications with high-impact ABS cases. Additionally, digital thermometers can measure the temperature of many substances from air to liquids to surfaces—all electronically. The best thing about this thermometer? It’s easy to use! Any user can record identical results with this intuitive unit. The range is –58.0 to 572°F and –50.0 to 300°C with a resolution of 0.1° (between –19.9 to 199.9°) otherwise 1° and an accuracy of ±1°C (between –30 and 250°C) otherwise ±2°C. This unit automatically captures and recalls minimum and maximum temperature readings over any time period. Its high and low alarm may be programmed in 1° increments. The alarm sounds every minute until temperature returns to non-alarm condition. Pressing the HOLD key freezes the display to record a current reading. To assure accuracy, an individually serial-numbered Traceable® Certificate is provided from its ISO 17025 calibration laboratory accredited by A2LA. It indicates traceability to standards provided by NIST (National Institute of Standards and Technology). The stainless-steel probe has a diameter of 0.14 inches x 7-1/2 inch length and is resistant to most chemicals. The supplied silver-oxide battery runs continuously for one year. Large 3/4-inch digits are readable from 20 feet. Compact size is 2-1/2 x 4-3/4 x 1/2 inches, and weight is 2-3/4 ounces. Each product goes through an intense vetting process before carrying the Traceable name, which means you’ll save both time and money by not having to calibrate separately. The Traceable Kangaroo Thermometer applies to various unique applications such as the storage, laboratory, and medical industries. Specifications: Temperature Range F: -58 - 572F Temperature Range C: -50 - 300C Temperature Resolution: 0.1C Temperature Accuracy: +/-1C Programmable High and Low Alarm ISO 17025 Calibration Stainless Steel Probe Diameter of Probe: 0.14 in Length of Probe: 7.5 in Size: 2.5x4.75x.5 in Weight: 2.75 ounces
$86.60
-
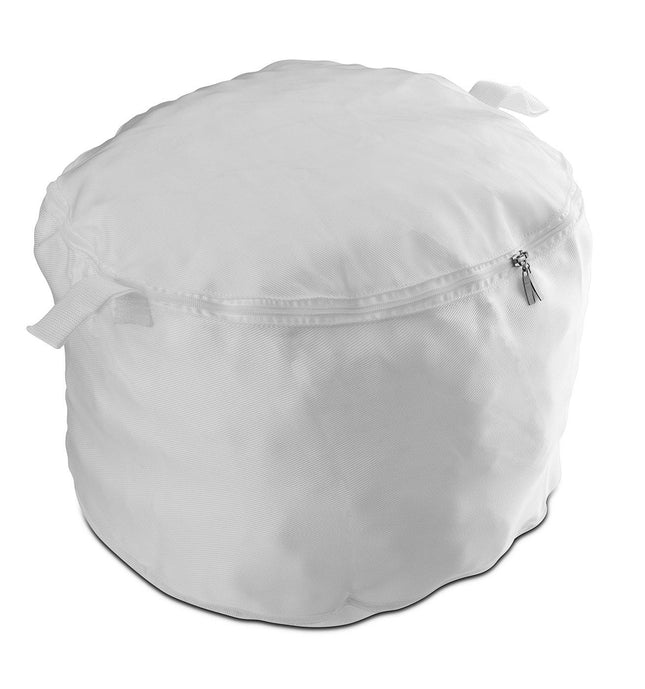
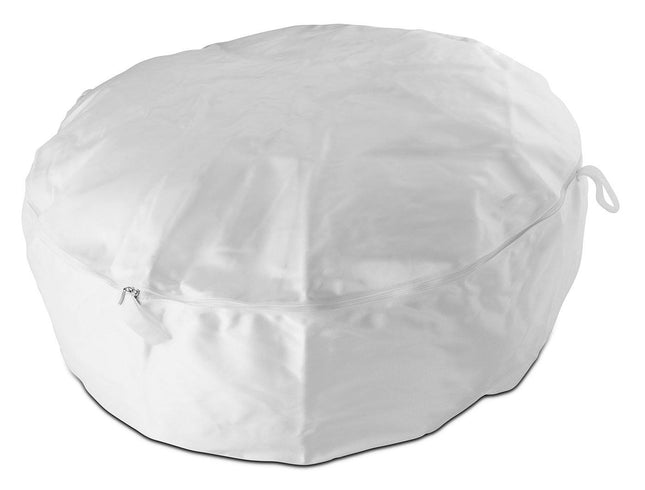
45L Centrifuge Bags
This nylon bag is designed to fit in our BVV brand centrifuges to contain material and be easily swappable after runs to speed up processing times. These bags come with 2 zippers and come in 1, 10, 50, 100, and 200 micron filtration levels. For use with 45L Centrifuges Appx. Size : 17.5" Diameter x 11.75" Height Specifications SKU Appx. Diameter In. Appx. Height in. CFB-45L-XXX 17.5" 11.75" CFB-160L-XXX 32.25" 13" CFB-280L-XXX 39.25" 14" CFB-475L-XXX 47.25" 16.75"
$180.41 - $431.54
-


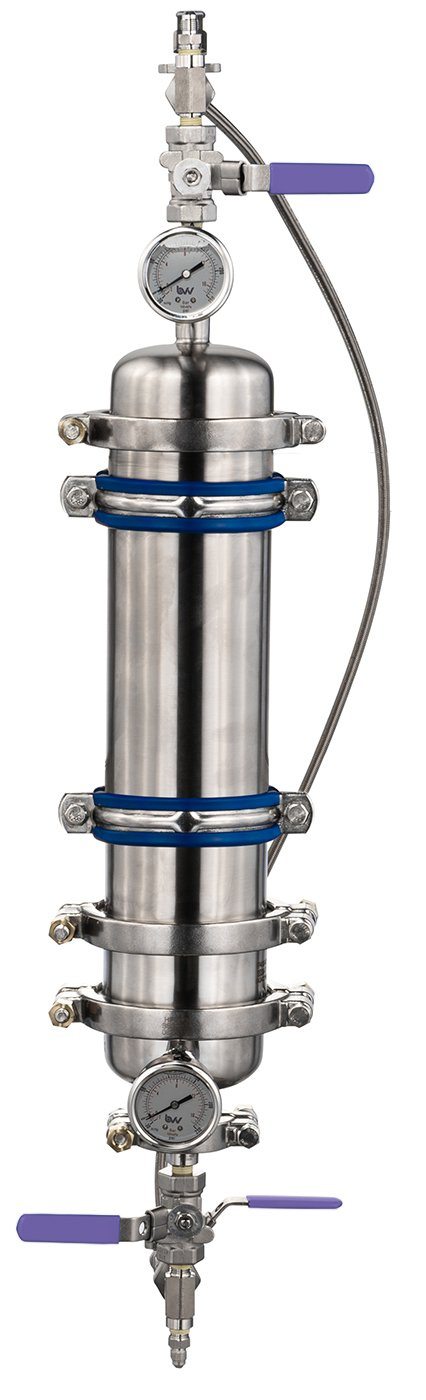
Inline CRC
Inline CRC Kit BVV's Inline CRC Kit can be utilized to adapt any 1.5", 2", 3", 4", or 6" diameter material column for inline adsorbent filtration. This kit includes a corresponding sized media column and a filter stack including a 5 micron & 1 micron Dutch Weave Sintered Filter Disc. This Inline color remediation kit is meant to be plumbed between your existing extractors material column and the existing hemispherical reducer of any closed loop hydrocarbon extractor.Assembly starts with placing the 1 micron sintered disk and gasket between the extracts hemispherical reducer and the included filter plate securing both with one of the included high-pressure clamps. Next, take the 5-micron sintered disk and the included ashless filter paper and rip around the circumference of the sintered disk, placing both atop the filter plate placing the sintered disc gasket and media column spool over top before securing both with the remaining high-pressure clamp. Since the spool secures the filter paper in place a filter plate ring is not required. Media can then be layered into the media column by weight before placing the loaded material column above the adsorbent filtration column and assembling the remainder of the extractor. For optimum filtering results utilize the following layer recipe from top to bottom: 30-50g per lb of biomass Silica 60A 75-100g per lb of biomass Bentonite Clay 30-50g per lb of biomass Neutral Activated Alumina This Kit includes: Media column Tri-clamp Spool V3 Filter Plate 5 Micron Sintered Disk 1 Micron Sintered Disk 2X Buna-N Sintered Disc Gaskets 2X High-pressure Clamps Fast Flow Ashless Filter Paper (100qty) *This video provides a visual assembly of the 3" Inline CRC which is applicable across all sizes*
$346.38 - $1,010.29
-

5L Digital Heating and Stirring Mantle
5L Digital Heating and Stirring Mantle Digital Heating and Stirring Mantles give the operator the most precise temperatures and readouts during distillations. These mantles autotune to specific user input to provide consistent results. Each mantle is equipped with large digital display that will give you readouts for both set temperature, actual temperature, and stirring speed. Each mantle also comes with a vertical brace bar and boss head as well as a temperature probe which plugs directly into the mantle. For first time use, the mantle should have an initial burn out done. This will burn off any residual oils used in the production of the insulation rope. The unit's max internal temperature cannot exceed 380C. The recommended max set temperature should not exceed 250C Features: PID Temperature control Brushless magnetic magnetic stirrer motor Temperature protector Specifications: Capacity: 5L (5000mL) Power Supply: 110V 60Hz Adjustable Rotation Speed: 50-1800 RPM Motor Power: 40W, DC14-24V Heating Power 180-2200W Temperature Control Accuracy: +/- 1C Intelligent Temperature Control: Yes Temperature Range: RT+10-380C Insulation Material: Alkali-free Glass Fiber, temperature resistant up to 450C Shipping Dimensions: 20 x 15 x 14 in. Weight: 12 lbs
$1,226.78
-
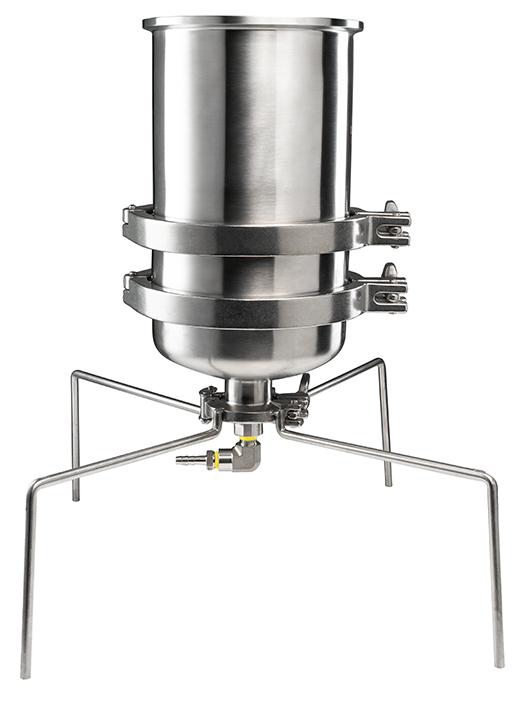

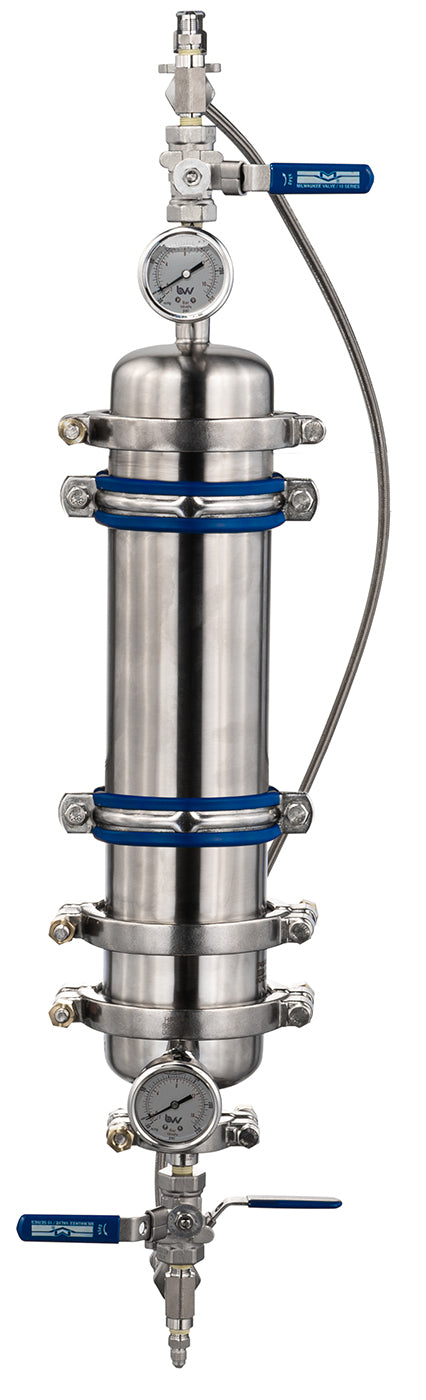
Refinement Filter
The BVV Refinement Filter is a stainless steel filtration system that provides large scale, high flow filtering, with greatly improved functionality compared to a traditional Buchner filter. This includes the Refinement Filter only. Does not include the 20L collection base. Please note, the Refinement filter alone does not have a vacuum port. You must pull vacuum through a secondary vessel if you are not using the 20L collection base. Key Features: Stainless steel design for greater thermal conductivity and improved lifespan Easy to clean and disassemble with Tri-Clamp stainless steel parts Small tabletop footprint with wide mouth design Wide base for stability while pouring Key Specifications: 216 cubic inches of liquid volume (3.5 Liters) Silicone gaskets with high alcohol resistance Drop-In Filter Plate with 100 Mesh Screen 3/8" Stainless steel barb connections Recommended Filter Paper: 180mm
$902.04 - $1,428.84
-
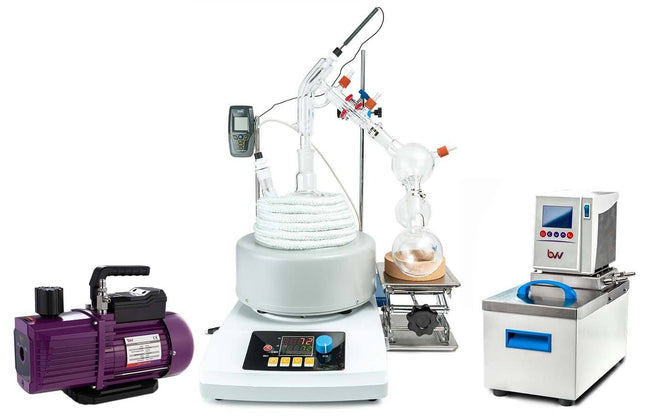

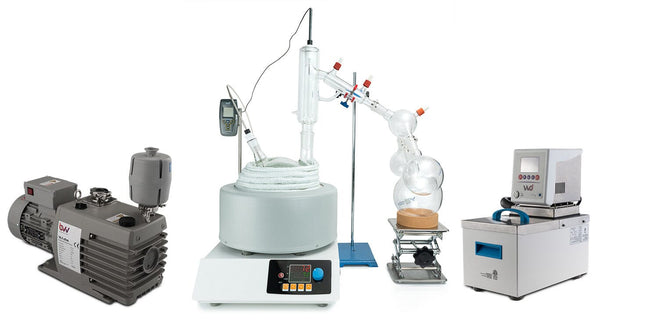
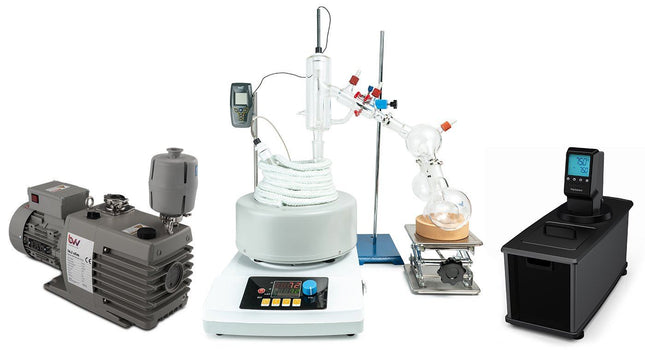
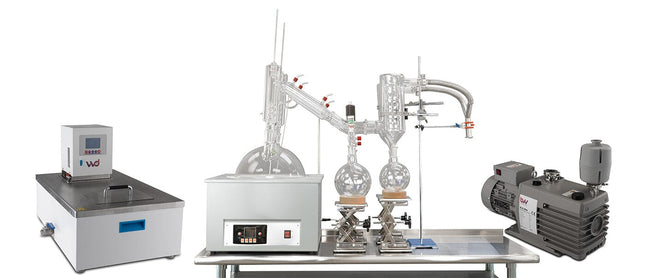
2L Standard Short Path Distillation Turnkey Setup
2L Standard Short Path Distillation Turnkey Setup The Standard Distillation Turnkey Setup includes all the components necessary to successfully perform distillation at an entry-level price point. Crossbar pictured is not included. We recommend purchasing multiple lab stands to accommodate your specific needs. The Standard Turnkey Setup Includes: 2L Distillation Kit 1/4" Flare x 1/4" Barb Adapter BVV™ 5L Heated Circulator BVV™ V9D 9CFM Two Stage Vacuum Pump High quality and durable Borosilicate 3.3 glass Vacuum-jacketed distillation adapter 3-way cow adapter, accommodating up to 3 pcs of 500mL flasks GCT-01 cold trap guarding from damage of vapors Kangaroo Traceable Digital Thermometer Flexible Gum Rubber Vacuum Tubing and Silicone Tubing for Flow Distillation Quick Start Guide This guide gives basic quick start instructions for distillation systems. It is intended to provide a starting point for learning the process. Parameters should be adjusted to suit specific needs, Before beginning distillation, ensure the following steps have been taken: Vacuum Pump is in good working order. The pump should be run against the dry load to allow internals to warm up. Oil should be clear. Cloudy or dark oil should be changed. All glass components are in good working order and ready to be assembled A winterization and degassing procedure has been done to prepare oil for distillation The unit's max internal temperature cannot exceed 380C. The recommended max set temperature should not exceed 250C Once all three of these steps have been completed, you are ready to begin distilling. Begin by placing stir bar in boiling flask and then load your material. This should be done using a funnel. A small amount of alcohol in the oil will give it a thinner consistency making it easier to transfer. Assemble all glassware and ensure each joint is properly greased. Do not use too much, as the vacuum pressure might pull some grease into the system. To ensure a full seal, spread grease in a circular motion by rotating glassware Attach circulator to condenser and set temperature to 50C. Allow circulator to reach temperature before beginning distillation. Connect vacuum pump to manifold. The manifold will allow you to isolate each individual component as well as let atmosphere into and out of the system. Connect receiving cow to cold trap. Connect cold trap to manifold. Connect vacuum gauge to manifold. At this point, ensure all connections are correct. Also ensure receiving cow is positioned to collect the first fraction in the far-left receiving flask. Circulator should be at its set temperature. Turn on vacuum pump to begin process. Turn on heat and set to 60C. Vacuum pump will begin to pull down and temperature will begin to rise. Watch the gauge to monitor vacuum pressure and stability. Start stir slower and increase speed with temperature. Once you are close to 60C, increase the temperature 20 degrees. Continue to raise the heat incrementally in 20-degree steps, increasing the set temperature as you near your set point. Increase temperatures incrementally until you reach 220C. You will see your first fraction somewhere between 180C and 190C or slightly before. This is the “heads” fraction. You will move to your second fraction when you see an increased reaction in the head, a slight color change toward golden, as well as a thickening of distillate. When this fraction hits, allow the distillate to “self-clean” the head for a minute or two then, rotate the cow to the middle receiving flask. Collect your “main body” fraction. You will see temps between 190-220C during this fraction. Continue to increase stirring speed as necessary. Reaction in the head may vary but it should never stop. As fluid level in the boiling flask decreases, increase stir speed. The final “tails” fraction is a mixture of the first and second fractions and should be saved for re-distillation later. Ideally, you want to turn the cow to the final flask before the tails fraction hits. The “tails” fraction has an obvious color change and will be darker than the “main body” fraction. You will see temps between 200-250C during this fraction. As fluid level in the boiling flask decreases even more, set stirring RPM higher (1000+ RPM). You may need to compensate with a bit more heat to finish of the final fraction as well. Once the process is complete, stop heat, stop stir, and stop vacuum. Let the atmosphere into the system. Be sure to properly store your distillate as exposure to air and light can cause oxidation. ***Note: This entire setup will ship via motor freight.*** *Notice to Customers: All units are inspected for broken glassware or parts before leaving BVV™. If the unit arrives damaged (this does not include minor imperfections or scuffs in glassware), the customer MUST contact BVV™ within 72 hours from carrier delivery to file a claim. If the customer DOES NOT contact BVV™ within 72 hours from carrier delivery, then BVV™ cannot issue any replacement(s) or compensation for the item; a new purchase will need to be made for a replacement. BVV™ is not responsible for the failure of glassware which must be inspected before and after every use because it may eventually develop imperfections or damage through normal usage, mishandling, and stress caused by temperature variations. If an imperfection or damage is noted while inspecting the glassware DO NOT use the glassware because it can fail, which can cause bodily harm or damage to the surrounding area.
$6,350.38
-

1L Distillation Kit
1L Distillation Kit The 1L Distillation Kit is a simple, easy to use system designed for small personal use. It includes all stands, clamps, clips, and tubing needed to begin distilling immediately. This Kit Does NOT include a vacuum pump or circulator. Please see the below recommendations for both as well as recommended add-ons. Or check out our 1L Standard Distillation Turnkey Setup which includes vacuum pump and circulator. Recommended Vacuum Pumps: Pro Series 5.6CFM Corrosion Resistant Two Stage Vacuum Pump (premium option) Just Better 6 CFM 2 Stage Deep Vacuum Pump (USA made economy option) Best Value Vacs VE280 9CFM Two Stage Vacuum Pump (economy option) Recommended Circulator: Polyscience 7 Liter MX Heated Circulator (economy option) Polyscience 7 Liter MX Refrigerated Circulator (premium option with chilling capability) Recommended Add-Ons: Glass Dewar Style Cold Trap (recommended cold trap) Bullseye Precison Vacuum Gauge (premium vacuum gauge for measuring depth) CT40 or CT80 Electronic Cold Trap (electronic cold trap, dry ice replacement) Specifications: Boiling Flask Size: 1L Receveiving Flask Size: 250ml Batch Capacity approximate: 200-400 grams Run time: 4 to 8 hours dependent upon material composition and throughput Distillation Temperature Range: 140-250C (Do not exceed 250C) Recommended Condenser Temperature: 40-50C This Kit Includes: Glass Components: 1L 2-Neck Boiling Flask Short Path Head Triple Neck Cow Receiving Flask 3x 250ml Single Neck Round Bottom Flask 14/20 Thermometer Adapter 24/40 Thermometer Adapter 120mm Glass Funnel 14/20 Stopper 24/40 Stopper Accessories: Magnetic PTFE Stirring Bar Retriever 5 Pack of Metal Keck Clips Dow Corning High Vacuum Silicone Grease Tripod Stand 1L Analog Heating and Stirring Mantle 3 Finger Clamp Adjustable 0-70mm Boss Head -13mm 6" x 6" Scissor Jack 250-500ml Cork Stand 10ft of Vacuum Hose 10ft of Chiller Hose 1/4" Vacuum Manifold Traceable Kangaroo Thermometer - Digital 10 Pack of Adjustable Stainless Steel Tubing Clamps Fiberglass Insulation Rope 10 Feet 1.5 Gallon Cold Trap (2QT Tank) Dry Ice, Liquid Nitrogen w/ 2x 1/4" Barb Adapters Distillation Quick Start Guide This guide gives basic quick start instructions for distillation systems. It is intended to provide a starting point for learning the process. Parameters should be adjusted to suit specific needs, Before beginning distillation, ensure the following steps have been taken: Vacuum Pump is in good working order. Pump should be run against dry load to allow internals to warm up. Oil should be clear. Cloudy or dark oil should be changed. All glass components are in good working order and ready to be assembled A winterization and degassing procedure has been done to prepare oil for distillation Once all three of these steps have been completed, you are ready to begin distilling. Begin by placing stir bar in boiling flask and then load your material. This should be done using a funnel. A small amount of alcohol in the oil will give it a thinner consistency making it easier to transfer. Assemble all glassware and ensure each joint is properly greased. Do not use too much, as the vacuum pressure might pull some grease into the system. To ensure a full seal, spread grease in a circular motion by rotating glassware Attach circulator to condenser and set temperature to 50C. Allow circulator to reach temperature before beginning distillation. Connect vacuum pump to manifold. The manifold will allow you to isolate each individual component as well as let atmosphere into and out of the system. Connect receiving cow to cold trap. Connect cold trap to manifold. Connect vacuum gauge to manifold. At this point, ensure all connections are correct. Also ensure receiving cow is positioned to collect the first fraction in the far-left receiving flask. Circulator should be at its set temperature. Turn on vacuum pump to begin process. Turn on heat and set to 60C. Vacuum pump will begin to pull down and temperature will begin to rise. Watch the gauge to monitor vacuum pressure and stability. Start stir slower and increase speed with temperature. Once you are close to 60C, increase the temperature 20 degrees. Continue to raise the heat incrementally in 20-degree steps, increasing the set temperature as you near your set point. Increase temperatures incrementally until you reach 220C. You will see your first fraction somewhere between 180C and 190C or slightly before. This is the “heads” fraction. You will move to your second fraction when you see an increased reaction in the head, a slight color change toward golden, as well as a thickening of distillate. When this fraction hits, allow the distillate to “self-clean” the head for a minute or two then, rotate the cow to the middle receiving flask. Collect your “main body” fraction. You will see temps between 190-220C during this fraction. Continue to increase stirring speed as necessary. Reaction in the head may vary but it should never stop. As fluid level in the boiling flask decreases, increase stir speed. The final “tails” fraction is a mixture of the first and second fractions and should be saved for re-distillation later. Ideally, you want to turn the cow to the final flask before the tails fraction hits. The “tails” fraction has an obvious color change and will be darker than the “main body” fraction. You will see temps between 200-250C during this fraction. As fluid level in the boiling flask decreases even more, set stirring RPM higher (1000+ RPM). You may need to compensate with a bit more heat to finish of the final fraction as well. Once process is complete, stop heat, stop stir, and stop vacuum. Let atmosphere into the system. Be sure to properly store your distillate as exposure to air and light can cause oxidation. *Notice to Customers: All units are inspected for broken glassware or parts before leaving BVV™. If the unit arrives damaged (this does not include minor imperfections or scuffs in glassware), the customer MUST contact BVV™ within 72 hours from carrier delivery to file a claim. If the customer DOES NOT contact BVV™ within 72 hours from carrier delivery, then BVV™ cannot issue any replacement(s) or compensation for the item; a new purchase will need to be made for a replacement. BVV™ is not responsible for the failure of glassware which must be inspected before and after every use because it may eventually develop imperfections or damage through normal usage, mishandling, and stress caused by temperature variations. If an imperfection or damage is noted while inspecting the glassware DO NOT use the glassware because it can fail, which can cause bodily harm or damage to the surrounding area.
$1,760.79
-
475L Centrifuge Bags
This nylon bag is designed to fit in our BVV brand centrifuges to contain material and be easily swappable after runs to speed up processing times. These bags come with 2 zippers and come in 1, 10, 50, 100, and 200 micron filtration levels. For use with 475L Centrifuges Appx. Size : 47.25" Diameter x 16.75" Height Specifications SKU Appx. Diameter In. Appx. Height in. CFB-45L-XXX 17.5" 11.75" CFB-160L-XXX 32.25" 13" CFB-280L-XXX 39.25" 14" CFB-475L-XXX 47.25" 16.75"
$392.57 - $786.58
-
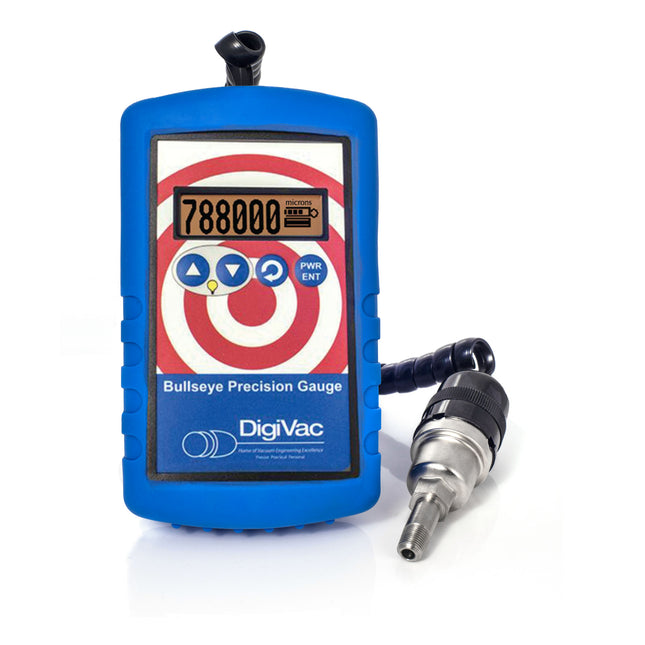

DigiVac Bullseye Precision Gauge | Portable Vacuum Gauge | .001 to 2 Torr Accuracy
Bullseye Precision Gauge | Portable Vacuum Gauge | .001 to 2 Torr Accuracy The Bullseye Precision Gauge is the ideal portable vacuum gauge to serve many applications. This patented vacuum gauge offers Graphical Displays and graphics supporting real-time analytics (Leak, Pump, Outgas, Stable) Visual graphing feature right on the display Display pinpoints the root of the problem so you get it right the first time Put it anywhere with its magnet and kickstand Options: Rugged carrying case designed for instrument, back-up sensor and these adapters that can change the NPT to a KF25 or KF16 vacuum interface adapters Sensor (Probe) Replacements: This gauge is paired with the Thermocouple Plus/531 Equivalent Sensor, but works with Agilent 531 or 536 sensors as well if you are looking for a more robust sensor option Numeric & Graphical Displays See vacuum readings in either numbers or easy-to-read graphs Calibrated & Precise Delivered pretested and calibrated with thermocouple sensor under actual vacuum against a NIST standard. Extended Battery Lifespan Solid state electronics are built into the Bullseye Precision Gauge. The portable vacuum gauge operates using AA batteries and lasts 70 hours. Applications Vacuum pump monitoring, vacuum pump testing, baseline vacuum pump performance, & transformer dry-out, distillation monitoring Bullseye Precision Gauge Accuracy Remember to choose your vacuum gauge that gives you the accuracy you need for your application. This Bullseye comes with a thermocouple sensor, which has better accuracy in the millitorr up to 6 Torr. If you need your Bullseye Gauge to have CE rating then choose either the Bullseye with 531 or Bullseye with 536 KF25 1 to 99 millitorr +/- 2 millitorr or 20% 100 to 2000 millitorr +/- 10% 2 to 6 Torr +/- 25% Above 6 Torr Continuous and monotonic (increasing reading indicates increasing pressure) Units Torr, mbar, bar, kPa, inHg, mm Hg, millitorr, microns, inches of water, PSI, Pa Control Range 1E-4 – 1000 Torr Range with Accuracy .001 – 5 Torr Sensor Type SEN-VGT500, Thermocouple Plus Dimensions 6.2”H x 3.7”W x 1.3”D Certifications ROHS and CE
$803.66
-
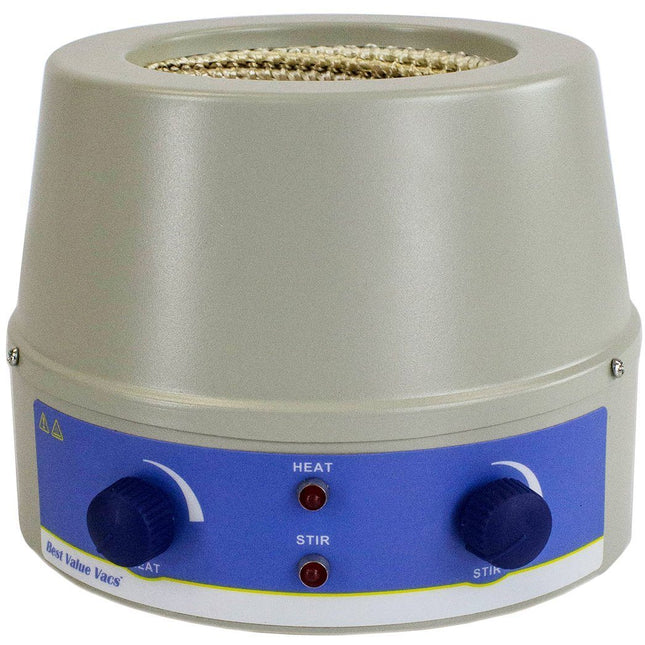
Analog Heating and Stirring Mantle
Analog Heating and Stirring Mantle is used to heat up a glass round bottom flask and stir the contents inside. Heating and stirring functions are analog and sizes range from 500ml to 2000ml. (Mantle's are tested in house and may show slight discoloration on the heating surface.) Certifications: CE Approval Warranties: 500ml - 30 Day Limited Warranty 1000/2000ml - 90 Day Limited Warranty.
$194.84 - $281.44
-
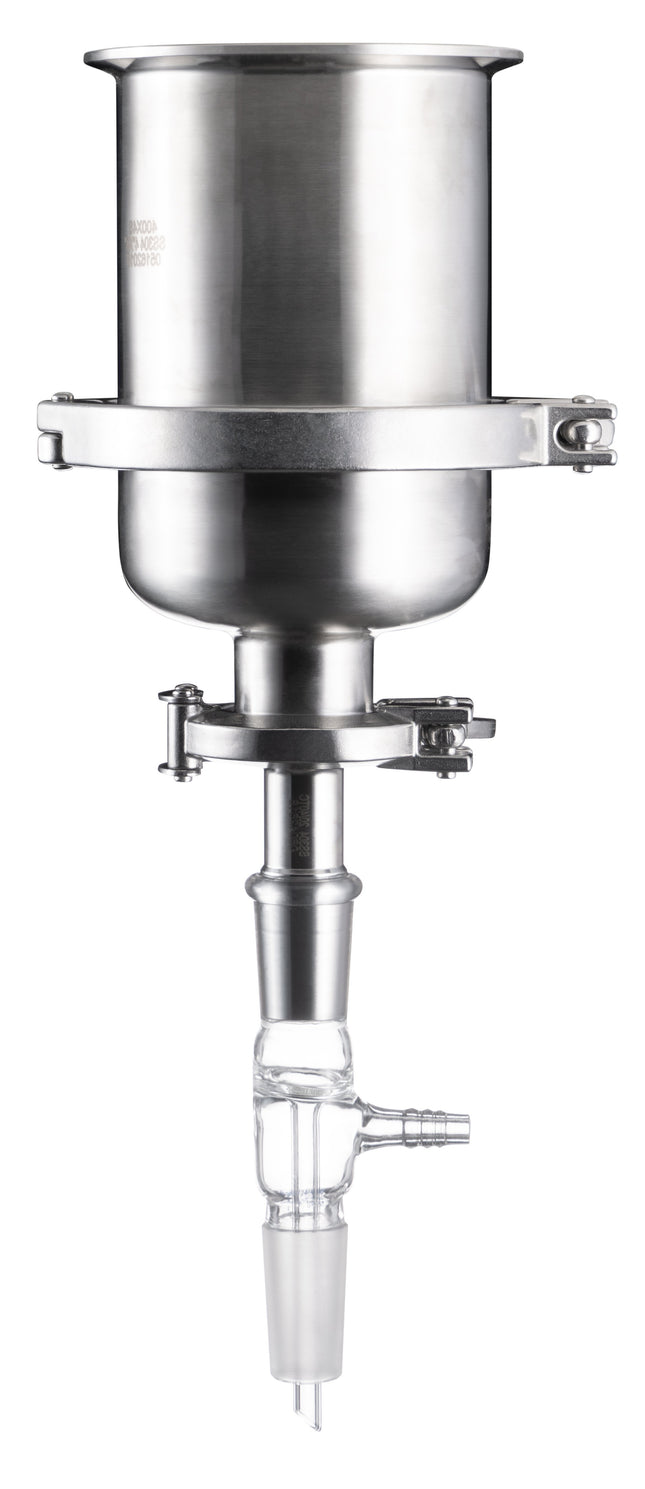
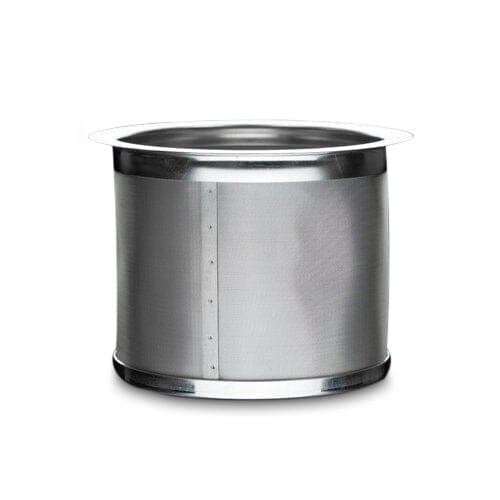
4" Stainless Steel Buchner Funnel
4 Inch Stainless Steel Buchner Funnel 4” Buchner Funnel Kit: This buchner funnel kit adapts to any vessel with a 24/40 joint. The included adapter makes it possible to pull vacuum and use large vessels as a collection. Max internal volume of the buchner funnel is 0.82L, but can be adapted with a larger spool for higher capacity. This kit features: 4” x 4” 304SS spool with a capacity of 0.82L 4” Tri-Clamp Single Hinge Clamp 4”x1.5” 304SS Hemispherical Reducer 1.5” Tri-Clamp Double Hinged Clamp 4” 5 Micron 304SS Sintered Disc Filter 4” 304SS Filter Plate V2 1.5”x24/40 304SS Adapter 24/40 Glass Inlet Straight Adapter with hose connection Recommended items: 110MM sized filter paper, 24/40 jointed glass conical flask. For additional information or questions regarding this kit contact our customer support line.
$534.01
-
5L Premium Short Path Distillation Turnkey Setup
5L Premium Distillation Kit This unit carries a 2 day lead time. The 5L Premium Short Path Distillation Turnkey Setup features our 5L Distillation Kit with P5 Distillation Head and USA made glass. Every component in this turnkey is made for precision, throughput, and repeatable results. Also included is our Pro Series 11.3CFM Corrosion Resistant Two Stage Vacuum Pump giving you extreme power and depth with a long lifespan, the Bullseye Precision Vacuum Gauge from Digivac which is the most rugged and dependable vacuum gauge on the market, and a BVV 19L Heated Circulator for maximum condensation of vapors. You will also receive a Dewar Style Glass Cold Trap to keep all volatiles and solvents out of your vacuum system. This Turnkey Setup gives you everything needed to perform distillation at the highest level. The Premium Short Path Distillation Turnkey Kit Includes: 5L Distillation Kit with P5 Distillation Head KF-25 x 1/4" Barb Adapter Dewar Style Glass Cold Trap Bullseye Precision Vacuum Gauge Polyscience 7L MX Heated Circulator Pro Series 14.1CFM Corrosion Resistant Two Stage Vacuum Pump Short Path Distillation Quick Start Guide This guide gives basic quick start instructions for distillation systems. It is intended to provide a starting point for learning the process. Parameters should be adjusted to suit specific needs, Before beginning distillation, ensure the following steps have been taken: Vacuum Pump is in good working order. Pump should be run against dry load to allow internals to warm up. Oil should be clear. Cloudy or dark oil should be changed. All glass components are in good working order and ready to be assembled A winterization and degassing procedure has been done to prepare oil for distillation Once all three of these steps have been completed, you are ready to begin distilling. Begin by placing stir bar in boiling flask and then load your material. This should be done using a funnel. A small amount of alcohol in the oil will give it a thinner consistency making it easier to transfer. Assemble all glassware and ensure each joint is properly greased. Do not use too much, as the vacuum pressure might pull some grease into the system. To ensure a full seal, spread grease in a circular motion by rotating glassware Attach circulator to condenser and set temperature to 50C. Allow circulator to reach temperature before beginning distillation. Connect vacuum pump to manifold. The manifold will allow you to isolate each individual component as well as let atmosphere into and out of the system. Connect receiving cow to cold trap. Connect cold trap to manifold. Connect vacuum gauge to manifold. At this point, ensure all connections are correct. Also ensure receiving cow is positioned to collect the first fraction in the far-left receiving flask. Circulator should be at its set temperature. Turn on vacuum pump to begin process. Turn on heat and set to 60C. Vacuum pump will begin to pull down and temperature will begin to rise. Watch the gauge to monitor vacuum pressure and stability. Start stir slower and increase speed with temperature. Once you are close to 60C, increase the temperature 20 degrees. Continue to raise the heat incrementally in 20-degree steps, increasing the set temperature as you near your set point. Increase temperatures incrementally until you reach 220C. You will see your first fraction somewhere between 180C and 190C or slightly before. This is the “heads” fraction. You will move to your second fraction when you see an increased reaction in the head, a slight color change toward golden, as well as a thickening of distillate. When this fraction hits, allow the distillate to “self-clean” the head for a minute or two then, rotate the cow to the middle receiving flask. Collect your “main body” fraction. You will see temps between 190-220C during this fraction. Continue to increase stirring speed as necessary. Reaction in the head may vary but it should never stop. As fluid level in the boiling flask decreases, increase stir speed. The final “tails” fraction is a mixture of the first and second fractions and should be saved for re-distillation later. Ideally, you want to turn the cow to the final flask before the tails fraction hits. The “tails” fraction has an obvious color change and will be darker than the “main body” fraction. You will see temps between 200-250C during this fraction. As fluid level in the boiling flask decreases even more, set stirring RPM higher (1000+ RPM). You may need to compensate with a bit more heat to finish of the final fraction as well. Once the process is complete, stop heat, stop stir, and stop vacuum. Let atmosphere into the system. Be sure to properly store your distillate as exposure to air and light can cause oxidation. ***Note: This entire setup will ship via motor freight.*** ***Note: All units are inspected for broken glass or parts before unit is shipped. If unit arrives damaged or glass is broken (this does not include minor imperfections or scuffs in glassware), Customer MUST contact BVV™ within 3 days of delivery to file a claim and receive a replacement part. If customer DOES NOT contact BVV™ within 3 days of delivery responsibility for replacement parts falls on the customer and they must pay for replacement pieces.*** ***Glassware Safety Disclaimer: BVV™ is not responsible for failure of glassware which must be inspected before and after every use because it may eventually develop imperfections or damage through normal usage, mishandling, and stress caused by temperature variations. If an imperfection or damage is noted while inspecting the glassware DO NOT use the glassware because it can fail causing bodily harm or damage to the surrounding area.***
$7,937.98
-
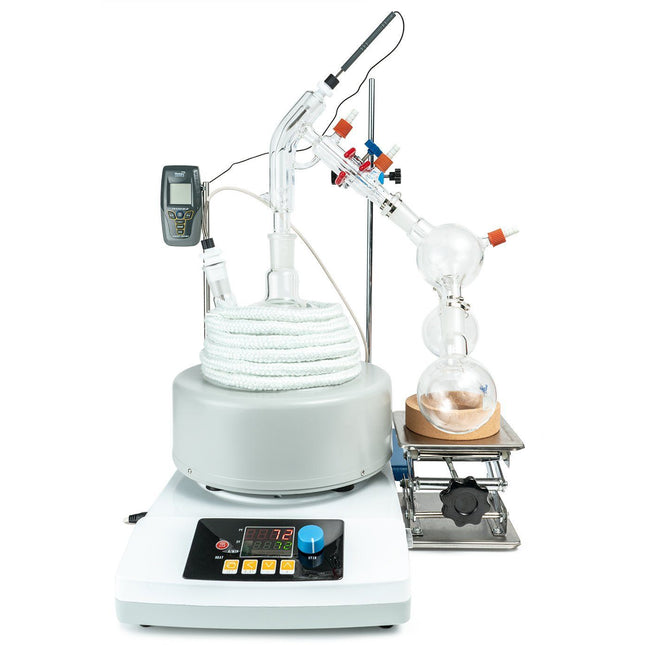

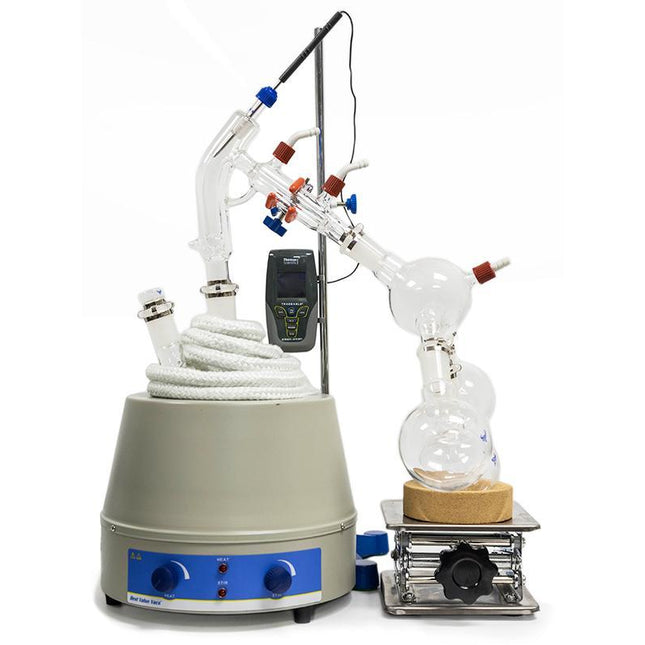
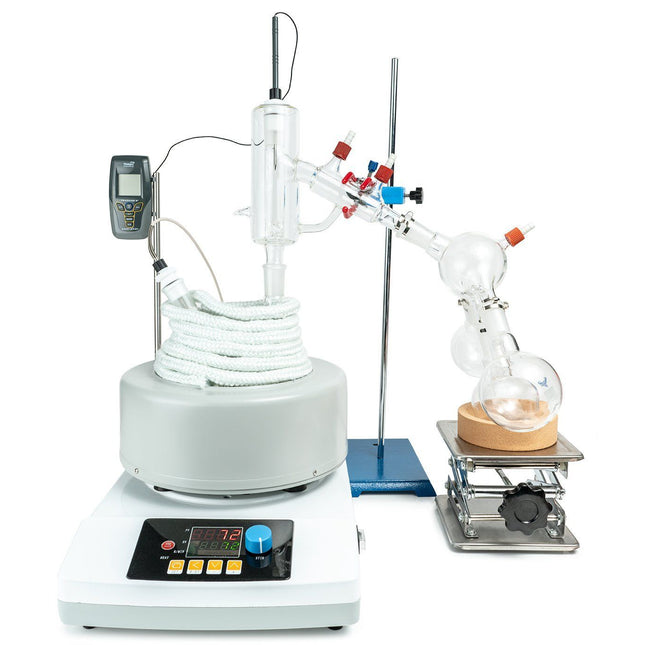
2L Short Path Distillation Kit
Short Path Distillation Setup Short path distillation is used for compounds that are not stable at high temperatures. It can also be used to purify small amounts of a compound. For those new to this type of distillation, our Short Path Kit includes everything you will need as you get started. All stands, clamps, clips, and tubing are included, which means it’s ready to start working straight out of the box. The cold trap, cow and vacuum grease can all be customized to meet your needs. The 2L Distillation Kit builds upon the same principal as the 1L Distillation Kit, giving users an easy to use system that will get them up and running at an affordable price. It includes all stands, clamps, clips, and tubing needed to begin distilling immediately. This Kit Does NOT include a vacuum pump or circulator. Please see the below recommendations for both as well as recommended add-ons. Or check out our 2L Standard Distillation Turnkey Setup which includes vacuum pump and circulator. Crossbar pictured is not included. We recommend purchasing multiple lab stands to accommodate your specific needs. Recommended Vacuum Pumps: Pro Series 5.6CFM Corrosion Resistant Two Stage Vacuum Pump (recommended option) Just Better 6 CFM 2 Stage Deep Vacuum Pump (economy option) Best Value Vacs VE280 9CFM Two Stage Vacuum Pump (economy option) Recommended Circulators: Polyscience 7 Liter MX Heated Circulator (economy option) Polyscience 7 Liter MX Refrigerated Circulator (premium option with chilling capability) Recommended Add-Ons: Glass Dewar Style Cold Trap (recommended cold trap) Bullseye Precison Vacuum Gauge (premium vacuum gauge for measuring depth) CT40 or CT80 Electronic Cold Trap (electronic cold trap, dry ice replacement) Short Path Distillation Kit Specifications: Boiling Flask Size: 2L Recieving Flask Size: 250ml Batch Capacity approximate: 2L = 400-1000 grams Run time: 4 to 8 hours dependent upon material composition and throughput Distillation Temperature Range: 140-250C (Do not exceed 250C) Recommended Condenser Temperature: 40-50C This Kit Comes Standard With The Following: Glass Components: 2L 2-Neck Boiling Flask Short Path Head Triple Neck Cow 3x 250mL Single Neck Receiving Flask 1/8" 14/20 PTFE Thermometer Adapter 1/4" 24/40 PTFE Thermometer Adapter 120mm Glass Funnel Accessories: Magnetic PTFE Stirring Bar Retriever 5 Pack of Metal Keck Clips Dow Corning High Vacuum Silicone Grease Tripod Stand 2L Digital Heating and Stirring Mantle 3 Finger Clamp Adjustable 0-70mm 6" x 6" Scissor Jack 250-500ml Cork Stand 10ft of Vacuum Hose 10ft of Chiller Hose 1/4" Vacuum Manifold Traceable Kangaroo Thermometer - Digital 10 Pack of Adjustable Stainless Steel Tubing Clamps Fiberglass Insulation Rope 10 Feet 1.5 Gallon Cold Trap (2QT Tank) Dry Ice, Liquid Nitrogen w/ 2x 1/4" Barb Adapters Distillation Quick Start Guide This guide gives basic quick start instructions for distillation systems. It is intended to provide a starting point for learning the process. Parameters should be adjusted to suit specific needs. Before beginning distillation, ensure the following steps have been taken: Vacuum Pump is in good working order. Pump should be run against dry load to allow internals to warm up. Oil should be clear. Cloudy or dark oil should be changed. All glass components are in good working order and ready to be assembled A winterization and degassing procedure has been done to prepare oil for distillation The unit's max internal temperature cannot exceed 380C. The recommended max set temperature should not exceed 250C Once all three of these steps have been completed, you are ready to begin distilling. Begin by placing stir bar in boiling flask and then load your material. This should be done using a funnel. A small amount of alcohol in the oil will give it a thinner consistency making it easier to transfer. Assemble all glassware and ensure each joint is properly greased. Do not use too much, as the vacuum pressure might pull some grease into the system. To ensure a full seal, spread grease in a circular motion by rotating glassware Attach circulator to condenser and set temperature to 50C. Allow circulator to reach temperature before beginning distillation. Connect vacuum pump to manifold. The manifold will allow you to isolate each individual component as well as let atmosphere into and out of the system. Connect receiving cow to cold trap. Connect cold trap to manifold. Connect vacuum gauge to manifold. At this point, ensure all connections are correct. Also ensure receiving cow is positioned to collect the first fraction in the far-left receiving flask. Circulator should be at its set temperature. Turn on vacuum pump to begin process. Turn on heat and set to 60C. Vacuum pump will begin to pull down and temperature will begin to rise. Watch the gauge to monitor vacuum pressure and stability. Start stir slower and increase speed with temperature. Once you are close to 60C, increase the temperature 20 degrees. Continue to raise the heat incrementally in 20-degree steps, increasing the set temperature as you near your set point. Increase temperatures incrementally until you reach 220C. You will see your first fraction somewhere between 180C and 190C or slightly before. This is the “heads” fraction. You will move to your second fraction when you see an increased reaction in the head, a slight color change toward golden, as well as a thickening of distillate. When this fraction hits, allow the distillate to “self-clean” the head for a minute or two then, rotate the cow to the middle receiving flask. Collect your “main body” fraction. You will see temps between 190-220C during this fraction. Continue to increase stirring speed as necessary. Reaction in the head may vary but it should never stop. As fluid level in the boiling flask decreases, increase stir speed. The final “tails” fraction is a mixture of the first and second fractions and should be saved for re-distillation later. Ideally, you want to turn the cow to the final flask before the tails fraction hits. The “tails” fraction has an obvious color change and will be darker than the “main body” fraction. You will see temps between 200-250C during this fraction. As fluid level in the boiling flask decreases even more, set stirring RPM higher (1000+ RPM). You may need to compensate with a bit more heat to finish of the final fraction as well. Once process is complete, stop heat, stop stir, and stop vacuum. Let atmosphere into the system. Be sure to properly store your distillate as exposure to air and light can cause oxidation. Learn more about short path distillation components and FAQs with this distillation guide. *Notice to Customers: All units are inspected for broken glassware or parts before leaving BVV™. If the unit arrives damaged (this does not include minor imperfections or scuffs in glassware), the customer MUST contact BVV™ within 72 hours from carrier delivery to file a claim. If the customer DOES NOT contact BVV™ within 72 hours from carrier delivery, then BVV™ cannot issue any replacement(s) or compensation for the item; a new purchase will need to be made for a replacement. BVV™ is not responsible for the failure of glassware which must be inspected before and after every use because it may eventually develop imperfections or damage through normal usage, mishandling, and stress caused by temperature variations. If an imperfection or damage is noted while inspecting the glassware DO NOT use the glassware because it can fail, which can cause bodily harm or damage to the surrounding area.
$3,066.95
-

160L Centrifuge Bags
This nylon bag is designed to fit in our BVV brand centrifuges to contain material and be easily swappable after runs to speed up processing times. These bags come with 2 zippers and come in 1, 10, 50, 100, and 200 micron filtration levels. For use with 160L Centrifuges Appx. Size : 31.25" Diameter x 13" Height Specifications SKU Appx. Diameter In. Appx. Height in. CFB-45L-XXX 17.5" 11.75" CFB-160L-XXX 32.25" 13" CFB-280L-XXX 39.25" 14" CFB-475L-XXX 47.25" 16.75"
$305.97 - $577.31
-

Diamond Sauce Separator for 1.9 ft³ Ovens and Larger
BVV Diamond Sauce Separator The BVV diamond sauce separator is a good compliment to any diamond miner. With this vessel you can easily strain and separate your diamonds from the sauce using the internal basket. You can clean your diamonds like never before with less work. DSS-9 12.25" Exact Height (Fits 1.9 ft³ Vacuum Ovens) 6" Deep Basket (100 micron mesh Dutch Weave) 3"x9" Main Body Spool DSS-12 15.25" Exact Height (Fits larger than 1.9 ft³ Vacuum Ovens) 9" Deep Basket (100 micron mesh Dutch Weave) 3"x12" Main Body Spool Replacement Top Gasket around the basket can be found Here.
$360.82 - $389.68
-
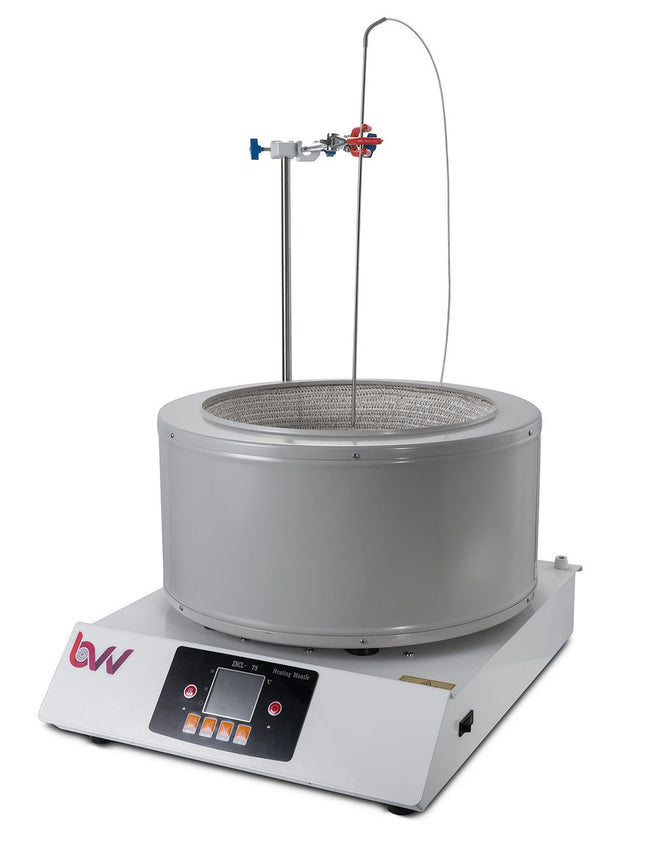
20L Digital Heating Mantle
20L DIGITAL HEATING AND STIRRING MANTLE Digital Heating and Stirring Mantles give the operator the most precise temperatures and readouts during distillations. These mantles autotune to specific user input to provide consistent results. Each mantle is equipped with large digital display that will give you readouts for both set temperature, actual temperature, and stirring speed. Each mantle also comes with a vertical brace bar and boss head as well as a temperature probe which plugs directly into the mantle. For first time use, the mantle should have an initial burn out done. This will burn off any residual oils used in the production of the insulation rope. The unit's max internal temperature cannot exceed 380C. The recommended max set temperature should not exceed 250C Specifications: Capacity: 20L (20000mL) Power Supply: 220V 60Hz (NEMA 6-20 plug) Adjustable Rotation Speed: 50-1800 RPM Motor Power: 40W, DC14-24V Heating Power 180-2200W Temperature Control Accuracy: +/- 1C Intelligent Temperature Control: Yes Temperature Range: RT+10-380C Insulation Material: Alkali-free Glass Fiber, temperature resistant up to 450C Shipping Dimensions: 25 x 25 x 18 in. Weight: 35 lbs
$2,525.72
-

280L Centrifuge Bags
This nylon bag is designed to fit in our BVV brand centrifuges to contain material and be easily swappable after runs to speed up processing times. These bags come with 2 zippers and come in 1, 10, 50, 100, and 200 micron filtration levels. For use with 280L Centrifuges Appx. Size : 39.25" Diameter x 14" Height Specifications SKU Appx. Diameter In. Appx. Height in. CFB-45L-XXX 17.5" 11.75" CFB-160L-XXX 32.25" 13" CFB-280L-XXX 39.25" 14" CFB-475L-XXX 47.25" 16.75"
$339.17 - $649.47
-

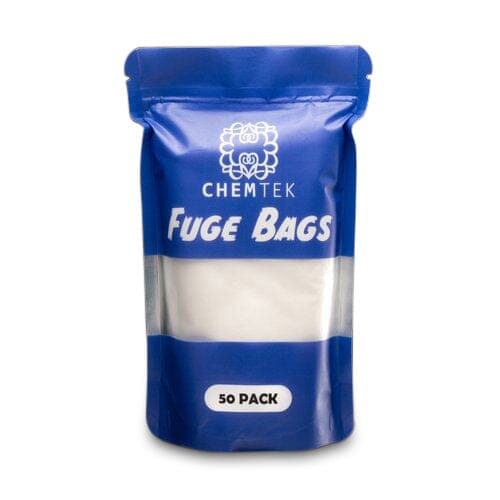
ChemTek ChemTek Large Fuge Bags - 50 Pack
ChemTek Large Fuge Bags - 50 Pack Centrifuge bags used for separations. Specifications: Size: 50-Pack Dimensions: H: 7” W: 6.5” Micron Size: 25 Micron Material: Food Grade Nylon
$72.16
-

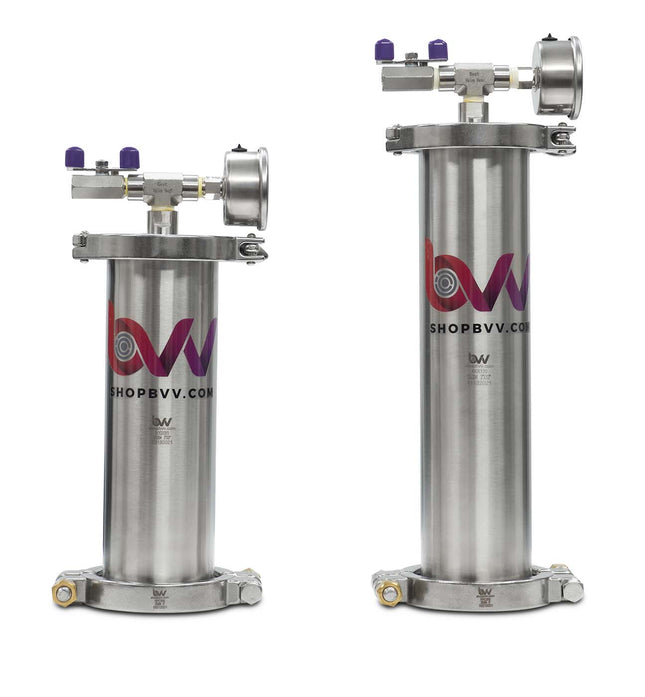
Color Remediation Column CRC w/ Bypass
Color Remediation Column w/ Bypass The CRC is a secondary column used as a filtration cartridge for hydrocarbon and ethanol extraction systems. Filter medias are packed in the column above a triple filtration stack, which aids in the removal of impurities from extracted oils. The CRC features a bypass path, allowing the operator to skip the column in case of a clog. The color remediation process is made simple by bundling the cartridge with the needed filter medias. We have paired the unit with suggested media, supplied in the proper ratio, and a standard operating procedure. The included procedure takes all the guesswork out of filtration, delivering the desired results the first try. Our CRC comes available with 1/4",3/8", and 1/2" MJIC connections, your choice of a 3",4", and 6" diameter spool with a 12" height, and rack mounting brackets standard to accommodate systems of any size. This Kit Includes: Color Remediation Column Rack Mounting Brackets 100 pack of 8 and 20-micron filter papers 1000g of Activated Alumina 1000g of Silica 60A 1000g of Pure-Flo® B80 (81, 5000, 6000 or Color Bleach)*Substitutes 1000g of Celite®545 Instruction Manual
$1,515.43 - $2,237.07
-

Diamond Sauce Separator Basket Dutch Weave 100 Micron
BVV Diamond Sauce Separator Baskets for your Diamond Sauce Separator sold "A la Carte" The 6" long basket fit the BVV DSS-9 The 8.25" long basket fit the BVV DSS-12 The basket is a Dutch Weave all 304 Stainless Steel basket, and fits inside a 3" tri-clamp spool. The lip perfectly fits the tri clamp flange and works with our Dutch Weave product line gaskets.
$43.30 - $50.51
-
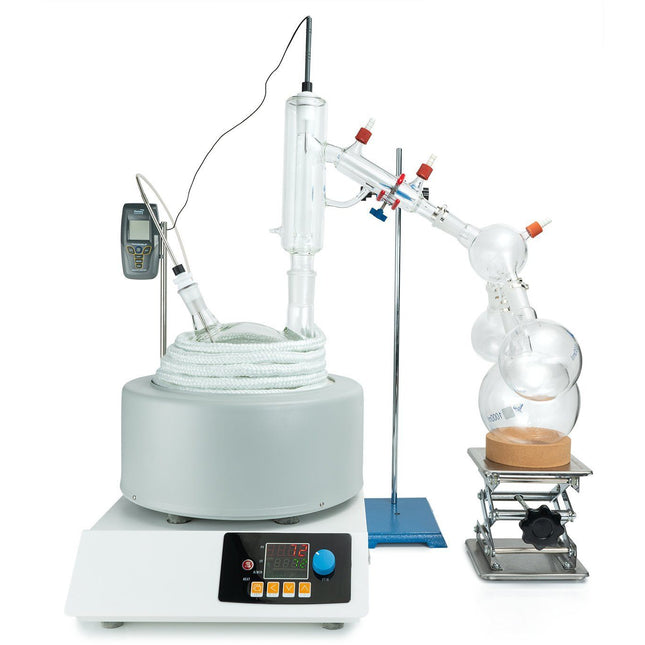
2L Short Path Distillation Kit with P2 Distillation Head
2L Short Path Distillation Kit with P2 Distillation Head The 2L Distillation Kit w/ P2 Distillation Head includes everything needed to perform distillation excluding the vacuum pump and chiller. This kit features our USA made P2 Distillation Head as well as USA made glass. It is designed with ease of use in mind and includes the highest quality components to ensure results are repeatable time and again. **This Kit Does NOT include a vacuum pump or circulator. Please see the below recommendations for both as well as recommended add-ons. Or check out our 2L Premium Turnkey Setup which includes vacuum pump and circulator.** Crossbar pictured is not included. We recommend purchasing multiple lab stands to accomodate your specific needs. Recommended Vacuum Pumps: Pro Series 5.6CFM Corrosion Resistant Two Stage Vacuum Pump (recommended option) Just Better 6 CFM 2 Stage Deep Vacuum Pump (USA made economy option) Welch 1400 DuoSeal 0.9 cfm 0.1 Micron Belt Drive Dual-Stage Pump Recommended Circulators: Polyscience 7 Liter MX Heated Circulator (economy option) Polyscience 7 Liter MX Refrigerated Circulator (premium option with chilling capability) Recommended Add-Ons: Glass Dewar Style Cold Trap (recommended cold trap) Bullseye Precison Vacuum Gauge (premium vacuum gauge for measuring depth) CT40 or CT80 Electronic Cold Trap (electronic cold trap, dry ice replacement) J-KEM Digital Vapor Temp Monitor (digital vapor temp monitor with data-logging capabilities) Specifications: Boiling Flask Size: 2L Receveiving Flask Size: 250mL Batch Capacity approximate: 2L = 400-1000 grams Run time: 4 to 8 hours dependent upon material composition and throughput Distillation Temperature Range: 140-250C (Do not exceed 250C) Recommended Condenser Temperature: 40-50C This Kit Includes: Glass components: 2L USA Made 2-Neck Boiling Flask P2 USA Made Distillation Head Triple Neck Cow 3x 250mL Receiving Flask 2x 24/40 Chemglass Thermometer Inlet Adapter 120mm Glass Funnel Accessories: Magnetic PTFE Stirring Bar Retriever 5 Pack of Metal Keck Clips Dow Corning High Vacuum Silicone Grease Tripod Stand 2L Digital Heating and Stirring Mantle 3 Finger Clamp Adjustable 0-70mm 6" x 6" Scissor Jack 250-500ml Cork Stand 10ft of Vacuum Hose 10ft of Chiller Hose 1/4" Vacuum Manifold Traceable Kangaroo Thermometer - Digital 10 Pack of Adjustable Stainless Steel Tubing Clamps Fiberglass Insulation Rope 10 Feet 1.5 Gallon Cold Trap (2QT Tank) Dry Ice, Liquid Nitrogen w/ 2x 1/4" Barb Adapters Distillation Quick Start Guide This guide gives basic quick start instructions for distillation systems. It is intended to provide a starting point for learning the process. Parameters should be adjusted to suit specific needs, Before beginning distillation, ensure the following steps have been taken: Vacuum Pump is in good working order. Pump should be run against dry load to allow internals to warm up. Oil should be clear. Cloudy or dark oil should be changed. All glass components are in good working order and ready to be assembled A winterization and degassing procedure has been done to prepare oil for distillation The unit's max internal temperature cannot exceed 380C. The recommended max set temperature should not exceed 250C Once all three of these steps have been completed, you are ready to begin distilling. Begin by placing stir bar in boiling flask and then load your material. This should be done using a funnel. A small amount of alcohol in the oil will give it a thinner consistency making it easier to transfer. Assemble all glassware and ensure each joint is properly greased. Do not use too much, as the vacuum pressure might pull some grease into the system. To ensure a full seal, spread grease in a circular motion by rotating glassware Attach circulator to condenser and set temperature to 50C. Allow circulator to reach temperature before beginning distillation. Connect vacuum pump to manifold. The manifold will allow you to isolate each individual component as well as let atmosphere into and out of the system. Connect receiving cow to cold trap. Connect cold trap to manifold. Connect vacuum gauge to manifold. At this point, ensure all connections are correct. Also ensure receiving cow is positioned to collect the first fraction in the far-left receiving flask. Circulator should be at its set temperature. Turn on vacuum pump to begin process. Turn on heat and set to 60C. Vacuum pump will begin to pull down and temperature will begin to rise. Watch the gauge to monitor vacuum pressure and stability. Start stir slower and increase speed with temperature. Once you are close to 60C, increase the temperature 20 degrees. Continue to raise the heat incrementally in 20-degree steps, increasing the set temperature as you near your set point. Increase temperatures incrementally until you reach 220C. You will see your first fraction somewhere between 180C and 190C or slightly before. This is the “heads” fraction. You will move to your second fraction when you see an increased reaction in the head, a slight color change toward golden, as well as a thickening of distillate. When this fraction hits, allow the distillate to “self-clean” the head for a minute or two then, rotate the cow to the middle receiving flask. Collect your “main body” fraction. You will see temps between 190-220C during this fraction. Continue to increase stirring speed as necessary. Reaction in the head may vary but it should never stop. As fluid level in the boiling flask decreases, increase stir speed. The final “tails” fraction is a mixture of the first and second fractions and should be saved for re-distillation later. Ideally, you want to turn the cow to the final flask before the tails fraction hits. The “tails” fraction has an obvious color change and will be darker than the “main body” fraction. You will see temps between 200-250C during this fraction. As fluid level in the boiling flask decreases even more, set stirring RPM higher (1000+ RPM). You may need to compensate with a bit more heat to finish of the final fraction as well. Once process is complete, stop heat, stop stir, and stop vacuum. Let atmosphere into the system. Be sure to properly store your distillate as exposure to air and light can cause oxidation. *Notice to Customers: All units are inspected for broken glassware or parts before leaving BVV™. If the unit arrives damaged (this does not include minor imperfections or scuffs in glassware), the customer MUST contact BVV™ within 72 hours from carrier delivery to file a claim. If the customer DOES NOT contact BVV™ within 72 hours from carrier delivery, then BVV™ cannot issue any replacement(s) or compensation for the item; a new purchase will need to be made for a replacement. BVV™ is not responsible for the failure of glassware which must be inspected before and after every use because it may eventually develop imperfections or damage through normal usage, mishandling, and stress caused by temperature variations. If an imperfection or damage is noted while inspecting the glassware DO NOT use the glassware because it can fail, which can cause bodily harm or damage to the surrounding area.
$4,185.48
-

2L Premium Short Path Distillation Turnkey Setup with P2 Distillation Head
2L Premium Short Path Distillation Turnkey Setup with P2 Distillation Head The 2L Premium Distillation Turnkey Setup features our 2L Distillation Kit with P2 Distillation Head and USA made glass. Every component in this turnkey is made for precision, throughput, and repeatable results. Also included is our Pro Series 11.3CFM Corrosion Resistant Two Stage Vacuum Pump giving you extreme power and depth with long lifespan, the Bullseye Precision Vacuum Gauge from Digivac which is the most rugged and dependable vacuum gauge on the market, and a Polyscience 7L MX Heated Circulator for maximum condensation of vapors. You will also receive a Dewar Style Glass Cold Trap to keep all volatiles and solvents out of your vacuum system. This Turnkey Setup gives you everything needed to perform distillation at the highest level. The Premium Turnkey Kit Includes: 2L Distillation Kit w/ P2 Distillation Head KF-25 x 1/4" Barb Adapter Dewar Style Glass Cold Trap Bullseye precision Vacuum Gauge Polyscience 7L MX Heated Circulator Pro Series 14.1CFM Corrosion Resistant Two Stage Vacuum Pump Distillation Quick Start Guide This guide gives basic quick start instructions for distillation systems. It is intended to provide a starting point for learning the process. Parameters should be adjusted to suit specific needs, Before beginning distillation, ensure the following steps have been taken: Vacuum Pump is in good working order. Pump should be run against dry load to allow internals to warm up. Oil should be clear. Cloudy or dark oil should be changed. All glass components are in good working order and ready to be assembled A winterization and degassing procedure has been done to prepare oil for distillation Once all three of these steps have been completed, you are ready to begin distilling. Begin by placing stir bar in boiling flask and then load your material. This should be done using a funnel. A small amount of alcohol in the oil will give it a thinner consistency making it easier to transfer. Assemble all glassware and ensure each joint is properly greased. Do not use too much, as the vacuum pressure might pull some grease into the system. To ensure a full seal, spread grease in a circular motion by rotating glassware Attach circulator to condenser and set temperature to 50C. Allow circulator to reach temperature before beginning distillation. Connect vacuum pump to manifold. The manifold will allow you to isolate each individual component as well as let atmosphere into and out of the system. Connect receiving cow to cold trap. Connect cold trap to manifold. Connect vacuum gauge to manifold. At this point, ensure all connections are correct. Also ensure receiving cow is positioned to collect the first fraction in the far-left receiving flask. Circulator should be at its set temperature. Turn on vacuum pump to begin process. Turn on heat and set to 60C. Vacuum pump will begin to pull down and temperature will begin to rise. Watch the gauge to monitor vacuum pressure and stability. Start stir slower and increase speed with temperature. Once you are close to 60C, increase the temperature 20 degrees. Continue to raise the heat incrementally in 20-degree steps, increasing the set temperature as you near your set point. Increase temperatures incrementally until you reach 220C. You will see your first fraction somewhere between 180C and 190C or slightly before. This is the “heads” fraction. You will move to your second fraction when you see an increased reaction in the head, a slight color change toward golden, as well as a thickening of distillate. When this fraction hits, allow the distillate to “self-clean” the head for a minute or two then, rotate the cow to the middle receiving flask. Collect your “main body” fraction. You will see temps between 190-220C during this fraction. Continue to increase stirring speed as necessary. Reaction in the head may vary but it should never stop. As fluid level in the boiling flask decreases, increase stir speed. The final “tails” fraction is a mixture of the first and second fractions and should be saved for re-distillation later. Ideally, you want to turn the cow to the final flask before the tails fraction hits. The “tails” fraction has an obvious color change and will be darker than the “main body” fraction. You will see temps between 200-250C during this fraction. As fluid level in the boiling flask decreases even more, set stirring RPM higher (1000+ RPM). You may need to compensate with a bit more heat to finish of the final fraction as well. Once the process is complete, stop heat, stop stir, and stop vacuum. Let the atmosphere into the system. Be sure to properly store your distillate as exposure to air and light can cause oxidation. ***Note: This entire setup will ship via motor freight.*** ***Note: All units are inspected for broken glass or parts before unit is shipped. If unit arrives damaged or glass is broken (this does not include minor imperfections or scuffs in glassware), Customer MUST contact BVV™ within 3 days of delivery to file a claim and receive a replacement part. If customer DOES NOT contact BVV™ within 3 days of delivery responsibility for replacement parts falls on the customer and they must pay for replacement pieces.*** ***Glassware Safety Disclaimer: BVV™ is not responsible for failure of glassware which must be inspected before and after every use because it may eventually develop imperfections or damage through normal usage, mishandling, and stress caused by temperature variations. If an imperfection or damage is noted while inspecting the glassware DO NOT use the glassware because it can fail causing bodily harm or damage to the surrounding area.***
$8,659.61 - $11,041.01
-
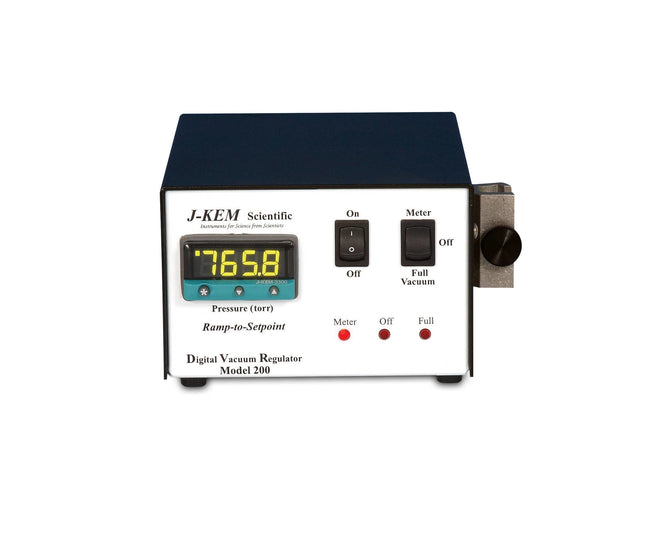
J-KEM Scientific J-KEM DVR-200-EV Digital Vacuum Regulator
J-KEM DVR-200-EV Digital Vacuum Regulator The DVR-200-EV has the same stainless steel pressure transducer inside, but the vacuum valve is outside of the controller. The value of this design is that the vacuum valve can be cleaned or replaced much easier than the valve in the classic DVR-200. Some applications, like distillations or stripping large volumes of solvent, can leave residues inside the valve which causes it to fail. Replacing the vacuum valve is the most frequent repair that J-KEM performs on the DVR-200. Replacing the valve in the classic DVR-200 is difficult and must be returned to J-KEM for repair. With the EV version, the user can disassembled the valve and wash it out, or even replace it in under 5 minutes. For large distillations or botanical applications, J-KEM recommends the DVR-200-EV. No Mercury 100% digital pressure entry and control Wetted parts are 100% stainless steel and Teflon Vacuum ramping feature eliminates bumping Resists: All organic solvents Acids Bases Water Specifications: 100 watts. Vacuum fittings: 1/8″ NPTM. Warranty: Electronics 2 Years, Vacuum Valve 6 months (void if damaged by chemical buildup)
$2,633.97
-

5L Short Path Distillation Kit with P5 Distillation Head
5L Short Path Distillation Kit with P5 Distillation Head This unit carries a 2 day lead time. The 5L Distillation Kit includes everything needed to perform distillation excluding the vacuum pump and chiller. This kit features our USA made P5 Distillation Head, as well as USA, made glass. This Kit is designed for high volume production with the highest quality components for precise, repeatable results time and again. This Kit Does NOT include a vacuum pump or chiller. Please see the below recommendations for both as well as recommended add-ons. Recommended Vacuum Pumps: Pro Series 11.3CFM Corrosion Resistant Two Stage Vacuum Pump (recommended option) Just Better 6 CFM 2 Stage Deep Vacuum Pump (economy option) Recommended Chillers: Polyscience 7 Liter MX Heated Circulator (economy option) Polyscience 7 Liter Refrigerated Circulator (premium option with chilling capability) Recommended Add-Ons: Bullseye Precision Vacuum Gauge (premium vacuum gauge for measuing depth) CT40 or CT80 Electronic Cold Trap (electronic cold trap, dry ice replacement) J-KEM Digital Vapor Temp Monitor (digital vapor temp monitor with data-logging capabilites) Specifications: Boiling Flask Size: 5L Receiving Flask Size: 2x 500mL, 1000mL Batch Capacity approximate: 1000-2500 grams Run time: 4 to 8 hours dependent upon material composition and throughput Distillation Temperature Range: 140-250C (Do not exceed 250C) Recommended Condenser Temperature: 40-50C This Kit Includes: Glass components: 5L Boiling Flask P5V6 Distillation Head Triple Neck Cow 2x 500mL Receiving Flask 1L Receiving Flask 120mm Glass Funnel Dewar cold trap Accessories: PTFE Magnetic Stir Bar Retriever 5 Pack of Metal Keck Clips Dow Corning High Vacuum Silicone Grease Tripod Stand 5L Digital Heating and Stirring Mantle 3-Finger Adjustable Clamp 0-77mm 6" x 6" Scissor Jack 500-1000mL Cork Stand 2x 24/40 ChemglassPTFE Thermometer Inlet Adapter 10ft of Gum Rubber Vacuum Hose 10ft of Silicone Chiller Hose 1/4" Vacuum Manifold Traceable Kangaroo Thermometer - Digital 10 Pack of Adjustable Stainless Steel Tubing Clamps Fiberglass Insulation Rope 10 Feet Distillation Quick Start Guide This guide gives basic quick start instructions for distillation systems. It is intended to provide a starting point for learning the process. Parameters should be adjusted to suit specific needs, Before beginning distillation, ensure the following steps have been taken: Vacuum Pump is in good working order. Pump should be run against dry load to allow internals to warm up. Oil should be clear. Cloudy or dark oil should be changed. All glass components are in good working order and ready to be assembled A winterization and degassing procedure has been done to prepare oil for distillation The unit's max internal temperature cannot exceed 380C. The recommended max set temperature should not exceed 250C Once all three of these steps have been completed, you are ready to begin distilling. Begin by placing stir bar in boiling flask and then load your material. This should be done using a funnel. A small amount of alcohol in the oil will give it a thinner consistency making it easier to transfer. Assemble all glassware and ensure each joint is properly greased. Do not use too much, as the vacuum pressure might pull some grease into the system. To ensure a full seal, spread grease in a circular motion by rotating glassware Attach circulator to condenser and set temperature to 50C. Allow circulator to reach temperature before beginning distillation. Connect vacuum pump to manifold. The manifold will allow you to isolate each individual component as well as let atmosphere into and out of the system. Connect receiving cow to cold trap. Connect cold trap to manifold. Connect vacuum gauge to manifold. At this point, ensure all connections are correct. Also ensure receiving cow is positioned to collect the first fraction in the far-left receiving flask. Circulator should be at its set temperature. Turn on vacuum pump to begin process. Turn on heat and set to 60C. Vacuum pump will begin to pull down and temperature will begin to rise. Watch the gauge to monitor vacuum pressure and stability. Start stir slower and increase speed with temperature. Once you are close to 60C, increase the temperature 20 degrees. Continue to raise the heat incrementally in 20-degree steps, increasing the set temperature as you near your set point. Increase temperatures incrementally until you reach 220C. You will see your first fraction somewhere between 180C and 190C or slightly before. This is the “heads” fraction. You will move to your second fraction when you see an increased reaction in the head, a slight color change toward golden, as well as a thickening of distillate. When this fraction hits, allow the distillate to “self-clean” the head for a minute or two then, rotate the cow to the middle receiving flask. Collect your “main body” fraction. You will see temps between 190-220C during this fraction. Continue to increase stirring speed as necessary. Reaction in the head may vary but it should never stop. As fluid level in the boiling flask decreases, increase stir speed. The final “tails” fraction is a mixture of the first and second fractions and should be saved for re-distillation later. Ideally, you want to turn the cow to the final flask before the tails fraction hits. The “tails” fraction has an obvious color change and will be darker than the “main body” fraction. You will see temps between 200-250C during this fraction. As fluid level in the boiling flask decreases even more, set stirring RPM higher (1000+ RPM). You may need to compensate with a bit more heat to finish of the final fraction as well. Once process is complete, stop heat, stop stir, and stop vacuum. Let atmosphere into the system. Be sure to properly store your distillate as exposure to air and light can cause oxidation. *Notice to Customers: All units are inspected for broken glassware or parts before leaving BVV™. If the unit arrives damaged (this does not include minor imperfections or scuffs in glassware), the customer MUST contact BVV™ within 72 hours from carrier delivery to file a claim. If the customer DOES NOT contact BVV™ within 72 hours from carrier delivery, then BVV™ cannot issue any replacement(s) or compensation for the item; a new purchase will need to be made for a replacement. BVV™ is not responsible for the failure of glassware which must be inspected before and after every use because it may eventually develop imperfections or damage through normal usage, mishandling, and stress caused by temperature variations. If an imperfection or damage is noted while inspecting the glassware DO NOT use the glassware because it can fail, which can cause bodily harm or damage to the surrounding area.
$3,175.19
-

Neocision 20L Neocision Dual Short Path Distillation Turnkey System
20L Neocision Dual Short Path Distillation Turnkey System This unit carries a 2 day lead time. (Note: This kit does NOT include the stainless steel table.) The 20L Neocision Distillation Turnkey Setup features our Dual USA made P10V6 Distillation Heads. Every component in this distillation kit is made for precision, throughput, and repeatable results. You will also receive Dual Dewar Style Ribbed Glass Cold Traps to keep all volatiles and solvents out of your vacuum system. This Turnkey Setup gives you everything needed to perform distillation at the highest level. The 20L Neo Kit Includes: 20L Neocision Kit with glassware, labware, and Dual P10V6 Distillation Heads. BVV 15 Liter Advanced Digital Heated Circulator Choice of Vacuum Pump KF-25 Bellow Y Manifold Dual Ribbed Dewar Style Glass Cold Trap Non-Mercury Glass Thermometers 20L Digital Heating and Stirring Mantle Distillation Quick Start Guide This guide gives basic quick start instructions for distillation systems. It is intended to provide a starting point for learning the process. Parameters should be adjusted to suit specific needs, Before beginning distillation, ensure the following steps have been taken: Vacuum Pump is in good working order. Pump should be run against dry load to allow internals to warm up. Oil should be clear. Cloudy or dark oil should be changed. All glass components are in good working order and ready to be assembled A winterization and degassing procedure has been done to prepare oil for distillation The unit's max internal temperature cannot exceed 380C. The recommended max set temperature should not exceed 250C Once all three of these steps have been completed, you are ready to begin distilling. Begin by placing stir bar in the boiling flask and then load your material. This should be done using a funnel. A small amount of alcohol in the oil will give it a thinner consistency making it easier to transfer. Assemble all glassware and ensure each joint is properly greased. Do not use too much, as the vacuum pressure might pull some grease into the system. To ensure a full seal, spread grease in a circular motion by rotating glassware Attach circulator to condenser and set temperature to 50C. Allow circulator to reach temperature before beginning distillation. Connect vacuum pump to manifold. The manifold will allow you to isolate each individual component as well as let atmosphere into and out of the system. Connect receiving cow to cold trap. Connect cold trap to manifold. Connect vacuum gauge to manifold. At this point, ensure all connections are correct. Also ensure receiving cow is positioned to collect the first fraction in the far-left receiving flask. Circulator should be at its set temperature. Turn on vacuum pump to begin process. Turn on heat and set to 60C. Vacuum pump will begin to pull down and temperature will begin to rise. Watch the gauge to monitor vacuum pressure and stability. Start stir slower and increase speed with temperature. Once you are close to 60C, increase the temperature 20 degrees. Continue to raise the heat incrementally in 20-degree steps, increasing the set temperature as you near your set point. Increase temperatures incrementally until you reach 220C. You will see your first fraction somewhere between 180C and 190C or slightly before. This is the “heads” fraction. You will move to your second fraction when you see an increased reaction in the head, a slight color change toward golden, as well as a thickening of distillate. When this fraction hits, allow the distillate to “self-clean” the head for a minute or two then, rotate the cow to the middle receiving flask. Collect your “main body” fraction. You will see temps between 190-220C during this fraction. Continue to increase stirring speed as necessary. Reaction in the head may vary but it should never stop. As fluid level in the boiling flask decreases, increase stir speed. The final “tails” fraction is a mixture of the first and second fractions and should be saved for re-distillation later. Ideally, you want to turn the cow to the final flask before the tails fraction hits. The “tails” fraction has an obvious color change and will be darker than the “main body” fraction. You will see temps between 200-250C during this fraction. As fluid level in the boiling flask decreases even more, set stirring RPM higher (1000+ RPM). You may need to compensate with a bit more heat to finish of the final fraction as well. Once process is complete, stop heat, stop stir, and stop vacuum. Let atmosphere into the system. Be sure to properly store your distillate as exposure to air and light can cause oxidation. ***Note: This entire setup will ship via motor freight.*** *Notice to Customers: All units are inspected for broken glassware or parts before leaving BVV™. If the unit arrives damaged (this does not include minor imperfections or scuffs in glassware), the customer MUST contact BVV™ within 72 hours from carrier delivery to file a claim. If the customer DOES NOT contact BVV™ within 72 hours from carrier delivery, then BVV™ cannot issue any replacement(s) or compensation for the item; a new purchase will need to be made for a replacement. BVV™ is not responsible for the failure of glassware which must be inspected before and after every use because it may eventually develop imperfections or damage through normal usage, mishandling, and stress caused by temperature variations. If an imperfection or damage is noted while inspecting the glassware DO NOT use the glassware because it can fail, which can cause bodily harm or damage to the surrounding area.
$18,762.50 - $24,535.57
-

ChemTek ChemTek Medium Fuge Bags - 50 Pack
ChemTek Medium Fuge Bags - 50 Pack Centrifuge bags used for separations Specifications: Size: 50-Pack Dimensions:H: 7” W: 5” Micron Size: 25 Micron Material: Food Grade Nylon
$43.30
-
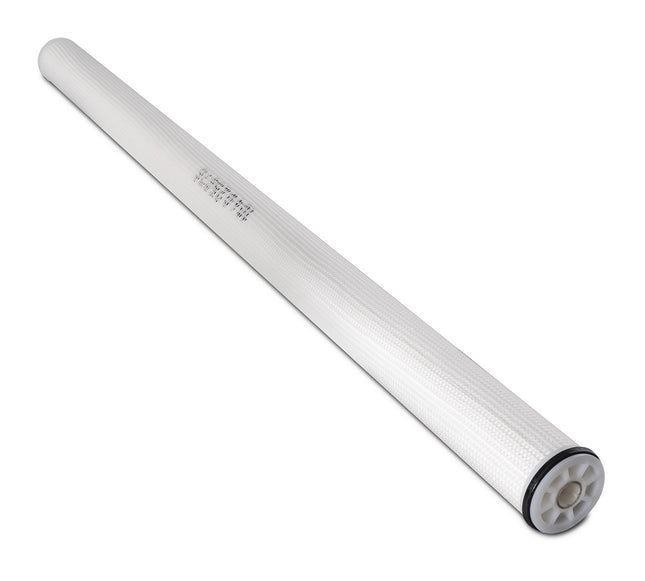

Synder NFS Membrane (200-300Da MWCO)
Synder NFS Membrane With a pore size ranging between 0.1-10nm, Synder Filtration's nanofiltration membranes enable the passage of water and certain salts through the membrane while effectively retaining multivalent ions, low molecular weight molecules, sugars, proteins, and various organic compounds. A result of extensive research and development, Synder's NFS, NFX, NFW, and NFG nanofiltration membrane products have demonstrated exceptional resistance to fouling, a high level of selectivity, and the physical durability necessary for diverse industrial separation processes. Specifically, NFS, NFX, and NFW exhibit outstanding rejection of MgSO4 and lactose, while NFG is designed to partially remove monosaccharides from oligosaccharides. These nanofiltration membranes, as a whole, have the capacity to significantly reduce levels of hardness, nitrates, sulfates, tannins, turbidity, color, total dissolved solids (TDS), and moderate levels of salt from feed water streams. The proven performance of Synder's nanofiltration membranes makes them well-suited for a broad spectrum of industrial applications including the desolvation of ethanol from botanical extract solutions. BVV utilizes 4X NFS 2540 Membranes inside our Nanofiltration Skid to recovery ethanol at 30 Gallons per hour. Specifications Polymer: Proprietary PA TFC Approx. Molecular Weight Cutoff: 100-250 DA Typical Operating Flux 30-40 GFD Average Lactose Rejection: 99.5% Average MgSO4 Rejection: 99.5% Average NaCl Rejection: 50% Maximum Operating Pressure <95F/35C: 600PSI/41.4 Bar Maximum Operating Pressure >95F/35C: 435PSI/30 Bar Maximum Pressure Drop per Element: 15PSI/1.0 Bar Maximum Pressure Drop per hosing: 60PSI/4.1 Bar Maximum continuous Operation Temperature: 122F/50C Maximum CIP Temperature: 104F/40C Maximum Temperature Operating pH Range: 3-9.5 Ambient Temperature Operating pH Range: 3-10.5 Maximum Temperature Cleaning pH Range: 2-11 Ambient Temperature Cleaning pH Range: 2-11
$1,411.52 - $1,796.87
-

ChemTek ChemTek Wide Mouth Fuge Basket Small - 4 Pack
ChemTek Wide Mouth Fuge Basket - 4 Pack Used for separating oils from solids. Different micron options are available. Specifications: 25 Micron 304 Stainless Steel H: 2.5” W: 3.25”
$72.16
-
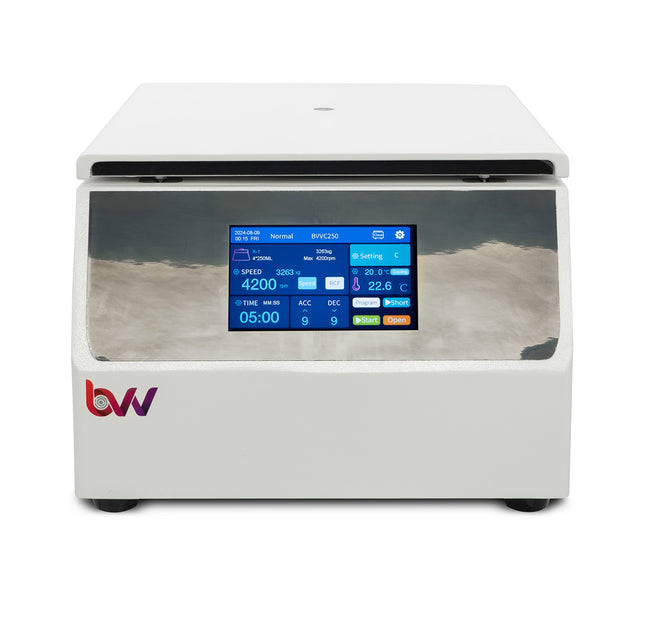

Centrifuge C250
BVV C250 Centrifuge The BVV C250 Centrifuge is a large-capacity desktop centrifuge with broad functionality suitable for various applications. The BVV C250 Centrifuge can be used to separate or concentrate samples by density or utilized to separate solid constituents from liquid constituents. The BVV C250 Centrifuge has a maximum speed of 5000rpm with a maximum centrifugal force is 3899xg which allows for fast separation times. It's user friendly simple to use touch screen interface allows for easy operation even when wearing gloves. With built-in cooling fans, the BVV C250 ensures sample preservation while allowing for heat-assisted separations. While the BVV C250 is not actively heated or refrigerated it typically operates at 130F/54C allowing for quick and efficient separations. For Solid & liquid separations we recommend utilizing our 45 Micron Large Rosin Bags, The BVV C250 comes with 3 sets of centrifuge baskets including: 4X 250ML Stainless Steel Separators 4X 2X 50ML Centrifuge Tube Plastic Inserts (8X 50ML Centrifuge Tube Capacity) *Centrifuge tubes not included* 10X Small Rosin Bags 45 Micron Features •Digital LCD display with a user-friendly interface for easy operation. •Microprocessor control, DC brushless motor with low noise and high accuracy. •Dual locking design with lock alarm on the interface. •Centrifuge chamber is made of 304 stainless steel to avoid corrosion. •Can switch RPM/RCF during operation. •Store up to 10 preset programs •Sound and indicator alarm for defaults. •Protection including door closing, malfunction, over-speed, over-heating, imbalance,etc. •Speed is adjustable to avoid sample suspension to ensure the performance. Technical Specifications Model BVVC250 Max Capacity 4*250mL Max Speed 5000rpm Max RCF 3899Xg Speed Accuracy ±10r/min Time Setting 0-99min59s Soft Brake 9 Ramps Noise ≤65dB(A) Power Supply 110V 60HZ Power Consumption 500W Net Weight 66lb/30kg Packing Size 20"x14"x*11"
$5,628.75
-
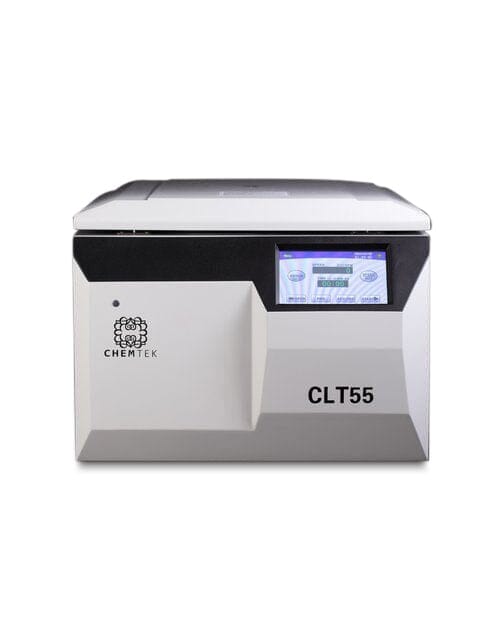
ChemTek ChemTek T55 Centrifuge
ChemTek CLT55 Centrifuge CLT55 centrifuges provide excellent performance and easy operation in a compact design that saves valuable time and laboratory space. Specifications: Power Supply: 110V 50/60Hz Max Speed: 4000 RPM Max Capacity:4x750ml Time Setting Range: Speed Accuracy: ± 10r/min Noise: ≤65dB Power Consumption: 900W Net Weight: 170lbs Comes with: (20) 50ml Tubes (4) Regular Mouth Basket (4) Wide Mouth Baskets (4) Regular Mouth Stainless Jar Lid/Band (4) Wide Mouth Stainless Jar Lid/Band (4) Five 50ml Tube Holder Inserts (4) Regular Mouth Jar Spacer Inserts (4) Wide Mouth Jar Spacer Inserts (1) 50-pack 5”x 7” Double Stitched Fuge Bags (1) 50-pack 6.5”x 7” Double Stitched Fuge Bags (1) Terp SqueeGee (1) 100-Pack of Large Diamond Grip Gloves (1) Power converter ChemTek CLT55 Centrifuge User Manual
$8,659.61
-
10L Premium Short Path Distillation Turnkey System
10L Premium Short Path Distillation Turnkey System This unit carries a 2 day lead time. (Note: Stainless Steel Table NOT Included.) The 10L Premium Short Path Distillation Turnkey System features our USA made P10 Distillation Head. Every component in this turnkey is made for precision, throughput, and repeatable results. Also included the Kangaroo digital thermometer which is very rugged and reliable. You will also receive a Ribbed Dewar Style Glass Cold Trap to keep all volatiles and solvents out of your vacuum system. This Turnkey Setup gives you everything needed to perform distillation at the highest level. The 10L Neo Kit Includes: 10L Short Path Distillation Kit including glassware, labware, and P10 Distillation Head. 10L Digital Heating and Stirring Mantle. Polyscience 15 Liter Advanced Digital Heated Circulator BVV™ 21.2CFM Pro Series Corrosion Resistant Vacuum Pump Valved Vacuum Adapter. Ribbed Dewar Style Glass Cold Trap. Kangaroo Digital Thermometer. Distillation Quick Start Guide This guide gives basic quick start instructions for distillation systems. It is intended to provide a starting point for learning the process. Parameters should be adjusted to suit specific needs, Before beginning distillation, ensure the following steps have been taken: Vacuum Pump is in good working order. Pump should be run against dry load to allow internals to warm up. Oil should be clear. Cloudy or dark oil should be changed. All glass components are in good working order and ready to be assembled A winterization and degassing procedure has been done to prepare oil for distillation The unit's max internal temperature cannot exceed 380C. The recommended max set temperature should not exceed 250C Once all three of these steps have been completed, you are ready to begin distilling. Begin by placing stir bar in boiling flask and then load your material. This should be done using a funnel. A small amount of alcohol in the oil will give it a thinner consistency making it easier to transfer. Assemble all glassware and ensure each joint is properly greased. Do not use too much, as the vacuum pressure might pull some grease into the system. To ensure a full seal, spread grease in a circular motion by rotating glassware Attach circulator to condenser and set temperature to 50C. Allow circulator to reach temperature before beginning distillation. Connect vacuum pump to manifold. The manifold will allow you to isolate each individual component as well as let atmosphere into and out of the system. Connect receiving cow to cold trap. Connect cold trap to manifold. Connect vacuum gauge to manifold. At this point, ensure all connections are correct. Also ensure receiving cow is positioned to collect the first fraction in the far-left receiving flask. Circulator should be at its set temperature. Turn on vacuum pump to begin process. Turn on heat and set to 60C. Vacuum pump will begin to pull down and temperature will begin to rise. Watch the gauge to monitor vacuum pressure and stability. Start stir slower and increase speed with temperature. Once you are close to 60C, increase the temperature 20 degrees. Continue to raise the heat incrementally in 20-degree steps, increasing the set temperature as you near your set point. Increase temperatures incrementally until you reach 220C. You will see your first fraction somewhere between 180C and 190C or slightly before. This is the “heads” fraction. You will move to your second fraction when you see an increased reaction in the head, a slight color change toward golden, as well as a thickening of distillate. When this fraction hits, allow the distillate to “self-clean” the head for a minute or two then, rotate the cow to the middle receiving flask. Collect your “main body” fraction. You will see temps between 190-220C during this fraction. Continue to increase stirring speed as necessary. Reaction in the head may vary but it should never stop. As fluid level in the boiling flask decreases, increase stir speed. The final “tails” fraction is a mixture of the first and second fractions and should be saved for re-distillation later. Ideally, you want to turn the cow to the final flask before the tails fraction hits. The “tails” fraction has an obvious color change and will be darker than the “main body” fraction. You will see temps between 200-250C during this fraction. As fluid level in the boiling flask decreases even more, set stirring RPM higher (1000+ RPM). You may need to compensate with a bit more heat to finish of the final fraction as well. Once process is complete, stop heat, stop stir, and stop vacuum. Let atmosphere into the system. Be sure to properly store your distillate as exposure to air and light can cause oxidation. ***Note: This entire setup will ship via motor freight.*** ***Note: All units are inspected for broken glass or parts before unit is shipped. If unit arrives damaged or glass is broken (this does not include minor imperfections or scuffs in glassware), Customer MUST contact BVV™ within 3 days of delivery to file a claim and receive a replacement part. If customer DOES NOT contact BVV™ within 3 days of delivery responsibility for replacement parts falls on the customer and they must pay for replacement pieces.*** ***Glassware Safety Disclaimer: BVV™ is not responsible for failure of glassware which must be inspected before and after every use because it may eventually develop imperfections or damage through normal usage, mishandling, and stress caused by temperature variations. If an imperfection or damage is noted while inspecting the glassware DO NOT use the glassware because it can fail causing bodily harm or damage to the surrounding area.***
$17,463.56
-
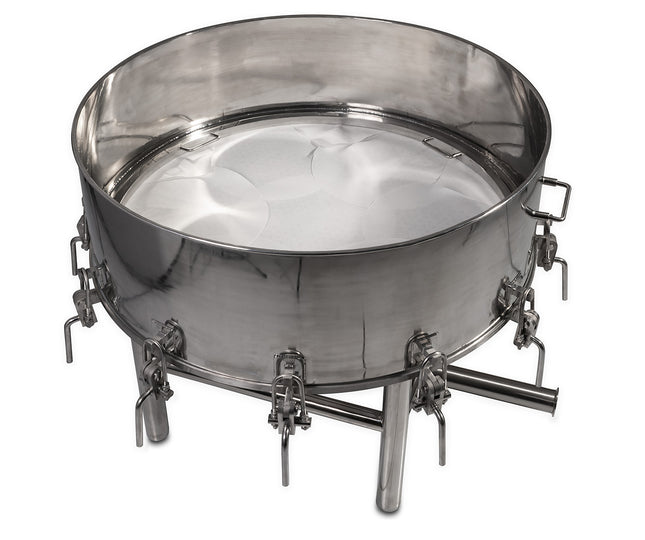

36 inch Filtration Funnel V2
Buchner Filtration Kit This filtration kit is operated by using a vacuum pump to pull the solution through the filter paper to remove particulate. The funnel has a 36" perforated plate to support the filter paper.
$10,968.85 - $11,805.94
-
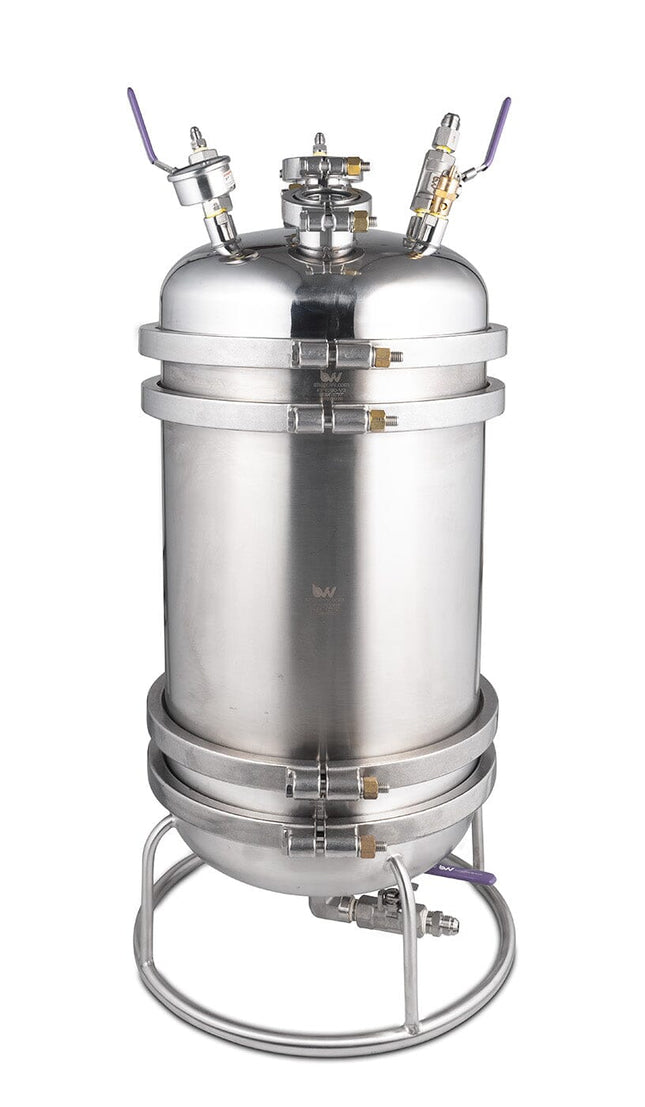

Nitrogen Pressure Filter
Nitrogen Pressure Filter Is vacuum filtration bottlenecking your processing? Filter faster with BVV's Nitrogen assisted pressure filters. Designed for versatility our prebuilt pressure filters come complete with our 1 micron Dutch Weave Sintered disk for ultra-fine filtration. Process continuous or batch-style solutions in half the time compared to most vacuum filtration applications. Specifications 6"x12" or 12"x12" filtration body 1um Dutch Weave Sintered disc Filter Plate Retention Ring Fast Flow Filter paper Included Solvent dispersal plate 2X Borosilicate Sight Glasses 1X 125 PSI ASME Safety Valves 1X -30hg-250PSI Compound Pressure Gauges 1X 1/2" JIC Lid Valve 2X 1/4" JIC Lid Valves 1X JIC Drain Valve (6NPS: 1/4" 12NPS: 1/2" JIC) Maximum Pressure Rating: 125PSI
$2,958.70 - $5,412.26
-
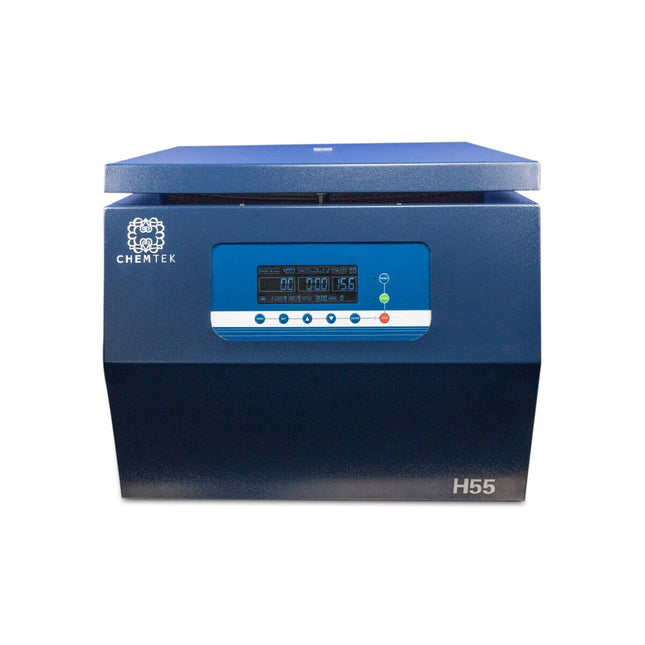
ChemTek ChemTek H55 Centrifuge
ChemTek H55 Centrifuge H55 centrifuges provide excellent performance and easy operation in a compact design that saves valuable time and laboratory space. The H55 is heated to assist with separation. Specifications: Power Supply: 110V 50/60Hz Max Speed: 4000 RPM Max RCF: Max Capacity:4x750ml Heat Capacity: 10C-70C Time Setting Range: 1 - 99min Speed Accuracy: ± 10r/min Noise: ≤65dB Power Consumption: 1500W Dimensions: Net Weight: 170lbs Comes with: (20) 50ml Tubes (4) Regular Mouth Basket (4) Wide Mouth Baskets (4) Regular Mouth Stainless Jar Lid/Band (4) Wide Mouth Stainless Jar Lid/Band (4) Five 50ml Tube Holder Inserts (4) Regular Mouth Jar Spacer Inserts (4) Wide Mouth Jar Spacer Inserts (1) 50-pack 5”x 7” Double Stitched Fuge Bags (1) 50-pack 6.5”x 7” Double Stitched Fuge Bags (1) Terp SqueeGee (1) 100-Pack of Large Diamond Grip Gloves
$10,247.21
-
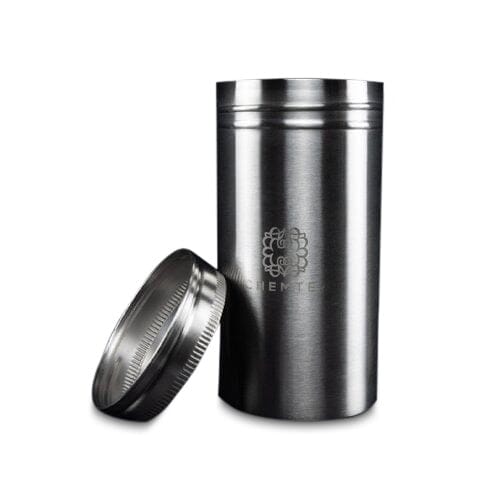
ChemTek ChemTek Wide Mouth Stainless Jar
ChemTek Wide Mouth Stainless Jar Triple-walled vacuum-insulated stainless steel jar for centrifuging. Material: 304 Stainless SteelHeight: 5.3”Width: 2.6” Capacity: 12oz
$38.97
-
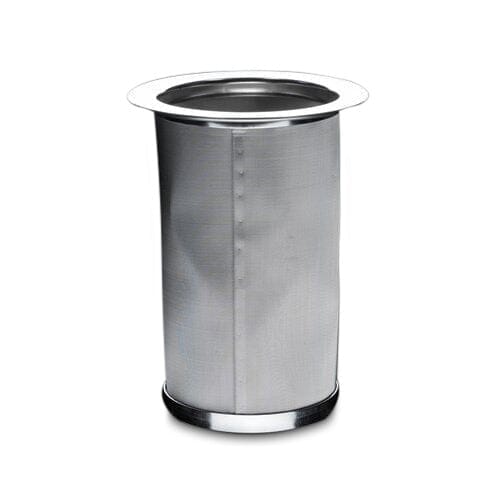
ChemTek ChemTek Regular Mouth Fuse Basket - 4 Pack
ChemTek Regular Mouth Fuge Basket - 4 Pack Used for separating oils from solids. Different micron options are available. Specifications: 304 Stainless Steel H: 3.5” W: 2.5”
$72.16
-
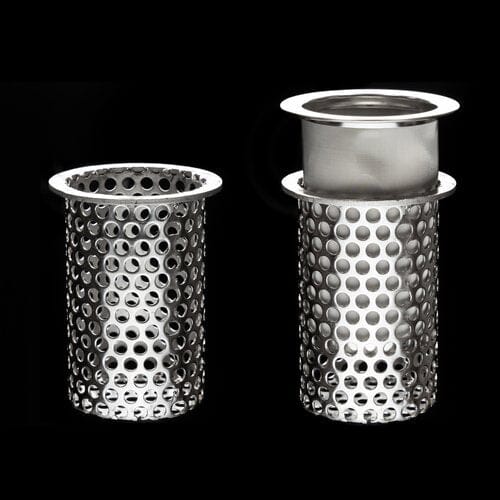
ChemTek ChemTek Regular Mouth Basket Support
ChemTek Regular Mouth Basket Support Made for supporting the centrifuge baskets to allow for higher RCF. Specifications: 304 Stainless Steel
$72.16 - $267.00
-

J-KEM Scientific J-KEM Digital Temperature Monitor
J-KEM Digital Temperature Monitor Monitors and displays the temperature of an attached piece of equipment on a bright LED display. Built-in USB and free KEM-Net software provide remote temperature monitoring and data logging to a GLP/GMP compliant file. Audible alarm. Specifications: 120 or 230Vac, 50 watts.Warranty: 2 Years The temperature range desired determines the probe/thermocouple type: J [black] (0 – 800° C) K [yellow] (-50 – 1200° C) T [blue] (-200 – 250° C)
$865.96 $721.63
-
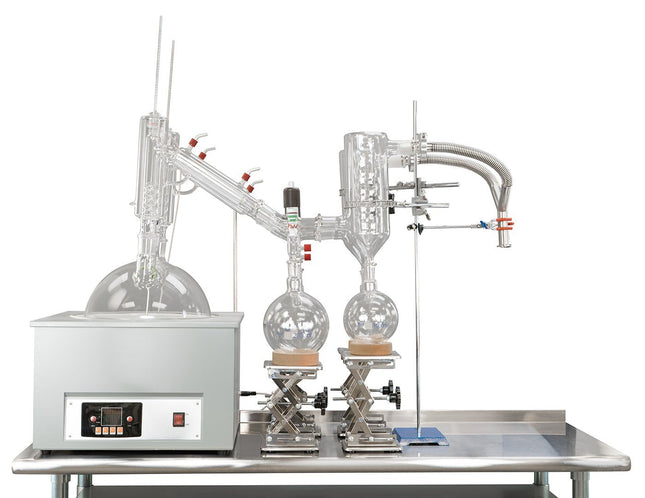
Neocision 20L Neocision Dual Head Short Path Distillation Kit
20L Neocision Dual Head Short Path Distillation Kit This unit carries a 2 day lead time. (Note: This kit does NOT include the stainless steel table.) The 20L Neocision Distillation Kit Setup features our Dual P10V6 Distillation Heads and USA made glass. Every component in this distillation kit is made for precision, throughput, and repeatable results. You will also receive Dual Dewar Style Ribbed Glass Cold Traps to keep all volatiles and solvents out of your vacuum system. This kit gives you the essentials of a short path distillation system and allows you to add a pump and temperature control system of your choosing. The 20L Neo Kit Includes: 20L Neocision Kit with glassware, labware, and Dual P10V6 Distillation Heads. KF-25 Bellow Y Manifold Dual Ribbed Dewar Style Glass Cold Trap Non-Mercury Glass Thermometers 20L Digital Heating and Stirring Mantle Distillation Quick Start Guide This guide gives basic quick start instructions for distillation systems. It is intended to provide a starting point for learning the process. Parameters should be adjusted to suit specific needs, Before beginning distillation, ensure the following steps have been taken: Vacuum Pump is in good working order. Pump should be run against dry load to allow internals to warm up. Oil should be clear. Cloudy or dark oil should be changed. All glass components are in good working order and ready to be assembled A winterization and degassing procedure has been done to prepare oil for distillation The unit's max internal temperature cannot exceed 380C. The recommended max set temperature should not exceed 250C Once all three of these steps have been completed, you are ready to begin distilling. Begin by placing stir bar in the boiling flask and then load your material. This should be done using a funnel. A small amount of alcohol in the oil will give it a thinner consistency making it easier to transfer. Assemble all glassware and ensure each joint is properly greased. Do not use too much, as the vacuum pressure might pull some grease into the system. To ensure a full seal, spread grease in a circular motion by rotating glassware Attach circulator to condenser and set temperature to 50C. Allow circulator to reach temperature before beginning distillation. Connect vacuum pump to manifold. The manifold will allow you to isolate each individual component as well as let atmosphere into and out of the system. Connect receiving cow to cold trap. Connect cold trap to manifold. Connect vacuum gauge to manifold. At this point, ensure all connections are correct. Also ensure receiving cow is positioned to collect the first fraction in the far-left receiving flask. Circulator should be at its set temperature. Turn on vacuum pump to begin process. Turn on heat and set to 60C. Vacuum pump will begin to pull down and temperature will begin to rise. Watch the gauge to monitor vacuum pressure and stability. Start stir slower and increase speed with temperature. Once you are close to 60C, increase the temperature 20 degrees. Continue to raise the heat incrementally in 20-degree steps, increasing the set temperature as you near your set point. Increase temperatures incrementally until you reach 220C. You will see your first fraction somewhere between 180C and 190C or slightly before. This is the “heads” fraction. You will move to your second fraction when you see an increased reaction in the head, a slight color change toward golden, as well as a thickening of distillate. When this fraction hits, allow the distillate to “self-clean” the head for a minute or two then, rotate the cow to the middle receiving flask. Collect your “main body” fraction. You will see temps between 190-220C during this fraction. Continue to increase stirring speed as necessary. Reaction in the head may vary but it should never stop. As fluid level in the boiling flask decreases, increase stir speed. The final “tails” fraction is a mixture of the first and second fractions and should be saved for re-distillation later. Ideally, you want to turn the cow to the final flask before the tails fraction hits. The “tails” fraction has an obvious color change and will be darker than the “main body” fraction. You will see temps between 200-250C during this fraction. As fluid level in the boiling flask decreases even more, set stirring RPM higher (1000+ RPM). You may need to compensate with a bit more heat to finish of the final fraction as well. Once process is complete, stop heat, stop stir, and stop vacuum. Let atmosphere into the system. Be sure to properly store your distillate as exposure to air and light can cause oxidation. *Note: This entire setup will ship via motor freight.*** *Notice to Customers: All units are inspected for broken glassware or parts before leaving BVV™. If the unit arrives damaged (this does not include minor imperfections or scuffs in glassware), the customer MUST contact BVV™ within 72 hours from carrier delivery to file a claim. If the customer DOES NOT contact BVV™ within 72 hours from carrier delivery, then BVV™ cannot issue any replacement(s) or compensation for the item; a new purchase will need to be made for a replacement. BVV™ is not responsible for the failure of glassware which must be inspected before and after every use because it may eventually develop imperfections or damage through normal usage, mishandling, and stress caused by temperature variations. If an imperfection or damage is noted while inspecting the glassware DO NOT use the glassware because it can fail, which can cause bodily harm or damage to the surrounding area.
$9,814.23 - $10,102.88
-
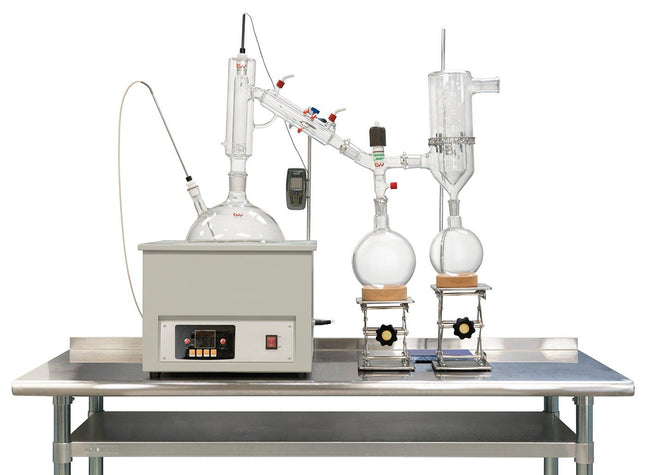
10L Premium Short Path Distillation Kit with P10 Distillation Head
10L Short Path Distillation Kit with P10 Distillation Head This unit carries a 2 day lead time. (Note: Stainless Steel Table NOT Included.) The 10L Short Path Distillation Kit features our USA made P10 Distillation Head. Every component in this turnkey is made for precision, throughput, and repeatable results. Also included the Kangaroo digital thermometer which is very rugged and reliable. You will also receive a Ribbed Dewar Style Glass Cold Trap to keep all volatiles and solvents out of your vacuum system. This Kit gives you the basic necessities of a short path distillation system and allows you to add on a temperature control system and vacuum pump to fit your needs. The 10L Neo Kit Includes: 10L Short Path Distillation Kit including glassware, labware, and P10 Distillation Head. 10L Digital Heating and Stirring Mantle. Valved Vacuum Adapter. Ribbed Dewar Style Glass Cold Trap. Kangaroo Digital Thermometer. Distillation Quick Start Guide This guide gives basic quick start instructions for distillation systems. It is intended to provide a starting point for learning the process. Parameters should be adjusted to suit specific needs, Before beginning distillation, ensure the following steps have been taken: Vacuum Pump is in good working order. Pump should be run against dry load to allow internals to warm up. Oil should be clear. Cloudy or dark oil should be changed. All glass components are in good working order and ready to be assembled A winterization and degassing procedure has been done to prepare oil for distillation The unit's max internal temperature cannot exceed 380C. The recommended max set temperature should not exceed 250C Once all three of these steps have been completed, you are ready to begin distilling. Begin by placing stir bar in boiling flask and then load your material. This should be done using a funnel. A small amount of alcohol in the oil will give it a thinner consistency making it easier to transfer. Assemble all glassware and ensure each joint is properly greased. Do not use too much, as the vacuum pressure might pull some grease into the system. To ensure a full seal, spread grease in a circular motion by rotating glassware Attach circulator to condenser and set temperature to 50C. Allow circulator to reach temperature before beginning distillation. Connect vacuum pump to manifold. The manifold will allow you to isolate each individual component as well as let atmosphere into and out of the system. Connect receiving cow to cold trap. Connect cold trap to manifold. Connect vacuum gauge to manifold. At this point, ensure all connections are correct. Also ensure receiving cow is positioned to collect the first fraction in the far-left receiving flask. Circulator should be at its set temperature. Turn on vacuum pump to begin process. Turn on heat and set to 60C. Vacuum pump will begin to pull down and temperature will begin to rise. Watch the gauge to monitor vacuum pressure and stability. Start stir slower and increase speed with temperature. Once you are close to 60C, increase the temperature 20 degrees. Continue to raise the heat incrementally in 20-degree steps, increasing the set temperature as you near your set point. Increase temperatures incrementally until you reach 220C. You will see your first fraction somewhere between 180C and 190C or slightly before. This is the “heads” fraction. You will move to your second fraction when you see an increased reaction in the head, a slight color change toward golden, as well as a thickening of distillate. When this fraction hits, allow the distillate to “self-clean” the head for a minute or two then, rotate the cow to the middle receiving flask. Collect your “main body” fraction. You will see temps between 190-220C during this fraction. Continue to increase stirring speed as necessary. Reaction in the head may vary but it should never stop. As fluid level in the boiling flask decreases, increase stir speed. The final “tails” fraction is a mixture of the first and second fractions and should be saved for re-distillation later. Ideally, you want to turn the cow to the final flask before the tails fraction hits. The “tails” fraction has an obvious color change and will be darker than the “main body” fraction. You will see temps between 200-250C during this fraction. As fluid level in the boiling flask decreases even more, set stirring RPM higher (1000+ RPM). You may need to compensate with a bit more heat to finish of the final fraction as well. Once process is complete, stop heat, stop stir, and stop vacuum. Let atmosphere into the system. Be sure to properly store your distillate as exposure to air and light can cause oxidation. ***Note: This entire setup will ship via motor freight.*** *Notice to Customers: All units are inspected for broken glassware or parts before leaving BVV™. If the unit arrives damaged (this does not include minor imperfections or scuffs in glassware), the customer MUST contact BVV™ within 72 hours from carrier delivery to file a claim. If the customer DOES NOT contact BVV™ within 72 hours from carrier delivery, then BVV™ cannot issue any replacement(s) or compensation for the item; a new purchase will need to be made for a replacement. BVV™ is not responsible for the failure of glassware which must be inspected before and after every use because it may eventually develop imperfections or damage through normal usage, mishandling, and stress caused by temperature variations. If an imperfection or damage is noted while inspecting the glassware DO NOT use the glassware because it can fail, which can cause bodily harm or damage to the surrounding area.
$5,917.40
-


36" Buchner Filtration Kit
Buchner Filtration Kit This filtration kit is operated by using a vacuum pump to pull the solution through the filter paper to remove particulate. The funnel has a 36" perforated plate to support the filter paper. The 150 liter collection vessel has multiple sight glass ports so that you can easily view inside the vessel as well as hold up a flashlight if needed. The standard lid includes a pressure gauge, KF-25 vacuum port, and a valve to release vacuum pressure or add positive pressure to the vessel. The vessel has a surrounding jacket that can be used to heat or cool the solution within the main vessel, it can even be outfitted with a mixer and recovery system if desired! To build your custom setup, talk to our experienced team of account representatives. This kit includes: 36" Filtration Funnel 150L Jacketed Reactor 1.5" Butyl hose Diaphragm vacuum pump (optional)
$13,711.06
-
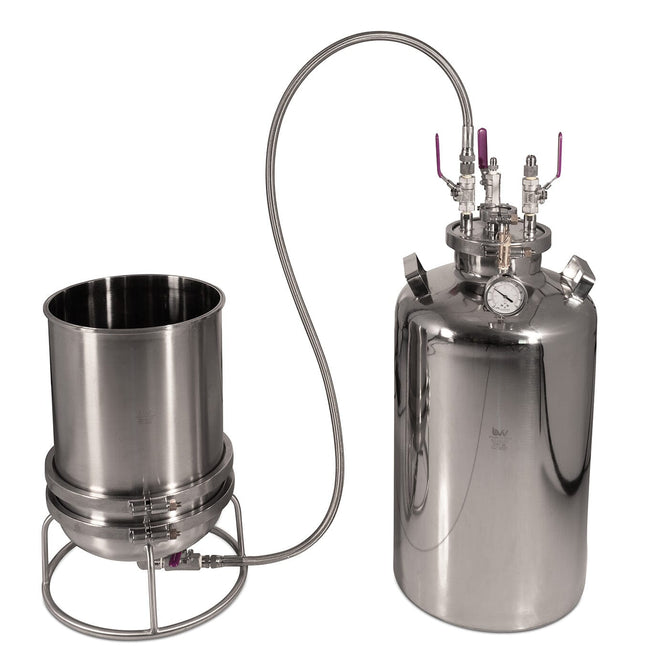

Large 1-Micron Refinement Filter
Large 1-Micron Refinement Filter Filter large volumes of solutions with ease with our Large 1-micron Refinement filter. complete with our 1-micron Dutch Weave sintered disk these refinement filters provide complete retention of the filter paper making it impossible for suspended particles to bypass the filter paper. Made from the highest quality 304 stainless steel parts this large refinement filter is built to last making it a great alternative to polypropylene filter trolleys. Our Large 1-Micron Refinement filter is available as a complete kit with and without the a Welch BTpro100 Diaphragm Pump. Processing Power Funnel Capacity: 22.24 Liters/5.88 Gallons Collection Capacity: 50 Liters/13.2 Gallons Specifications 12"x12" Funnel Body 12" 1um Dutch Weave Sintered Disk 12" Hemispherical Ring stand 1/2" JIC Drain Valve 50L Stainless Steel Carboy Collection base -30Hg Vacuum Gauge 1/2" JIC Vacuum Port 3/8" JIC Diptube Valve 1/4" JIC Butterfly Accessory Valve 350MM Ashless Filter Paper Silicone Gaskets
$4,185.48 - $9,814.23
-
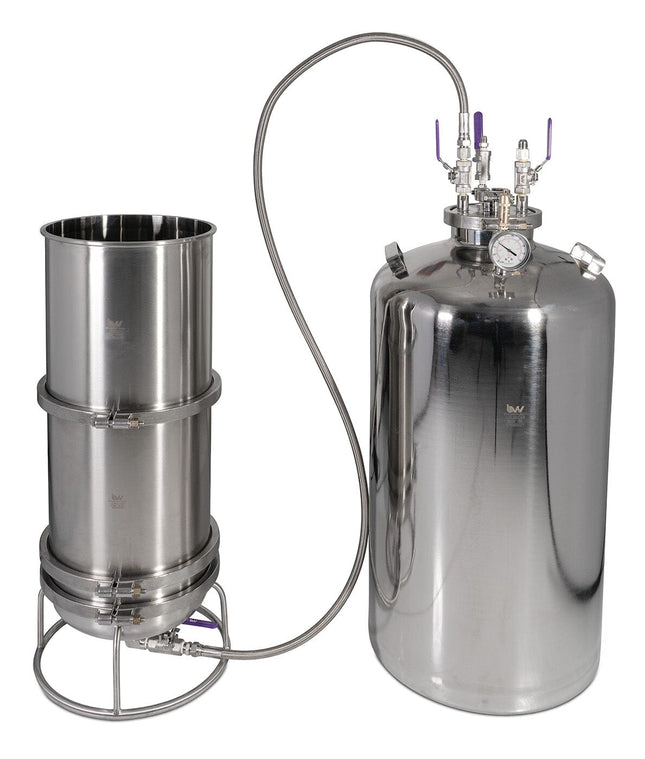
XL 1-Micron Refinement Filter
XL 1-Micron Refinement Filter Filter large volumes of solutions with ease with our XL 1-micron Refinement filter. complete with our 1-micron Dutch Weave sintered disk these refinement filters provide complete retention of the filter paper making it impossible for suspended particles to bypass the filter paper. Made from the highest quality 304 stainless steel parts this XL Refinement Filter is built to last making it a great alternative to polypropylene filter trolleys. Processing Power Funnel Capacity: 44.48 Liters/11.75 Gallons Collection Capacity: 50 Liters/26.41 Gallons Specifications 12"x24" Funnel Body 12" 1um Dutch Weave Sintered Disk 12" Hemispherical Ring stand 1/2" " JIC Drain Valve 50 Liter Stainless Steel Carboy Collection Base -30Hg Vacuum Gauge 1/2" JIC Vacuum Valve 3/8" JIC Diptube Valve 1/4" JIC Butterfly Accessory Valve 350MM Ashless Filter Paper Silicone Gaskets
$4,762.79
-
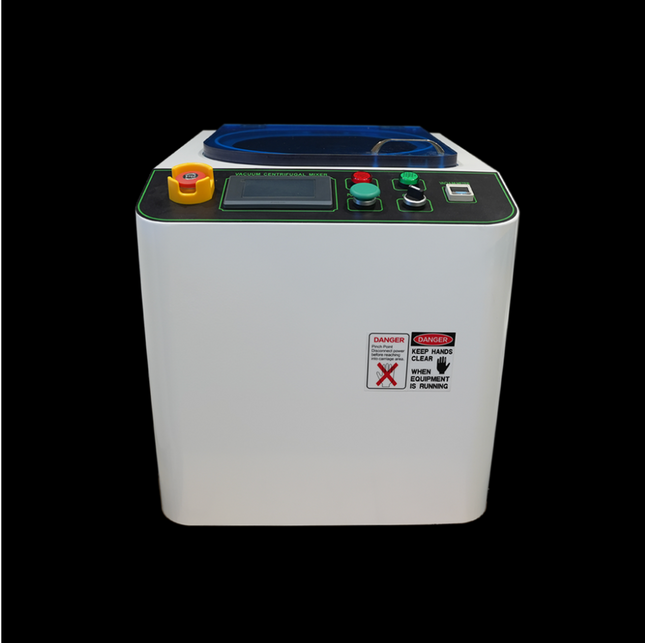

ChemTek ChemTek - Planetary Centrifuge Vacuum Mixer
ChemTek - Planetary Centrifuge Vacuum Mixer The combination of centrifugal force and vacuum in a planetary vacuum centrifuge mixer allows for the rapid and thorough removal of residual solvents from extracts. The vacuum environment lowers the boiling point of solvents, enabling their efficient evaporation without excessive heat. This is crucial for preserving the integrity and potency of heat-sensitive compounds, such as terpenes, ensuring a purer final product. T-500 Power Supply: 220V Max Speed: 1500 RPM Max Capacity: 2 x 500ml Program: Adjustable program settings for different viscosities Dimensions: L: 29” W: 24” H: 39” Net Weight: 65kg Safety Function: Emergency Stop Button T-1000 Power Supply: 220V upon request Max Speed: 1500 RPM Max Capacity: 2 x 1000ml Program: Adjustable program settings for different viscosities Dimensions: L: 32” W: 29” H: 43” Net Weight: 75kg Safety Function: Emergency Stop Button
$25,978.84 - $36,081.73
-
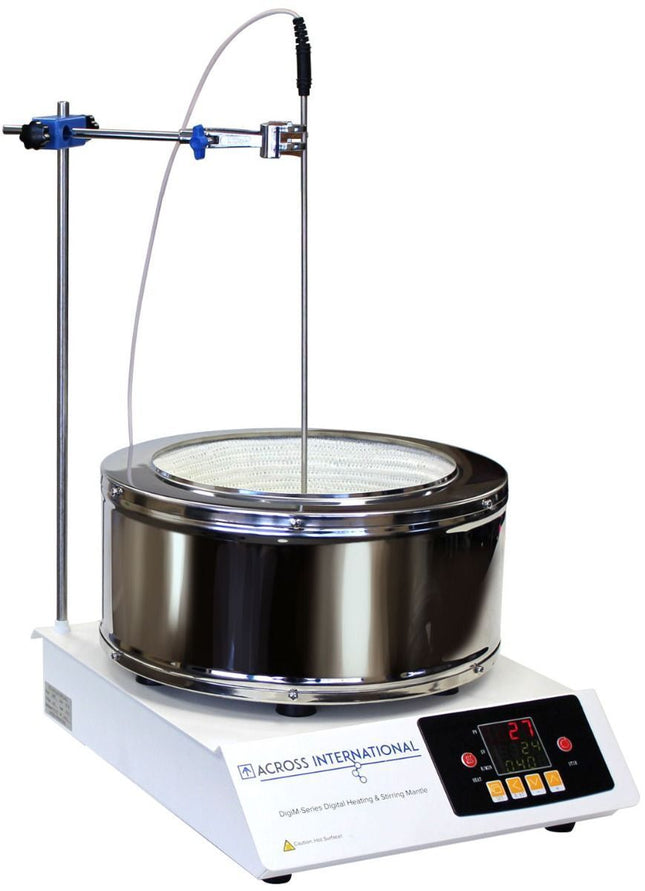

Across International Ai DigiM 5L 300C 1200 RPM PID Controlled Digital Heating Mantle
Ai DigiM 5L 300C 1200 RPM PID Controlled Digital Heating Mantle Across International heating and stirring mantles come standard with a digital display for the most accurate control. The large display interface makes it easy to quickly and precisely adjust temperature and rotation speeds.The DigiM mantle has two sets of thermocouples for proper temperature and speed detection. The heating jacket is pre-treated before shipment, which ensures that no smoke or odors (caused by heat) are released into your work environment. Specifications Model DigiM5 Electrical requirements 110V 60Hz 1-Phase, 1100 watts, 12A or 220V 50/60Hz 1-Phase, 1100 watts, 6A Heating Ambient to 300°C Stirring Min. speed: 110 rpm, max. speed: 1200 rpm Motor power: 40 watts Motor type: brushless DC motor Controller PID control with digital temperature and rotation speed display External thermocouple Type: PT100 Cable length: 43 inches Stainless steel probe length: 15 inches Stainless steel probe diameter: 5 mm Flask holder Maximum flask capacity: 5 liters Top opening diameter: 9 inches Depth: 5.5 inches Dimensions (WxDxH) Unit: 13.5 x 17 x 10 inches, shipping: 20 x 16 x 15 inches Weight Unit: 22 lbs, shipping: 32 lbs Safety Thermocouple failure protection Certification ETL tested to UL and CSA standards (optional), CE (standard) Warranty One year Standard package Part description Quantity Part image Ai DigiM 5L digital heating & stirring mantle 1 set External temperature probeDigiM05, DigiM2, DigiM5: Cable Length: 40”, Probe Length: 9” DigiM10, DigiM20: Cable Length: 43”, Probe Length: 15” 1 pc Internal temperature plug 1 pc Boss head DigiM2, DigiM5:- 1 pc DigiM10 and DigiM20: 2 pcs 1 or 2 pcs Stainless steel support rod DigiM2, DigiM5:- 1 pc DigiM10 and DigiM20: 2 pcs 1 or 2 pcs PTFE coated stir bar 2 pcs PTFE coated magnetic stir bar remover 1 pc 4 prong stainless steel clamp opens to 3 1/2" DigiM2, DigiM5:- 1 pc DigiM10, and DigiM20: 2 pcs 1 or 2 pcs User's manual 1 pc
$1,428.84 - $1,933.98


You have seen 48 out of 66 products