BVV
-
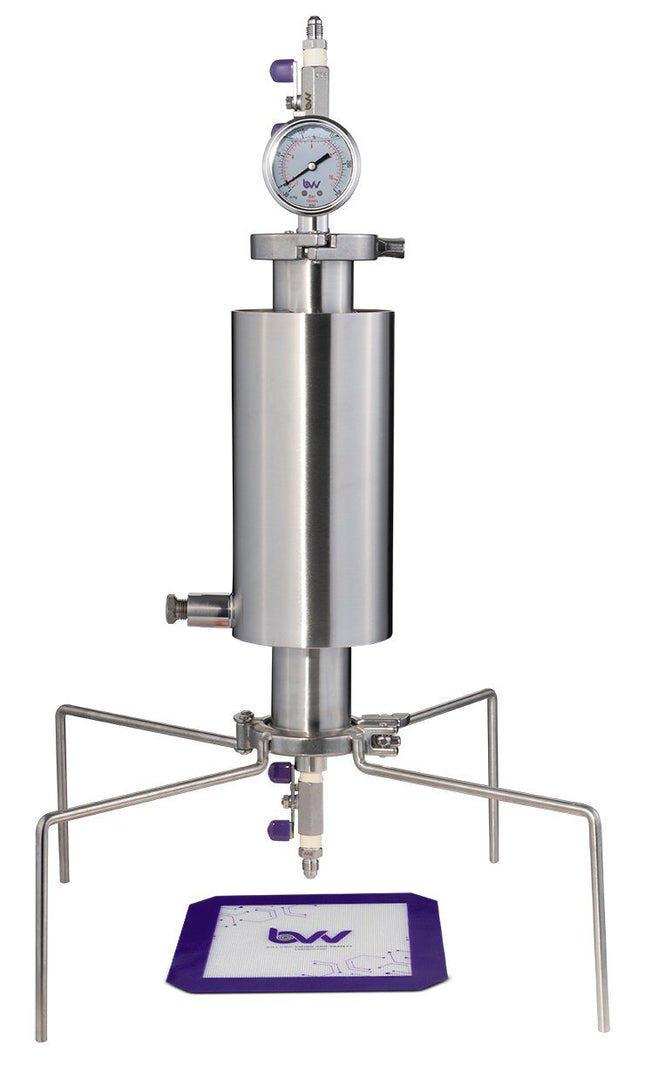

2" Dewaxing Closed Column Extractor 115-200g
DISCLAIMER: This unit is intended for LEGAL purposes only, to be used in accordance with local laws and ordinances. Use only in extremely well ventilated areas. DO NOT USE INDOORS *Note: Column capacity may vary depending on the biomass density, moisture content and column packing density. Capacity is calculated using the industry standard of 4.2g/in3. This is the upper limit for column capacity. Low density, uncut, heavily dried, and/or lightly packed material can reduce capacity by 50%. For best results, we recommend to tightly pack coarse ground material. Key Features and Description: Dewaxing Spool Included to coagulate fats and lipids to be caught in the filter. Compound Gauge with (-30)-160 PSI readout. Closed Column Pressure Extractor (Comes with 1 yr. Limited warranty, excludes gaskets and screens) This system allows the user to build up solvent pressure by closing the valve, pulling a vacuum and filling the extractor, Extractor will fill about 85% with solvent before the internal pressure will equal the pressure of the can propellant. The solvent can will fit into either port with a tip adapter supplied with some butane cans, tip adapter required, not included Solvent Soak is expected to be between 30-90 min, but this all depends on material, starting with frozen cans of solvent is recommended This system allows the user to soak the material before opening the bottom valve to release the solvent and oil. Professional Kit Adds the following: Compound Gauge Sight Glass Shower Head Explorer Kit Includes the Following: 8" x 8" Platinum Cured Silicone Non-Stick Pad 2" Dewaxer Tri-Clamp 304 Stainless Steel Material Tube Dewaxer Spool Sizes Specifications: 2" x 12" Dewaxer = 115G 2" x 18" Dewaxer = 150G 2" x 24" Dewaxer = 200G 304 Stainless Steel Flare End Caps with Heavy Duty Stainless Steel Miniature Ball Valves 1/4" Stainless Steel MNPT Drain Plug (1) 2" Standard Pressure Tri-Clamp Clamps 2" Tri-Clamp Quadpod (1) Buna-N Tri-Clamp Gaskets Buna-N 100 Mesh (150 Micron) Gasket ***Note: Parts and components can be subject to substitutions. Any substituted parts will have the same function and will be of equal or greater value.****
$522.18 - $752.22
-
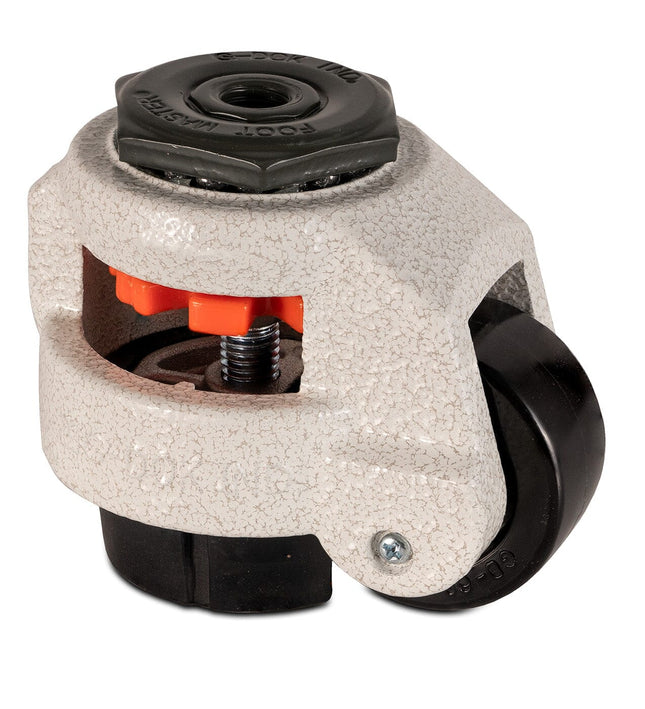

2" Footmaster Leveling Caster Ivory - 550lb cap
2" Footmaster Leveling Caster Ivory This ingenious product combines the mobility of a caster, the height adjustability of a level mount, and the stability of a foot pad. The GD Series leveling caster profile is integral to its function. A thick aluminum frame is used to achieve the combination of being both strong and compact. The swivel section contains 2 sets of ball bearings for easy maneuverability. Bearing raceway sleeves made from hardened steel prevent scouring to the aluminum frame, leading to high performance and dependable reliability. Moving is easy thanks to a 50 mm diameter wheel mated with an axle shaft made of cold forged steel. And once positioned, the caster provides side access to an ABS thermoplastic thumbwheel used to lower the foot pad. As the wheel is lifted off the ground, the foot pad takes over to make the application completely stationary. Making the fine adjustments to achieve the perfect level set, even under heavy loads, is light work for this world renowned leveling caster. When it is time to move again, simply raise the foot pad to restore the freedom of mobility.
$176.41
-
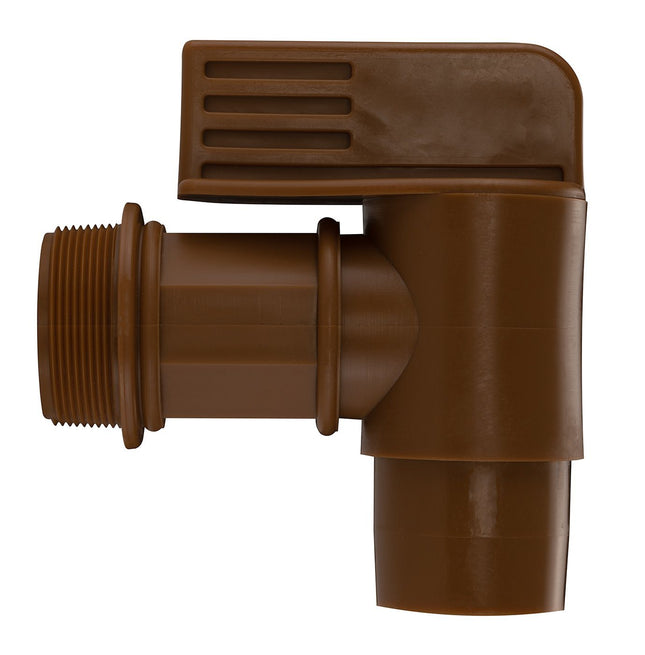
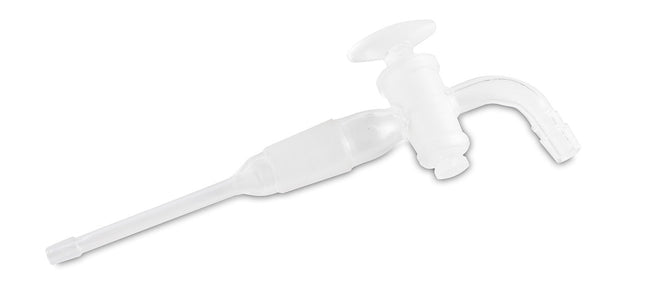
2" Plastic Drum Faucet
Recommended for dispensing light oils, acids and cleaning solutions. FDA approved high-density polyethylene (HDPE) plastic faucet. The faucet is designed to fit 2" NPT threads and can be used to dispense most non-flammable liquids. Use with plastic and steel drums. Tough polyethylene. FDA compliant. Material: High density polyethylene (HDPE ) is the most commonly used resin. This economical plastic has good impact resistant, is naturally translucent, flexible, and typically used for personal care products, such as shampoo bottles. Adding color will give HDPE an opaque look that will result in an increase in weight and rigidness. We have a variety of these rigid and tough high density polyethylene products in stock, from containers, pails, bottles, caps, tubs, and jugs. HDPE works well in below freezing temperatures. HDPE heat compatibility varies. Generally, it should not be used with products filled at over 145°F.
$35.28 $21.17
-
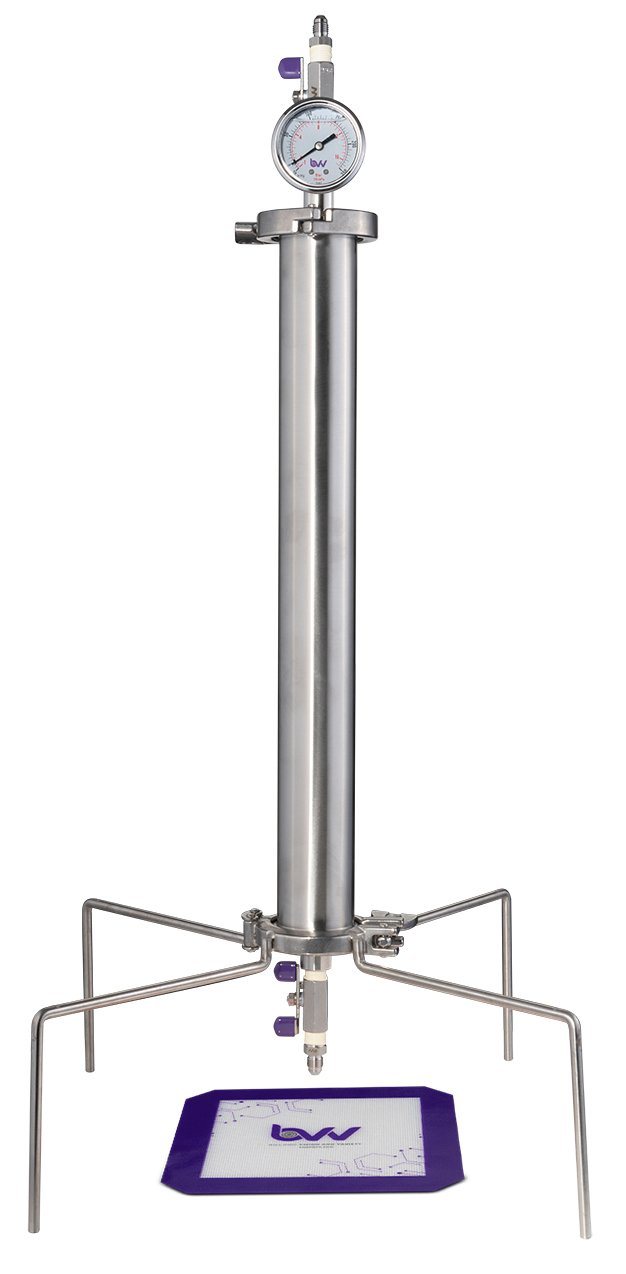

2" Standard Closed Column Extractor 115-200g
DISCLAIMER: This unit is intended for LEGAL purposes only, to be used in accordance with local laws and ordinances. Use only in extremely well ventilated areas. DO NOT USE INDOORS Our dewaxing closed column extractor is the primary tool for extracting maximum solvent, and is designed to increase productivity. This closed system can be filled about 85% with solvent before the internal pressure will equal the pressure of the can propellant. Adding dry ice to the dewaxing column on the outside of the extractor decreases the temperature of the extractor, which filters out coagulated waxes and lipids from being extracted. This provides a more efficient and productive extraction process. With a 2” stainless steel tube, this unit can be customized to your needs, handling everything from 90-270g of material. Pressure gauge, shower head, and sight glass can all be added to increase ease of use. Key Features and Description: Closed Column Pressure Extractor (Comes with 1 yr. Limited warranty, excludes gaskets and screens) Compound Gauge with (-30)-160 PSI readout. This system allows the user to build up solvent pressure by closing the valve, pulling a vacuum and filling the extractor, Extractor will fill about 85% with solvent before the internal pressure will equal the pressure of the can propellant. The solvent can will fit into either port with a tip adapter supplied with some butane cans, tip adapter required, not included Solvent Soak is expected to be between 30-90 min, but this all depends on material, starting with frozen cans of solvent is recommended This system allows the user to soak the material before opening the bottom valve to release the solvent and oil. Professional Kit Adds the following: Compound Gauge Sight Glass Shower Head Explorer Kit Includes the Following: 8" x 8" Platinum Cured Silicone Non-Stick Pad 2" Tri-Clamp 304 Stainless Steel Material Tube Spool Sizes Specifications: 2" x 12" = 115G 2" x 18" = 150G 2" x 24" = 200G 304 Stainless Steel Flare End Caps with Heavy Duty Stainless Steel Miniature Ball Valves (1) 2" Standard Pressure Tri-Clamp Clamps 2" Tri-Clamp Quadpod (1) Buna-N Tri-Clamp Gaskets Buna-N 100 Mesh (150 Micron) Gasket *Note: Column capacity may vary depending on the density of packed material and packing density. Capacity is calculated using the industry standard of 4.2g/in3. This is the upper limit for column capacity. Low density, uncut, and/or lightly packed material can reduce capacity by 50%. For best results, we recommend to tightly pack coarse ground material. ***Note: Parts and components can be subject to substitutions. Any substituted parts will have the same function and will be of equal or greater value.****
$461.49 - $632.26
-
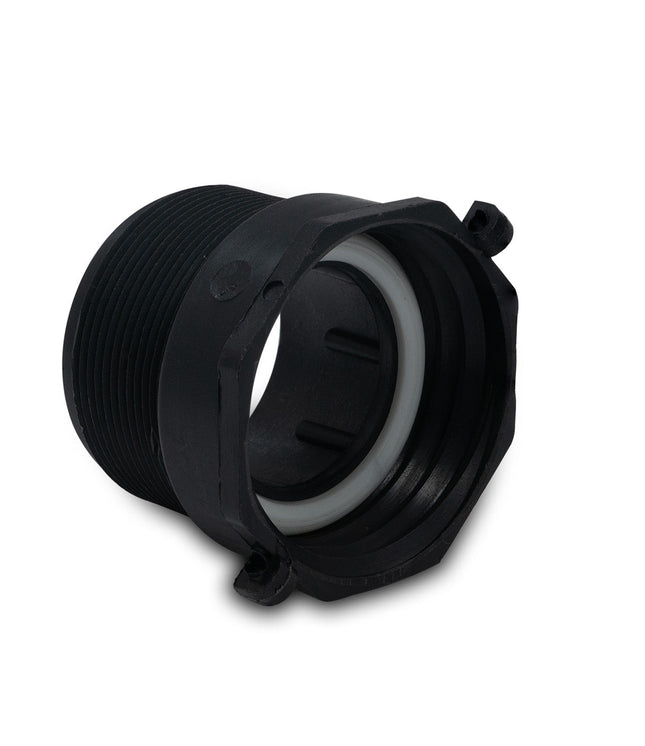

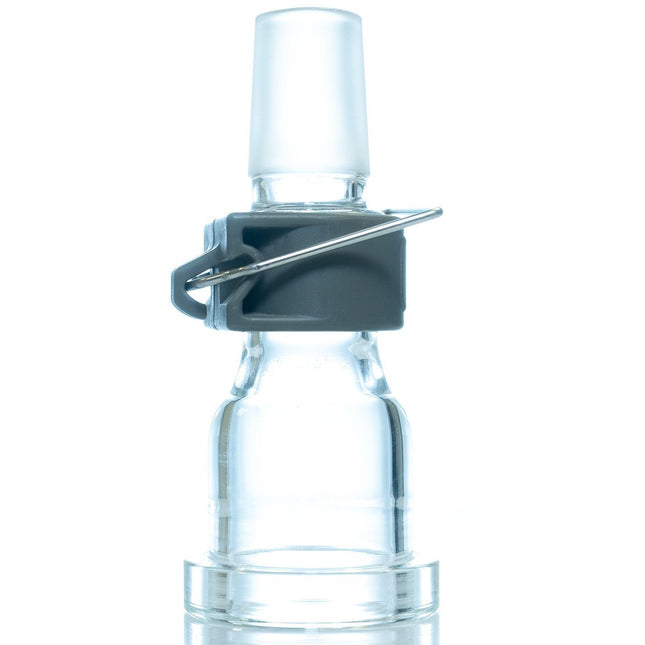
2" Stubby Buttress to NPT Adaptor
2" Stubby Buttress to NPT Adaptor This adapter converts 2" (50mm) male buttress pipe threads to 2" male NPT pipe threads. The adapter incorporates female buttress threads on one end and male NPT threads on the other for connecting pipes and valves with different ends. Made of tough polypropylene (PP), this adapter also incorporates an ethylene propylene diene monomer (EPDM) gasket for a leak-tight connection. Shallow profile ensures valve does not protrude past IBC tote cage. Key benefits: Converts 2" male buttress pipe thread to a 2" male NPT pipe thread 2" long profile does not protrude past IBC cage during transport Made of PP EPDM gasket ensures a secure seal Suitable for use in a wide variety of liquid handling applications Proudly Made in the USA Material: Polypropylene (PP) is a tough plastic that has good chemical resistance. PP is translucent in its natural state but can have a glossy finish when produced with color. Some examples of common products made with PP are dairy and medication containers. Polypropylene is suitable for hot fill applications of up to 165°F and is therefore great for autoclaving. It is not recommended for cold or sub-freezing temperatures. The Cary Company has an assortment of polypropylene plastics available for purchase, such as plastic caps and jars, which have a higher tolerance for chemical products. Disclaimer: This information has been provided as a general guide. It is the customer's responsibility to select the proper container for product and application compatibility. Material PP Dimensions 2.4" Dia. x 1.02" H Weight 0.135 lbs. Case Pack 200 ea. Case Dimensions 15" L x 15" W x 16" H Case Weight 27 lbs. Pallet Pack 4,800 ea. (24 Cases) Pallet Dimensions 40" L x 48" W x 60" H Pallet Weight 648 lbs. Country of Manufacture United States Gasket EPDM Rubber Gasket Note: Color may vary.
$16.94 $11.29
-

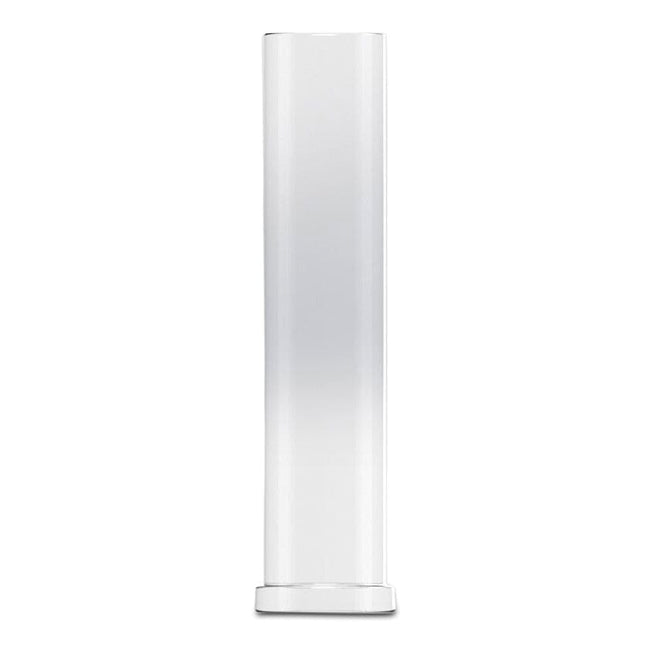
2" Tri-Clamp Dewaxer Columns
2" Tri-Clamp/ Tri Clover Dewaxing Columns This is a 2" Tri-Clamp BVV™ Tri-Clamp Dewaxing Spool. It is intended to have dry ice put into the sleeve to chill the material inside the column. **Note: When selecting a Pipe Hanger choose the size that correlates to the Sleeve OD NOT Spool OD Sizes Available: 2" x 12" Tri-clamp Dewaxer Column 2" x 18" Tri-clamp Dewaxer Column 2" x 24" Tri-clamp Dewaxer Column Specifications: Tri-Clamp Size 2" Material 304 Stainless Steel Standard 3A High Polish Sleeve OD 4.000" Spool ID 1.870" Spool OD 2.000" Flange OD 2.516" Bead Center 2.218" Drain Port 1/4"-18 FNPT (Drain Plug Included) OD = Outer Dimension ID = Inner Dimension Disclaimer to Customer: User assumes all responsibility and risks of the system for all Stainless Steel Parts bought separately to piece together a Closed Loop, Closed Column, or Open Blast Extractors. They DO NOT come with a standard 1 year system warranty, customer assistance on how to run your system, technical help or a guarantee of the system being tested. BVV™ 2" Tri-Clamp Dewaxer Columns - Drawing
$104.44 - $207.46
-
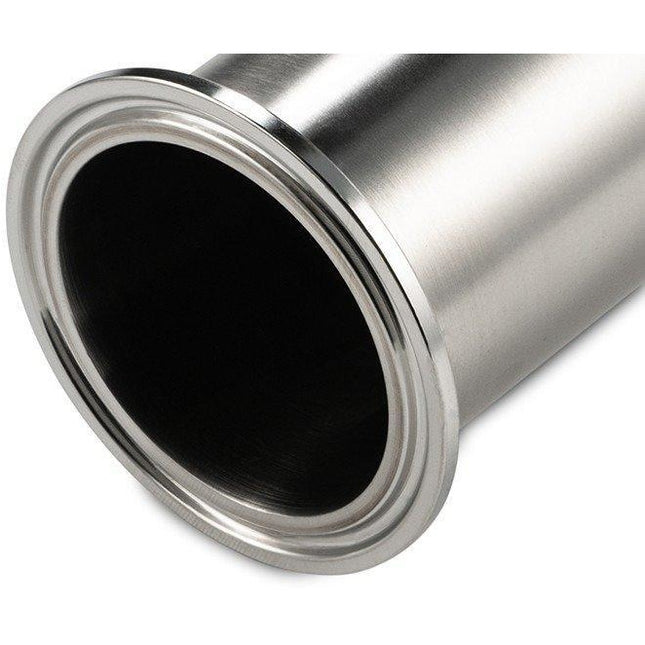
2" Tri-Clamp Spools
2" Tri-Clamp/ Tri Clover Spools Sizes Available: 2" x 2" Tri-Clamp Spool 2" x 12" Tri-Clamp Spool 2" x 18" Tri-Clamp Spool 2" x 24" Tri-Clamp Spool Specifications: Tri-Clamp Size 2" Material 304 Stainless Steel Standard 3A High Polish Spool OD 2" Spool ID 1.87" Flange OD 2.516" Bead Center 2.218" OD = Outer Dimension ID = Inner Dimension Disclaimer to Customer: User assumes all responsibility and risks of the system for all Stainless Steel Parts bought separately to piece together a Closed Loop, Closed Column, or Open Blast Extractors. They DO NOT come with a standard 1 year system warranty, customer assistance on how to run your system, technical help or a guarantee of the system being tested. BVV™ 2" Tri-Clamp Spools - Drawing Material Capacity Cylinder Volume Radius (in) 1.5" 2" 3" 4" 6" 8" 10" 12" Length (in) Volume (in3) Select Material Butane ISO-Butane Propane How Much Will Fit in Cylinder FormulaVolume x Weight of Water x Specific Gravity ConstantsWeight of Water = 0.0360 (lbs / in3)Specific Gravity of = Lbs. of : Recommended: Account for an 80% fill to avoid a hydraulic lock How Much Material Will Fit in the Cylinder Volume Packing Density (g) 2.5 3 3.5 4.3 Grams of Material Lbs. of Material Cans of Butane Cae by Size Pounds of Butane mL fl oz lbs # of Cans 420 14.2 300 10.1 200 6.7 150 5.07
$38.10 - $95.97
-
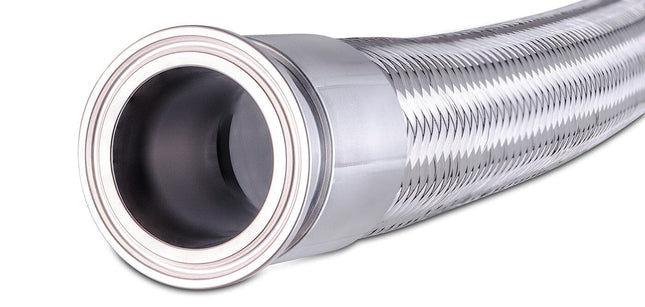

2" Tri-Clamp Stainless Steel Braided Hose with Convoluted PTFE Liner
2" Tri-Clamp Stainless Steel Braided Hose with Convoluted PTFE Liner This premium industrial hose assembly delivers superior performance in chemical processing and high-pressure fluid transfer applications. The convoluted PTFE liner provides exceptional chemical compatibility and flexibility, while the 304 stainless steel braid ensures structural strength and durability. Tri-Clamp end connections enable quick, reliable system integration. Performance Specifications: Connection Type 2" Tri-Clamp Liner Material PTFE (Teflon) Braid & Flanges 304 Stainless Steel Temperature Range -65°F to 450°F Pressure Rating 580 PSI Chemical Resistance Excellent Bend Radius 13" (24" length) / 5.5" (48"-96" lengths) Critical Operating Guidelines: Maintain bend radius specifications to prevent PTFE liner kinking and loss of hose integrity. The 24" version accommodates 90-degree bends only.
$388.10 - $740.93
-
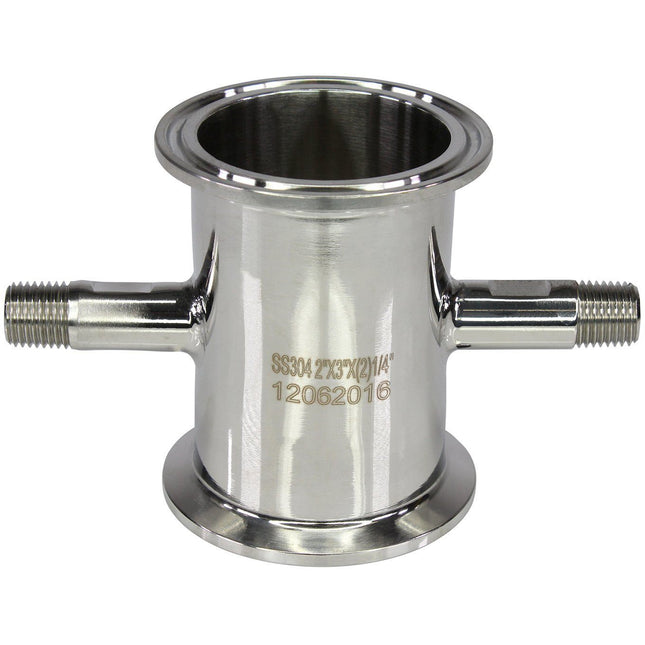
2" Tri-Clamp x 3" x (2) 1/4" MNPT
2" Tri-Clamp Tri Clover x 3" x (2) 1/4" MNPT This specialty spool with a 1/4" MNPT connection can be used for various reasons including a valve manifold to inject solvent into a column from the bottom allowing it to flow upwards spreading the solvent more evenly the top down method.
$46.57
-


200L Non-Jacketed Explosion Proof Glass Reactor
200L Non-Jacketed Glass Reactor The non jacketed glass reactor is great for mixing different compounds that require an explosion proof environment. There are two valves on top with 1/2" barbed connections that can be used to pull liquids in with assistance from vacuum pump, and also a wide mouth port that can be opened to input liquid or solid materials such as catalysts. The drain port is a 1.375" barb and has a 15" clearance above the ground. The motor controller can be mounted in multiple locations on the frame, 3 feet of flexible explosion proof conduit are included with wiring. The conduit should be wired directly to an explosion proof junction box to keep everything sealed. Electrical requirements: 110VAC / 370w Overall dimensions: 29" x 29" x 98"
$11,995.93
-
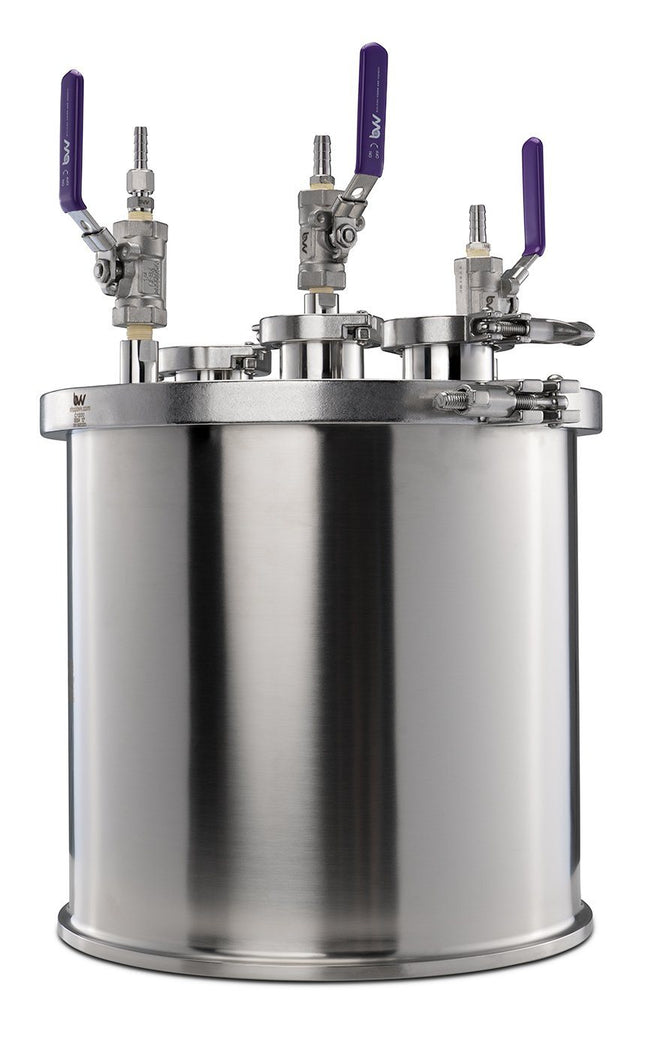

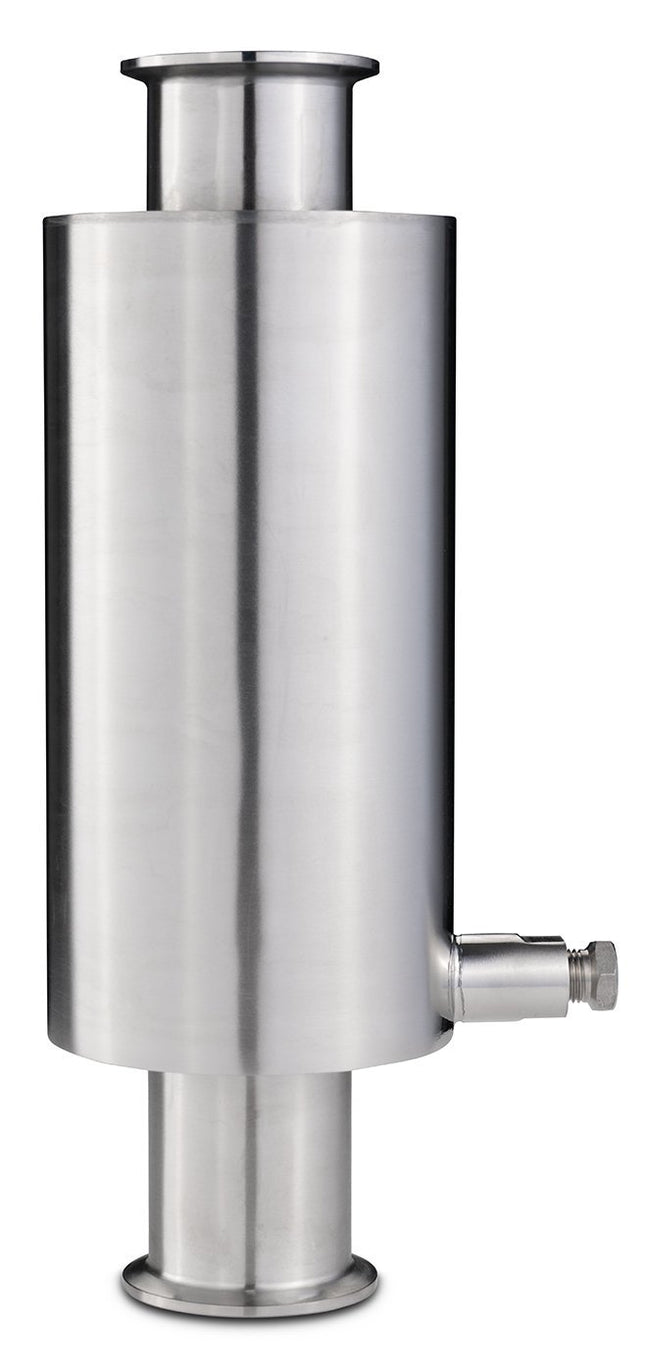
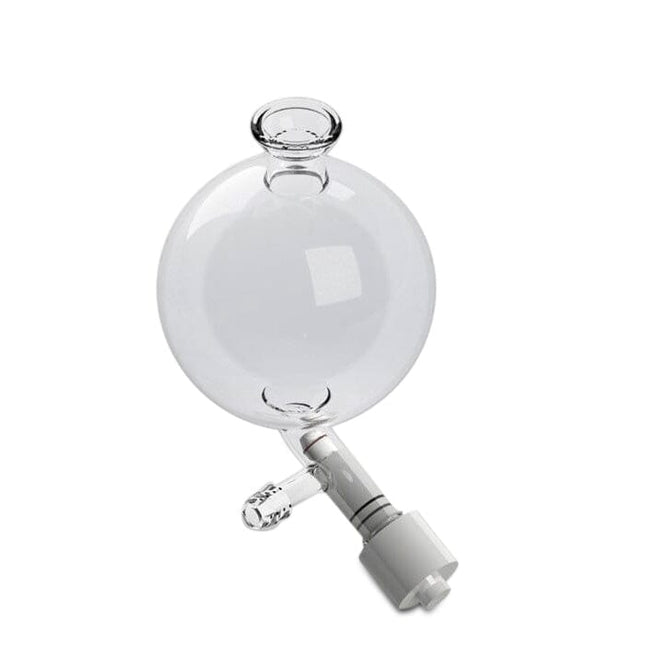
20L Collection Base
The 20 Liter Collection Base allows for vacuum assistance during filtration. It works most efficiently when paired with the Refinement Filter but can be used as a standalone unit. It includes a dedicated vacuum valve and dedicated liquid dip tube valve which allows for direct injection into a rotovap. Key Features: Stainless steel design for greater thermal conductivity and improved lifespan Easy to clean and disassemble with Tri-Clamp stainless steel parts Collection vessel for vacuum and storage of material Liquid dip tube for direct injection into rotary evaporator after filling Key Specifications: 20 Liter Collection Base (12"x12" Welded Bottom Spool w/ 12" Lid) Dedicated Vacuum Valve Dedicated Dip Tube Valve Silicone gaskets with high alcohol resistance 1/4" and (2)3/8" Stainless steel barb connections Polycarbonate sights for easy viewing
$1,278.63
-
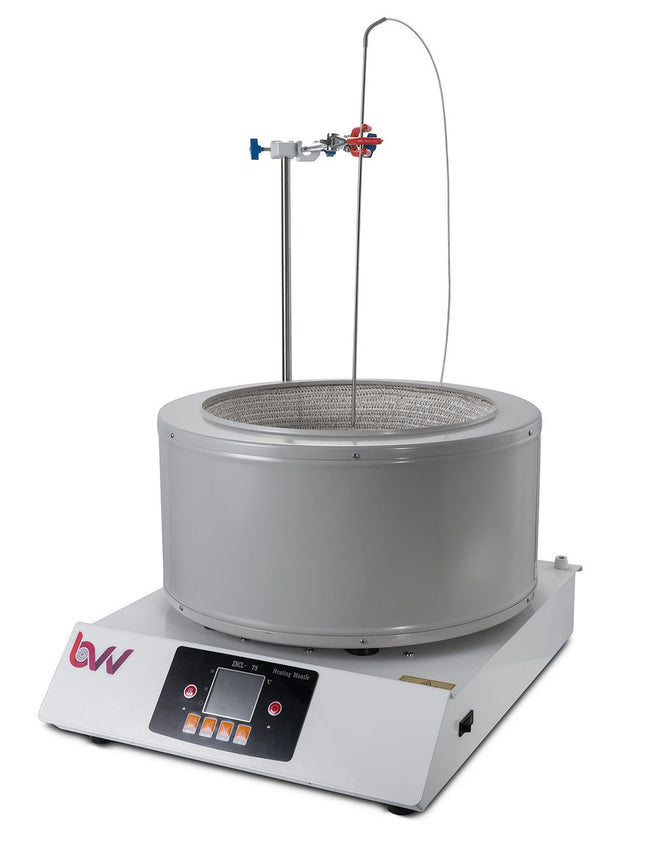
20L Digital Heating Mantle
20L DIGITAL HEATING AND STIRRING MANTLE Digital Heating and Stirring Mantles give the operator the most precise temperatures and readouts during distillations. These mantles autotune to specific user input to provide consistent results. Each mantle is equipped with large digital display that will give you readouts for both set temperature, actual temperature, and stirring speed. Each mantle also comes with a vertical brace bar and boss head as well as a temperature probe which plugs directly into the mantle. For first time use, the mantle should have an initial burn out done. This will burn off any residual oils used in the production of the insulation rope. The unit's max internal temperature cannot exceed 380C. The recommended max set temperature should not exceed 250C Specifications: Capacity: 20L (20000mL) Power Supply: 220V 60Hz (NEMA 6-20 plug) Adjustable Rotation Speed: 50-1800 RPM Motor Power: 40W, DC14-24V Heating Power 180-2200W Temperature Control Accuracy: +/- 1C Intelligent Temperature Control: Yes Temperature Range: RT+10-380C Insulation Material: Alkali-free Glass Fiber, temperature resistant up to 450C Shipping Dimensions: 25 x 25 x 18 in. Weight: 35 lbs
$2,469.75
-
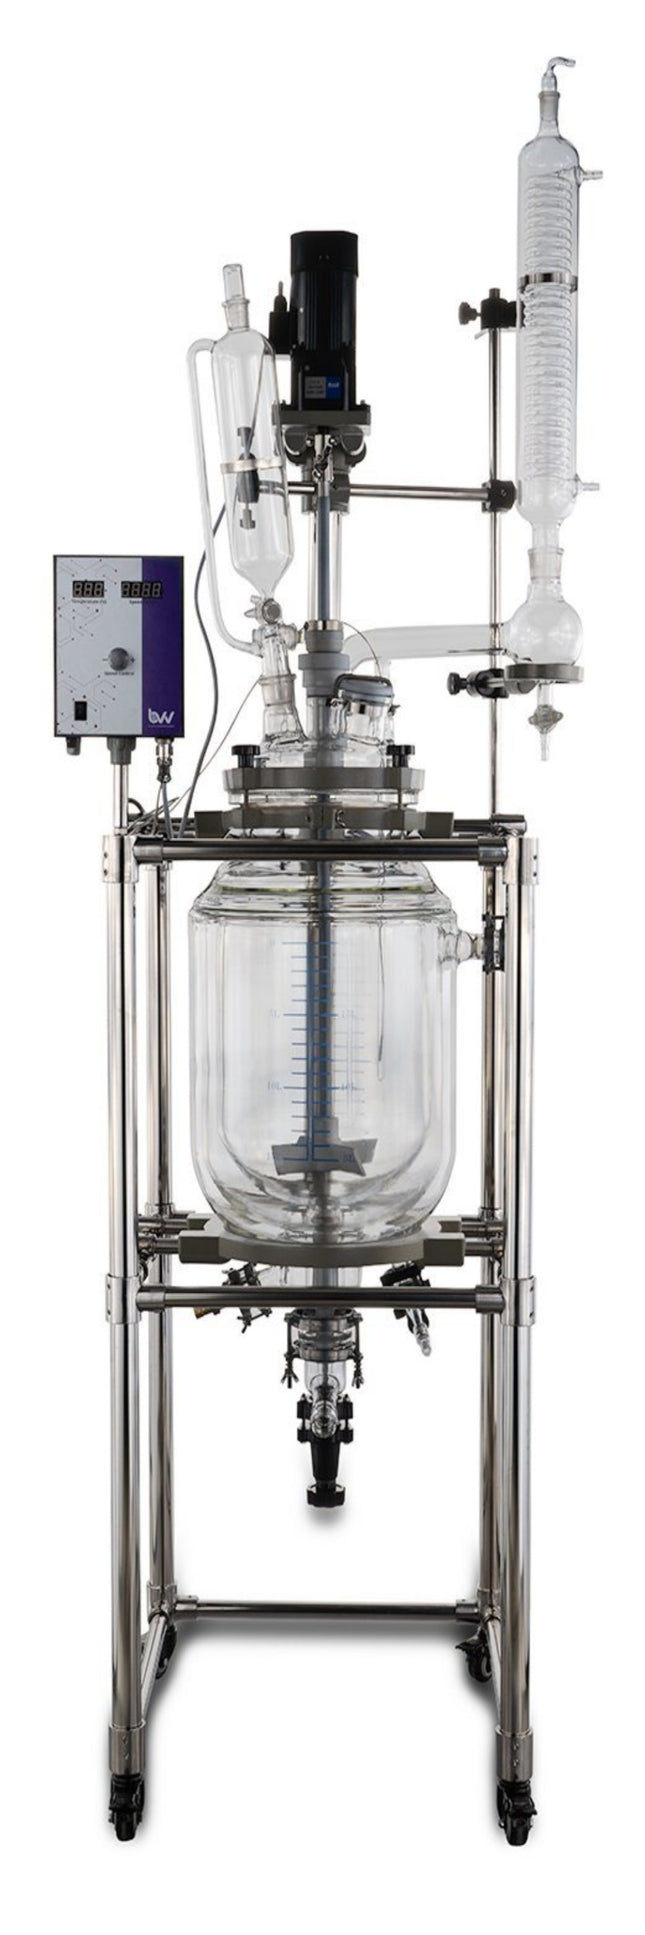

20L Double Jacketed Glass Reactor
The Double Jacketed Glass Reactors are ideal for reaction applications involving extreme temperatures. They include an inner jacket for cooling or heating and an outer jacket for vacuum insulation. The outer jacket also alleviates moisture buildup so you can always see exactly what's happening inside the system. Jacketed Reaction vessels are used for synthetic reaction of different types of materials in a controlled temperature and vacuum environment. Reaction Vessels can be used as an all in one tool for extraction, refinement, distillation, and homogenization. Consisting of an inner vessel with either one or two jackets, a reactor uses temperature differentials created by a chiller to change it's internal environment. Reaction vessels also operate under vacuum making them ideal for any atmospheric sensitive applications. They can be made out of glass or stainless steel and range in volume from 1L to 100L+. To run a reaction vessel most efficiently, you will need a chiller capable of bringing the internal temperature of the vessel to an extreme low, a chemical resistant vacuum pump, and a cold trap to catch any vapors that might pass through the condenser during operation. BVV™ Jacketed Reaction vessels are simple, cost-effective, and durable machines that allow you to process material quickly and efficiently. BVV 20L and 50L Glass Reactor Diagram Specifications: Glass Material: GG-17 High Borosilicate Glass Internal Volume: 20L 6.75L Jacket Capacity Shelf Material: Aluminum Alloy Homogenizer Power: 110V/60Hz Homogenizer Speed: 0-400 RPM Digital Homogenizer Control Digital temperature probe readout included Double Jacket 3/4" Jacket Connections 1/4" and 3/8" Vacuum Connections Length: 20 in. Width: 30 in. Height: 76 in. Does not include: Chiller, Vacuum System, Cold Trap Requires Assembly *Notice to customers: All units are inspected for broken glassware or parts before leaving BVV™. If the unit arrives damaged (this does not include minor imperfections or scuffs in glassware), the customer MUST contact BVV™ within 72 hours from carrier delivery to file a claim. If the customer DOES NOT contact BVV™ within 72 hours from carrier delivery, then BVV™ cannot issue any replacement(s) or compensation for the item; a new purchase will need to be made for a replacement. ***Disclaimer: This unit is intended for LEGAL purposes only, to be used in accordance with local laws and ordinances. Use only in WELL VENTILATED AREAS!*** ***Glassware Safety Disclaimer: BVV™ is not responsible for failure of glassware which must be inspected before and after every use because it may eventually develop imperfections or damage through normal usage, mishandling, and stress caused by temperature variations. If an imperfection or damage is noted while inspecting the glassware DO NOT use the glassware because it can fail causing bodily harm or damage to the surrounding area.***
$6,350.79 - $6,915.30
-
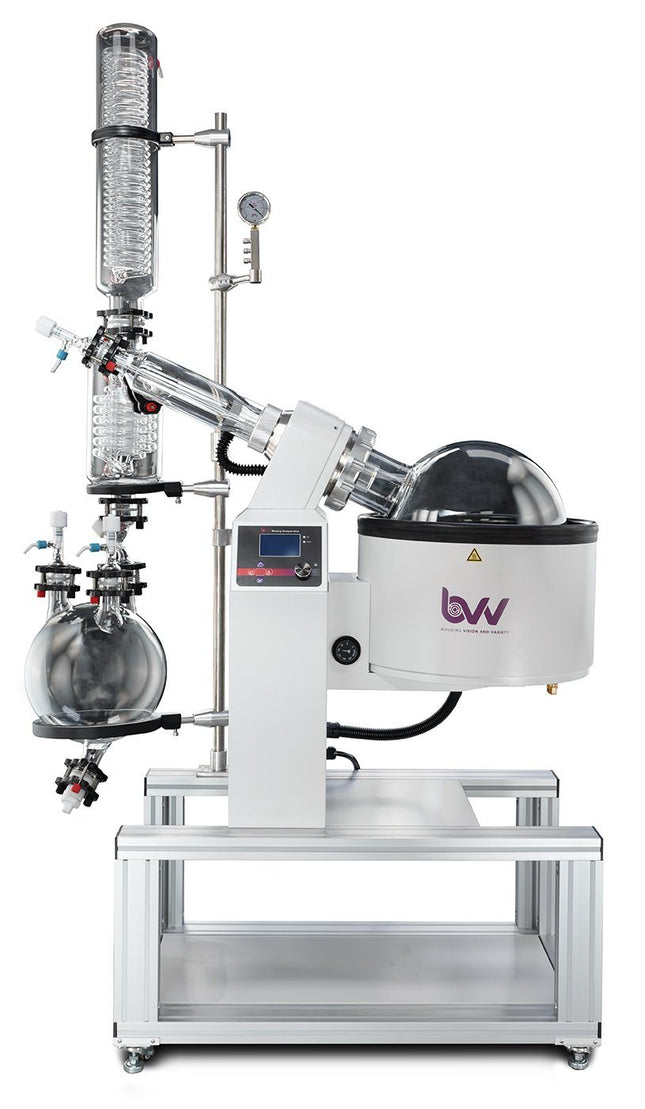
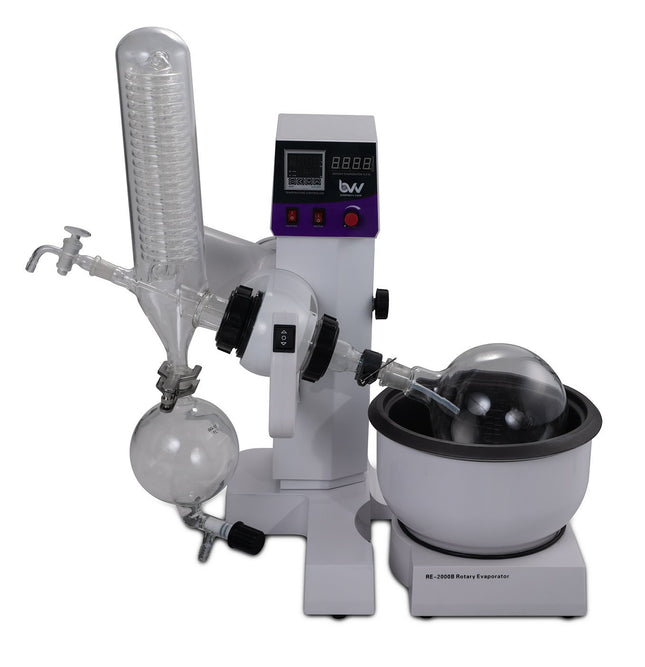
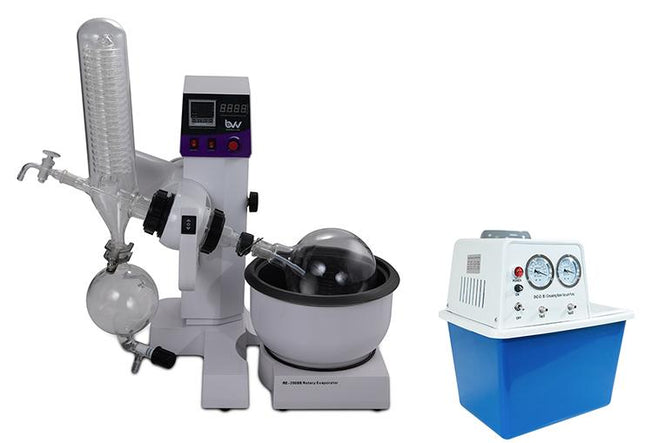
20L Neocision ETL Lab Certified Rotary Evaporator
20L Neocision ETL Lab Certified Rotary Evaporator The 20L Neocision ETL Lab Certified Rotary Evaporator is a full-scale system meant to fulfill the needs of large volume production and meet the requirements of a certified laboratory with its ETL certification standards. Featuring an electric lift bath and all PTFE valves for extreme chemical resistance, the 20L Neocision gives users the ability to recover large amounts of solvent in a smaller footprint with highly improved functionality. All Neocision rotovaps feature high-efficiency valves and drain ports making it easy to directly inject solution continuously without the need to stop the system or release vacuum to drain. The temperature and rotation speed are easily controlled from a single digital interface. Our rotovaps are a fraction of the price of more costly systems with the same functionality and evaporation efficiency. To keep your bath heating properly, this unit should only be used with RO or DI water. 10-50L NEO and ECO Rotary Evaporator Diagram Features: ETL Certified for Lab use. Digital temperature and speed control with simple user interface Electric Bath Lift Teflon Coated Bath for corrosion resistance High-efficiency drain port and injection valves Smaller footprint for improved workspace allocation Mobility with locking casters Shorter vapor path for faster evaporation and condensation Direct injection capability for continuous feeding of solution Continuous draining capability without the need to release vacuum or stop the system 1-year warranty on all mechanical parts. Does not include glassware. Model 20L NEOCISION Rotary Evaporator Optimum Ambient Temperature 5~25C / 41~105.8F Glass Material GG-17 High Borosilicate Power (V/Hz) 220-240V 60Hz Single Phase Speed Regulation Digital Step-less Regulation Rotation Speed 0-120 RPM Set Temperature 0-99C / 0-210F Temperature Control Digital Temperature Control Maximum Vacuum Pressure -29.8 inHg Evaporating Flask Capacity 20L (20000ml) Receiving Flask Capacity 10L (10000ml) Condenser Style Main + Auxiliary Vertical Double Helix Evaporation Capacity Alcohol >/= 12 L/H Heater Max Current Draw (Amps) 25 Water Bath Material 304 Stainless Steel Water Bath Size 17.7 x 9.8 in. Lifting Function Electric Lifting Stroke 190mm / 7.5 in. Total Power Consumption (kW) 4.1 Dimensions 49 x 24 x 83 in. Weight 155 lbs Vacuum Connection 10mm / 3/8 in. Barb Condenser Connection 10mm / 3/8 in. Barb Warranty 1 Year excluding glass parts Certifications ETL Rotovap Quick Start Guide This guide gives basic quick start instructions for rotovaps. It is intended to provide a starting point for learning the process. Parameters should be adjusted to suit specific needs. Clean and assemble unit. Make sure all pieces are cleaned and sterilized using an alcohol solution. Connect chiller to condenser and set to 0C (32F). Always fill a rotovap condenser from the top down (chiller output to top of condenser, chiller input to bottom of condenser). Connect vacuum pump to cold trap and connect cold trap to vacuum port on rotovap. Turn on heat bath and set to 40C (113F). Once heat bath, chiller and cold trap have reached desired temperatures, turn on rotovap motor and set speed to approximately 100 RPM (does not have to be precise). Keep in mind, higher RPM’s will increase evaporation power but also increase heat load. Start vacuum pump and allow vacuum to pull down for a few minutes before injection. Once vacuum has been pulled to a sufficient level (does not have to be precise but should be below 100 Torr), using the injection valve, very slowly inject approximately 500 mL of solution into evaporating flask and then close the valve. Allow this small amount to begin evaporating. You may see the chiller begin to rise in temperature, this is called “priming” the rotovap. Once the temperature stops rising or all liquid is almost completely evaporated, open the injection valve again very slowly so that a small amount of liquid begins to enter the evaporating flask. Do not close injection valve this time but continue to allow solution to enter the evaporating flask. At this point you must try to match the input speed to the output speed. What this means is that you should be injecting the same amount of liquid into the rotovap that is equal to the amount of liquid dripping from the condenser into the receiving flask. You will know that the input speed and output speed are matched because the chiller will remain at a stable temperature. If the chiller begins to rise, then you are injecting too much liquid. Dial back the valve until the chiller stabilizes. Once everything is stabilized, you may walk away from the rotovap if necessary. Check every so often to make sure temperatures remain stable and evaporation continues efficiently. ***Note: All units are inspected for broken glass or parts before unit is shipped. If unit arrives damaged or glass is broken (this does not include minor imperfections or scuffs in glassware), Customer MUST contact BVV™ within 3 days of delivery to file a claim and receive a replacement part. If customer DOES NOT contact BVV™ within 3 days of delivery responsibility for replacement parts falls on the customer and they must pay for replacement pieces.*** ***Note: This item will ship by freight only.*** ***Glassware Safety Disclaimer: BVV™ is not responsible for failure of glassware which must be inspected before and after every use because it may eventually develop imperfections or damage through normal usage, mishandling, and stress caused by temperature variations. If an imperfection or damage is noted while inspecting the glassware DO NOT use the glassware because it can fail causing bodily harm or damage to the surrounding area.***
$10,161.26
-
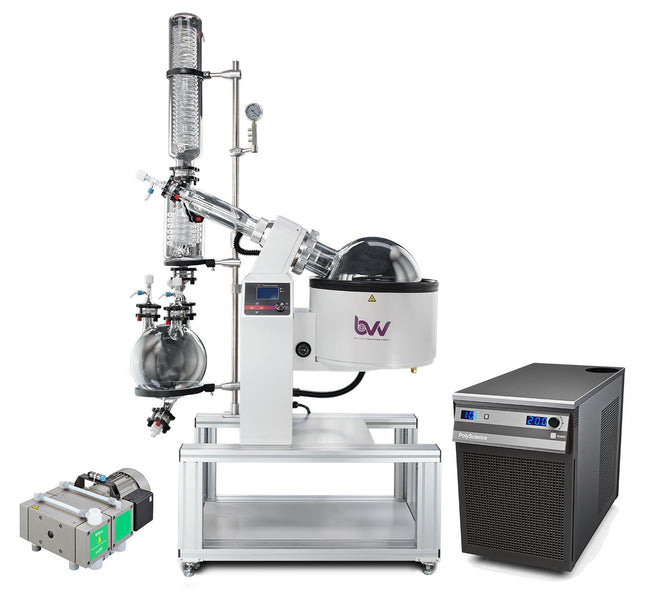

20L Neocision ETL Lab Certified Rotary Evaporator Turnkey System
20L Neocision ETL Lab Certified Rotary Evaporator Turnkey System 20L NEO Rotary Evaporator Turnkey System setup includes all the necessary components to successfully perform solvent recovery via rotary evaporation. A cold trap should always be used inline between your vacuum system and application to protect the pump from volatile vapors. To keep your bath heating properly, this unit should only be used with RO or DI water. 10-50L NEO and ECO Rotary Evaporator Diagram 20L NEO Rotary Evaporator Turnkey System setup includes: 20L Neocision ETL Lab Certified Rotary Evaporator Polyscience 6160T 1HP Chiller 3/8" Gum Rubber - 25ft 3/8" Tubing - 25ft Welch BTpro100 Diaphragm Pump Adjustable Stainless Steel Hose Clamps Rotovap Quick Start Guide This guide gives basic quick start instructions for rotovaps. It is intended to provide a starting point for learning the process. Parameters should be adjusted to suit specific needs. Clean and assemble unit. Make sure all pieces are cleaned and sterilized using an alcohol solution. Connect chiller to condenser and set to 0C (32F). Always fill a rotovap condenser from the top down (chiller output to top of condenser, chiller input to bottom of condenser). Connect vacuum pump to cold trap and connect cold trap to vacuum port on rotovap. Turn on heat bath and set to 40C (113F). Once heat bath, chiller and cold trap have reached desired temperatures, turn on rotovap motor and set speed to approximately 100 RPM (does not have to be precise). Keep in mind, higher RPM’s will increase evaporation power but also increase heat load. Start vacuum pump and allow vacuum to pull down for a few minutes before injection. Once vacuum has been pulled to a sufficient level (does not have to be precise but should be below 100 Torr), using the injection valve, very slowly inject approximately 500 mL of solution into evaporating flask and then close the valve. Allow this small amount to begin evaporating. You may see the chiller begin to rise in temperature, this is called “priming” the rotovap. Once the temperature stops rising or all liquid is almost completely evaporated, open the injection valve again very slowly so that a small amount of liquid begins to enter the evaporating flask. Do not close injection valve this time but continue to allow solution to enter the evaporating flask. At this point you must try to match the input speed to the output speed. What this means is that you should be injecting the same amount of liquid into the rotovap that is equal to the amount of liquid dripping from the condenser into the receiving flask. You will know that the input speed and output speed are matched because the chiller will remain at a stable temperature. If the chiller begins to rise, then you are injecting too much liquid. Dial back the valve until the chiller stabilizes. Once everything is stabilized, you may walk away from the rotovap if necessary. Check every so often to make sure temperatures remain stable and evaporation continues efficiently. ***Note: All units are inspected for broken glass or parts before unit is shipped. If unit arrives damaged or glass is broken (this does not include minor imperfections or scuffs in glassware), Customer MUST contact BVV™ within 3 days of delivery to file a claim and receive a replacement part. If customer DOES NOT contact BVV™ within 3 days of delivery responsibility for replacement parts falls on the customer and they must pay for replacement pieces.*** ***Note: This item will ship by freight only.*** ***Glassware Safety Disclaimer: BVV™ is not responsible for failure of glassware which must be inspected before and after every use because it may eventually develop imperfections or damage through normal usage, mishandling, and stress caused by temperature variations. If an imperfection or damage is noted while inspecting the glassware DO NOT use the glassware because it can fail causing bodily harm or damage to the surrounding area.***
$22,016.07 - $27,378.96
-
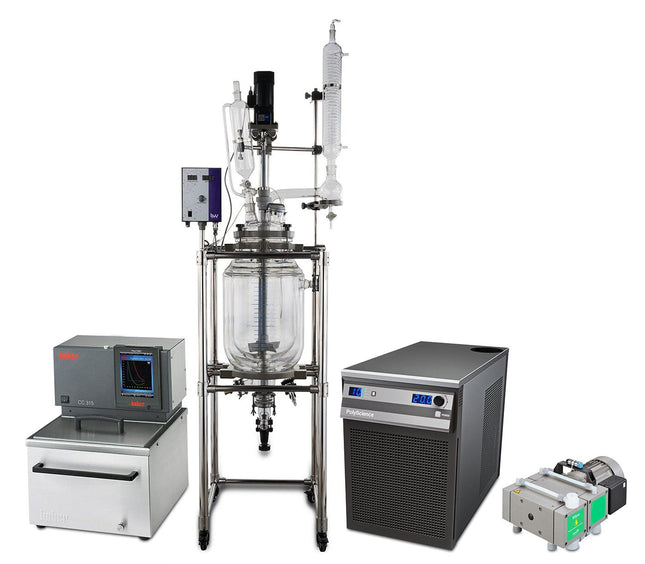
20L Turnkey Reactor Kit
20L Turnkey Reactor Kit The BVV 20L Double Jacketed Glass Reactor Kit is the ideal solution for small to medium-sized solvent recovery and decarboxylation applications. This kit includes everything to get you up and running including a Single 20L triple-layer Glass Reactor with Condenser, either a BVV 19L Heated circulator capable of heating to 220C or a UL-listed Huber CC-315B capable of heating up to 300C, a 1HP Polyscience 6160T for chilling the condenser, a Welch BTpro100 for vacuum, 25ft of 3/8" Gum rubber tubing for vacuum connections, 20ft of reinforced PVC hose for the chiller, 1/2" Stainless Steel JIC Hoses for the heater, 5 Gallons of Therminol Heat transfer fluid and 5 Gallons of Propylene glycol. 20L Double Jacketed Glass Reactor Specifications Glass Material: GG-17 High Borosilicate Glass Internal Volume: 20L 6.75L Jacket Capacity Shelf Material: Aluminum Alloy Homogenizer Power: 110V/60Hz Homogenizer Speed: 0-400 RPM Digital Homogenizer Control Digital temperature probe readout included Double Jacket 3/4" Jacket Connections 1/4" and 3/8" Vacuum Connections Length: 20 in. Width: 30 in. Height: 76 in. Polyscience 6100 1 HP Chiller Specifications 6100 Series 1 HP Chiller with Turbine Pump, 100psi; 13.2l/min Display: LED Working Temperature Range C: -10 to 40 Temperature Stability: +/-0.1 Temperature Calibration Capability: 1-point Pump Type: Turbine Working Temperature Range F: 14 to 104 Working Temperature Range C: -10 to 40 Reservoir Capacity (gallons): 1.11 Reservoir Capacity (liters): 4.2 Reservoir Cover: Screw-on cap Cleanable Air Filter: Yes Cleanable Fluid Filter: Yes Temperature Stability F: +/-0.2 Temperature Stability C: +/-0.1 Display: LED Display Resolution (Read): 0.1 Pump Type: Turbine Process Connections: 1/2" FNPT Over-Temperature Protection / Failsafe Heater Control: Yes Reservoir Liquid Level Indicator: Yes Reservoir Drain: Yes Cool Command Refrigeration Technology: Yes WhisperCool Environmental Control Technology: Yes Maximum Ambient Temperature F: 95 Maximum Ambient Temperature C: 35 Overall Dimensions (LxWxH inches): 27.6 x 14.5 x 22.6 Overall Dimensions (LxWxH cm): 70 x 36.8 x 57.5 Compressor Size (HP): 1 Refrigerant: R134a Shipping Weight (pounds): 199 Shipping Weight (kilograms): 90 Welch BTpro100 Specifications Model BTpro100 Free Air Displacement@60Hz,lpm(CFM) 100(3.5) Ultimate Vacuum Pressure, Torr 6 Maximum Vacuum, in. Hg 29.7 Horsepower, HP (watts) 0.5(390) Built-in adjustable vacuum - Gas Ballast Yes Head Material PTFE Diaphragm PTFE Inlet/outlet Connection NW16 flange1 Agency (National Recognized Lab) cUL Weight, lbs (kg) 40.3(18.3) Overall DimensionsLxWxH in.(cm) 9x15x7(23x38x18) Shipping Weight, lbs(kg) 48.5 (22) Shipping Carton DimensionsLxWxH in.(cm) 18.9x12.6x11.8(48x32x30) HUBER CC-315B Specifications Common Specifications Temperature range (-20) 28...300 °C Temperature stability ±0.02 °C Temperature control TAC, self-optimizing (True Adaptive Control) Controller Pilot ONE (E-grade "basic") Safety class III / FL Protection class IP20 Dimensions (W x D x H) 13.19 x 15.04 x 17.05 inches Weight 48.51 pounds Heating / cooling capacity Heating capacity 3 - 3,5 kW Circulation pump Pressure pump max. 25 lpm : 0,7 bar | 6.6 gpm ; 10.15 psi Suction pump max. 18.5 lpm : 0,4 bar | bar 4.89 gpm ; 5.8 psi Pump connection M16x1 AG male Permissible viscosity 50 mm²/s Connections Pt100 connection Pt100 Digital interface RS232, Ethernet, USB Device, USB Host Operating data Old sku 2007.0003.01 Permissible ambient temp. 5...40 °C Bath opening W x D / BD 10.63 x 5.71 / 7.87 inches Bath volume 15 Liters | 3.96 gal Filling volume min. 11.5 Liters | 3.04 gal Power supply 208V 2~ 60Hz Current max. 16 A Fusing 20 A
$33,165.23 - $44,455.52
-
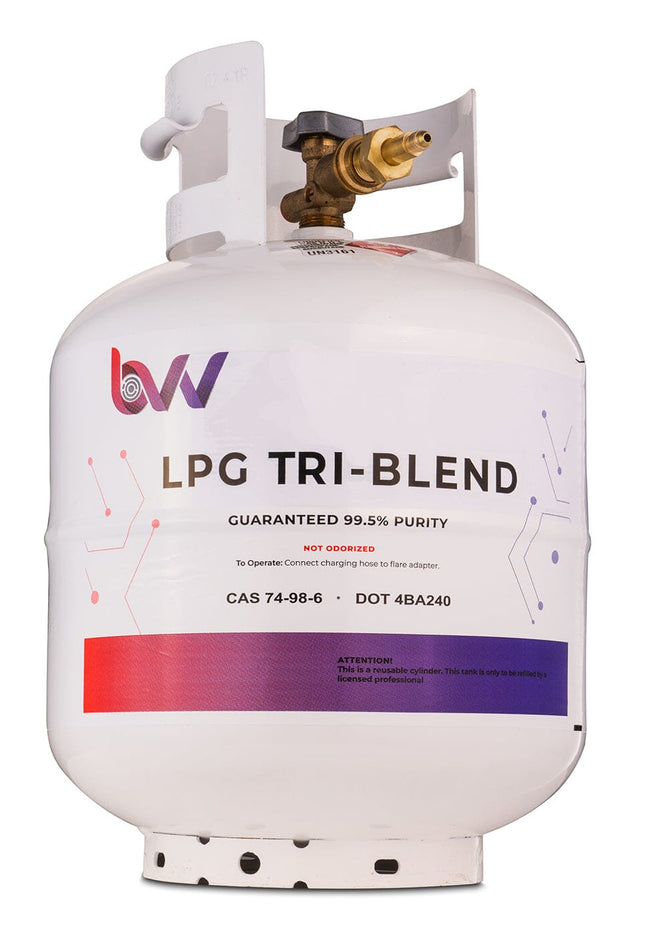

20LB High Purity USA 50/25/25% N-Butane/Iso-Butane/Propane TRI-Blend - 99.5% Guaranteed - Buy 2 Get 1 Free (Add 3 To Cart)
20LB High Purity USA 50/25/25% N-Butane/Iso-Butane/Propane TRI-Blend - 99.5% Guaranteed - Buy 2 Get 1 Free (Add 3 To Cart) High purity 50/25/25% N-Butane/Iso-Butane/Propane TRI-Blend is USA sourced, and guaranteed to be 99.5% pure. This instrument grade solvent helps to produce a higher quality extract by reducing mystery oils and contaminants. Solvent comes in a DOT refillable LP tank. This product is clean, colorless and odorless. KEY BENEFITS: Free of any hydrogen Sulphide based Ethyl Mercaptan Odorants. This product is clean, colorless, and odorless. Tank contains no diptube. Sourced and Refined in USA. Actual Tri-Blend liquid weight is 20LB DISCLAIMER(S): This unit is intended for LEGAL purposes only, to be used in accordance with local laws and ordinances. Use only in WELL VENTILATED AREAS! Notice: This item will ship via Ground ONLY. BVV™ always recommends distillation of every solvent before use. Tank does not include CGA 510 fitting. Must be added through dropdown or bought separately. Actual liquid weight is 20LB California now prohibits the retail sale of any Non-Odorized butane in quantities larger than 150ml. If you are not a retail purchaser, you can call in to place an order. Permitted Sales Include the Following: Persons licensed to perform volatile solvent extraction activity under CA Bus & Prof Code Division 10 Manufacturers, wholesalers, resellers, or retailers solely for resale How To Buy 2 Get 1 Free Simply add 3X of 20LB Tanks to your cart and you will automatically be discounted the third tank. Need one with a CGA fitting two without? Simply add one tank with your desired CGA fitting and add two of the same item selecting "None" for the "CGA fitting" and "Connection Size" options. Want 2 Butane Tanks and 1 Propane Tank? No problem, just add 3 of ANY of our 20LB LPG tanks to your cart and enjoy the third tank free! Due to FAA regulations, solvent tanks cannot be safely transported via means other than ground. Any order that has solvent will not be shipped in an expedited fashion. If an order with solvent is combined with any other items and chosen to be expedited, that entire order will ship via UPS Ground/Freight. We will not split up any orders and ship them separately. If a customer is wanting to expedite specific items and order solvent, 2 separate orders (1 for the solvent and 1 for the expedited items) will need to be placed in order to do so. Solvents do not ship to Hawaii, Puerto Rico, or any other US Territory outside of the contiguous 48 States. Shipping Solvent to Alaska may ONLY ship via freight and will be required to travel through Canada. We have this policy in place to ensure safety when transporting solvents, and to prevent any issue with shipping times for our customers. Chemical Formula: C₄H₁₀ + C3H8 Molecular Weight: 58.12 g/mol & 44.10 g/mol CAS Registry Number: 106-97-8 & 74-98-6 & 75-28-5 Appearance Colorless Odor: Faint Petroleum Density N/A Boiling Point: N/A Solubility in water: Low Solubility GHS Pictograms: GHS Signal Word: Danger GHS Hazard Statements: H220, H280 GHS Precautionary Statements P210, P377, P381, P403, P410+P403 UN Identification Number: 1965 Proper Shipping Name: Hydrocarbon Gas Mixture, liquefied, n.o.s. Transport Hazard Class: 2.1 Packing Group: None DOT Placard: Tri-Blend Certificate of Conformance (COC) and Certificates of Analysis (COA's) Tri-Blend Safety Data Sheet (SDS)
$373.99 - $395.16
-

20LB High Purity USA 70/30% N-Butane/Propane Blend - 99.5% Guaranteed - Buy 2 Get 1 Free (Add 3 To Cart)
20LB High Purity USA 70/30% N-Butane/Propane Blend - 99.5% Guaranteed - Buy 2 Get 1 Free (Add 3 To Cart) This instrument-grade solvent produces a higher quality extract by reducing mystery oils and other contaminants. Our 70/30% N-Butane/Propane Blend comes in a 20 LB DOT refillable LP tank. Enjoy working with a solvent that’s clean, colorless, and odorless! KEY BENEFITS: Free of any hydrogen Sulphide based Ethyl Mercaptan Odorants. This product is clean, colorless, and odorless. Tank contains no diptube. Sourced and Refined in USA. Actual 70/30 Blend liquid weight is 20LB DISCLAIMER(S): This unit is intended for LEGAL purposes only, to be used in accordance with local laws and ordinances. Use only in WELL VENTILATED AREAS! Notice: This item will ship via Ground ONLY. BVV™ always recommends distillation of every solvent before use. Tank does not include CGA 510 fitting. Must be added through dropdown or bought separately. Actual liquid weight is 20LB California now prohibits the retail sale of any Non-Odorized butane in quantities larger than 150ml. If you are not a retail purchaser, you can call in to place an order. Permitted Sales Include the Following: Persons licensed to perform volatile solvent extraction activity under CA Bus & Prof Code Division 10 Manufacturers, wholesalers, resellers, or retailers solely for resale How To Buy 2 Get 1 Free Simply add 3X of 20LB Tanks to your cart and you will automatically be discounted the third tank. Need one with a CGA fitting two without? Simply add one tank with your desired CGA fitting and add two of the same item selecting "None" for the "CGA fitting" and "Connection Size" options. Want 2 Butane Tanks and 1 Propane Tank? No problem, just add 3 of ANY of our 20LB LPG tanks to your cart and enjoy the third tank free! Due to FAA regulations, solvent tanks cannot be safely transported via means other than ground. Any order that has solvent will not be shipped in an expedited fashion. If an order with solvent is combined with any other items and chosen to be expedited, that entire order will ship via UPS Ground/Freight. We will not split up any orders and ship them separately. If a customer is wanting to expedite specific items and order solvent, 2 separate orders (1 for the solvent and 1 for the expedited items) will need to be placed in order to do so. Solvents do not ship to Hawaii, Puerto Rico, or any other US Territory outside of the contiguous 48 States. Shipping Solvent to Alaska may ONLY ship via freight and will be required to travel through Canada. We have this policy in place to ensure safety when transporting solvents, and to prevent any issue with shipping times for our customers. Chemical Formula: C₄H₁₀ + C3H8 Molecular Weight: 58.12 g/mol & 44.10 g/mol CAS Registry Number: 106-97-8 & 74-98-6 Appearance Colorless Odor: Faint Petroleum Density N/A Boiling Point: N/A Solubility in water: Low Solubility GHS Pictograms: GHS Signal Word: Danger GHS Hazard Statements: H220, H280 GHS Precautionary Statements P210, P377, P381, P403, P410+P403 UN Identification Number: 1965 Proper Shipping Name: Hydrocarbon Gas Mixture, (Butane/Propane) liquefied, n.o.s. Transport Hazard Class: 2.1 Packing Group: None DOT Placard: Dual Blend Certificate of Analysis (COA) Dual Blend Safety Data Sheet (SDS)
$373.99 - $395.16
-

20LB High Purity USA ISO-BUTANE R600A - 99.5% Guaranteed - Buy 2 Get 1 Free (Add 3 To Cart)
20LB High Purity USA ISO-BUTANE R600A - 99.5% Guaranteed - Buy 2 Get 1 Free (Add 3 To Cart) This solvent is instrument-grade and helps produce a higher quality extract through the reduction of mystery oils and contaminants. This solvent is clean, odorless, and colorless, meaning there are zero hydrogen sulfide-based Ethyl Mercaptan odorants. It’ll arrive in a DOT refillable LP tank., note that the tank doesn’t contain a dip tube. KEY BENEFITS: Free of any hydrogen Sulphide based Ethyl Mercaptan Odorants. This product is clean, colorless, and odorless. Tank contains no diptube. Sourced and Refined in USA. Actual Isobutane liquid weight is 20LB DISCLAIMER(S): This unit is intended for LEGAL purposes only, to be used in accordance with local laws and ordinances. Use only in WELL VENTILATED AREAS! Notice: This item will ship via Ground ONLY. BVV™ always recommends distillation of every solvent before use. Tank does not include CGA 510 fitting. Must be added through dropdown or bought separately. Actual liquid weight is 20LB California now prohibits the retail sale of any Non-Odorized butane in quantities larger than 150ml. If you are not a retail purchaser, you can call in to place an order. Permitted Sales Include the Following: Persons licensed to perform volatile solvent extraction activity under CA Bus & Prof Code Division 10 Manufacturers, wholesalers, resellers, or retailers solely for resale How To Buy 2 Get 1 Free Simply add 3X of 20LB Tanks to your cart and you will automatically be discounted the third tank. Need one with a CGA fitting two without? Simply add one tank with your desired CGA fitting and add two of the same item selecting "None" for the "CGA fitting" and "Connection Size" options. Want 2 Butane Tanks and 1 Propane Tank? No problem, just add 3 of ANY of our 20LB LPG tanks to your cart and enjoy the third tank free! ***Shipping Notes: This item will ONLY ship via UPS Ground, in accordance with FAA regulations. Any orders including solvent will NOT be shipped Expedited. If an order includes solvent as well as additional items, it will all be shipped via UPS Ground/Freight even if you’ve selected Expedited. If you want the non-solvent item to ship Expedited, place 2 separate orders; we won’t split up orders and ship them separately otherwise. We do not ship solvents to Hawaii, Puerto Rico, or any other U.S. Territory outside of the contiguous 48 States. Shipping solvent to Alaska will ONLY be via freight and will be required to travel through Canada. Our shipping policies are in place to ensure safe transport of solvents and prevent any problems with shipping times for BVV customers. Chemical Formula: C₄H₁₀ Molecular Weight: 58.12 g/mol CAS Registry Number: 75-28-5 Appearance Colorless Odor: Faint Petroleum Density 563 kg/m³ (or 0.563 g/mL) Boiling Point: 10°F (-12°C) Solubility in water: Low Solubility GHS Pictograms: GHS Signal Word: Danger GHS Hazard Statements: H220 GHS Precautionary Statements P203, P210, P222, P280, P377, P381, and P403 UN Identification Number: 1969 Proper Shipping Name: Isobutane, liquefied Transport Hazard Class: 2.1 Packing Group: None DOT Placard: Isobutane Certificate of Analysis (COA) Isobutane Safety Data Sheet (SDS)
$373.99 - $395.16
-

20LB High Purity USA N-Butane R600 - 99.5% Guaranteed - Buy 2 Get 1 Free (Add 3 To Cart)
20LB High Purity USA N-Butane R600 for Extraction - Buy 2 Get 1 Free (Add 3 To Cart) This solvent is instrument-grade and helps produce a higher quality extract through the reduction of mystery oils and contaminants. This N-Butane is colorless, odorless, and clean. Butane is commonly used for butane extractions which occurs in a closed-loop extraction system. Given that butane has a boiling point of 30.2F, it can easily be re-condensed without the use of extreme temperatures. This makes butane the solvent of choice for passive recovery. Butane tends to yield a more stable extract, as polar terpenes are left behind. Another benefit to butane for extraction is that Hydrocarbon extraction is often used in large production. Large amounts of material can be extracted at once, and because these solvents have such low boiling points, they can be distilled from the extract quickly, and without using high temperatures can degrade the product. These solvents are used for full plant extracts, and post-processing can yield various consistencies. This makes butane extraction a preferable method. KEY BENEFITS: Free of any hydrogen Sulphide based Ethyl Mercaptan Odorants. This product is clean, colorless, and odorless. Tank contains no diptube. Sourced and Refined in USA. Actual Butane liquid weight is 20LB DISCLAIMER(S): This unit is intended for LEGAL purposes only, to be used in accordance with local laws and ordinances. Use only in WELL VENTILATED AREAS! Notice: This item will ship via Ground ONLY. BVV™ always recommends distillation of every solvent before use. Tank does not include CGA 510 fitting. Must be added through dropdown or bought separately. Actual liquid weight is 20LB California now prohibits the retail sale of any Non-Odorized butane in quantities larger than 150ml. If you are not a retail purchaser, you can call in to place an order. Permitted Sales Include the Following: Persons licensed to perform volatile solvent extraction activity under CA Bus & Prof Code Division 10 Manufacturers, wholesalers, resellers, or retailers solely for resale Sourced right here in the USA, this high-quality butane is guaranteed to be 99.5% pure. This is a solvent that is instrument-grade and helps produce a higher quality extract through the reduction of mystery oils and contaminants. This butane is clean, colorless, odorless, and free of any hydrogen sulfide-based ethyl mercaptan odorants. Because of this, a finer, higher quality extract is consistently available to our customers. How To Buy 2 Get 1 Free Simply add 3X of 20LB Tanks to your cart and you will automatically be discounted the third tank. Need one with a CGA fitting two without? Simply add one tank with your desired CGA fitting and add two of the same item selecting "None" for the "CGA fitting" and "Connection Size" options. Want 2 Butane Tanks and 1 Propane Tank? No problem, just add 3 of ANY of our 20LB LPG tanks to your cart and enjoy the third tank free! ***Shipping Notes: Due to FAA regulations, solvent tanks cannot be safely transported via means other than ground. Any order that has solvent will not be shipped in an expedited fashion. If an order with solvent is combined with any other items and chosen to be expedited, that entire order will ship via UPS Ground. We will not split up any orders and ship them separately. If a customer is wanting to expedite specific items and order solvent, 2 separate orders (1 for the solvent and 1 for the expedited items) will need to be placed in order to do so. Solvents do not ship to Hawaii, Puerto Rico, or any other US Territory outside of the contiguous 48 States. Shipping Solvent to Alaska may ONLY ship via freight and will be required to travel through Canada. We have this policy in place to ensure safety when transporting solvents, and to prevent any issue with shipping times for our customers. Chemical Formula: C₄H₁₀ Molecular Weight: 58.12 g/mol CAS Registry Number: 106-97-8 Appearance Colorless Odor: Faint Petroleum Density 2.6 kg/m³ (or 2.6 g/L) Boiling Point: 30.2 F (-1C) Solubility in water: Low Solubility GHS Pictograms: GHS Signal Word: Danger GHS Hazard Statements: H220 GHS Precautionary Statements P203, P210, P222, P280, P377, P381, and P403 UN Identification Number: 1011 Proper Shipping Name: Butane, liquefied Transport Hazard Class: 2.1 Packing Group: None DOT Placard: N-Butane Certificate of Analysis (COA) N-Butane Safety Data Sheet (SDS)
$373.99 - $395.16
-

20LB High Purity USA PROPANE R290 - 99.5% Guaranteed - Buy 2 Get 1 Free (Add 3 To Cart)
R290 PROPANE - Buy 2 Get 1 Free (Add 3 To Cart) The 20LB High Purity Propane is USA-sourced with 99.5% guaranteed purity. Not to mention the propane gas is clean, colorless, and odorless. Additionally, solvent comes in a DOT refillable LP tank with an adapter to 1/4" SAE. This gas cylinder doesn’t contain a dip tube. KEY BENEFITS: Free of any hydrogen Sulphide based Ethyl Mercaptan Odorants. This product is clean, colorless, and odorless. Tank contains no diptube. Sourced and Refined in USA. Actual Propane liquid weight is 20LB DISCLAIMER(S): This unit is intended for LEGAL purposes only, to be used in accordance with local laws and ordinances. Use only in WELL VENTILATED AREAS! Notice: This item will ship via Ground ONLY. BVV™ always recommends distillation of every solvent before use. Tank does not include CGA 510 fitting. Must be added through dropdown or bought separately. Actual liquid weight is 20LB How To Buy 2 Get 1 Free Simply add 3X of 20LB Tanks to your cart and you will automatically be discounted the third tank. Need one with a CGA fitting two without? Simply add one tank with your desired CGA fitting and add two of the same item selecting "None" for the "CGA fitting" and "Connection Size" options. Want 2 Butane Tanks and 1 Propane Tank? No problem, just add 3 of ANY of our 20LB LPG tanks to your cart and enjoy the third tank free! Any order that has solvent will not be shipped in an expedited fashion. If an order with solvent is combined with any other items and chosen to be expedited, that entire order will ship via UPS Ground/Freight. We will not split up any orders and ship them separately. If a customer wants to expedite specific items and order solvent, 2 separate orders (1 for the solvent and 1 for the expedited items) will need to be placed to do so. Solvents do not ship to Hawaii, Puerto Rico, or any other US Territory outside of the contiguous 48 States. Shipping Solvent to Alaska may ONLY ship via freight and will be required to travel through Canada. We have this policy in place to ensure safety when transporting solvents, and to prevent any issue with shipping times for our customers. Chemical Formula: C3H8 Molecular Weight: 44.10 g/mol CAS Registry Number: 74‐98‐6 Appearance Colorless Odor: Gasoline Density 0.116 Boiling Point: ‐40 F Solubility in water: Slightly Soluble GHS Pictograms: GHS Signal Word: Danger GHS Hazard Statements: H220 GHS Precautionary Statements P203, P210, P222, P280, P377, P381, and P403 UN Identification Number: 1075 Proper Shipping Name: Petroleum Gases, liquefied Transport Hazard Class: 2.1 Packing Group: None DOT Placard: Propane Certificate of Analysis (COA) Propane Safety Data Sheet (SDS)
$373.99 - $395.16
-

24" & 36" Filter Paper (Qualitative, Large Diameter)
Ashless Filter Papers - Qualitative Ashless quantitative and qualitative filter papers provide laboratory grade filtration for extraction systems and are specifically used in combination with a Buchner funnel to remove fats, waxes and any other unwanted contaminants from your solution. These filter papers are used in the pre-processing stage of short path distillation to clean up the material prior to processing. Key Features: ISO 9001 Approved Manufactured from alpha-cellulose and cotton linters High Purity and low background Consistent performance Low ashless content: <0.1% Whatman equivalent quality Pre-Cut for ease of use Specifications: Classification Qualitative Sizes Available: BIO-1 11um - Medium BIO-4 20um - Fast BIO-5 2.5um - Slow BIO-6 3um - Slow Ash Content <0.1% Quantity per Pack 100 Diameter 24 - 36" Technical Data: Grade Particle Retention Appearance Speed Ash Content (%) Basis Weight (g/m2) Wet burst (mm H2O) BIO-1 11um Smooth Medium <0.1 80.0±4.0 >140 BIO-2 8um Smooth Medium <0.1 80.0±4.0 >140 BIO-4 20um Smooth Fast <0.1 80.0±4.0 >120 BIO-5 2.5um Smooth Slow <0.1 80.0±4.0 >180 BIO-6 3um Smooth Slow <0.1 80.0±4.0 >180 BIO-40 8um Smooth Medium <0.007 80.0±4.0 >140 BIO-41 20-25um Smooth Fast <0.007 80.0±4.0 >120 BIO-42 2.5um Smooth Slow <0.007 80.0±4.0 >180 BIO-43 16um Smooth Medium to Fast <0.007 80.0±4.0 >120 BIO-44 3um Smooth Slow <0.007 80.0±4.0 >180
$317.54 - $1,093.75
-
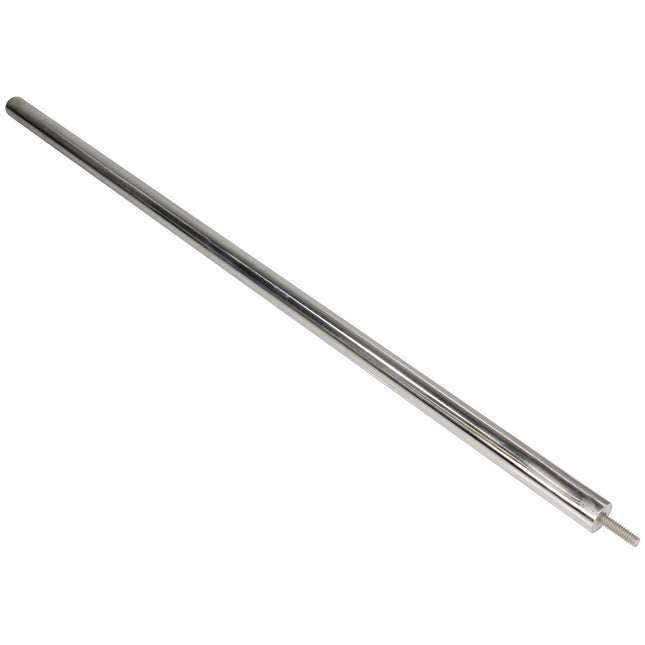
24" Stainless Steel Packing Rod Extension
24" Stainless Steel Packing Rod Extension This is the Best Value Vacs 24" Extension for the packing rod and can easily be threaded on and off to extend or reduce the size of your packing rod. Specifications: Material: 304 Stainless Steel Length: 24" Thread Size: 1/4"-20
$28.23
-
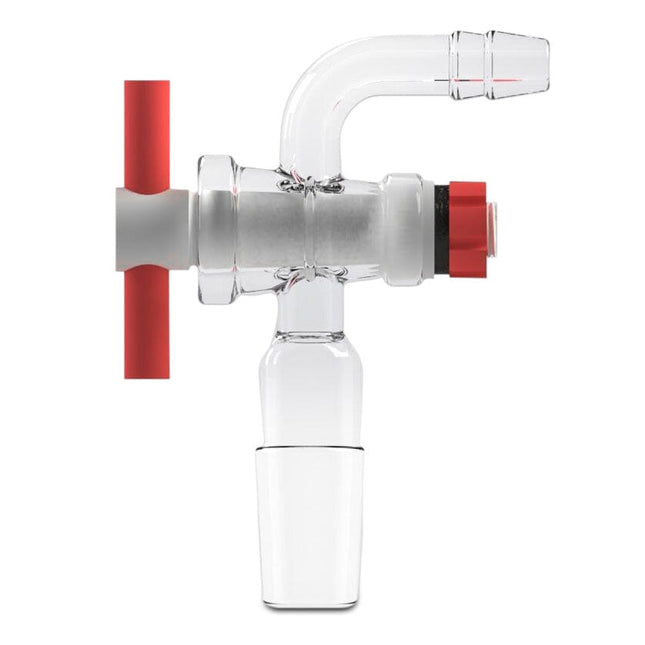
24/29 Valve
24/29 Valve For 10L-50L Best Value Rotary Evaporators. *Notice to customers: All units are inspected for broken glassware or parts before leaving BVV™. If the unit arrives damaged (this does not include minor imperfections or scuffs in glassware), the customer MUST contact BVV™ within 72 hours from carrier delivery to file a claim. If the customer DOES NOT contact BVV™ within 72 hours from carrier delivery, then BVV™ cannot issue any replacement(s) or compensation for the item; a new purchase will need to be made for a replacement. **Glassware Safety Disclaimer: BVV™ is not responsible for failure of glassware which must be inspected before and after every use because it may eventually develop imperfections or damage through normal usage, mishandling, and stress caused by temperature variations. If an imperfection or damage is noted while inspecting the glassware DO NOT use the glassware because it can fail causing bodily harm or damage to the surrounding area.**
$49.40
-

24/40 Jointed Straight Adapter
24/40 Jointed Straight Adapter This straight inlet adapter allows the user to connect two female 24/40 jointed connections. The overall distance between the joints is 70mm. *Notice to customers: All units are inspected for broken glassware or parts before leaving BVV™. If the unit arrives damaged (this does not include minor imperfections or scuffs in glassware), the customer MUST contact BVV™ within 72 hours from carrier delivery to file a claim. If the customer DOES NOT contact BVV™ within 72 hours from carrier delivery, then BVV™ cannot issue any replacement(s) or compensation for the item; a new purchase will need to be made for a replacement. **Glassware Safety Disclaimer: BVV™ is not responsible for failure of glassware which must be inspected before and after every use because it may eventually develop imperfections or damage through normal usage, mishandling, and stress caused by temperature variations. If an imperfection or damage is noted while inspecting the glassware DO NOT use the glassware because it can fail causing bodily harm or damage to the surrounding area.**
$21.17
-
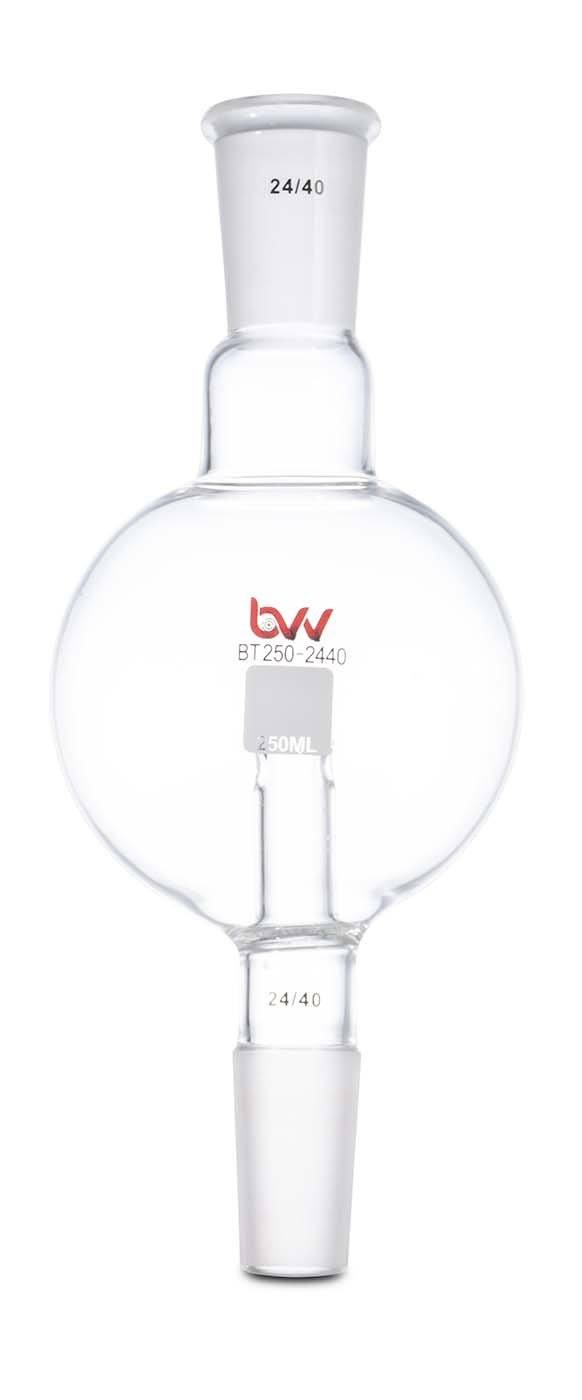
250ml Bump Trap 24/40 Male to 24/40 Female
Bump traps are used on rotary evaporators between the evaporating flask and condensing column. They help prevent contamination in the collection vessel when “bumping” occurs. When “bumping” occurs substance in the evaporating flask shoots up and ends up in the collection flask, which is unwanted when operating. This bump trap features a 250ML round flask with upper 24/40 female ground joint and bottom 24/40 male ground joint. With the use of ground joints vacuum grease must be applied to assure a tight seal. Internally, there is a tube that extends and two openings on the sides. This is what stops the bumping from occurring. If any substance makes its way through the openings, it will get trapped in the flask. Vapor is still allowed to flow freely through the openings. Recommend using this bump trap on 2L rotary evaporators and other distillation setups it has an overall length of 9". Specifications Material Borosilicate Flask Size 250ml Top Connection 24/40 Female Ground Joint Bottom Connection 24/40 Male Ground Joint *Notice to customers: All units are inspected for broken glassware or parts before leaving BVV™. If the unit arrives damaged (this does not include minor imperfections or scuffs in glassware), the customer MUST contact BVV™ within 72 hours from carrier delivery to file a claim. If the customer DOES NOT contact BVV™ within 72 hours from carrier delivery, then BVV™ cannot issue any replacement(s) or compensation for the item; a new purchase will need to be made for a replacement. **Glassware Safety Disclaimer: Best Value Vacs is not responsible for failure of glassware which must be inspected before and after every use because it may eventually develop imperfections or damage through normal usage, mishandling, and stress caused by temperature variations. If an imperfection or damage is noted while inspecting the glassware DO NOT use the glassware because it can fail causing bodily harm or damage to the surrounding area.**
$84.68
-
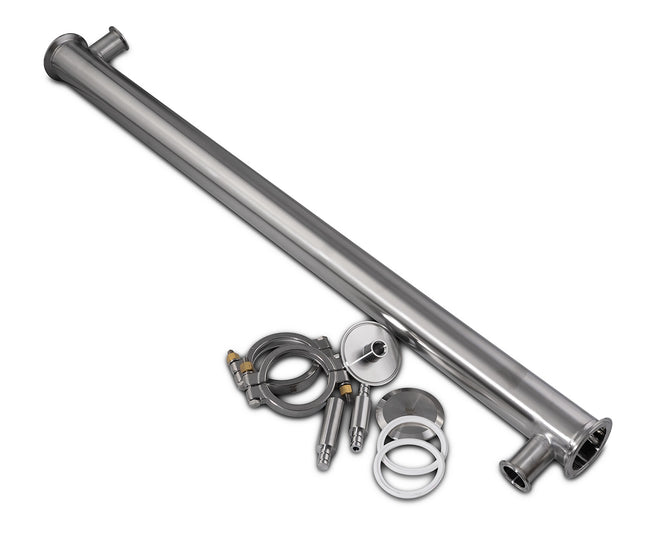

2540 Membrane Housing Kit
2540 Membrane Housing Kit This is a membrane housing kit designed to fit Snyder 2540 membranes. The inner diameter of the housing measured 2.519' (64MM) and measured 46" from end to end. The opposing 1.5" tri-clamp ports protrude 3.5" from the center of the housing and are spaced 42.5" apart measured from the center of each ferrule. This housing kit includes 3" tri-clamp end caps that accept the membrane permeate adapters to perfectly support the membrane within the housing. The permeate adapters include 014 Viton O-rings to perfectly seal the permeate stream from the retentate stream. To complete the housing this kit Includes 2X 3" High pressure Clamps and 2X 3" Silicone gaskets. Components: 1X 2540 Membrane housing (2X 3" TC ports, 2X 1.5" TC ports 1X 3" Permeate endcap with 3/8" NPT outlet 1X 3" Solid end cap 1X Solid Membrane Insert 1X Membrane Permeate Insert 2X 3" High pressure Clamps 2X 3" Silicone Tri-clamp Gaskets 6X 014 Viton O-Rings
$2,116.93
-
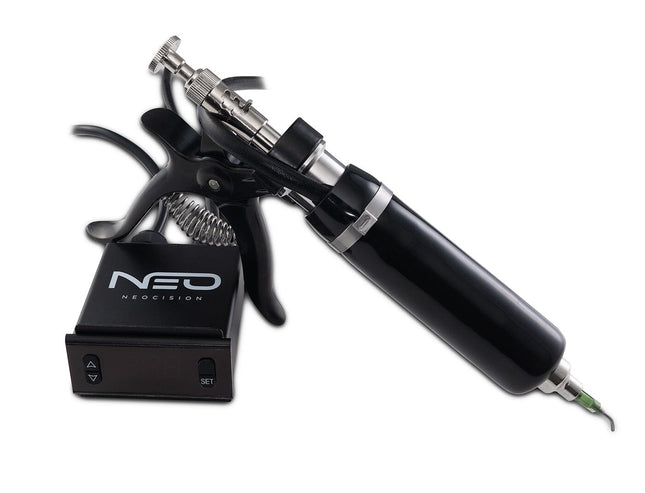
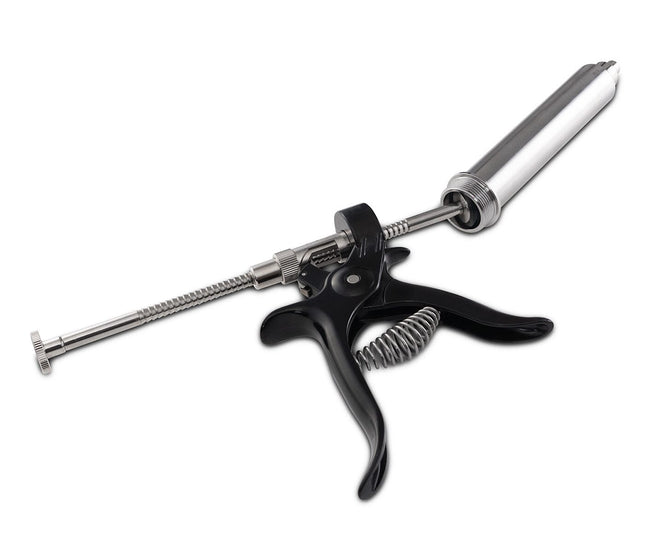
25ml Heated Filling Gun with Stainless Steel Barrel (0.5ml Incremental Shots)
Heated Filling Gun with Stainless Steel Barrel 30 Day Limited Warranty 2023 Version Upgraded Stainless Barrel! The BVV™ Semi-Automatic Lab Dosing Gun can is easily adjusted to fill in 0.5ml, 1ml, 1.5ml, 2ml, and 2.5ml increments. You can quickly and accurately fill your cartridges. The heated barrel has a digital controller that allows the user to set a temperature from (Room Temperature - 190°F) in increments of 1.0°F. The Filler comes ready to use, first clean the components, plug it in and attach the included 14 Gauge Tip. Specifications: Stainless Steel Barrel – 304 Grade Polished Stainless Steel 14 Gauge lure lock needle included 110V USA Plug Adjusts from 0.5-2.5ml Shots (0.5ml increments) Lure Lock Hub for all types of size attachments Extra Barrel Plunger Gasket included Adjustable plunger tension/tightening (*for user preferred plunger action) Built-in Temperature Cutoff @190F. 5ft Power Cord 3ft Heat Cord to Control Box. Assembled weight 1lb. 8oz. Cleaning: NOTE: Please Clean Prior to first use gun does not come sterilized. Cleaning the barrel and components can be done with De-limonene, other chemicals can be used, however, *The Barrel Gasket is made of Nitrile and can degrade with overexposure to chemicals like Isopropyl Alcohol. To Fill the Syringe:Advance the plunger all the way to the needle tip of the barrel. Place the needle into the Oil and pull the plunger all the way back until it stops. The barrel will be filled. Increasing the Max Temperature: The Max Temperature Setting is 190°F. To increase the temperature beyond that, the user will need to follow the included instruction to unlock and change the max temp. (Absolute Max. is 212°F) Lab Dosing Gun User Manual PDF
$416.33
-

280L Centrifuge Bags
This nylon bag is designed to fit in our BVV brand centrifuges to contain material and be easily swappable after runs to speed up processing times. These bags come with 2 zippers and come in 1, 10, 50, 100, and 200 micron filtration levels. For use with 280L Centrifuges Appx. Size : 39.25" Diameter x 14" Height Specifications SKU Appx. Diameter In. Appx. Height in. CFB-45L-XXX 17.5" 11.75" CFB-160L-XXX 32.25" 13" CFB-280L-XXX 39.25" 14" CFB-475L-XXX 47.25" 16.75"
$331.65 - $635.08
-
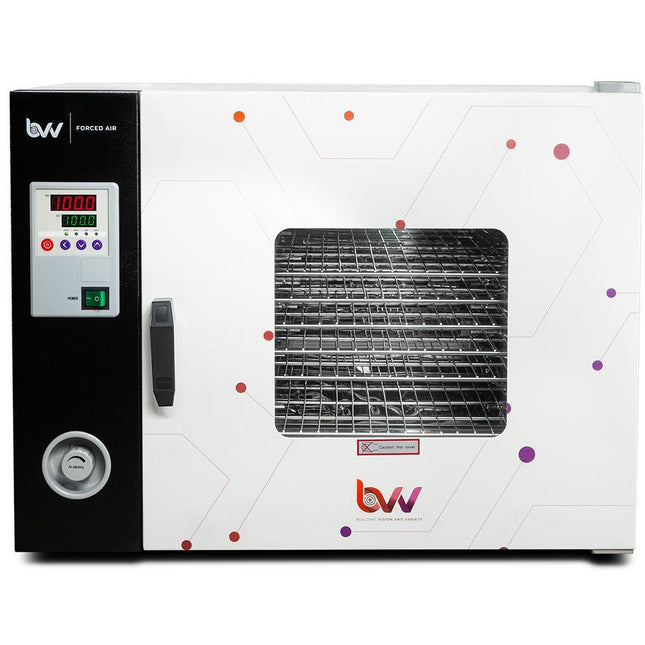
2CF CSA Certified Lab Grade Forced Air Convection Drying Oven – 6 Shelves Standard
2CF BVV™ CSA Certified Lab Grade Forced Air Convection Drying Oven – 6 Shelves Standard DISCLAIMER: This unit is intended for LEGAL purposes only, to be used in accordance with local laws and ordinances. Use only in WELL VENTILATED AREAS! The 2CF CSA Certified Laboratory Grade Drying Oven is our newest addition to the Best Value Vacs line of Laboratory-grade processing equipment. Offering a leading ±1⁰F temperature stability, over 98% heat uniformity, and no overshoot, technicians can now process material with ease and confidence. We regulate heat using a modern, high-precision PID controller with a large, bright display and touchscreen buttons. The interior is a high-polish stainless steel, presenting a clean and easy to maintain surface. Our drying oven comes fully-stocked as a standard- offering ten spacious, wire frame shelves you can easily insert, remove, and clean. With a clear, no-overshoot advantage, there’s simply no better choice for your precision processing needs. Key Oven Features: Long-lifetime convection fan gently circulates air for optimal heat distribution Stainless steel interior for a sanitary, easy-to-clean look 6 spacious, wire racks are easy to insert and remove Level-adjusting caster wheels for mobility and stability Overload circuit breaker for electrical protection Large, tough, stainless steel door handle feels solid and works great Temperature overshoot protection enabled Digital timer allows users precise control of heating cycle Simple and powerful user interface presented in a large, bright, clear display Specifications Electrical 120 VAC / 60Hz / 1100W / USA Plug Internal Chamber Material: Polished Stainless Steel Dimensions (LxWxH): 16.5" x 15.5" x 13.75" Temperature Control LED PID Controller Temperature Range: RT+18F - 572F Temperature Stability: +/- 1F Temp Resolution: +/-0.1F Heat Uniformity: 98% Shelves Up to 6 Removeable Shelves Door Dual Layer Observation Window made from Tempered Glass Replaceable Gasket Material: Silicone Weight & Dimensions Outside Dimensions (LxWxH): 28.34" x 20.86" x 20.47" Weight: 77.16lbs Compliance CSA Certified *ISO 9001:2005 Note: This item is a freight ship item and will ship Via UPS Ground Freight. Expedited freight can only be calculated by calling customer service 331-281-0154. All orders with expedited freight through the website will not be honored and will need to be re-quoted. A valid Phone Number IS REQUIRED to ship, Otherwise UPS freight Cannot Contact you for a delivery setup window.
$1,693.54 $1,270.16
-
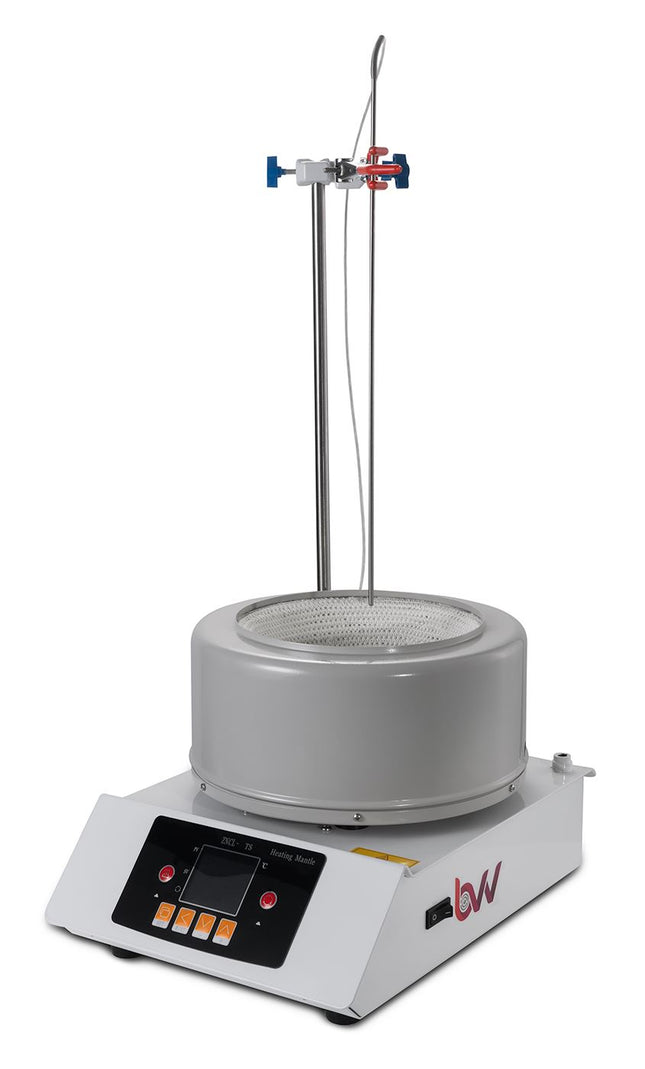
2L Digital Heating and Stirring Mantle
2L Digital Heating and Stirring Mantle Digital Heating and Stirring Mantles give the operator the most precise temperatures and readouts during distillations. These mantles autotune to specific user input to provide consistent results. Each mantle is equipped with large digital display that will give you readouts for both set temperature, actual temperature, and stirring speed. Each mantle also comes with a vertical brace bar and boss head as well as a temperature probe which plugs directly into the mantle. For first time use, the mantle should have an initial burn out done. This will burn off any residual oils used in the production of the insulation rope. The unit's max internal temperature cannot exceed 380C. The recommended max set temperature should not exceed 250C Specifications: Capacity: 2L (2000mL) Power Supply: 110V 60Hz Adjustable Rotation Speed: 50-1800 RPM Motor Power: 40W, DC14-24V Heating Power 180-2200W Temperature Control Accuracy: +/- 1C Intelligent Temperature Control: Yes Temperature Range: RT+10-380C Insulation Material: Alkali-free Glass Fiber, temperature resistant up to 450C Shipping Dimensions: 20 x 14 x 13 in. Weight: 8 lbs
$917.34
-
2L Electric Evaporating Flask Adapter
2L Electric Evaporating Flask Adapter This replacement part is for the 2L Electric Lift Rotary evaporator and connects the evaporating flask to the motor interface. *Notice to customers: All units are inspected for broken glassware or parts before leaving BVV. If the unit arrives damaged (this does not include minor imperfections or scuffs in glassware), the customer MUST contact BVV within 72 hours from carrier delivery to file a claim. If the customer DOES NOT contact BVV within 72 hours from carrier delivery, then BVV cannot issue any replacement(s) or compensation for the item; a new purchase will need to be made for a replacement. **Glassware Safety Disclaimer: BVV is not responsible for failure of glassware which must be inspected before and after every use because it may eventually develop imperfections or damage through normal usage, mishandling, and stress caused by temperature variations. If an imperfection or damage is noted while inspecting the glassware DO NOT use the glassware because it can fail causing bodily harm or damage to the surrounding area.**
$139.72
-
2L Electric Lift Glass Axis
Glass axis for 2L Best Value Electric Lift Rotary Evaporator. *Notice to customers: All units are inspected for broken glassware or parts before leaving BVV™. If the unit arrives damaged (this does not include minor imperfections or scuffs in glassware), the customer MUST contact BVV™ within 72 hours from carrier delivery to file a claim. If the customer DOES NOT contact BVV™ within 72 hours from carrier delivery, then BVV™ cannot issue any replacement(s) or compensation for the item; a new purchase will need to be made for a replacement. **Glassware Safety Disclaimer: BVV™ is not responsible for failure of glassware which must be inspected before and after every use because it may eventually develop imperfections or damage through normal usage, mishandling, and stress caused by temperature variations. If an imperfection or damage is noted while inspecting the glassware DO NOT use the glassware because it can fail causing bodily harm or damage to the surrounding area.**
$63.51
-
2L Electric Lift Rotary Evaporator
2L Electric Lift Rotary Evaporator The 2L BVV™ Electric Lift Rotary Evaporator is the ideal tabletop rotovap for small scale evaporation and recovery of solvents. Designed with ease of use in mind, the 2L allows users to separate solvents from a given mixture with minimal user input. The heating bath and temperature controls allow for precise, repeatable results. The double helix vertical condenser gives maximum surface area for condensation of vapors. PTFE seals on the entire system are made for maximum chemical resistance to ensure vacuum depth and lifespan of the system. Our rotovaps are a fraction of the price of more costly systems with the same functionaility and evaporation efficiency. 2L Best Value Electric Lift Rotovap Parts Diagram Features: Digital PID temperature and rotation speed control All PTFE valves for improved lifespan and chemical resistance Direct injection capability for continuous feeding of solution Small tabletop footprint Electric multi-level lifting mechanism for ease of use CE Listed 90-day limited warranty (excludes glassware, consumables & moving parts) Specifications: Model 2L Best Value Electric Lift Rotary Evaporator Optimum Ambient Temperature 5~25C / 41~105.8F Glass Material GG-17 High Borosilicate Power (V/Hz) 110V 60Hz Speed Regulation Digital Step-less Regulation Rotation Speed 20-198 RPM Set Temperature 0-99C / 0-210F Temperature Control Digital Temperature Control Maximum Vacuum Pressure -29.8 inHg Evaporating Flask Capacity 2L (2000mL) Receiving Flask Capacity 1L (1000mL) Condenser Style Vertical Double Helix Evaporation Capacity Alcohol >/= 1 L/H Heater Max Current Draw (Amps) 13.6 Water Bath Material Teflon Composite Water Bath Size 10 x 5 in. Lifting Function Electric Lifting Stroke 14cm / 5.5 in. Total Power Consumption (kW) 1.8 kW Dimensions 28 x 18 x 27 in. Weight 37.2 kg / 82 lbs Vacuum Connection 3/8” Barb Condenser Connection 3/8” Barb Warranty 90 days excluding glass parts Certifications CE Rotovap Quick Start Guide This guide gives basic quick start instructions for rotovaps. It is intended to provide a starting point for learning the process. Parameters should be adjusted to suit specific needs. Clean and assemble unit. Make sure all pieces are cleaned and sterilized using an alcohol solution. Connect chiller to condenser and set to 0C (32F). Always fill a rotovap condenser from the top down (chiller output to top of condenser, chiller input to bottom of condenser). Connect vacuum pump to cold trap and connect cold trap to vacuum port on rotovap. Turn on heat bath and set to 40C (113F). Once heat bath, chiller and cold trap have reached desired temperatures, turn on rotovap motor and set speed to approximately 100 RPM (does not have to be precise). Keep in mind, higher RPM’s will increase evaporation power but also increase heat load. Start vacuum pump and allow vacuum to pull down for a few minutes before injection. Once vacuum has been pulled to a sufficient level (does not have to be precise but should be below 100 Torr), using the injection valve, very slowly inject approximately 500 mL of solution into evaporating flask and then close the valve. Allow this small amount to begin evaporating. You may see the chiller begin to rise in temperature, this is called “priming” the rotovap. Once the temperature stops rising or all liquid is almost completely evaporated, open the injection valve again very slowly so that a small amount of liquid begins to enter the evaporating flask. Do not close injection valve this time but continue to allow solution to enter the evaporating flask. At this point you must try to match the input speed to the output speed. What this means is that you should be injecting the same amount of liquid into the rotovap that is equal to the amount of liquid dripping from the condenser into the receiving flask. You will know that the input speed and output speed are matched because the chiller will remain at a stable temperature. If the chiller begins to rise, then you are injecting too much liquid. Dial back the valve until the chiller stabilizes. Once everything is stabilized, you may walk away from the rotovap if necessary. Check every so often to make sure temperatures remain stable and evaporation continues efficiently. ***Note: All units are inspected for broken glass or parts before unit is shipped. If unit arrives damaged or glass is broken (this does not include minor imperfections or scuffs in glassware), Customer MUST contact BVV™ within 3 days of delivery to file a claim and receive a replacement part. If customer DOES NOT contact BVV™ within 3 days of delivery responsibility for replacement parts falls on the customer and they must pay for replacement pieces.*** ***Glassware Safety Disclaimer: BVV™ is not responsible for failure of glassware which must be inspected before and after every use because it may eventually develop imperfections or damage through normal usage, mishandling, and stress caused by temperature variations. If an imperfection or damage is noted while inspecting the glassware DO NOT use the glassware because it can fail causing bodily harm or damage to the surrounding area.***
$2,251.00 - $2,469.75
-
2L Electric Receiving Flask with PTFE Valve
2L Electric Receiving Flask with PTFE Valve This receiving flask fits Best Value Vacs 2L Electric Rotary Evaporators and is made out of GG-17 glass with a PTFE dispensing valve. This Flask has a 35/15 round joint with a 1/2" Hose Barb and Viton gaskets on the Teflon Valve.
$265.32
-
2L Electric Rotary Evaporator Kit with BVV Water Circulation Vacuum Pump
2L Electric Rotary Evaporator Kit with BVV™ Water Circulation Vacuum Pump 2L Electric Rotary Evaporator Kit with BVV™ Water Circulation Vacuum Pump setup includes all the neccessary components to successfully perform solvent recovery via rotary evaporation. A cold trap should always be used inline between your vacuum system and application to protect the pump from volatile vapors. 2L Rotary Evaporator Turnkey Setup includes: 2L Electric Lift Rotary Evaporator 90-day limited warranty (excludes glassware, consumables & moving parts) BVV™ Water Circulation Vacuum Pump Rotovap Quick Start Guide This guide gives basic quick start instructions for rotovaps. It is intended to provide a starting point for learning the process. Parameters should be adjusted to suit specific needs. Clean and assemble unit. Make sure all pieces are cleaned and sterilized using an alcohol solution. Connect chiller to the condenser and set to 0C (32F). Always fill a rotovap condenser from the top down (chiller output to top of the condenser, chiller input to bottom of the condenser). Connect vacuum pump to cold trap and connect cold trap to the vacuum port on rotovap. Turn on heat bath and set to 40C (113F). Once heat bath, chiller, and cold trap have reached desired temperatures, turn on the rotovap motor and set the speed to approximately 100 RPM (does not have to be precise). Keep in mind, higher RPM’s will increase evaporation power but also increase heat load. Start vacuum pump and allow vacuum to pull down for a few minutes before injection. Once the vacuum has been pulled to a sufficient level (does not have to be precise but should be below 100 Torr), using the injection valve, very slowly inject approximately 500 mL of solution into evaporating flask and then close the valve. Allow this small amount to begin evaporating. You may see the chiller begin to rise in temperature, this is called “priming” the rotovap. Once the temperature stops rising or all liquid is almost completely evaporated, open the injection valve again very slowly so that a small amount of liquid begins to enter the evaporating flask. Do not close injection valve this time but continue to allow the solution to enter the evaporating flask. At this point, you must try to match the input speed to the output speed. What this means is that you should be injecting the same amount of liquid into the rotovap that is equal to the amount of liquid dripping from the condenser into the receiving flask. You will know that the input speed and output speed are matched because the chiller will remain at a stable temperature. If the chiller begins to rise, then you are injecting too much liquid. Dial back the valve until the chiller stabilizes. Once everything is stabilized, you may walk away from the rotovap if necessary. Check every so often to make sure temperatures remain stable and evaporation continues efficiently. ***Glassware Safety Disclaimer: BVV™ is not responsible for failure of glassware which must be inspected before and after every use because it may eventually develop imperfections or damage through normal usage, mishandling, and stress caused by temperature variations. If an imperfection or damage is noted while inspecting the glassware DO NOT use the glassware because it can fail causing bodily harm or damage to the surrounding area.***
$2,610.88
-
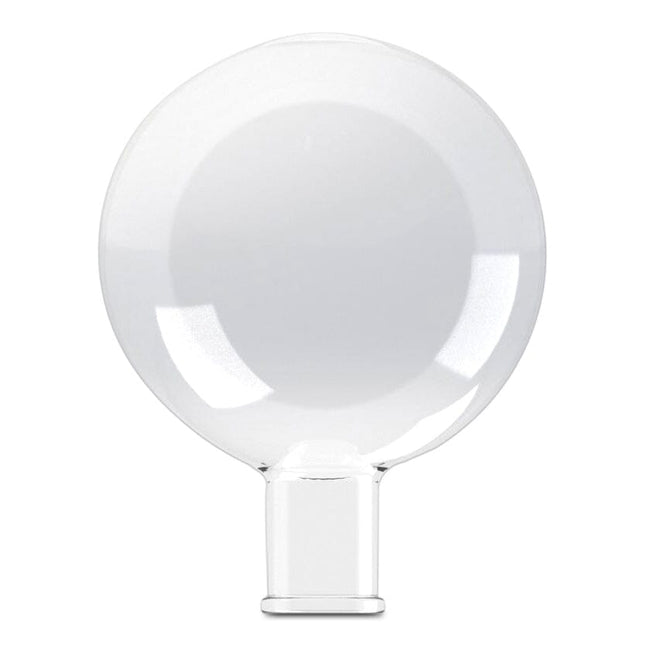
2L Evaporating Flask
2L evaporating flask for 2L Best Value Electric Lift Rotary Evaporator. *Notice to customers: All units are inspected for broken glassware or parts before leaving BVV™. If the unit arrives damaged (this does not include minor imperfections or scuffs in glassware), the customer MUST contact BVV™ within 72 hours from carrier delivery to file a claim. If the customer DOES NOT contact BVV™ within 72 hours from carrier delivery, then BVV™ cannot issue any replacement(s) or compensation for the item; a new purchase will need to be made for a replacement. **Glassware Safety Disclaimer: Best Value Vacs is not responsible for failure of glassware which must be inspected before and after every use because it may eventually develop imperfections or damage through normal usage, mishandling, and stress caused by temperature variations. If an imperfection or damage is noted while inspecting the glassware DO NOT use the glassware because it can fail causing bodily harm or damage to the surrounding area.**
$169.35
-
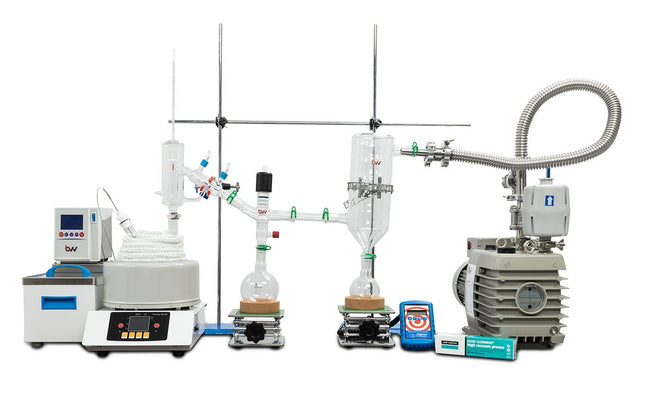

2L Full Bore Short Path Distillation Turnkey Kit with P2 Distillation Head
2L Full Bore Short Path Distillation Turnkey Kit with P2 Distillation Head This unit carries a 2-day lead time The 2L Full Bore Short Path Distillation Turnkey Kit with P2 Distillation Head is a great setup for smaller scale processors that want a budget friendly system without sacrificing quality on the main components that make a short path great. We understand that as an operator our customers want to be able to start their system and operate in ideal conditions run after run. That is why we paired a full-bore setup with a 14.1CFM pump that will assure the lowest vacuum depth will be pulled every time. Main components such as the distillation head, vacuum valve adapter, and cold trap are all American blown glass. These components allow us to present this system that will repeat in performance time after time. For a in depth analysis of this system please view the following videos. Here you will see the system setup, component explanation, and even see it perform in a first and second distillation pass. These runs were all performed in our lab and the data was used to help fine tune the system. The unit's max internal temperature cannot exceed 380C. The recommended max set temperature should not exceed 250C Video 1 - Setup and Component Explanation Video 2 - Setup Addendum Video 3 - Fist pass Distillation Video 4 - Second Pass Distillation The 2L Full Bore Short Path Distillation Turnkey Kit with P2 Distillation Head Includes: 1 First Pass Distillation Operating Procedure 1 P2 Distillation Kit 1 2L Double Neck Boiling Flask 1 Full Bore Vacuum Valve Adapter 1 BVV MP7H Heater 1 2L Heating Mantle 1 Ribbed Glass Cold Trap 1 Bullseye Precision Vacuum Gauge 1 BVV Pro Series 14.1CFM Rotary Vane Pump (Comes filled with oil. Recommend purchasing additional Ultra 19 Vacuum Pump Oil. SKU: INLAND19-ULTRS-1G) 1 Oil Mist Filter Trap for Rotary Vane Pump 1 24/40 250ml Single Neck Round Bottom Flask 3 24/40 500ml Single Neck Round Bottom Flask 1 24/40 Glass Funnel 1 Vacuum Manifold for Rotary Vane Pump 1 1 Meter Bellow Hose 1 PTFE Magnetic Stirring Bar Retriever 1 24/40 Metal Keck Clip 6 24/40 Plastic Keck Clips 3 250-500ml Cork Stands 2 Chain Clamps 1 Boss Head with 3 Finger Clamp 1 BVV Lab Stand 10 Fiber Glass Insulation Rope 1 Dow Corning High Vacuum Grease 1 10/30 Non-Mercury Glass Thermometers 1 24/40 – 10/30 Glass Adapter Bushing 1 24/40 – 1/8” Thermometer Adapter 1 24/40 Straight Adapter 2 6”x6” Scissor Jack 3 36” Threaded Lab Stand Rod 2 Gl14 – 8mm Barb 6 ¼” Silicone Tubing 2 PTFE Magnetic Stirring Bar 4 Hose Clamp with Butterfly Key ***Note: This entire setup will ship via motor freight.*** ***Note: All units are inspected for broken glass or parts before unit is shipped. If unit arrives damaged or glass is broken (this does not include minor imperfections or scuffs in glassware), Customer MUST contact BVV™ within 3 days of delivery to file a claim and receive a replacement part. If customer DOES NOT contact BVV™ within 3 days of delivery responsibility for replacement parts falls on the customer and they must pay for replacement pieces.*** ***Glassware Safety Disclaimer: BVV™ is not responsible for failure of glassware which must be inspected before and after every use because it may eventually develop imperfections or damage through normal usage, mishandling, and stress caused by temperature variations. If an imperfection or damage is noted while inspecting the glassware DO NOT use the glassware because it can fail causing bodily harm or damage to the surrounding area.***
$11,149.16
-
2L Injection Valve
Injection valve for 2L Best Value Electric Lift Rotary Evaporator. *Notice to customers: All units are inspected for broken glassware or parts before leaving BVV™. If the unit arrives damaged (this does not include minor imperfections or scuffs in glassware), the customer MUST contact BVV™ within 72 hours from carrier delivery to file a claim. If the customer DOES NOT contact BVV™ within 72 hours from carrier delivery, then BVV™ cannot issue any replacement(s) or compensation for the item; a new purchase will need to be made for a replacement. **Glassware Safety Disclaimer: Best Value Vacs is not responsible for failure of glassware which must be inspected before and after every use because it may eventually develop imperfections or damage through normal usage, mishandling, and stress caused by temperature variations. If an imperfection or damage is noted while inspecting the glassware DO NOT use the glassware because it can fail causing bodily harm or damage to the surrounding area.**
$98.79
-
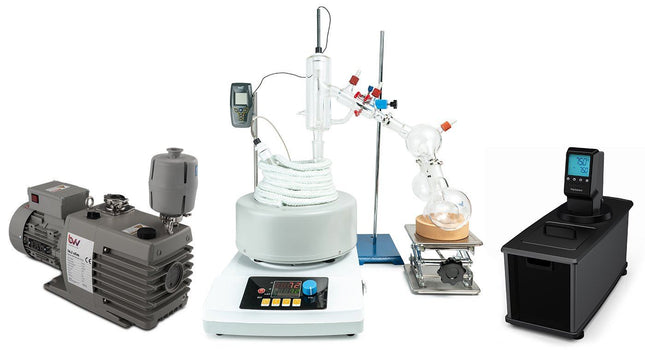

2L Premium Short Path Distillation Turnkey Setup with P2 Distillation Head
2L Premium Short Path Distillation Turnkey Setup with P2 Distillation Head The 2L Premium Distillation Turnkey Setup features our 2L Distillation Kit with P2 Distillation Head and USA made glass. Every component in this turnkey is made for precision, throughput, and repeatable results. Also included is our Pro Series 11.3CFM Corrosion Resistant Two Stage Vacuum Pump giving you extreme power and depth with long lifespan, the Bullseye Precision Vacuum Gauge from Digivac which is the most rugged and dependable vacuum gauge on the market, and a Polyscience 7L MX Heated Circulator for maximum condensation of vapors. You will also receive a Dewar Style Glass Cold Trap to keep all volatiles and solvents out of your vacuum system. This Turnkey Setup gives you everything needed to perform distillation at the highest level. The Premium Turnkey Kit Includes: 2L Distillation Kit w/ P2 Distillation Head KF-25 x 1/4" Barb Adapter Dewar Style Glass Cold Trap Bullseye precision Vacuum Gauge Polyscience 7L MX Heated Circulator Pro Series 14.1CFM Corrosion Resistant Two Stage Vacuum Pump Distillation Quick Start Guide This guide gives basic quick start instructions for distillation systems. It is intended to provide a starting point for learning the process. Parameters should be adjusted to suit specific needs, Before beginning distillation, ensure the following steps have been taken: Vacuum Pump is in good working order. Pump should be run against dry load to allow internals to warm up. Oil should be clear. Cloudy or dark oil should be changed. All glass components are in good working order and ready to be assembled A winterization and degassing procedure has been done to prepare oil for distillation Once all three of these steps have been completed, you are ready to begin distilling. Begin by placing stir bar in boiling flask and then load your material. This should be done using a funnel. A small amount of alcohol in the oil will give it a thinner consistency making it easier to transfer. Assemble all glassware and ensure each joint is properly greased. Do not use too much, as the vacuum pressure might pull some grease into the system. To ensure a full seal, spread grease in a circular motion by rotating glassware Attach circulator to condenser and set temperature to 50C. Allow circulator to reach temperature before beginning distillation. Connect vacuum pump to manifold. The manifold will allow you to isolate each individual component as well as let atmosphere into and out of the system. Connect receiving cow to cold trap. Connect cold trap to manifold. Connect vacuum gauge to manifold. At this point, ensure all connections are correct. Also ensure receiving cow is positioned to collect the first fraction in the far-left receiving flask. Circulator should be at its set temperature. Turn on vacuum pump to begin process. Turn on heat and set to 60C. Vacuum pump will begin to pull down and temperature will begin to rise. Watch the gauge to monitor vacuum pressure and stability. Start stir slower and increase speed with temperature. Once you are close to 60C, increase the temperature 20 degrees. Continue to raise the heat incrementally in 20-degree steps, increasing the set temperature as you near your set point. Increase temperatures incrementally until you reach 220C. You will see your first fraction somewhere between 180C and 190C or slightly before. This is the “heads” fraction. You will move to your second fraction when you see an increased reaction in the head, a slight color change toward golden, as well as a thickening of distillate. When this fraction hits, allow the distillate to “self-clean” the head for a minute or two then, rotate the cow to the middle receiving flask. Collect your “main body” fraction. You will see temps between 190-220C during this fraction. Continue to increase stirring speed as necessary. Reaction in the head may vary but it should never stop. As fluid level in the boiling flask decreases, increase stir speed. The final “tails” fraction is a mixture of the first and second fractions and should be saved for re-distillation later. Ideally, you want to turn the cow to the final flask before the tails fraction hits. The “tails” fraction has an obvious color change and will be darker than the “main body” fraction. You will see temps between 200-250C during this fraction. As fluid level in the boiling flask decreases even more, set stirring RPM higher (1000+ RPM). You may need to compensate with a bit more heat to finish of the final fraction as well. Once the process is complete, stop heat, stop stir, and stop vacuum. Let the atmosphere into the system. Be sure to properly store your distillate as exposure to air and light can cause oxidation. ***Note: This entire setup will ship via motor freight.*** ***Note: All units are inspected for broken glass or parts before unit is shipped. If unit arrives damaged or glass is broken (this does not include minor imperfections or scuffs in glassware), Customer MUST contact BVV™ within 3 days of delivery to file a claim and receive a replacement part. If customer DOES NOT contact BVV™ within 3 days of delivery responsibility for replacement parts falls on the customer and they must pay for replacement pieces.*** ***Glassware Safety Disclaimer: BVV™ is not responsible for failure of glassware which must be inspected before and after every use because it may eventually develop imperfections or damage through normal usage, mishandling, and stress caused by temperature variations. If an imperfection or damage is noted while inspecting the glassware DO NOT use the glassware because it can fail causing bodily harm or damage to the surrounding area.***
$8,467.72 - $10,796.34
-
2L Rotary Evaporator Power Cable
Replacement Power cable for BVV 2L Rotary Evaporator.
$21.17
-
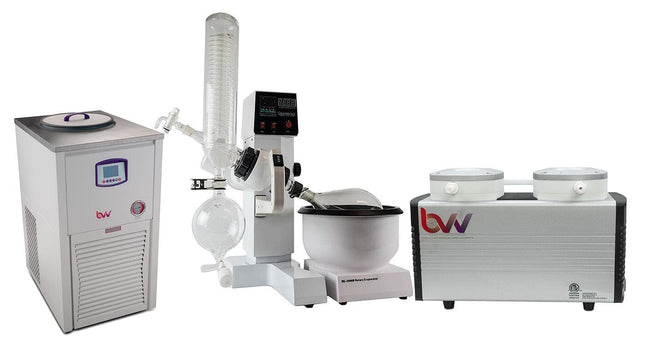
2L Rotary Evaporator Turnkey Setup
2L Rotary Evaporator Turnkey Setup 2L Electric Lift Rotary Evaporator turnkey setup includes all the necessary components to successfully perform solvent recovery via rotary evaporation. A cold trap should always be used inline between your vacuum system and application to protect the pump from volatile vapors. 2L Rotary Evaporator Turnkey Setup includes: 2L Electric Lift Rotary Evaporator 90-day limited warranty (excludes glassware, consumables & moving parts) BVV NEO 1.4 CFM Diaphragm Pump ETL Rated OR. 3.5CFM Dry Floating Scroll Vacuum Pump Polyscience LS -20C to 40C 1/2HP Chiller w/ Turbine Pump OR BVV NEOCISION 20L Chiller (-40C) - ETL Rated 10ft of Vacuum Tubing 20ft of Chiller Tubing 10 Pack of Adjustable stainless steel hose clamps 3/8" Vacuum Manifold Optional add-on : BVV™ CT40 -40°F 300ml x 3 Cold Trap, BVV™ CT80 -112°F 300ml x 3 Cold Trap Optional add-on: J-KEM DVR-200 Digital Vacuum Regulator Optional add-on: Heat Transfer Fluid -- NuTherm PF-50 or Dynalene HC-50 Rotovap Quick Start Guide This guide gives basic quick start instructions for rotovaps. It is intended to provide a starting point for learning the process. Parameters should be adjusted to suit specific needs. Clean and assemble unit. Make sure all pieces are cleaned and sterilized using an alcohol solution. Connect chiller to the condenser and set to 0C (32F). Always fill a rotovap condenser from the top down (chiller output to top of the condenser, chiller input to bottom of the condenser). Connect vacuum pump to cold trap and connect cold trap to the vacuum port on rotovap. Turn on heat bath and set to 40C (113F). Once heat bath, chiller, and cold trap have reached desired temperatures, turn on the rotovap motor and set the speed to approximately 100 RPM (does not have to be precise). Keep in mind, higher RPM’s will increase evaporation power but also increase heat load. Start vacuum pump and allow vacuum to pull down for a few minutes before injection. Once the vacuum has been pulled to a sufficient level (does not have to be precise but should be below 100 Torr), using the injection valve, very slowly inject approximately 500 mL of solution into evaporating flask and then close the valve. Allow this small amount to begin evaporating. You may see the chiller begin to rise in temperature, this is called “priming” the rotovap. Once the temperature stops rising or all liquid is almost completely evaporated, open the injection valve again very slowly so that a small amount of liquid begins to enter the evaporating flask. Do not close injection valve this time but continue to allow the solution to enter the evaporating flask. At this point, you must try to match the input speed to the output speed. What this means is that you should be injecting the same amount of liquid into the rotovap that is equal to the amount of liquid dripping from the condenser into the receiving flask. You will know that the input speed and output speed are matched because the chiller will remain at a stable temperature. If the chiller begins to rise, then you are injecting too much liquid. Dial back the valve until the chiller stabilizes. Once everything is stabilized, you may walk away from the rotovap if necessary. Check every so often to make sure temperatures remain stable and evaporation continues efficiently. ***Glassware Safety Disclaimer: BVV™ is not responsible for failure of glassware which must be inspected before and after every use because it may eventually develop imperfections or damage through normal usage, mishandling, and stress caused by temperature variations. If an imperfection or damage is noted while inspecting the glassware DO NOT use the glassware because it can fail causing bodily harm or damage to the surrounding area.***
$19,052.37
-
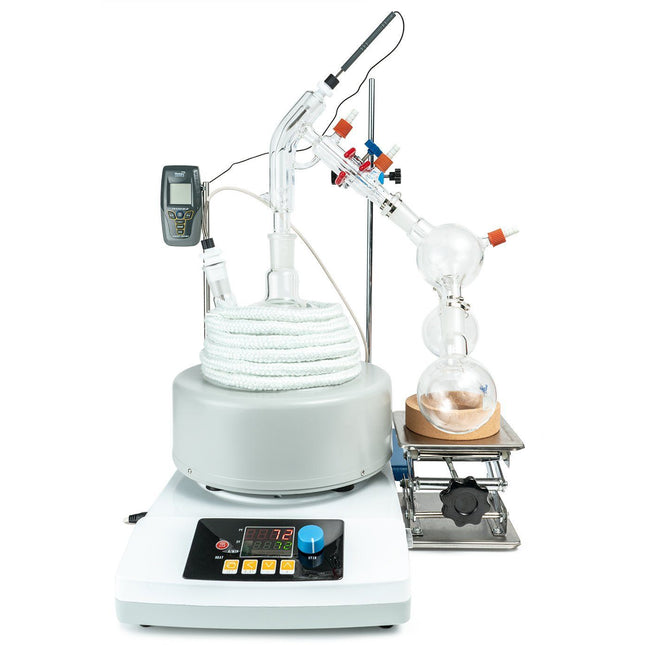

2L Short Path Distillation Kit
Short Path Distillation Setup Short path distillation is used for compounds that are not stable at high temperatures. It can also be used to purify small amounts of a compound. For those new to this type of distillation, our Short Path Kit includes everything you will need as you get started. All stands, clamps, clips, and tubing are included, which means it’s ready to start working straight out of the box. The cold trap, cow and vacuum grease can all be customized to meet your needs. The 2L Distillation Kit builds upon the same principal as the 1L Distillation Kit, giving users an easy to use system that will get them up and running at an affordable price. It includes all stands, clamps, clips, and tubing needed to begin distilling immediately. This Kit Does NOT include a vacuum pump or circulator. Please see the below recommendations for both as well as recommended add-ons. Or check out our 2L Standard Distillation Turnkey Setup which includes vacuum pump and circulator. Crossbar pictured is not included. We recommend purchasing multiple lab stands to accommodate your specific needs. Recommended Vacuum Pumps: Pro Series 5.6CFM Corrosion Resistant Two Stage Vacuum Pump (recommended option) Just Better 6 CFM 2 Stage Deep Vacuum Pump (economy option) Best Value Vacs VE280 9CFM Two Stage Vacuum Pump (economy option) Recommended Circulators: Polyscience 7 Liter MX Heated Circulator (economy option) Polyscience 7 Liter MX Refrigerated Circulator (premium option with chilling capability) Recommended Add-Ons: Glass Dewar Style Cold Trap (recommended cold trap) Bullseye Precison Vacuum Gauge (premium vacuum gauge for measuring depth) CT40 or CT80 Electronic Cold Trap (electronic cold trap, dry ice replacement) Short Path Distillation Kit Specifications: Boiling Flask Size: 2L Recieving Flask Size: 250ml Batch Capacity approximate: 2L = 400-1000 grams Run time: 4 to 8 hours dependent upon material composition and throughput Distillation Temperature Range: 140-250C (Do not exceed 250C) Recommended Condenser Temperature: 40-50C This Kit Comes Standard With The Following: Glass Components: 2L 2-Neck Boiling Flask Short Path Head Triple Neck Cow 3x 250mL Single Neck Receiving Flask 1/8" 14/20 PTFE Thermometer Adapter 1/4" 24/40 PTFE Thermometer Adapter 120mm Glass Funnel Accessories: Magnetic PTFE Stirring Bar Retriever 5 Pack of Metal Keck Clips Dow Corning High Vacuum Silicone Grease Tripod Stand 2L Digital Heating and Stirring Mantle 3 Finger Clamp Adjustable 0-70mm 6" x 6" Scissor Jack 250-500ml Cork Stand 10ft of Vacuum Hose 10ft of Chiller Hose 1/4" Vacuum Manifold Traceable Kangaroo Thermometer - Digital 10 Pack of Adjustable Stainless Steel Tubing Clamps Fiberglass Insulation Rope 10 Feet 1.5 Gallon Cold Trap (2QT Tank) Dry Ice, Liquid Nitrogen w/ 2x 1/4" Barb Adapters Distillation Quick Start Guide This guide gives basic quick start instructions for distillation systems. It is intended to provide a starting point for learning the process. Parameters should be adjusted to suit specific needs. Before beginning distillation, ensure the following steps have been taken: Vacuum Pump is in good working order. Pump should be run against dry load to allow internals to warm up. Oil should be clear. Cloudy or dark oil should be changed. All glass components are in good working order and ready to be assembled A winterization and degassing procedure has been done to prepare oil for distillation The unit's max internal temperature cannot exceed 380C. The recommended max set temperature should not exceed 250C Once all three of these steps have been completed, you are ready to begin distilling. Begin by placing stir bar in boiling flask and then load your material. This should be done using a funnel. A small amount of alcohol in the oil will give it a thinner consistency making it easier to transfer. Assemble all glassware and ensure each joint is properly greased. Do not use too much, as the vacuum pressure might pull some grease into the system. To ensure a full seal, spread grease in a circular motion by rotating glassware Attach circulator to condenser and set temperature to 50C. Allow circulator to reach temperature before beginning distillation. Connect vacuum pump to manifold. The manifold will allow you to isolate each individual component as well as let atmosphere into and out of the system. Connect receiving cow to cold trap. Connect cold trap to manifold. Connect vacuum gauge to manifold. At this point, ensure all connections are correct. Also ensure receiving cow is positioned to collect the first fraction in the far-left receiving flask. Circulator should be at its set temperature. Turn on vacuum pump to begin process. Turn on heat and set to 60C. Vacuum pump will begin to pull down and temperature will begin to rise. Watch the gauge to monitor vacuum pressure and stability. Start stir slower and increase speed with temperature. Once you are close to 60C, increase the temperature 20 degrees. Continue to raise the heat incrementally in 20-degree steps, increasing the set temperature as you near your set point. Increase temperatures incrementally until you reach 220C. You will see your first fraction somewhere between 180C and 190C or slightly before. This is the “heads” fraction. You will move to your second fraction when you see an increased reaction in the head, a slight color change toward golden, as well as a thickening of distillate. When this fraction hits, allow the distillate to “self-clean” the head for a minute or two then, rotate the cow to the middle receiving flask. Collect your “main body” fraction. You will see temps between 190-220C during this fraction. Continue to increase stirring speed as necessary. Reaction in the head may vary but it should never stop. As fluid level in the boiling flask decreases, increase stir speed. The final “tails” fraction is a mixture of the first and second fractions and should be saved for re-distillation later. Ideally, you want to turn the cow to the final flask before the tails fraction hits. The “tails” fraction has an obvious color change and will be darker than the “main body” fraction. You will see temps between 200-250C during this fraction. As fluid level in the boiling flask decreases even more, set stirring RPM higher (1000+ RPM). You may need to compensate with a bit more heat to finish of the final fraction as well. Once process is complete, stop heat, stop stir, and stop vacuum. Let atmosphere into the system. Be sure to properly store your distillate as exposure to air and light can cause oxidation. Learn more about short path distillation components and FAQs with this distillation guide. *Notice to Customers: All units are inspected for broken glassware or parts before leaving BVV™. If the unit arrives damaged (this does not include minor imperfections or scuffs in glassware), the customer MUST contact BVV™ within 72 hours from carrier delivery to file a claim. If the customer DOES NOT contact BVV™ within 72 hours from carrier delivery, then BVV™ cannot issue any replacement(s) or compensation for the item; a new purchase will need to be made for a replacement. BVV™ is not responsible for the failure of glassware which must be inspected before and after every use because it may eventually develop imperfections or damage through normal usage, mishandling, and stress caused by temperature variations. If an imperfection or damage is noted while inspecting the glassware DO NOT use the glassware because it can fail, which can cause bodily harm or damage to the surrounding area.
$2,998.98
-
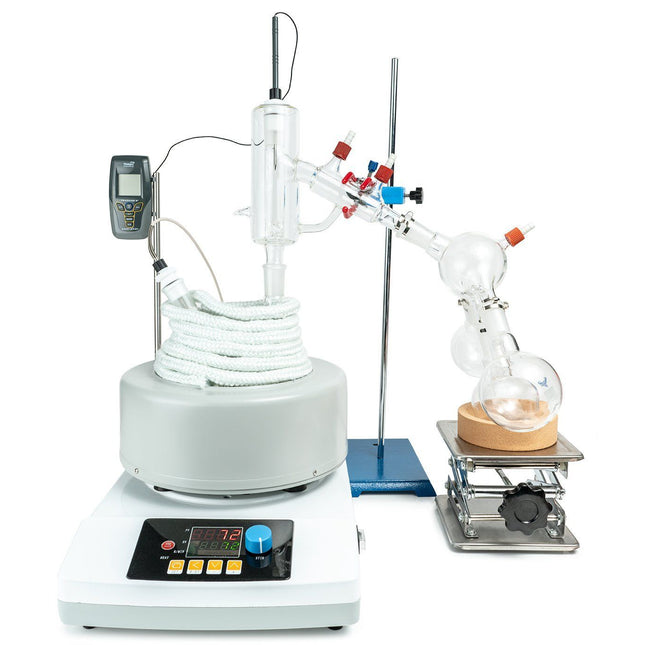
2L Short Path Distillation Kit with P2 Distillation Head
2L Short Path Distillation Kit with P2 Distillation Head The 2L Distillation Kit w/ P2 Distillation Head includes everything needed to perform distillation excluding the vacuum pump and chiller. This kit features our USA made P2 Distillation Head as well as USA made glass. It is designed with ease of use in mind and includes the highest quality components to ensure results are repeatable time and again. **This Kit Does NOT include a vacuum pump or circulator. Please see the below recommendations for both as well as recommended add-ons. Or check out our 2L Premium Turnkey Setup which includes vacuum pump and circulator.** Crossbar pictured is not included. We recommend purchasing multiple lab stands to accomodate your specific needs. Recommended Vacuum Pumps: Pro Series 5.6CFM Corrosion Resistant Two Stage Vacuum Pump (recommended option) Just Better 6 CFM 2 Stage Deep Vacuum Pump (USA made economy option) Welch 1400 DuoSeal 0.9 cfm 0.1 Micron Belt Drive Dual-Stage Pump Recommended Circulators: Polyscience 7 Liter MX Heated Circulator (economy option) Polyscience 7 Liter MX Refrigerated Circulator (premium option with chilling capability) Recommended Add-Ons: Glass Dewar Style Cold Trap (recommended cold trap) Bullseye Precison Vacuum Gauge (premium vacuum gauge for measuring depth) CT40 or CT80 Electronic Cold Trap (electronic cold trap, dry ice replacement) J-KEM Digital Vapor Temp Monitor (digital vapor temp monitor with data-logging capabilities) Specifications: Boiling Flask Size: 2L Receveiving Flask Size: 250mL Batch Capacity approximate: 2L = 400-1000 grams Run time: 4 to 8 hours dependent upon material composition and throughput Distillation Temperature Range: 140-250C (Do not exceed 250C) Recommended Condenser Temperature: 40-50C This Kit Includes: Glass components: 2L USA Made 2-Neck Boiling Flask P2 USA Made Distillation Head Triple Neck Cow 3x 250mL Receiving Flask 2x 24/40 Chemglass Thermometer Inlet Adapter 120mm Glass Funnel Accessories: Magnetic PTFE Stirring Bar Retriever 5 Pack of Metal Keck Clips Dow Corning High Vacuum Silicone Grease Tripod Stand 2L Digital Heating and Stirring Mantle 3 Finger Clamp Adjustable 0-70mm 6" x 6" Scissor Jack 250-500ml Cork Stand 10ft of Vacuum Hose 10ft of Chiller Hose 1/4" Vacuum Manifold Traceable Kangaroo Thermometer - Digital 10 Pack of Adjustable Stainless Steel Tubing Clamps Fiberglass Insulation Rope 10 Feet 1.5 Gallon Cold Trap (2QT Tank) Dry Ice, Liquid Nitrogen w/ 2x 1/4" Barb Adapters Distillation Quick Start Guide This guide gives basic quick start instructions for distillation systems. It is intended to provide a starting point for learning the process. Parameters should be adjusted to suit specific needs, Before beginning distillation, ensure the following steps have been taken: Vacuum Pump is in good working order. Pump should be run against dry load to allow internals to warm up. Oil should be clear. Cloudy or dark oil should be changed. All glass components are in good working order and ready to be assembled A winterization and degassing procedure has been done to prepare oil for distillation The unit's max internal temperature cannot exceed 380C. The recommended max set temperature should not exceed 250C Once all three of these steps have been completed, you are ready to begin distilling. Begin by placing stir bar in boiling flask and then load your material. This should be done using a funnel. A small amount of alcohol in the oil will give it a thinner consistency making it easier to transfer. Assemble all glassware and ensure each joint is properly greased. Do not use too much, as the vacuum pressure might pull some grease into the system. To ensure a full seal, spread grease in a circular motion by rotating glassware Attach circulator to condenser and set temperature to 50C. Allow circulator to reach temperature before beginning distillation. Connect vacuum pump to manifold. The manifold will allow you to isolate each individual component as well as let atmosphere into and out of the system. Connect receiving cow to cold trap. Connect cold trap to manifold. Connect vacuum gauge to manifold. At this point, ensure all connections are correct. Also ensure receiving cow is positioned to collect the first fraction in the far-left receiving flask. Circulator should be at its set temperature. Turn on vacuum pump to begin process. Turn on heat and set to 60C. Vacuum pump will begin to pull down and temperature will begin to rise. Watch the gauge to monitor vacuum pressure and stability. Start stir slower and increase speed with temperature. Once you are close to 60C, increase the temperature 20 degrees. Continue to raise the heat incrementally in 20-degree steps, increasing the set temperature as you near your set point. Increase temperatures incrementally until you reach 220C. You will see your first fraction somewhere between 180C and 190C or slightly before. This is the “heads” fraction. You will move to your second fraction when you see an increased reaction in the head, a slight color change toward golden, as well as a thickening of distillate. When this fraction hits, allow the distillate to “self-clean” the head for a minute or two then, rotate the cow to the middle receiving flask. Collect your “main body” fraction. You will see temps between 190-220C during this fraction. Continue to increase stirring speed as necessary. Reaction in the head may vary but it should never stop. As fluid level in the boiling flask decreases, increase stir speed. The final “tails” fraction is a mixture of the first and second fractions and should be saved for re-distillation later. Ideally, you want to turn the cow to the final flask before the tails fraction hits. The “tails” fraction has an obvious color change and will be darker than the “main body” fraction. You will see temps between 200-250C during this fraction. As fluid level in the boiling flask decreases even more, set stirring RPM higher (1000+ RPM). You may need to compensate with a bit more heat to finish of the final fraction as well. Once process is complete, stop heat, stop stir, and stop vacuum. Let atmosphere into the system. Be sure to properly store your distillate as exposure to air and light can cause oxidation. *Notice to Customers: All units are inspected for broken glassware or parts before leaving BVV™. If the unit arrives damaged (this does not include minor imperfections or scuffs in glassware), the customer MUST contact BVV™ within 72 hours from carrier delivery to file a claim. If the customer DOES NOT contact BVV™ within 72 hours from carrier delivery, then BVV™ cannot issue any replacement(s) or compensation for the item; a new purchase will need to be made for a replacement. BVV™ is not responsible for the failure of glassware which must be inspected before and after every use because it may eventually develop imperfections or damage through normal usage, mishandling, and stress caused by temperature variations. If an imperfection or damage is noted while inspecting the glassware DO NOT use the glassware because it can fail, which can cause bodily harm or damage to the surrounding area.
$4,092.73
-
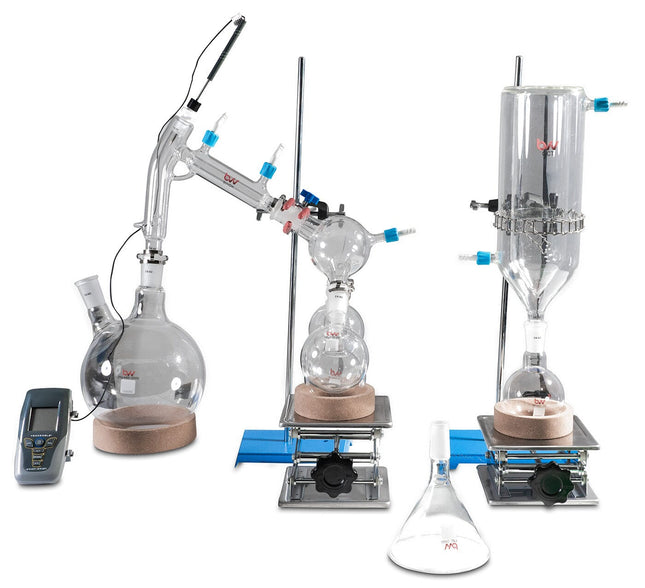

2L Short Path Parts Kit with Dry Ice Cold Trap
2L Short Path Parts Kit with Dry Ice Cold Trap This kit includes all the parts and fixturing to build a distillation setup with a 2L boiling flask. No heating or cooling equipment is included.
$1,340.72
-
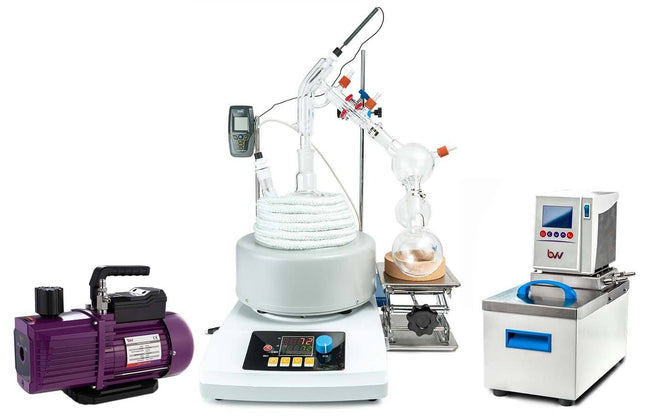

2L Standard Short Path Distillation Turnkey Setup
2L Standard Short Path Distillation Turnkey Setup The Standard Distillation Turnkey Setup includes all the components necessary to successfully perform distillation at an entry-level price point. Crossbar pictured is not included. We recommend purchasing multiple lab stands to accommodate your specific needs. The Standard Turnkey Setup Includes: 2L Distillation Kit 1/4" Flare x 1/4" Barb Adapter BVV™ 5L Heated Circulator BVV™ V9D 9CFM Two Stage Vacuum Pump High quality and durable Borosilicate 3.3 glass Vacuum-jacketed distillation adapter 3-way cow adapter, accommodating up to 3 pcs of 500mL flasks GCT-01 cold trap guarding from damage of vapors Kangaroo Traceable Digital Thermometer Flexible Gum Rubber Vacuum Tubing and Silicone Tubing for Flow Distillation Quick Start Guide This guide gives basic quick start instructions for distillation systems. It is intended to provide a starting point for learning the process. Parameters should be adjusted to suit specific needs, Before beginning distillation, ensure the following steps have been taken: Vacuum Pump is in good working order. The pump should be run against the dry load to allow internals to warm up. Oil should be clear. Cloudy or dark oil should be changed. All glass components are in good working order and ready to be assembled A winterization and degassing procedure has been done to prepare oil for distillation The unit's max internal temperature cannot exceed 380C. The recommended max set temperature should not exceed 250C Once all three of these steps have been completed, you are ready to begin distilling. Begin by placing stir bar in boiling flask and then load your material. This should be done using a funnel. A small amount of alcohol in the oil will give it a thinner consistency making it easier to transfer. Assemble all glassware and ensure each joint is properly greased. Do not use too much, as the vacuum pressure might pull some grease into the system. To ensure a full seal, spread grease in a circular motion by rotating glassware Attach circulator to condenser and set temperature to 50C. Allow circulator to reach temperature before beginning distillation. Connect vacuum pump to manifold. The manifold will allow you to isolate each individual component as well as let atmosphere into and out of the system. Connect receiving cow to cold trap. Connect cold trap to manifold. Connect vacuum gauge to manifold. At this point, ensure all connections are correct. Also ensure receiving cow is positioned to collect the first fraction in the far-left receiving flask. Circulator should be at its set temperature. Turn on vacuum pump to begin process. Turn on heat and set to 60C. Vacuum pump will begin to pull down and temperature will begin to rise. Watch the gauge to monitor vacuum pressure and stability. Start stir slower and increase speed with temperature. Once you are close to 60C, increase the temperature 20 degrees. Continue to raise the heat incrementally in 20-degree steps, increasing the set temperature as you near your set point. Increase temperatures incrementally until you reach 220C. You will see your first fraction somewhere between 180C and 190C or slightly before. This is the “heads” fraction. You will move to your second fraction when you see an increased reaction in the head, a slight color change toward golden, as well as a thickening of distillate. When this fraction hits, allow the distillate to “self-clean” the head for a minute or two then, rotate the cow to the middle receiving flask. Collect your “main body” fraction. You will see temps between 190-220C during this fraction. Continue to increase stirring speed as necessary. Reaction in the head may vary but it should never stop. As fluid level in the boiling flask decreases, increase stir speed. The final “tails” fraction is a mixture of the first and second fractions and should be saved for re-distillation later. Ideally, you want to turn the cow to the final flask before the tails fraction hits. The “tails” fraction has an obvious color change and will be darker than the “main body” fraction. You will see temps between 200-250C during this fraction. As fluid level in the boiling flask decreases even more, set stirring RPM higher (1000+ RPM). You may need to compensate with a bit more heat to finish of the final fraction as well. Once the process is complete, stop heat, stop stir, and stop vacuum. Let the atmosphere into the system. Be sure to properly store your distillate as exposure to air and light can cause oxidation. ***Note: This entire setup will ship via motor freight.*** *Notice to Customers: All units are inspected for broken glassware or parts before leaving BVV™. If the unit arrives damaged (this does not include minor imperfections or scuffs in glassware), the customer MUST contact BVV™ within 72 hours from carrier delivery to file a claim. If the customer DOES NOT contact BVV™ within 72 hours from carrier delivery, then BVV™ cannot issue any replacement(s) or compensation for the item; a new purchase will need to be made for a replacement. BVV™ is not responsible for the failure of glassware which must be inspected before and after every use because it may eventually develop imperfections or damage through normal usage, mishandling, and stress caused by temperature variations. If an imperfection or damage is noted while inspecting the glassware DO NOT use the glassware because it can fail, which can cause bodily harm or damage to the surrounding area.
$6,209.66
-
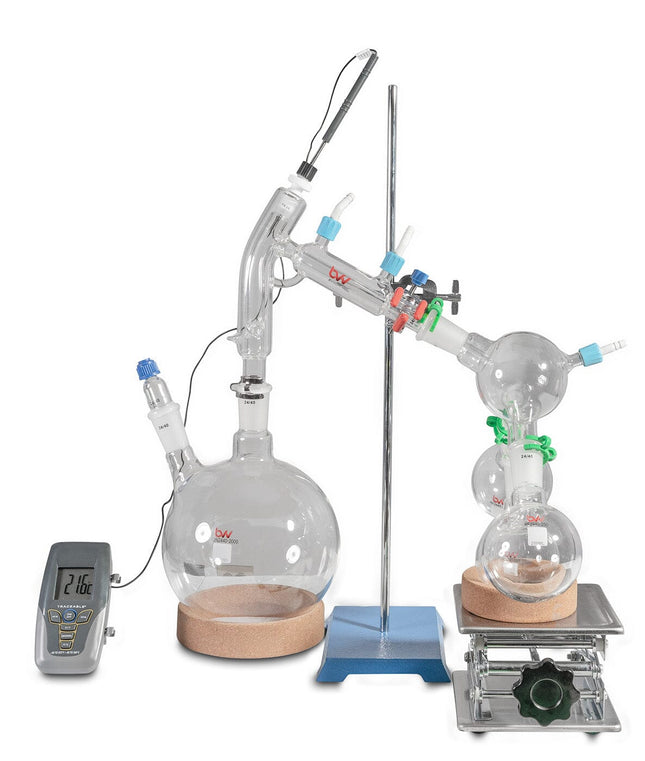

2L Standard Short Path Parts Kit
Short Path Distillation Setup Short path distillation is used for compounds that are not stable at high temperatures. It can also be used to purify small amounts of a compound. The 2L Distillation Kit gives users an easy to use system that will get them up and running at an affordable price. It includes all stands, clamps, clips, This Kit Does NOT include a vacuum pump, circulator, or heating source. Please see the below recommendations for both as well as recommended add-ons. Or check out our 2L Standard Distillation Turnkey Setup which includes vacuum pump, circulator, and mantle. Recommended Vacuum Pumps: Pro Series 5.6CFM Corrosion Resistant Two Stage Vacuum Pump (recommended option) Just Better 6 CFM 2 Stage Deep Vacuum Pump (economy option) Best Value Vacs VE280 9CFM Two Stage Vacuum Pump (economy option) Recommended Circulators: Polyscience 7 Liter MX Heated Circulator (economy option) Polyscience 7 Liter MX Refrigerated Circulator (premium option with chilling capability) Recommended Heating Mantle: BVV 2L Heating Mantle Recommended Add-Ons: Glass Dewar Style Cold Trap (recommended cold trap) Bullseye Precison Vacuum Gauge (premium vacuum gauge for measuring depth) CT40 or CT80 Electronic Cold Trap (electronic cold trap, dry ice replacement) Short Path Distillation Kit Specifications: Boiling Flask Size: 2L Recieving Flask Size: 250ml Batch Capacity approximate: 2L = 400-1000 grams Run time: 4 to 8 hours dependent upon material composition and throughput Distillation Temperature Range: 140-250C (Do not exceed 250C) Recommended Condenser Temperature: 40-50C This Kit Comes Standard With The Following: Glass Components: 2L 2-Neck Boiling Flask Short Path Head Triple Neck Cow 3x 250mL Single Neck Receiving Flask 1/8" 14/20 PTFE Thermometer Adapter 1/4" 24/40 PTFE Thermometer Adapter 120mm Glass Funnel Accessories: Magnetic PTFE Stirring Bar Retriever Keck Clips 3 Finger Clamp Adjustable 0-70mm Boss head 6" x 6" Scissor Jack 250-500ml Cork Stand Traceable Kangaroo Thermometer - Digital Distillation Quick Start Guide This guide gives basic quick start instructions for distillation systems. It is intended to provide a starting point for learning the process. Parameters should be adjusted to suit specific needs. Before beginning distillation, ensure the following steps have been taken: Vacuum Pump is in good working order. Pump should be run against dry load to allow internals to warm up. Oil should be clear. Cloudy or dark oil should be changed. All glass components are in good working order and ready to be assembled A winterization and degassing procedure has been done to prepare oil for distillation The unit's max internal temperature cannot exceed 380C. The recommended max set temperature should not exceed 250C Once all three of these steps have been completed, you are ready to begin distilling. Begin by placing stir bar in boiling flask and then load your material. This should be done using a funnel. A small amount of alcohol in the oil will give it a thinner consistency making it easier to transfer. Assemble all glassware and ensure each joint is properly greased. Do not use too much, as the vacuum pressure might pull some grease into the system. To ensure a full seal, spread grease in a circular motion by rotating glassware Attach circulator to condenser and set temperature to 50C. Allow circulator to reach temperature before beginning distillation. Connect vacuum pump to manifold. The manifold will allow you to isolate each individual component as well as let atmosphere into and out of the system. Connect receiving cow to cold trap. Connect cold trap to manifold. Connect vacuum gauge to manifold. At this point, ensure all connections are correct. Also ensure receiving cow is positioned to collect the first fraction in the far-left receiving flask. Circulator should be at its set temperature. Turn on vacuum pump to begin process. Turn on heat and set to 60C. Vacuum pump will begin to pull down and temperature will begin to rise. Watch the gauge to monitor vacuum pressure and stability. Start stir slower and increase speed with temperature. Once you are close to 60C, increase the temperature 20 degrees. Continue to raise the heat incrementally in 20-degree steps, increasing the set temperature as you near your set point. Increase temperatures incrementally until you reach 220C. You will see your first fraction somewhere between 180C and 190C or slightly before. This is the “heads” fraction. You will move to your second fraction when you see an increased reaction in the head, a slight color change toward golden, as well as a thickening of distillate. When this fraction hits, allow the distillate to “self-clean” the head for a minute or two then, rotate the cow to the middle receiving flask. Collect your “main body” fraction. You will see temps between 190-220C during this fraction. Continue to increase stirring speed as necessary. Reaction in the head may vary but it should never stop. As fluid level in the boiling flask decreases, increase stir speed. The final “tails” fraction is a mixture of the first and second fractions and should be saved for re-distillation later. Ideally, you want to turn the cow to the final flask before the tails fraction hits. The “tails” fraction has an obvious color change and will be darker than the “main body” fraction. You will see temps between 200-250C during this fraction. As fluid level in the boiling flask decreases even more, set stirring RPM higher (1000+ RPM). You may need to compensate with a bit more heat to finish of the final fraction as well. Once process is complete, stop heat, stop stir, and stop vacuum. Let atmosphere into the system. Be sure to properly store your distillate as exposure to air and light can cause oxidation. Learn more about short path distillation components and FAQs with this distillation guide. *Notice to Customers: All units are inspected for broken glassware or parts before leaving BVV™. If the unit arrives damaged (this does not include minor imperfections or scuffs in glassware), the customer MUST contact BVV™ within 72 hours from carrier delivery to file a claim. If the customer DOES NOT contact BVV™ within 72 hours from carrier delivery, then BVV™ cannot issue any replacement(s) or compensation for the item; a new purchase will need to be made for a replacement. BVV™ is not responsible for the failure of glassware which must be inspected before and after every use because it may eventually develop imperfections or damage through normal usage, mishandling, and stress caused by temperature variations. If an imperfection or damage is noted while inspecting the glassware DO NOT use the glassware because it can fail, which can cause bodily harm or damage to the surrounding area.
$917.34
-
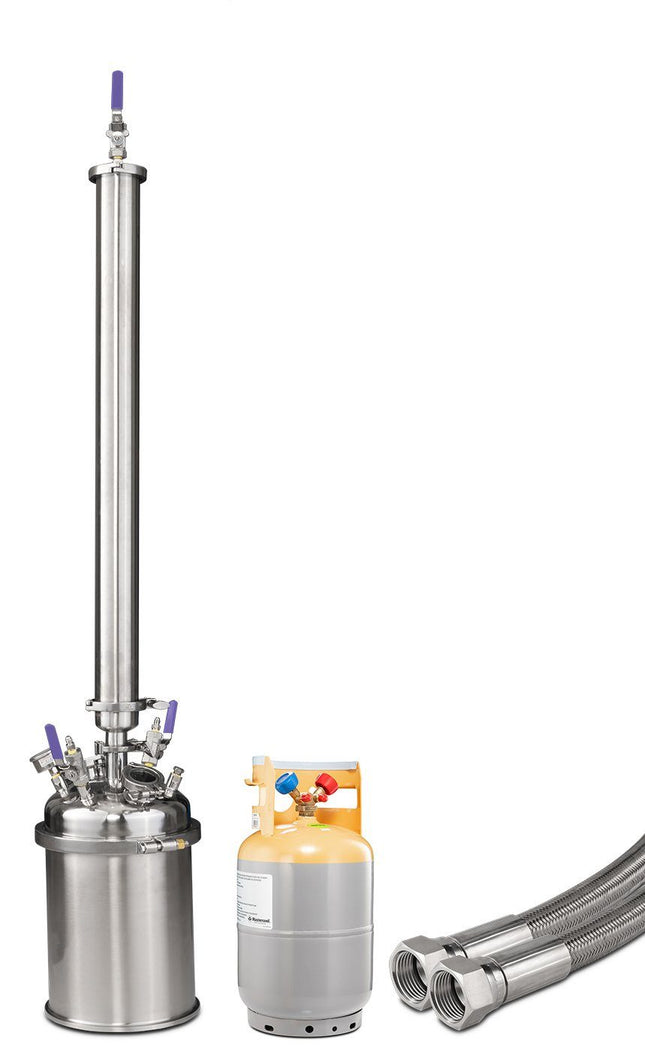

2LB Apollo Top Fill Closed Loop Extractor
***Note: Butane(Solvent) not included with systems unless ordered with dropdown menu or separately. Any order with butane WILL NOT SHIP EXPEDITED. DISCLAIMER: This unit is intended for LEGAL purposes only, to be used in accordance with local laws and ordinances. Use only in extremely well ventilated areas. Check with your local fire marshal for guidance when operating indoors 2lb Closed Loop Reclamation Extraction System (System comes with 1 yr. limited warranty) The 2lb closed loop hydrocarbon extraction system performs botanical extraction within a sealed, vacuumed system. Utilizing a top-fill input, solvent washes thru the material column, collecting oils as it passes over the material. Oil bearing solvent is collected in the collection base under the material column. Once collected, solvent is distilled and recovered, leaving the oils in the collection base. This is a passive unit that utilizes pressure differences created by manipulating temperature to move solvent. This unit can be upgraded into an Active recovery unit by purchasing the upgrade kit. TRS21 Active Closed Loop Recovery Kit Extractor Configurations: Explorer: Our standard, most economical setup, perfect for the entry level extractor on a budget. Comes with a welded bottom base and standard LP tank. This model has minimal features to keep cost low, while providing the necessary equipment to get the job done. Professional: This model features upgrades to help produce a higher quality extract. Solvent is input into the material column with a showerhead endcap, ensuring the full material column is saturated with solvent. The Professional comes with a sleeved spool, allowing users to utilize dry ice to freeze the material column. This will help lock in fats and waxes to the material. An inline ball valve is used to allow solvent to be suspended in the material column, as well as closing the collection base off during recovery. Upon completion of the run, extract removal is made simple by adding a removable bottom to the collection base. Elite: The Elite series is our fully upgraded Apollo model. The elite series adds a level of dependability needed for those seeking to produce the highest quality extracts. It features a larger bore on valves and hoses, all American made instrumentation valves by SSP, an AVCO ultra-low temperature inline ball valve, sleeved dewaxing column, jacketed collection base, and a stainless steel LP tank. The Elite series boasts increased efficiency on both solvent input and recovery by bumping up all valves and lines to 3/8” JIC. The stainless steel LP tank is able to be opened and cleaned, making solvent contamination a non-issue. The jacketed collection gives precision during recovery, allowing a heated fluid to be circulated around the base. This method keeps temperature both accurate and consistent. *NOTE* This model requires a heater circulator or chiller Explorer Professional Elite BVV 316SS Full Bore Valves Welded Bottom Base BVV 316SS Full Bore Valves Showerhead Dewaxer Ball Valve Splatter Platter Base SSP Valves Showerhead Dewaxer AVCO Ball Valve HP Clamps Jacketed Base/Platter SSLP 3/8" Valves & Hoses Unit Includes: Collection Base 10"x10" Welded Bottom Base Assembled 10" extractor lid 3"x36" Material column with reducer & top cap #30 LP tank 60" High Pressure PTFE Braided SS Hose 10" clamp, (2)3" clamps and a 1.5" clamp with gaskets Instruction Manual Specifications: 3"x 36" 304 Stainless Steel Material Tube 2lb (900g) 316 Stainless Steel Fully Encapsulated Miniature Ball Valves System Rated to 150PSI Multiple port connections for _" 316 Stainless JIC 37 Degree 304 Stainless Steel Base Container 10" diameter by 10" tall Tri-Clamps at all interfaces make for a high pressure, easy clean unit. Viton Gaskets are designed for Oil Processing Temp range -40-200F Dimensions (Inches): 55" x 10" Diameter overall size Weight: 38 lbs. Operating Temperature Range: -40F to 160F Ultimate Vacuum: as low as 10 Microns Base unit Maximum Capacity: 785 cubic inches, (12.8704 Liters) Construction: All components made of 304 Stainless Steel. Max Vacuum -29.9inHg High Polish Interior *Note: Column capacity may vary depending on the density of packed material and packing density. Capacity is calculated using the industry standard of 4.2g/in3. This is the upper limit for column capacity. Low density, uncut, and/or lightly packed material can reduce capacity by 50%. For best results, we recommend to tightly pack coarse ground material. Material Capacity Cylinder Volume Triclamp Spool (in) 1.5" 2" 3" 4" 6" 8" 10" 12" Length (in) 1" 2" 3" 4" 6" 8" 10" 12" 18" 24" 36" 48" Volume (in3) Select Material Butane ISO-Butane Propane How Much Will Fit in Cylinder FormulaVolume x Weight of Water x Specific Gravity ConstantsWeight of Water = 0.0360 (lbs / in3)Specific Gravity of = Lbs. of : Recommended: Account for an 80% fill to avoid a hydraulic lock How Much Material Will Fit in the Cylinder Packing Density (g) 2.5 3 3.5 4.3 Grams of Material Lbs. of Material
$2,159.27 - $5,518.13


You have seen 192 out of 1077 products